Storage Drawers / Platform for my GMT800 Suburban - WIP

rayra

Expedition Leader
I'm thinking about using a bracket something like this furniture table leaf mating bracket as an attachment for the sleeping extension.

48840-02-1000.jpg


I'd put in on the inside front of the 'breadbox'. When things are set up for sleeping, I'd flip open the breadboxes, slide the sleeping extension forward, unfold its flat legs. The rear supports would clip together with the above bracket or somethign like it. The forward supports would slide down between the halves of the folded 2nd row seats. So the extension would kind of sit like a 4-legged table, bridging over the 2nd row seating area. The platform modules are ~53" at their top deck. So the extension has to go out at least two feet for decent support.
And a Full -sized air mattress is only a few inches wider than the cargo area, so such would be a good fit, for sleeping.
 

rayra

Expedition Leader
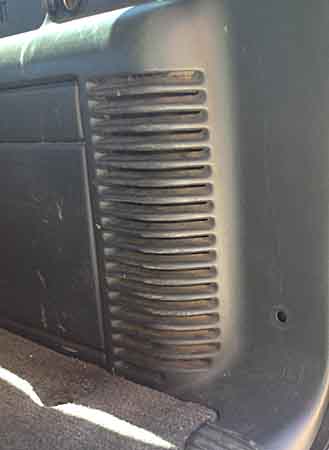
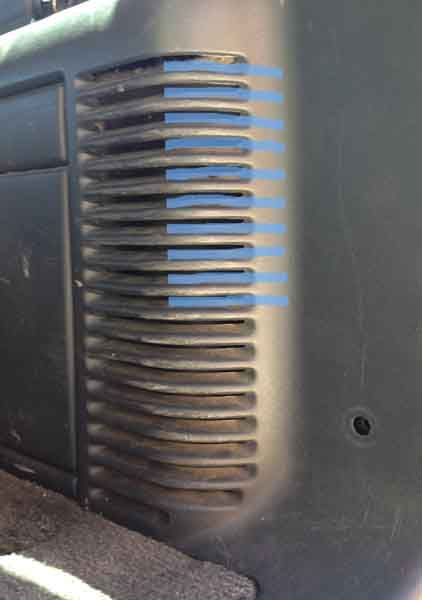
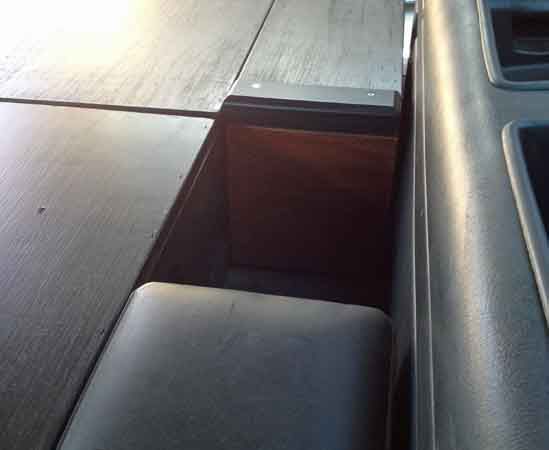
The rear AC inlet / return. The slots are pretty thin, set down within the larger molded grooves. There's no mesh in there though. Just a bunch of 1/8" slots. I'm probably going to enlarge the slots, extend them to the right in the blank area and make some sort of speaker grill kind of mesh over it. Or maybe make such a grill and open it wide.

storagebuild088.jpg


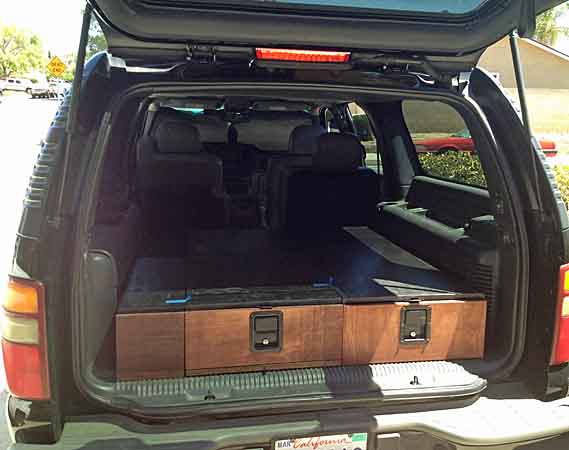
You can see how the storage platform blocks the face of the grill and crowds the rest. It's noticeably louder, more vacuum-like at max vent settings.

storagebuild089.jpg


Here's another inside shot. Basically the middle module will be more accessible from between the two 2nd row seats.

storagebuild090.jpg


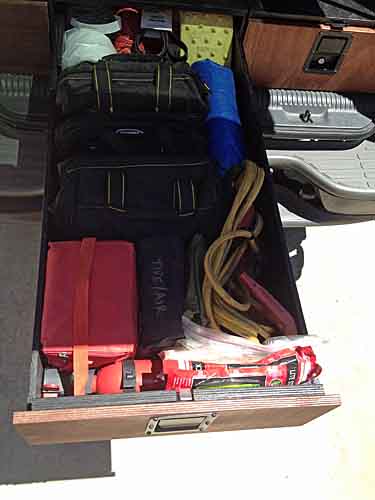
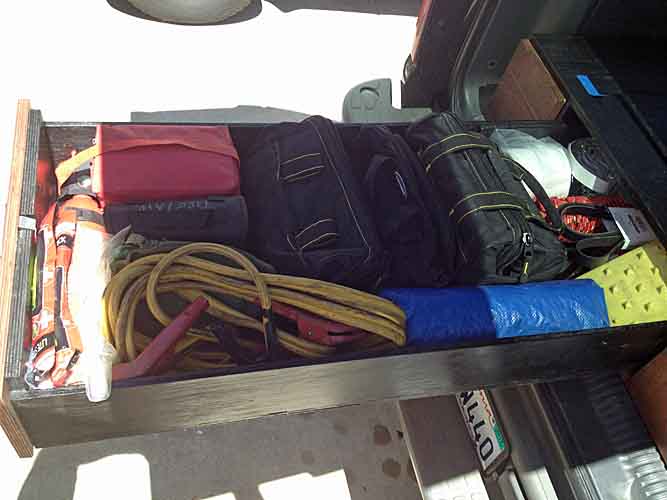
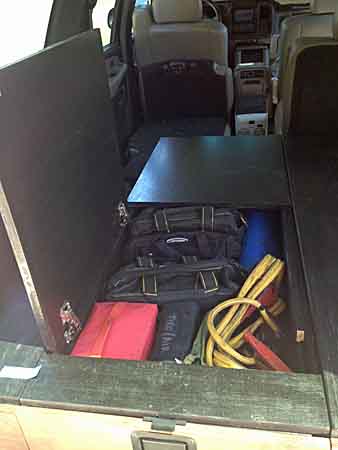
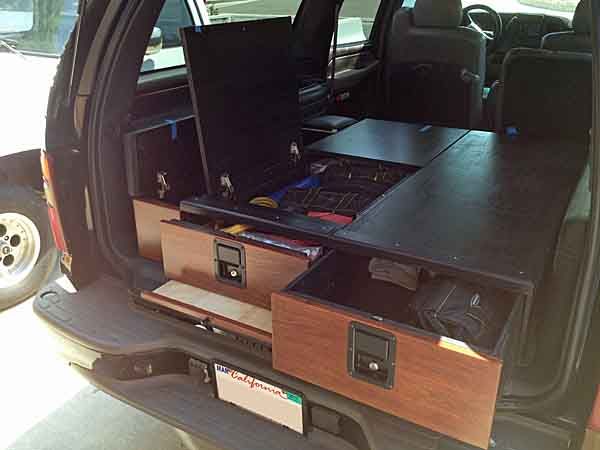
Then I got sidetracked emptying out the plastic footlocker I've been using for my roadside emergency junk and trying various arrangements in the 'Tool' drawer. I found out that my extinguisher fit almost perfectly across the drawer, so I moved its mount there. The previous location was untenable anyway with the new modules. I got almost everything in there, no real room to spare.

storagebuild092.jpg
storagebuild091.jpg


That last pic, left to right: Extinguisher under road flares and light sticks. Red bag is a beefed up 1st aid kit. Narrow gray-black bag below it is my mini inflator and a bunch of flat repair tools crammed in the bag. Military collapsing shovel under the heavy duty jumper cables.
Big / 12" black bag next to the red bag, all my 'recovery' / tow straps. Narrow black bag to its right, basic hand tools, need to beef that up now. Next big bag to the right is my awning project stuff. Big blue cheap tarp, groundcloth, shade, whatever. Whtie thing is a roll of TP in a gallon ziploc. There's kitchen and 33gal trashbags under it. Beyodn it is a gallon jug of water with carry strap. 100' of basic utility rope. Replacement S-belts, when I put a new pair on, I kept the old as emergency spares. The yellow thing is a traction / extraction device, had a pair of them for a very long time, trying to remember the name / brand. Under it and the belts is a collapsible 2.5ga;? water jug, new in its box.

And here's the mess with the hatch open, most of the critical stuff can be readily accessed with the Liftgate and drawer still closed.

storagebuild093.jpg


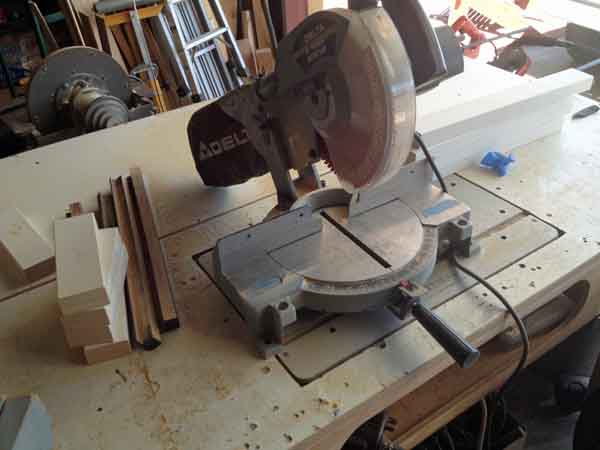
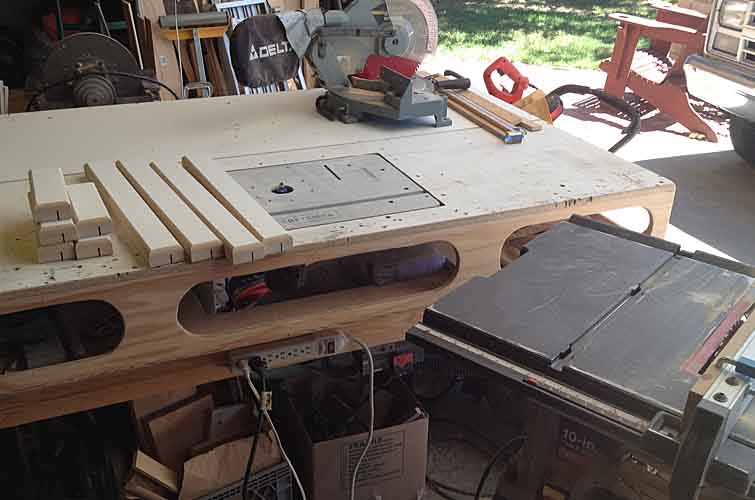
And this is about as far as I got with my master plan to make the edge mouldings. I diced up the glue-laminated MDF. I'll probably get back out there on this task, after I cool off a bit. It's 104+ out there and 96F+ in the shade in the garage and I'm an aging fat man.

storagebuild094.jpg


1150
 
Last edited:

kojackJKU

Autism Family Travellers!
what do you think of making modular system front to rear. Meaning it can be locked together when the 3rd row is gone, or removed when 3rd row is needed etc.?
 

rayra

Expedition Leader
It's certainly possible, but you'd have to figure otu how you would access the forward storage that you swap with the 3rd row. Would be much room for it to be drawers opening forward, the 2nd row seats would be in the way. Unless they are folded down. So maybe you put stuff you wouldn't need often in there.
I have been thinking about building one wide drawer unit that would fit behind the 3rd row, as we've used that a few times in the last year. Most of the time my 3rd row is sitting in my garage, same as the missus' 3rd row seats from her Tahoe. 3rd row seats are reportedly a high crime item here in L.A.

---


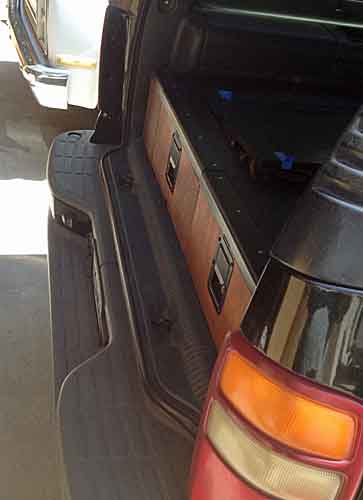
One of my issues mentioned above is clearance for the rear AC intake grill. The design of it mostly faces sideways into the cargo area, with just a bit of wraparound on the corner of the panel. Now much of it is blocked by my max-room drawer module. So I'm considering enlarging the existing intake slots or even making more radical moves to make it free-breathing again.

I think with some careful masking, drilling and cutting, I can add a line of 1/4" holes at the rightmost ends of those blue lines and all the way down to the curve at the bottom of the panel and then use a jigsaw or air saw to enlarge and extend the original slots to meet those holes. With the panel OFF the vehicle. That will give me at least as much unblocked openings as there was originally. And I can mount black aluminum screen mesh behind it and still wind up with greater unobstructed airflow than the original openings.
and basically keep the same styling look to it all.

Make the saw cuts a bit shy of the marks and use some fine sandpaper on a putty knife to work things smooth to the lines.

storagebuild095_zpslx1ikn84.jpg
 

rayra

Expedition Leader
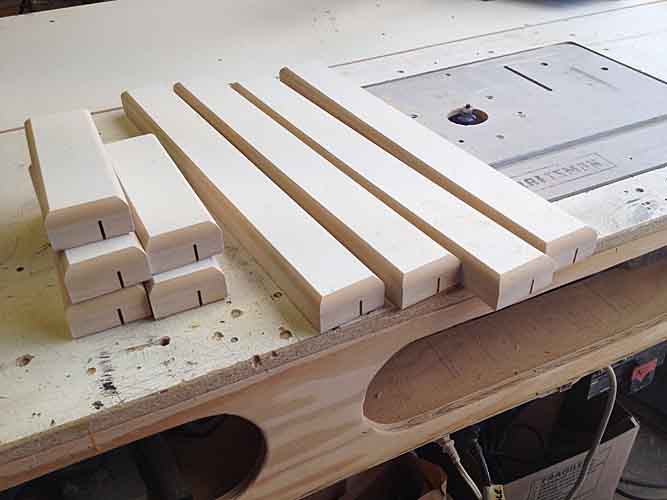
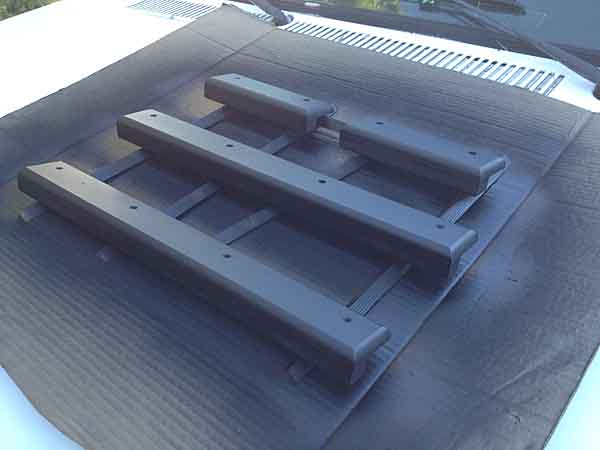
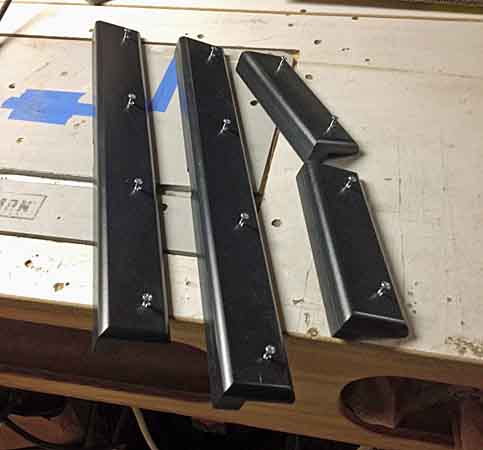
This morning I managed to finish the milling on the edge moulding parts. I went ahead and milled two sets as I already had the bulk material ready. Almost as easy as one set, anyway, using batch processes.
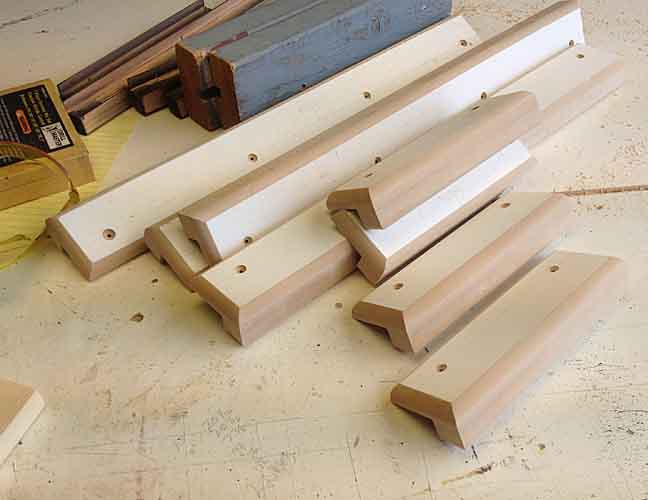
I went with a 1/2" radius on all the top edges and a 1/4" radius on the bottom edges. Used my big table disc sander to sand the edge faces flush, getting rid of the glue joint line and factory roughness. Then the table saw to make two cuts to form the rabbet / notch where the moulding will fit down over the top edge of the modules (and the attached carpet).

storagebuild096.jpg
storagebuild097.jpg


Then I measured out my screw locations, in 1" from the ends on the top face of the portion that will overlay the carpet / deck, on all pieces. And an additional two screws in the middle portions of the 20"L mouldings for the drawers. Marked a piece of each size as a 'master', used a fine drill to make my pilot holes. Then I clamped each remaining piece to the master, face to face, and drilled thru the master holes into the other pieces. This puts all my holes in the same places (or close enough). Then I took a #8 countersink bit to everything. The mouldings will be screwed into the top deck using 1" #8 countersunk wood screws, which will be set flush with the top face of the mouldings.

storagebuild098.jpg


I've got the install set sprayed with flat black and drying right now. The 'spares' are tape-bundled and set aside for future need. Later today I'll put a couple coats of satin black spray enamel on the install set and let them dry overnight for install tomorrow.

Next will be the hardwood selection and fitment. And I've got a bunch of electrical / electronic purchases to make for the power module components, some parts inbound already. I've got some power diagramming to work out and troubleshoot. I'm trying to do several different common vehicle power mods all at the same time. It's solvable, just need to work on it a bit.


eta

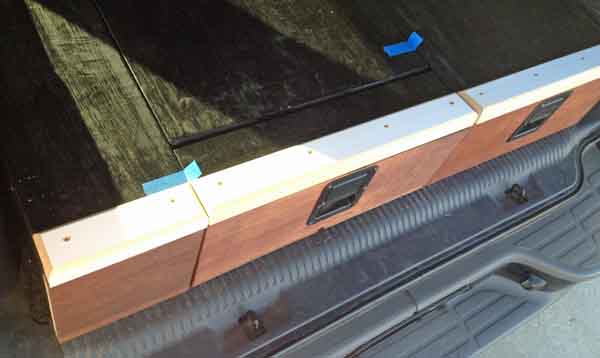
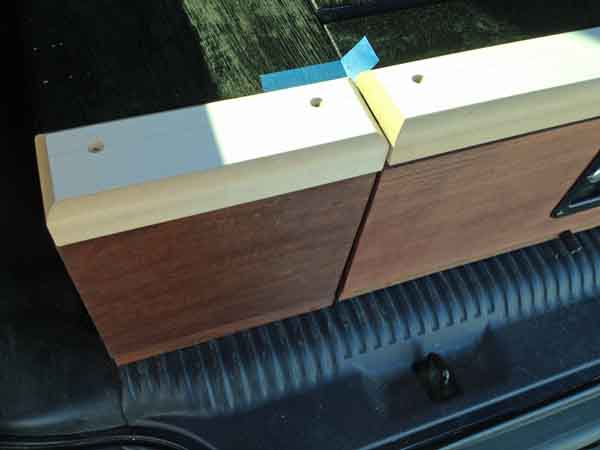
How the edge / curb will look / fit.

storagebuild099.jpg
storagebuild100.jpg


And that's when I realized I forgot to do the inletting for the drawer latch striker plates, before I painted the damned things.

storagebuild101.jpg


So I guess I'll have to do that fitting work in the morning and then touch them up before installing them
 
Last edited:

rayra

Expedition Leader
full drawer, three fingers in the paddle latch and very little effort. There's about a 1/16" vertical clearance in the drawer / runners spacing. So I just pick up the latch and some up-force on the drawer and it comes right out with little effort. Putting it away I just grab it and lift / push, again very little effort. And this is with a poor rough surface. The bottom runners are installed on edge. Worst way. I did it for height to clear the sliding tray. And the pressboard skids on the bottom of the drawer have their smoothest face against that sawn edge. Not a good config over time / use.

My intent is to re-cut the runners and also top them with pressboard, again maintaining clearance for the sliding tray. Right now both the bottom and top runners / guides in the tool drawer are only brad nailed in. Temporary. I was experimenting with retaining methods. It worked and I moved on to something else. I need to revisit it, rebuild it for least friction then glue and screw.
That picture of the modules stacked and the drawer fully extended is with just a few brad nails. And even with the drawer full, those guides and the gravity and leverage are all just working to pin the guides in place, so the brad nails have been sufficient.

---


Edge trims ready to be installed ... tomorrow.

storagebuild102.jpg


Got the inletting for the strike plates done and let me tell you routing MDF with a handheld trim router - while easy - is messy as hell. The table router setup includes my shop vac running, which sucks down almost all the mess in the right setup. The trim router, I was working in a talcum-fine cloud.

Then it was more edge sanding, re-spraying in Flat, then Matte-finish clear.

I'm leaving the screws in the white for now. I'll probably paint them after the carpet is done and they are re-installed. Or maybe find some more stylish black screws.


---

Already had my first 'official' use, I hooked up and pulled a stalled car out of a very busy intersection today (on the way to get my new battery). I was waiting to make a left and across the intersection in a thru lane I see a full sized ford pickup with a person behind it waving people around them. I see a couple people crossing back and forth from the adjacent gas station, but nothing really happening except a big traffic jam.
I get my green and circle around into that gas station, still seeing no recovery action. So I pop my rear glass, lift that rear drawer hatch and grap a tow strap. I stroll thru the traffic, ask the lady what she's got going on, she's waiting on AAA. In the middle lane. So I waggle the tow strap at her and tell her I'll pull her out of the middle of the road. She's totally relieved. Her pickup had the big factory hooks / hoops in the front, I hook up, lay out my strap a short distance and get back to my vehicle. I cut a few upset people off to work my way in front of her. A gent in a van in the slow lane next to us sees what I'm up to and backs several feet and blocks that lane, the lady and I both hop in our respective vehicles and I tow her around the corner and into the strip mall. The End.

Whole thing worked real nice, much like I'd envisioned, in terms of handiness and being able to get stuff out without opening either the Liftgate or Drawer.
 
Last edited:

boll_rig

Adventurer
Damn Rayra looking great! Siked to see this thing finished, looks real close. Moldings look great, vent idea is great, table leaf mating bracket for bed would be perfect, seems like you are 100% on track.

The fully loaded draws are really making me think about my storage, can't believe the amount of stuff you have in that space, not that its small, just a lot of stuff.

Overall the entire design and aesthetic really matches the vehicle.
 

rayra

Expedition Leader
Thanks very much. It was a close fit on my tool junk. I was trying to work within a bunch of limitations, some self-imposed, on budget, overall height, layout, length etc and then I also lost about an inch in drawer height by having the pull out tray / table under it. And a few inches off the end for the 'breadbox' detail. But the drawers are still 19"x49"+ on the interior. The tool drawer depth is about 6-1/2", the other drawer 7-1/2". Comes out to about 4cu' per drawer. Doesn't seem like much, but most importantly it puts all my stuff out of sight. And I have a locking drawer for transporting rifles to the range.
The overall height is 9-1/2", not counting carpet or raised edge moulding. Still leaves me 24" of loading height at the rear Liftgate. Still low enough that I can put an air mattress on it and sleep on it. Still low enough that my 126-lb GSD can walk around on top of it.
My earliest scribbled notes on this build are dated Christmas 2014, about a month after I got this Suburban. So I've had lots of time to consider and re-design and sift thru all the interesting stuff here for design inspirations. And I'm glad to be finally building it.


---


More crappy pics of the install. Lighting contrast in the bright hot day is just too much for me to mess with.

Edge mouldings installed.

storagebuild103.jpg


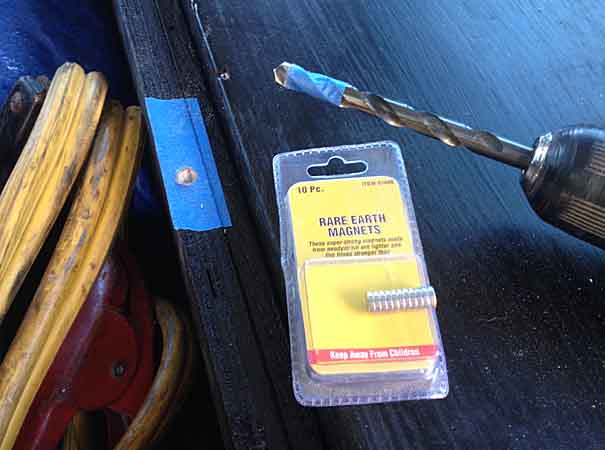
Then I did some work embedding small rare earth magnets as cabinet latches. Was getting a bit annoyed at the tool drawer hatch clattering when I drove over bumps. I drilled a shallow hole a hair larger than the magnet diameters, marked the magnet faces so I could keep track of which faces should face each other, mixed up some two-part epoxy and smushed them in, wiped off the extra and temp-taped them flush.

storagebuild104.jpg


I'm idly shopping for some flush-mount cabinet door pulls to mount in the power module and tool drawer hatches. Trying to find a style my dogs won't snag their toes in.


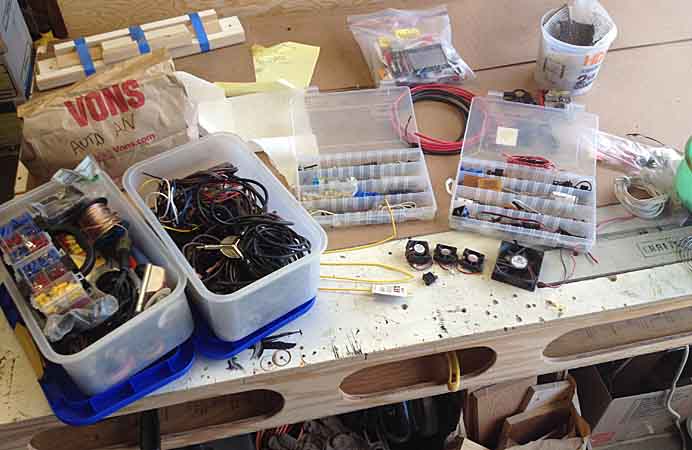
Then I got sidetracked with a big cleanup and re-org of my workspaces and burned the rest of the useful day. Did some fiddling around with all my electrical junk, looking for bits I can re-use, before ordering a bunch of stuff for the power module build.

storagebuild105.jpg


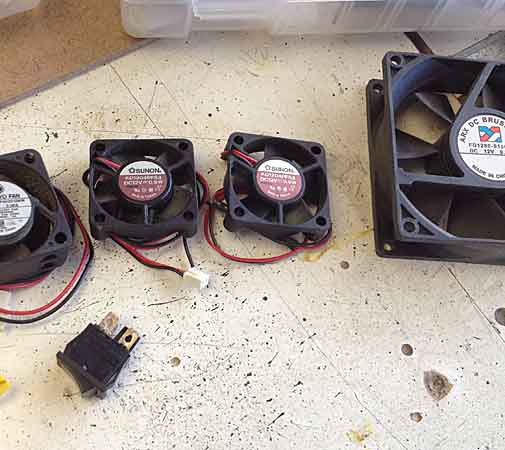
Most of the small inverters I've looked at have fans that draw air in and thru the body of the device, with the fans on the opposite end from the 110VAC plugs. Not good for my intended install, the heat would be pumped INTO the box. So I'm considering various layouts whereby I can add a very small fan to draw air out of the box. And trying to figure where to place it. And as I'm also intendign to put a solar charge controller in there, as well as additional small batteries, fuse panel, other inverters / converters, etc I think I'm really going to want to have some ventilation. I have a few old 40mm 12VDC fans stripped from discarded computer equipment. They draw less than a tenth of an amp.
storagebuild106.jpg


Right now I'm thinking to have most of the accessory power ports I'm adding to the Power Module box on a single switched branch circuit. via an exterior mounted lighted switch. The fan would be on the same bus. But I'm also considering options to use a thermo-controlled switch and just have the fan come on when the box grows warm. But in a black suburban in SoCal that might mean it runs all day long.
Early days on the electronics, I haven't really focused my attention on it yet, being busy with woodworking etc.

And speaking of woodworking it's time to go fetch my piece of nicely figured hardwood. Choices are slim around my area, without spending as much on gas as on the wood.
 
Last edited:

rayra

Expedition Leader
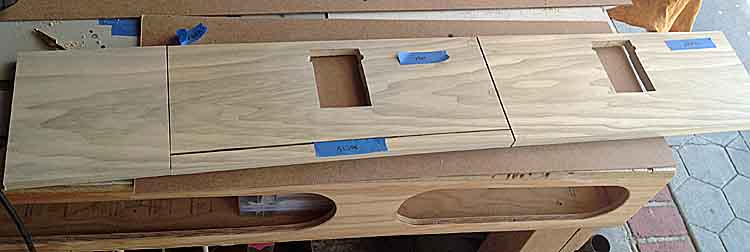
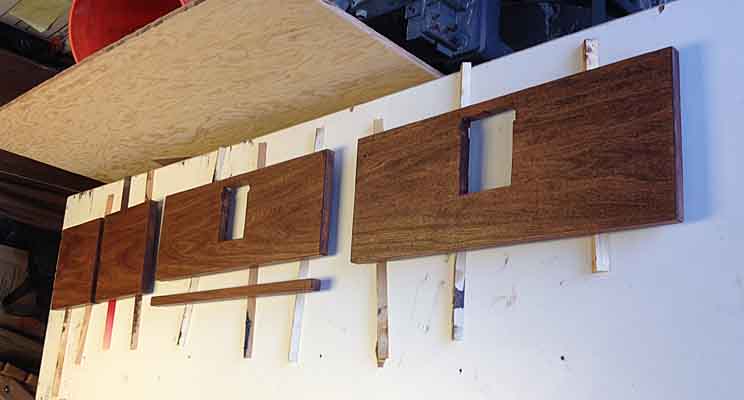
Best piece of wood (that suited what I wanted) that I could find locally was a piece of poplar. One of the big box stores near me had started stocking walnut. but not in the width I needed (8-1/8"). Four big-box hardware stores in my area and all their oak was ****. All their wide boards were all cupped and twisted, been on the shelves for far too long.

Poplar wasn't even my third choice, but it will do. Maybe someday I re-face things with something really nice. I expect to get the finish I want with two stain applications, probably minwax 'Red Mahogany'. I'm still working the cut pieces, sandign things smooth, slightly rounding edges and corners. When I'm ready to stain I'll hit some of the offcuts with a couple colors to see what works best, then roll right to staining the pieces. And I'll be finishing it up with a wipe-on satin-finish poly. So it's going to take 2-3 days to do it up right.

storagebuild108.jpg
storagebuild107.jpg


1615


eta

I used a 1/8" radius rounding bit on the table router and ran all the pieces thru on their face edges and corner edges. And on the back edges of the ends, which stick out beyond the drawers. Then ran over things with some 220 grit backed with a sanding sponge.

storagebuild109.jpg


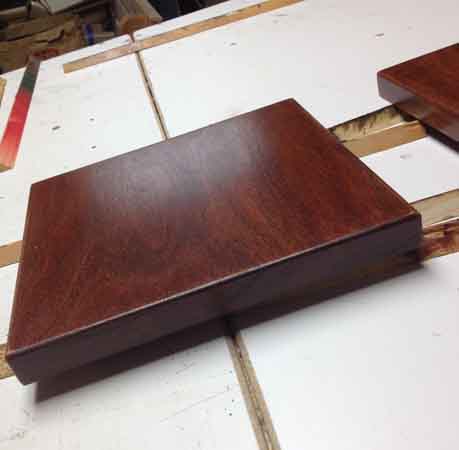
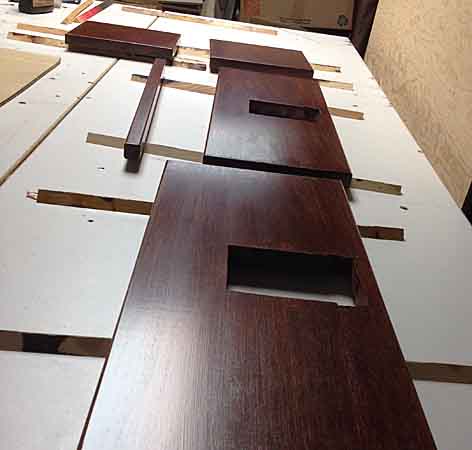
I went with 'Red Chestnut', the variance in the pic is due to the overhead lighting. To the eye they look like the left end of the image.

storagebuild110.jpg


I tried a second application before the first was really dry, didn't make much difference. Will try again in 3-4hrs. I expect to make the first poly coat in the late morning and possibly have things mounted by Monday evening.
 
Last edited:

rayra

Expedition Leader
this no edit thing is bull****e.


I used a 1/8" radius rounding bit on the table router and ran all the pieces thru on their face edges and corner edges. And on the back edges of the ends, which stick out beyond the drawers. Then ran over things with some 220 grit backed with a sanding sponge.

storagebuild109.jpg


I went with 'Red Chestnut', the variance in the pic is due to the overhead lighting. To the eye they look like the left end of the image.

storagebuild110.jpg


I tried a second application before the first was really dry, didn't make much difference. Will try again in 3-4hrs. I expect to make the first poly coat in the late morning and possibly have things mounted by Monday evening.


eta late night second application. All that grain selection for nought, can't hardly see it under this shade.

storagebuild112.jpg
 
Last edited:

rayra

Expedition Leader
About another hour and I'll buff things up with a t-shirt and apply the 3rd coat of wipe-on satin poly. I should be able get them mounted up tomorrow.

storagebuild114.jpg
storagebuild113.jpg


1780
 
Last edited:

rayra

Expedition Leader
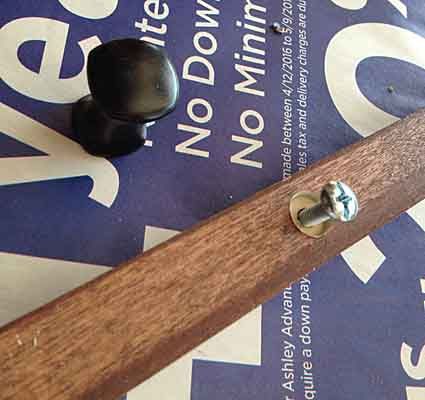
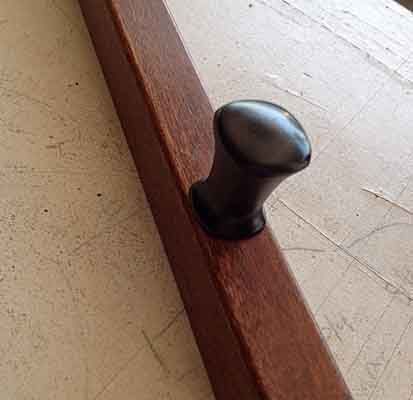
Some fiddly fitting work this morning. Installed the drawer pull I selected for the pull out table.

storagebuild115_zpsd6lkmczv.jpg
storagebuild116_zpssnqbeiqs.jpg


The pull-out is still a short scrap mockup. I'll be building a full-length, butcher-block sort of thing with alternating species of wood. Might be an oak / walnut alternation in 2-3" wide longitudinal stripes. The tray width is ~18". And the fascia piece will be attached using a Kreg pocket hole jig, from below the tray into the back of the fascia. That's why I inset the knob screw. For now the fascia is just stuck on the short mockup with hot melt glue.
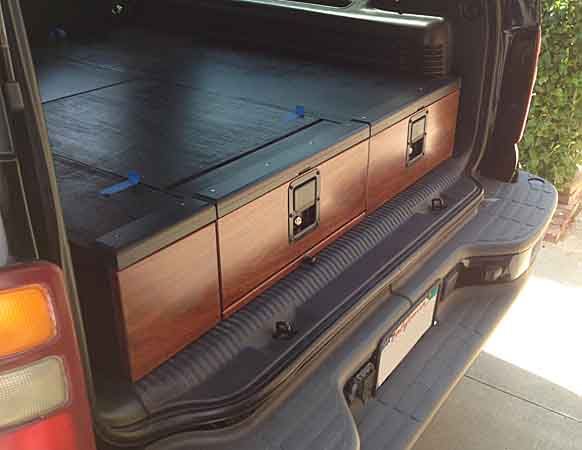

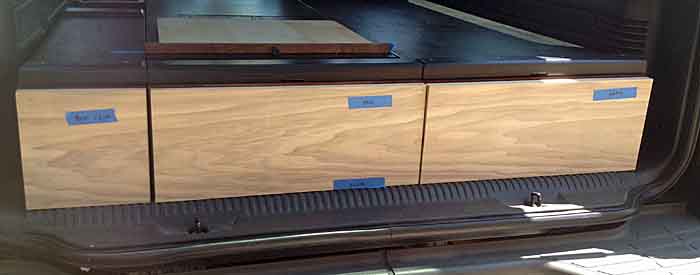
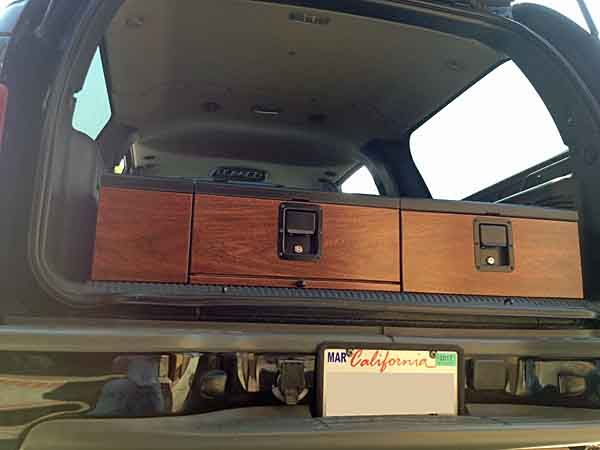
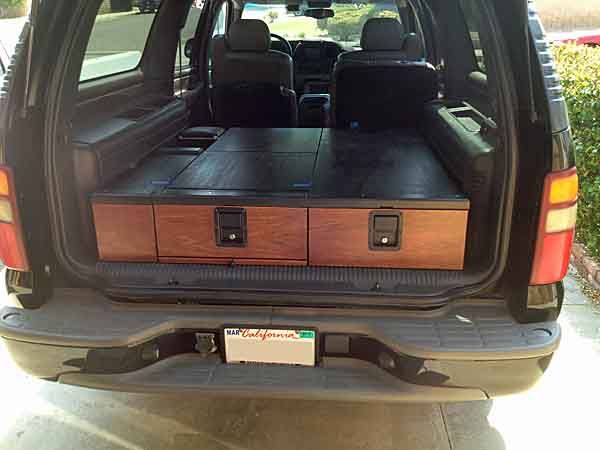
And now ... drum roll .... the big reveal (such as it is, still not done)

storagebuild119_zpsil58bh2c.jpg
storagebuild117_zpsoybogqyj.jpg
storagebuild118_zpsyig75p6s.jpg
storagebuild120_zpscfjscude.jpg
storagebuild121_zpshpuyzenz.jpg


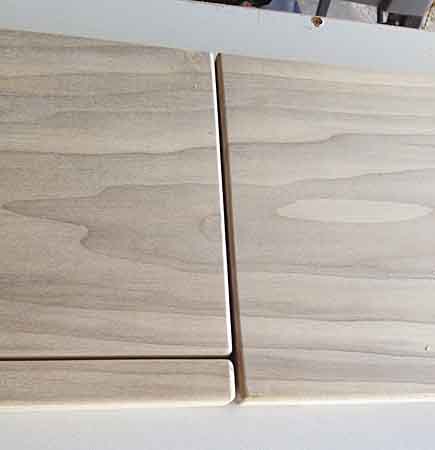
There will be similar spacing gaps at the tops of the drawer faces once the carpet is installed, as the edge trim will sit on top of it. That gap should then match that between the hardwood faces.


I'm going to do a photoshop mockup later tonight of how the power module face will look with the power ports / adapters, controls, inverter etc mounted. I'm still picking hardware and experimenting with layouts. Trying to make it both look good and be functional from both the outside and inside for wiring and placement of other components in that narrow box.
 

Forum statistics

Threads
188,178
Messages
2,903,430
Members
229,665
Latest member
SANelson
Top