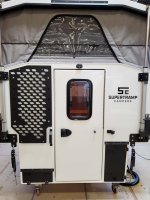
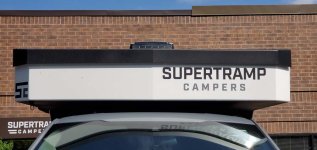
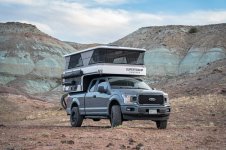
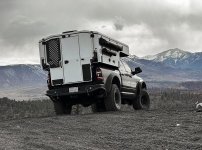
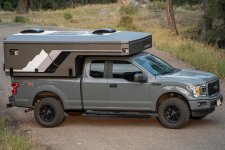
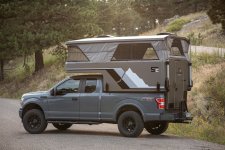
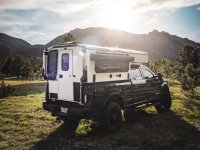
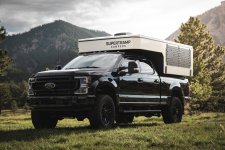
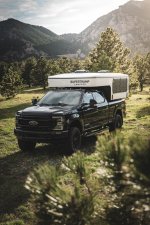
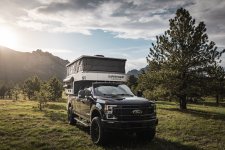
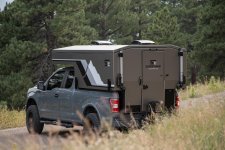
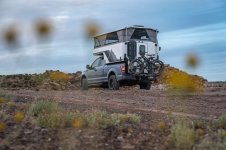
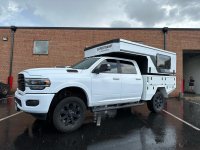
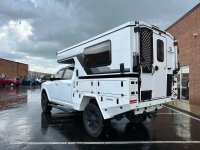
Supertramp Flagship LT pop-up slide-in pickup camper

Chadx

♫ Off road, again. Just can't wait to get...
Thought I'd start a new Supertramp Flagship LT Camper thread thread since the other threads were started when there was a fair bit of speculation and/or the specs were evolving where as now there are quite a few examples delivered and in the wild (50+ campers) . The Flagship LT model will continue to evolve, but the updates have slowed. Still, this is a moment-in-time and so all of the info below is subject to change, particularly when specific components/brands/models are mentioned.

The Supertramp Flagship LT camper overview/information is available on the Supertramp website https://www.supertrampcampers.com/ and there are a number of videos located on their Media page including a video from Scott Brady, Overland Journal, when he took one out for a night.

I've following Supertramp Campers since they debuted, but recently dug deeper into the details and wanted to share some of those deeper details and thoughts. These have been gathered through direct communication with Kelsey and Keith at Supertramp campers prior to, and during, a visit and tour of their facility but also from owners and my personal research on some of the individual components used in the current version (Truma, Dometic, Victron, etc.).
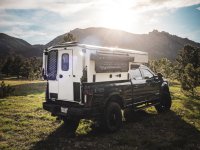
P1117591.jpg

List of standard and optional equipment per the website (as of July 01, 2023):

Standard Features

ELECTRICAL
  • Four Lifting linear actuators with manual override
  • Three 110W Flexible solar panels
  • Two Maxxair Deluxe 7500K roof vent fans
  • 12V, 100Ah BattleBorn Lithium battery
  • 12V, 2.1A Dual USB ports
  • 12V, 5A Dash socket
  • Smoke Detector
  • NOCO 10amp AC/DC converter (battery charger) Note: In late 2023, Supertramp has replaced the Noco 10amp with the Victron Energy Blue Smart IP67 12-Volt 17 amp charger as the standard battery charger in the camper.
  • CO/Propane alarm
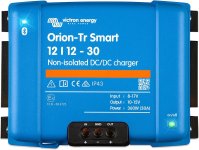
  • Victron 30 amp DC/DC battery charger
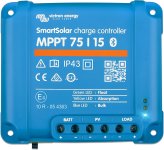
  • Victron MPPT Solar charge controller
  • Victron SmartShunt
PLUMBING
  • 24 Gallon fresh water tank
  • 5 Gallon grey water tank for sink
  • Easy-access grey water drain hose
  • Easy-access winter drain valve
  • External water inlet
  • Folding marine faucet
  • 10’ Hose and Nozzle for interior/exterior shower
  • Truma Combi on-demand water heater and cabin heater
COMPONENTS
  • Queen-size bed
  • 65L Isotherm fridge
  • Two 11 lb Propane tanks
  • Insulated pop-up fabric
  • Rhino liner base with automotive paint finish
  • Rear molle panel and L track now STANDARD
  • Rear door window now STANDARD
  • Portable cassette toilet
  • Keyless Entry
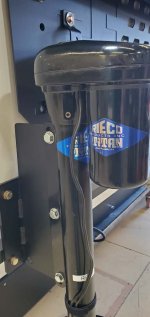
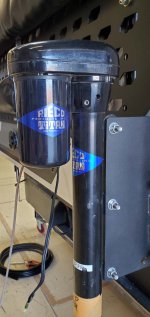
  • Reico Titan convertible jacks
OPTIONAL UPGRADES
  • DC Air Conditioning
  • Up to 400 Ah of lithium batteries
  • Truma Combi Eco Plus (adds ability to run off shore power)
  • Lagun table
  • 1500W AC Inverter
  • Additional 100Ah lithium batteries
  • 42” Artic Tern window with integrated screen and shade
  • Inside shower (curtain, drain, 5 gallon grey water tank)
  • 23 Zero 180-Degree awning
  • Outside shower enclosure
  • Backup camera
  • L tracks (various options for interior on side walls and celling, exterior one side walls)
  • Molle panels
  • 3M wrap
  • Bunk bed
  • Paint Color Options: Battleship Grey, Forest Green, or Sand Dune Tan
 
Last edited:

Chadx

♫ Off road, again. Just can't wait to get...
So, besides the basic specs listed above, here are some areas where I dove a bit deeper and added some thoughts.

Dimensions:
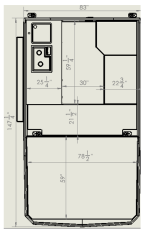
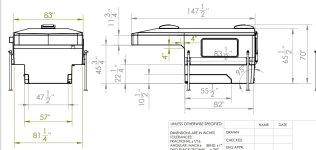
When top is raised, standard camper height goes from 70" to 96" including vents (actuators raise 26"). The optional 12v Air Conditioner will be taller.

Interior dimension:
thumbnail_image.png

Exterior dimensions:
dims02.JPG

Pop-top and windows:

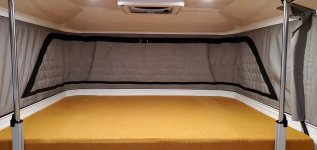
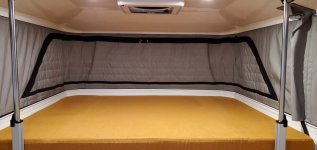
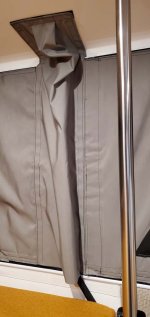
One feature that gets a lot of attention is the layout of the pop-top windows. With the use of actuators to raise and lower the pop-top, the front and rear of the pop-top fabric wall are void of supporting brackets which allow additional windows in those locations. There are only a handful of other pop-top campers that offer actuators and windows front and back. Uniquely, in the Flagship LT, the front window wraps around the front giving a 180 degree view. The front window does not have the clear plastic window layer, unlike the rear and two side windows, so the front window is either closed/insulated or open with only the screen. Like all windows, the front window's screen can also be unzipped, but the front window has two sewn-in shock-cord guides on each corner, so unzipping the front window screen is intended more for emergency exit rather than unzipping for an “open-air balcony”. While one could unzip the entire front window screen, re-zipping would be complicated by the tension of the shock cord and so is outside the day-to-day intent.

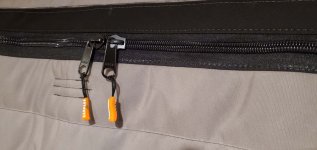
For the two side windows and one rear window, all the layers can be easily unzipped and rezipped individually including all layers unzipped for that open air feel (or passing the 10' shower hose outside when needed). Based on feedback, Supertramp has recently doubled the size of the window zippers from #5 zippers to #10 zippers. Zipper size refers to the teeth width, in millimeters, when the zipper is closed.

As noted in various videos, the soft top consists of two layers waterproof breathable material with a layer of insulation in between. Supertramp says it's about 1/2" thick which they felt was a happy medium between enough insulation while still allowing consistent pop-top closure.

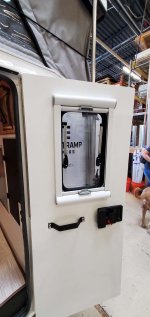
The small Arctic Tern window on the rear door is now included as standard rather than an option. Though standard, some owners have opted to do a window-delete on the door. A typical double pane acrylic camper window, the door window has a sliding screen and shade and it hinges at the top so, at lesser openings, there is less chance of rain ingress. There is no screen door, though there is at least one aftermarket brand that has been offering a magnetic-closure screen door similar to those offered on many camper vans.

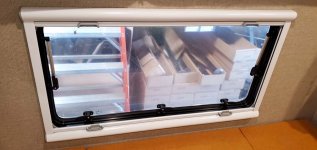
Supertramp offers the option to add an Artic Tern 18"H x 42"W window to the driver's side camper wall. There are pros and cons depending on one's intended use case. Increased view and ventilation are usually a positive. Those that camp often in extreme cold may value the solid wall panel, and the insulation it provides, over a window. Same for those that frequent narrow tree branch and brush filled trails as acrylic windows scratch fairly easy; though acrylic windows can be polished to remove pinstripes. I've used such products on acrylic camper windows and what these various acrylic polishes will remove is amazing. Some may also prefer having other optional equipment on the driver's side wall rather than the window, such as interior and/or exterior L Track, outside Molle panels or the bunk bed option. That area is also where one might lean back when seated along the driver's side wall and the optional side window will effect the backrest area.

They estimate an overall all average R value of R7 though it's not been formerly tested.
-------------------------------------------

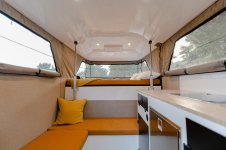
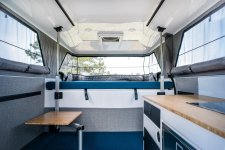
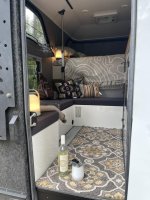
There are two main color families available and there are four cushion color choices in each family, so more subdued cushion color choices, than the orange and blue colors often shown in the interior images, are available. I've recently seen images of a dark grey seat cushion that looks great, but I'm partial the the orange color (called Dune) which isn't quite as bright in person as it seems in the images.
P1056058+(1)-min.jpg


Supertramp website image


Supertramp website image
P1117741+-+Copy.jpg


Adding image from an owner that shared their interior with dark grey cushions.
357578521_10229888606470090_7051259585932769340_n.jpg


The remaining thread images are from a recent trip to Golden, CO, that my wife and I did, to get the Supertramp tour.

Latest zippers have increased from #5 to #10.
20230623_082018.jpg


Example of the optional driver's side window.
20230623_082027.jpg


The front window zipped up (was neat to see because all videos/images have the front window open so I'd never seen it with the front window closed).
20230623_082040.jpg


Image showing the sewn in corner pockets for the shock cord.
20230623_084053.jpg


20230623_084059.jpg
 
Last edited:
Chadx

♫ Off road, again. Just can't wait to get...
Cabin and Water heater, shore power, fridge, inverter:

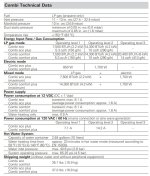
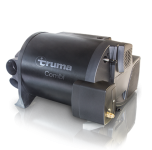
The Truma Combi heater is both cabin heat and water heater and runs off of propane. The Eco model is utilized rather than the Comfort model; the only difference being the Comfort model can generate more BTUs, but that level of heat isn't needed for such a small, efficient space. Supertramp gives the option to upgrade the Combi to the Truma Combi plus model, which adds an electric heating element. The "plus" allows for cabin heat and/or water heat to run off not only propane, but also off of shore power (electric) or a combination of both propane and electric. When both are available, the "plus" unit prioritizes electric, but if the electric element can't produce enough heat to meet what is being called for, it also introduces propane heat as needed. The plus version can be set to two different power draws. 'Operating level 1' draws a 120v max of 850watts. 'Operating level 2' draws a 120v max of 1,700 watts. This allows the user to limit the draw if need be, when plugged into a 120v outlet that has other loads on it. See image further below of the 'Truma Combi Technical Datasheet'.

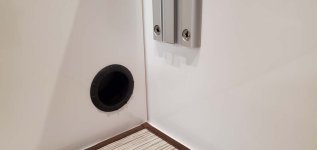
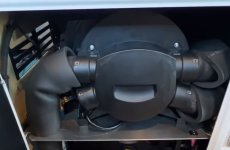
Truma Combis have four outbound ducts available for cabin heat. Supertramp campers utilize three outputs; one leads down to the basement to keep freshwater tank and grey water tanks from freezing and the other two into the cabin from the galley cabinet (one pointing towards cabover and one pointing towards drivers side bench seat). I like the idea that the heated basement would keep the floor comfortably warmer in cold weather. Recently, the basement heat circuit was adjusted. That heat duct first goes into the basement, with vents pointing at fresh water tank and grey water tanks, but then the duct comes back into the cabin space so there is now a third cabin heat duct located near the floor where the front and side bench seats meet (see images further below).

When the camper is plugged into shore power, the 120v Alternating Current (AC) shore power circuit is energized. The shore power 120v AC circuit powers only the AC-to-DC converter (battery charger). If the optional "plus" version of the Truma Combi is specced, the electic heating element is also powered by the 120v shore power, but it receives its own exterior wall plug separate from the battery charger plug. That Combi Plus plug, on the camper exterior, is a NEMA 5-20P (P stands for plug) rather than a NEMA 5-15P like the battery charger plug. NEMA 5-20 plugs have one prong turned sideways, rather than both prongs being parallel, and indicates it should be plugged into a 20amp circuit rather than 15 amp circuit. You'll need an extension cord or adapter with a NEMA 5-20R (R is for receptacle; aka outlet) and ensure you only plug into a 20amp 120v outlet if you plan to use the full potential (highest setting) of the electric heating element. This is because the combi plus can draw up to 1,700 watts (14.2amps on 120v) and best practice is to limit continuous draw to 80% of a circuits rating, which is 16 amps on a 20amp circuit.

As noted previously, there is the option to run the Combi plus on 'Operating Level 1' which draws a max of 850 watts (7.1amps on 120v). It is perfectly fine to draw a continuous 7.1 amps from a 15amp circuit since it is well below the 80% rating which is 12amps. The caveat on any circuit is there could be other loads on the same circuit. For example, if your camper is plugged into an outlet in your garage and there is another outlet on the same circuit with a garage fridge plugged into it, or someone was to plug in a power tool or heater to the same circuit, the circuit may experience sustained draw over the 80% circuit rating level or simply be overloaded and trip the breaker or blow a fuse.

My initial reaction was a preference to have only one camper exterior 120v plug that powered both the battery charger and the optional Combi Plus. That would avoid needing two extension cords and also have only one, rather than two, shell penetrations. But, thinking it through, being able to supply power to only one of the two, rather than both, has value. Having two external plugs allows the user to choose which items are powered when. And, the Combi Plus plug being NEMA 5-20P reminds the user of the potential power draw and need to use an appropriately sized circuit.

Again, having two camper exterior plugs is only the case if the optional "plus" version of the Truma Combi is specced. If not, there will be only a single exterior plug and that plug powers only the battery charger.

-------------------------------------------------------
Truma Combi technical data sheet.
The standard Combi is the 'Combi eco'.
Optional Combi is the 'Combi eco plus' which adds an electric heating element.
Combi Technical Datasheet.JPG


The shore power circuit is a completely separate 120v circuit than the 120v outbound from the optional 'Go Power' brand 1500 watt inverter. Shore power does not energize any 120v AC outlets in the camper cabin. The cabin 120v AC outlets exist only along with the optional inverter.

Isotherm Cruise 65liter fridge is the DC-only version rather than AC/DC (two way) fridge version. Two-way (AC/DC) fridges prioritize 120v AC if both AC and DC are available which avoids draw on your house battery. In these builds, the Isotherm 65liter is a DC-only fridge which reduces complexity/wiring. Isotherm spec states this fridge draws about 2.5amps continuous on 12v DC when running. Obviously, a fridge doesn't run constantly so Isotherm provides a typical 24 hour power consumption number. This unit indicates 275 watts per 24 hours, but as always, fridge power consumption varies with camper temperature, fridge contents/fullness, etc.)
-------------------------------

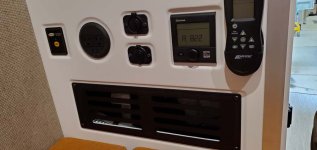
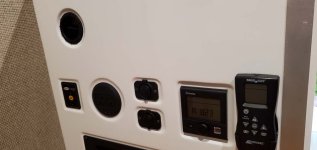
End of galley with optional Go-Power Inverter switch and associated 120v outlets. Also showing standard 12v outlet, USB outlet, Truma controller (controls both cabin heat and water heating featues) and vent fan remote control.
20230623_082221.jpg


One of the three cabin heat vents from the Truma Combi.
20230623_082228.jpg


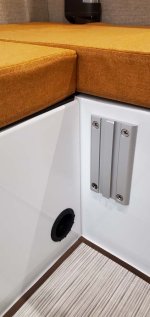
New - There is now a third cabin heater vent as the basement duct now goes into the basement, with vents down there, but now also vents into the cabin. Also shown is the table mount for the optional Lagun table.
20230623_082306.jpg


20230623_082310.jpg


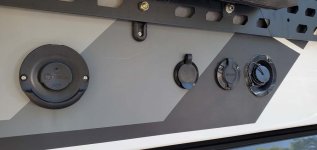
Passenger side exterior showing (left to right) the Truma Combi intake/exhaust port, extra plug for optional Truma Combi "Plus" upgrade, Noco plug for battery charger, and freshwater fill. Note that the freshwater fill does not have a locking cap. If that is important to you, I know of at least one owner that removed the factory freshwater fill and replaced with a locking freshwater fill...and it was not an easy task. When I asked the Supertramp team about it, they elaborated that the locking caps add a couple more connections (fewer is better) plus there hadn't been a demand for the locking caps so far.
20230623_095158.jpg


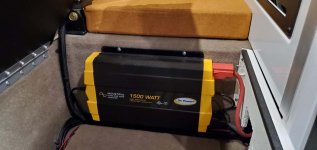
Optional Go-Power 1500 watt inverter is located under the front bench seat.
20230623_082456.jpg
 
Last edited:
Chadx

♫ Off road, again. Just can't wait to get...
Offroad worthiness:

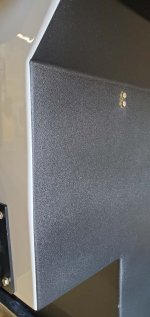
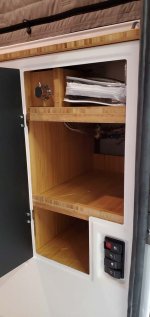
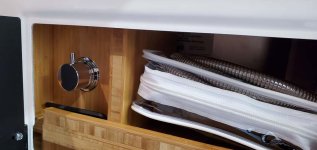
Shell and interior robustness is a necessity on rigs whose target audience spends time on backroads, forest service roads, trails/offroad, and "loooong g g g g washboarrrrd d d d rooooaadz dz dz dz ", so I was keen to ask about ruggedness and if there were any concerns with durability for heavy uses experiencing a lot of chassis twisting, bouncing and long-duration vibrations of washboard roads. Supertramp team has no concerns about such a use case. They shared that there are current owners doing some brutal offroading with no issues and even some data from a small crash where nothing failed. Regarding the interior, they shared that the interior cabinetry is made out of composites and the galley doors are made out of aluminum. The only bamboo is the countertop and the interior kitchen storage shelving. The interior kitchen cabinet storage is its own "unit" that they assemble outside of the camper and then mount it into place in the galley.

Standard and optional exterior paints and wraps:

The campers come out of the mold white. They are painted with a single stage paint that can be buffed to remove pinstripes. If there was more extensive damage, one could bondo and repaint. The paint colors available, other than white, are Battleship Gray, Forest Green and Sand Dune Tan and are an option with added cost. The paint codes are recognized in the automotive industry for easy color match. The campers come standard with a decal and, because decals show pinstripes easier, they can be omitted at the customer's request.

One can also spec a 3M vinyl wrap as an additional-cost option. It is more costly than the optional paint colors, but would allow exact color match to a vehicle wrap, more elaborate design, etc. Of note is wraps leave the main/central roof area white and the vinyl wraps are not as pinstripe resistant as the paint options.

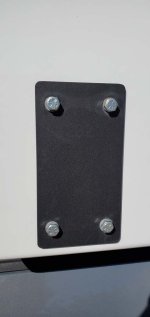
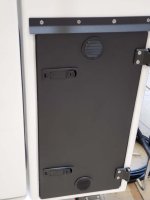
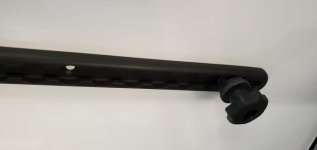
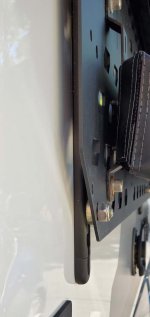
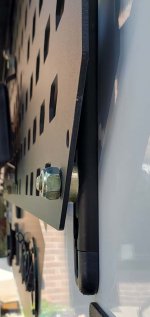
The jacks unbolt completely and the location is covered with a small plate which improves mirror visibility and tabs that could snag on things.

Interior:

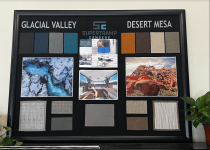
Within each color family, one can spec the seat cushions to be any of the four colors within that family. So if you order Glacial Valley (cool color temperatures), the seat cushions can be Fjord, Iceberg, Moraine and Crevasse. If you order Desert Mesa (warm color temperatures), the cushions can be Dune, Bedrock, Camel and Bone.

The included mattress is about 4". From the mattress surface up to the bottom of the fan is 7" of clearance. Mattress surface up to the flat portion of the cabover ceiling is 9" of clearance and less where the ceiling edges slope down. When the pop-top is closed and fabric folded in, there is slightly less than 2.5" of space above the factory mattress should one want to add a topper or Froli system. Froli systems add 1.3" to 2.36" of height depending on which of the three models are chosen. The most common for boats and campers is the Traveler which is 1.3" tall. And, if a person was replacing the entire mattress, one should target less than 6.5", so a 6" replacement mattress would be a good fit.


Color/fabric board.
fabric board.png


20230623_081802.jpg


Jacks mounted on a camper.
20230623_083517.jpg20230623_083526.jpg


Jacks removed and plate in place.
20230623_084119.jpg


Front underside of campers are now lined.
20230623_083529.jpg

20230623_083533.jpg

Exterior of a well-used camper showing some pinstriping on the decals (had to get the camera angle just right to get the light to reflect these).
Owner's can choose to not have the decals applied. A few pinstripes are a small price to pay for having the slick looking exterior decals.
20230623_084114.jpg
 
Last edited:
Chadx

♫ Off road, again. Just can't wait to get...
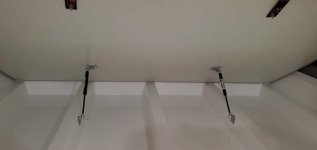
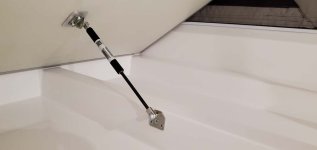
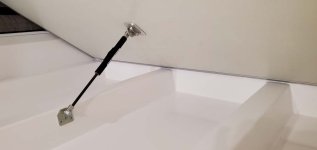
Underbed storage:

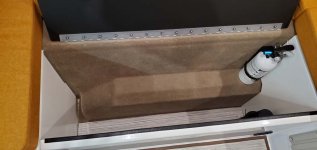
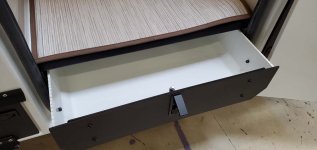
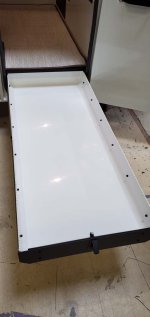
For the underbed storage, the first units had grey carpet Supertramp built a new mold for this area and so it is now white composite so the storage area is brighter and will be easier to clean.

20230623_082118.jpg

20230623_082131.jpg

20230623_082134.jpg


Tie down, under-camper mats:

They have a tie down system where two posts, on either side of the front camper base, slides into slots on the front pickup bed bracket mounts. This eliminates the need for front turnbuckles. The original strap tie downs have been replaced with turnbuckles and with the front bracket design, only two rear turnbuckles are needed. Supertramp plans to release a video showing this, but from what I've seen, it's slick. No more "crawling on your belly like a reptile" to get the front turnbuckles attached and closed through a port or hatch.

Integral to the tie down systems, the camper sits on a specific-depth mat to ensure the front pins engage correctly with the front pickup brackets. For this reason, you cannot change the height of the camper mats later. Everything is sized, depth-wise, to the specific pickup to ensure clearance between the cabover and the pickup roof and between the camper and pickup bedrails and once installed, the height of the bed mat, camper pins, and camper bracket are dependent on one another and must remain 'as installed'.

Some composite campers have an aluminum perimeter frame and only the footprint of the camper need be supported rather than the entire camper footprint. The entire footprint of the Supertramp must be supported. This means adding some overall weight since a 4' x 6' x 1/2" livestock mats are ~65lbs. Supertramp can also spec a foam mat, that weighs next to nothing, though they say it's noisier during driving.

Battery bank and charging circuits:

At the time of this post, the standard AC/DC converter (battery charger) is a NOCO 10amp. If you upgrade to larger battery banks and air conditioner, the 10amp charger is upped to a Progressive Dynamics 45amp charger as part of those packages. [Update: As of November 2023, Supertramp has replaced the Noco 10amp with the Victron Energy Blue Smart IP67 12-Volt 17 amp charger as the standard battery charger in the camper. Image in post number https://forum.expeditionportal.com/...e-in-pickup-camper.239844/page-4#post-3137844].


The Victron DC/DC charger is an Orion "12v/12v - 30amp" Non-isolated model. Unlike the AC/DC charger, the DC/DC charger does not change based on the battery and air conditioner options you choose. Early on, there was a video noting that a smaller Renogy 20amp DC/DC charger would run off the 4pin/7pin trailer plug outlet. That was never implemented and, from the first customer deliveries, the install includes a run of dedicated, heavy gauge wire from the pickup battery, through a fuse/breaker, then back to a heavy gauge connector, then into the camper to the Victron DC/DC charger. The connector is mounted on the rear passenger side of the pickup bed. On my previous camper builds, I also add a heavy-duty, manual battery switch under the pickup hood, such as a Blue Sea M-series, which allows me to de-energize that DC circuit. Even when my previous campers were loaded (6 or 7 months out of the year) and plugged in, I'd leave the switch off as I only want the DC/DC charger to charge when I absolutely need it. I instead prefer to rely on a camper's solar panels to charge up the house battery bank, but it's nice to be able to flip a switch and add in DC/DC charging in the rare scenarios it's needed. Based on the location of the Supertramp connector, this could also be easily accomplished by not plugging in the connector. With the location of the connector and plug on the Flagship LT, one can plug or unplug at any time unlike other campers that have the connector accessible only during loading/unloading but not once the camper is in position.

71fJum4GMGL._AC_SL1500_.jpg


The campers are specced with three 110-watt flexible solar panels (total of 330watts) rather than the original two 150watt panels (total of 300 watts). The panels are wired in series and attached with Very High Bond (VHB) tape so they can be removed later if they ever need replacement. (VHB can be a challenge to remove, but there are a few techniques that make it a little easier).

The Victron solar controller is the MPPT 75/15 model (75v max and 15amp max output), which is reasonably good match for the three 110watt solar panels wired in series, though it's a bit over-paneled. The charger can only output about 219watts (14.6v x 15amps). The 330watt panels, under ideal conditions, will generate more power than the solar controller can handle. These chargers are up to 98% efficient. Even if operating at only 95% efficiency, solar panels larger than about 230watts is overpaneled. Overpaneling a solar controller is common practice since there are often times the panels are not making max power (cloudy, sun low in horizon in winter months, sun low in horizon in morning/evening, partial shade, when panels heat up, etc.). During those times, you'll collect more solar than you would with a solar array sizes exactly to the solar controller. Nothing wrong with over-paneling. It's simply something to take into consideration when calculating how much solar input your system will get as you need to calculate based on the max Solar Controller output to battery (about 219watts; or 15amps at 14.6v) rather than calculate on solar panel size (330watts; about 22.6amps at 14.6v). This is a spread of about 111watts or 7.6amps. [Edit: We specced our Supertramp with the 75v/20 solar controller which has a throughput of an extra 5 amps (14.6v x 5amps = 73 watts). 20 amps at 14.6v is a throughput of 292watts rather than the 219watts of the 15amp solar controller].
81l8HlmPStL._AC_SL1500_.jpg


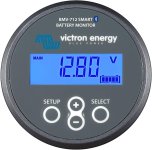
A Victron BMV-712 Smart Battery Monitor gauge is mounted in the electronics cabinet and it displays the battery stats (State of Charge, amps in/out, etc.). A Victron smart shunt is used which also allows monitoring with any mobile device via the Victron app and a Bluetooth connection.
71h0iTyarXL._AC_SL1134_.jpg

61DICO4OdnL._SL1500_.jpg


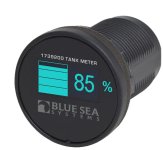
A Blue Sea '1739200' Mini OLED Tank Meter gauge, that displays remaining freshwater tank level, is also mounted in that compartment.
water monitor.JPG


Cold weather considerations and Winterization:

The Truma Combi, and optional Truma Combi plus, are completely inside the camper. Unlike a Truma AquaGo instant hot water heater, which is exposed to exterior temps, there is no need to drain the water system or Combi water heater when outside temps are below freezing provided the camper interior temp is kept above freezing. I'm used to having to either keep the AquaGo water heater turned on or needing to bypass and drain the water out of my current camper's Truma AquaGo water heater in cold temps. Truma also makes a 12v heating element for the AquaGo that can keep the unit from freezing while driving.

The Truma Combi is more like a tank water heater than an instant water heater so one needs to plan ahead and let it heat for around 15 minutes prior to needing hot water (depending on water temp, outside temp, and setting of Eco, High, Boost). By contrast, Truma AquaGo takes less than a minute to produce hot water and the water heating in constant and endless. That being said, Truma Combi users tell me running out of hot water with the Combi during showers, etc. isn't an issue.

With the Combi not being exposed to outside, there is no need for a water line bypass for draining only the water heater like most AquaGo are plumbed. In the Superstramp Flagship LT, it's all or nothing for water line and water heater draining which makes sense because if the interior of the camper drops below freezing, then the entire plumbing system needs to be drained. For draining, the Flagship is setup to gravity drain and so no RV antifreeze need be introduced. If any plumbing modifications are made, such as adding a water filtration system and second drinking water tap, it's important to evaluate impact to the gravity-drained winterization process as one may introduce areas that can not be gravity drained.
heating-combi-us.png
combi.JPG


The winterization process Supertramp recommends is as follows:

WINTERIZATION:

Step 1: Drain as much water out through the faucet or shower as possible with the water pump on.

Step 2: Leave the faucet and shower nozzle open. Open the yellow drain valve in the utility compartment with the water pump on. This water will drain into your truck bed if the camper is still on.

Step 3: Once the water is done draining, turn off the water pump and hold the shower nozzle up so water can drain out of the system.

Step 4: Leave the yellow drain valve open, the faucet valve open, and the water pump off.

Step 5: Grey water freezes and can burst lines. Ensure these are drained.

Supertramp has provided the following video winterization instructions:
 
Last edited:
Chadx

♫ Off road, again. Just can't wait to get...
Lights and optional backup camera, sink, etc. :


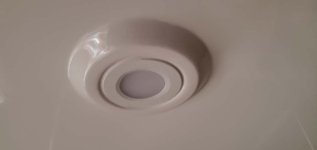
The 4 LED ceiling puck lights have been updated to be molded into the ceiling. The switch for these is on/off only; not dimmable.
20230623_082908.jpg


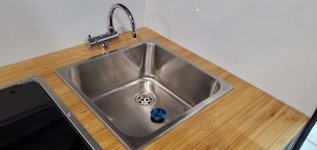
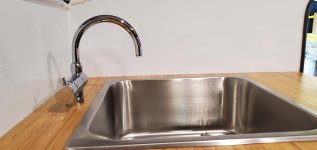
The faucet, for the stainless steel sink, has been updated several times. Protypes had "kitchen sprayer" recoiling type which was replaced by a very nice RV type arching faucet. Recently, a slightly different faucet is being specced which is not quite as tall, but extends further out into the sink. There is still a coiled up shower sprayer, with 10' hose, and it is located within the cabinet under the sink. It has it's own controller. That sprayer is used for both outside shower and the optional inside shower. There is no exterior shower connector. The sprayer being attached under the sink means that, for outside use, the user will run the sprayer hose out a window or through the rear door. I like this setup since it eliminates one cabin penetration and the need to babysit an outside faucet/attachment in below freezing weather.

20230623_081929.jpg

20230623_081934.jpg


Latest sink and faucet.
20230623_081943.jpg


The original "sprayer" faucet.
P1056108-min.jpg


The second gen version of faucet was taller, but didn't reach into the sink very far.
20230623_084753.jpg


Side view of the new version of the faucet which has a better reach.
20230623_081952.jpg


Battery bank:

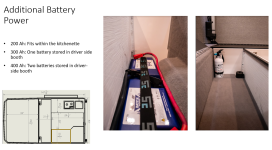
Standard builds come with one Battleborne 100ah battery. One can optionally add up to three additional Battleborne 100ah batteries for a total of four. In my last two campers, I did all or part of the house battery and solar wiring setups/installs (battery, solar panel, solar controller, battery monitor, etc.) I do like lithium batteries and have experience with three different brands, including Battleborne which have performed well. The area in the galley cabinet, near the Victron components, can house up to two Battleborne 100ah batteries. The compartment under the drivers side bench can house two additional Battleborne 100ah batteries. Some of the LiFePo4 brand batteries I'm familiar with are too wide to fit in either place. Something to be aware of if you plan to use a battery other than the Battleborne 100ah batteries in standard shape. (Note that Battleborne also makes a 100ah in vertical format (6v replacement format) called the GC2, which will not fit).

There is potential battery bank expansion room in the cabinet beneath the front bench seat. That space is reportedly 11"H x 54"W x 21"D. Lithium batteries taller than 11" can be oriented on their side without issue, so that area may be a good option for a larger battery bank and/or for batteries of a different dimension than the Battleborne 100ah battery. The fresh water tank and water pump are located there with a protective panel over it so if this location was used to mount batteries, be aware that the batteries would need to be removed to pull the panel and access the water pump or freshwater tank and fittings.

thumbnail_image (10).png

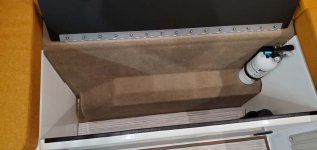
This is the same drivers's side compartment when third and fourth batteries are not specced.
20230623_082332.jpg


Air conditioner options:

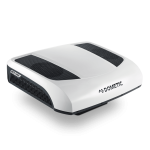
The optional 12v DC Air Conditioner offered is the Dometic RTX2000. They offer two options with the primary difference being a cabover curtain and the number of batteries required to support the desired/usable battery-powered duration. For both Air Conditioner options, they increase the 120v shore power battery charger from 10amp to 45amp so one can run the Air Conditioner from shore power or a generator (or simply to recharge a depleted large battery bank quicker.
Per the Dometic website, the RTX2000 has cooling capacity of 6,824 BTU and should be run on battery banks of 180ah or larger. 12v 19amp consumption in Eco mode. Rated power is 650watt. Fuse required is 80amp. The unit itself (not counting other install components, wiring, or larger battery bank) weighs 72.6 lbs (33 kg).

Supertramp's description of the two Air Conditioner options:

Phase 1: This solution is designed for the Air Conditioner to run off shore power or a generator, however, it would allow you to turn it on to run for a few hours to cool the space each night (~4 hours without shore power or generator). It requires purchase of one additional battery (for a total of two) and we would increase the shore power plug-in to a 45 amp charger so you can run the unit from shore power or a generator.

Phase 2: This solution is designed for the Air Conditioner to be "off grid". It would require purchase of three additional batteries for a total of four. This solution is designed to cool the camper down in the evenings and throughout the night. This unit is a 12V solution, but we advise that you need to be mindful of your solar and power and that this should be primarily used to cool your sleeping area before bed. It includes a divider to separate the bed area from the main space to allow for more efficient cooling.
rtx2000_9600028490_36528.png

Sizes:
The Flagship LT is the only model currently available. Per Supertramp team, an 8' slide-in and 6.5' flatbed are being requested by potential clients. No plans are in place to offer either of those as of yet which is understandable considering the backlog of Flagship LT orders. If you are seriously interested in buying different, share your thoughts with the Supertramp team as they do like buyer input.


Thoughts on weight:
The dry weight, listed on the website, has been adjusted to reflect updates to standard features and is now listed at 1,350lbs. Adding options can bring the dry weight of the camper up to 1,600. As I've found with my last two pop-up campers, wet weight adds about 200 - 300lbs (water, propane, house batteries). Add in food, camping supplies, tools, minor recovery gear, vehicle accessories, wiring, mounting brackets, etc. and you are quickly 2,200lb. Add in total weight of passengers (300lb for my wife and I for example) and it's up to 2,500lb total payload...and we travel light!

Now add tongue weight (bike rack, cargo rack, trailer tongue weight, etc.) 100lb for MTB rack and two bikes and it's 2,600lb of payload total. Or, 300lb for our fishing boat's tongue weight or our loaded enclosed trailer's tongue weight and it's 2,800lb payload.

You can get your total payload weight 2,500 - 3,000lbs very easily. With seven years experience with a couple different "light weight" pop-up camper brands on a Fullsize pickup (formerly called 1/2 ton pickup) that was set up with Riderite airbags and E-rated tires, I submit that it's appropriate to choose an heavy duty/superduty pickup over a modified Fullsize pickup since a realistic payload will be 2,500 - 3,000lbs.
 
Last edited:
Chadx

♫ Off road, again. Just can't wait to get...
Actuators:

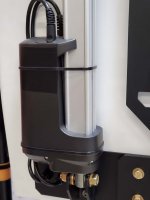
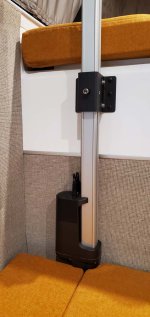
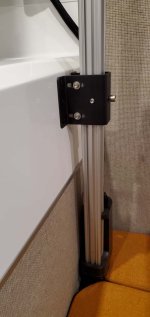
Actuators have their own dedicated breaker box with individual breaker for each leg. They also contain internal sensors and all four legs communicate to one another so if one leg encounters and issue or jam, the other legs will react accordingly. They also can perform self diagnostics afterwards and do a calibration cycle.

20230623_081827.jpg


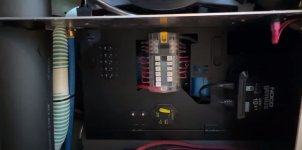
Actuator breakers to the left of the main fuse block.
panel.JPG


20230623_081902.jpg


20230623_082032.jpg


20230623_082040.jpg


20230623_082144.jpg


20230623_082155.jpg


20230623_082203.jpg


Actuators cables run throughout the camper and all four communicate with one another.
20230623_082342.jpg


20230623_082351.jpg
 
Last edited:
Chadx

♫ Off road, again. Just can't wait to get...
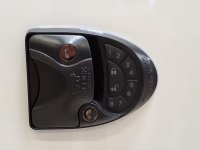
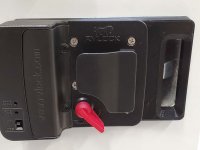
Camper utilizes a RVLock.com handle and lock which allows both keyed and keyless entry. The electronic portion can be turned on and off, as needed, with a switch inside (see next image).
20230623_081816.jpg

Inside view of door. Note the switch in lower left to disable and enable keyless entry pad, a code reset pinhole and removable battery cover.
20230623_081907.jpg


Supertramp Molle Panel and L track suggested weight limits:
Rear Molle Panel: 50 lbs
Side Molle Panel: 100 lbs
Exterior Side Wall L Tracks: Each L track has the capacity to carry 33.3lbs
Interior Driver Side L Track: 75 lbs (this is less than with the bunk bed because two additional supports are positioned when in use)
Ceiling L Track: 50 lbs (25lbs per l track)
Kitchenette L Track: 25 lbs

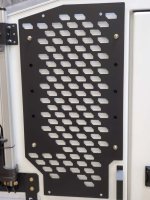
One rear panel is standard. There are options to add panels to the drivers and/or passenger camper sides as well (which also requires the external side L track option).
20230623_081822.jpg

Door stop which also holds door open.
20230623_081831.jpg


Propane cabinet is vented and lockable.
20230623_081835.jpg


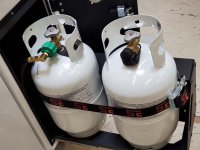
Slide-out propane drawer and two 11lb propane bottles are included. I've used duel propane bottles on previous campers and really like it over one single large propane. You can pull one and use it elsewhere in camp for a portable cooktop or propane campfire. It also makes it obvious when you are at 50% mark (provided your second bottle is full), though it does require manually swapping the propane hose over to the second tank (including in the middle of the night). But with two tanks, someone can make a run for a propane refill while the camper is still hooked up to the other tank (handy in extreme cold where you would not want to leave the camper unheated). One pro of a standard, vertical propane tank would be the option of swapping it out the tank at a retailer if a refill station could not be found, but planning ahead cares for that scenario.
20230623_081847.jpg


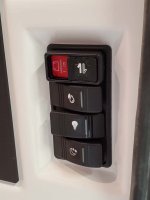
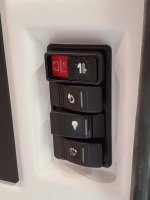
The switches are located low on the galley cabinet and are handy from both inside and outside. Four switches are (from top to bottom): Actuator switch (with "safety"), water pump power, interior lights, exterior light.
20230623_081902.jpg


All the handles have the STC logo.
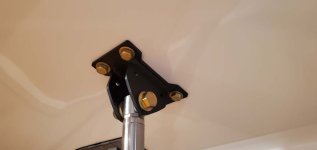
20230623_081914.jpg


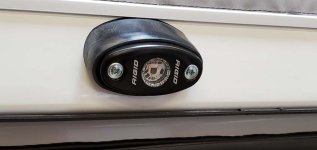
Exterior light can be had in both white and amber light colors.
20230623_081920.jpg


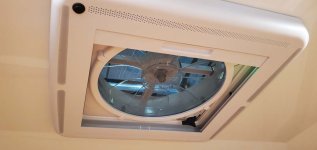
Two Maxxair Deluxe roof vent fans, with remote control, are included as standard.
20230623_082158.jpg
 
Last edited:

Chadx

♫ Off road, again. Just can't wait to get...
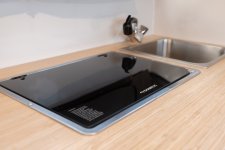
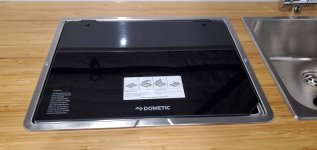
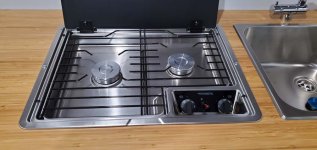
Dometic two burner propane cooktop
20230623_081956.jpg

20230623_082003.jpg


Galley drawer is a great location for utensils, a portable induction burner or anything that needs to be kept handy.
20230623_082241.jpg


20230623_082246.jpg


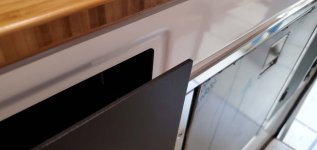
The galley is molded one piece and the inset lips around the cabinet drawers are a nice touch.
20230623_082300.jpg

Under the driver's side bench is a deep storage cabinet that goes very deep. It is also the location of battery #3 and #4 if the optional extra batteries are chosen.
20230623_082323.jpg


20230623_082332.jpg


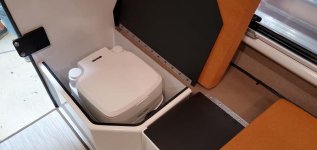
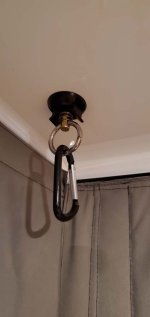
The included portable toilet lives under the driver's side bench seat. If the optional interior shower is chosen, this tub is utilized as the shower basin. That option also includes a 5 gallon dedicated grey water tank (in addition to the standard and separate sink 5 gallon grey water tank). It also includes shower curtain and ceiling hooks.
Based on our experience with portable toilets in past rigs, we'll likely do a separating toilet solution instead. [Edit: We went with a Trelino M separating toilet and love it]
20230623_082359.jpg


One of four L track sections for clip-in shower hooks.
20230623_082751.jpg

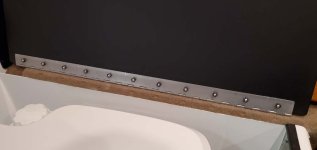
Piano hinge of basin cover.
20230623_082403.jpg
 
Last edited:
Chadx

♫ Off road, again. Just can't wait to get...
Optional Lagun table can be stored under the front bench since there is a carpeted floor that covers the freshwater tank and water pump. [Edit: in our build, we added a second Lagun table mount so we have the option to locate the table in two different places depending on need]
20230623_082453.jpg


The optional 1500watt Go-Power inverter is located in the front bench cabinet. [Edit: They now also offer a 2,000watt inverter which is what we did in our build]
20230623_082456.jpg


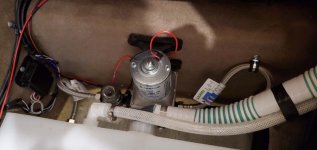
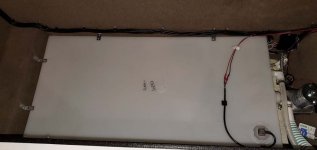
Under the removable floor is the water pump and freshwater tank.
20230623_082629.jpg

20230623_082634.jpg

24 gallon freshwater tank.
20230623_082649.jpg


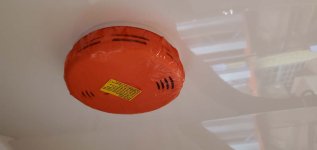
New-in-the-wrap smoke detector.
20230623_082759.jpg

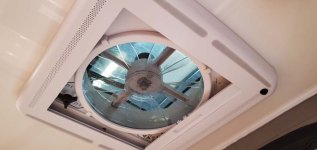
Another view of the fan which includes light, remote control, and black-out shade.
20230623_082845.jpg


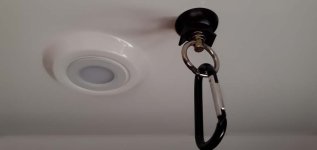
One of four molded-in LED interior lights along with another L track shower curtain hook.
20230623_082901.jpg


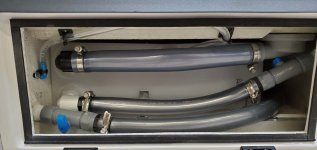
The 5 gallon grey water tank, for the optional interior shower, is accessed from outside at the driver's side rear of the camper. If the shower is not optioned, this is a storage space. The sink's grey water tank is located in the back of the galley, but it's drain hose is also located in this area.
20230623_083330.jpg
 
Last edited:
Chadx

♫ Off road, again. Just can't wait to get...
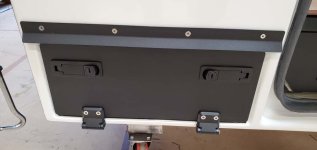
This is the lockable door to the rear exterior storage compartment (or shower grey water tank if so optioned).
20230623_083317.jpg


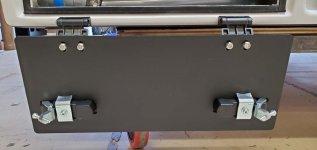
It hinges downward to stay out of the way while accessing.
20230623_083325.jpg


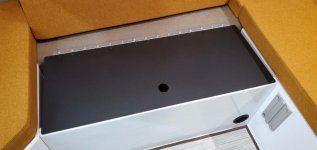
The interior floor covering is removable and can be hosed off or otherwise cleaned while outside the camper.
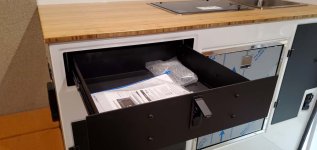
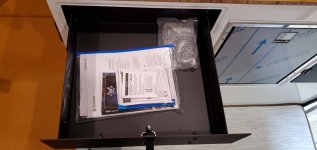
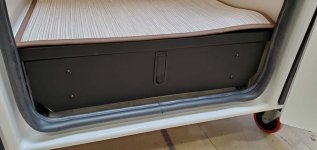
The large basement pull out drawer is inside the camper and so inaccessible and secure when the camper door is closed.
20230623_083229.jpg

In this particular picture, the trim has not yet been applied to the upper edge of the drawer.
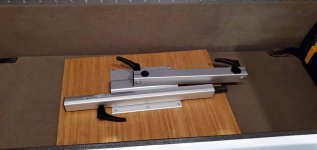
20230623_083239.jpg


In this particular picture, the trim has not yet been applied to the upper edge of the drawer, but one can see how large the drawer is.
Drawer inside measurements are approximately 52"L x 20.75"W x 5"D.
20230623_083259.jpg


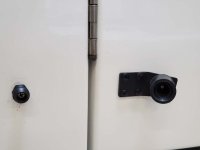
The arctic tern window is now standard on the door. I've heard that some buyers have successfully opted to delete the window from the door.
20230623_083442.jpg


Supertramp Molle Panel and L track suggested weight limits:
Rear Molle Panel: 50 lbs
Side Molle Panel: 100 lbs
Exterior Side Wall L Tracks: Each L track has the capacity to carry 33.3lbs
Interior Driver Side L Track: 75 lbs (this is less than with the bunk bed because two additional supports are positioned when in use)
Ceiling L Track: 50 lbs (25lbs per l track)
Kitchenette L Track: 25 lbs


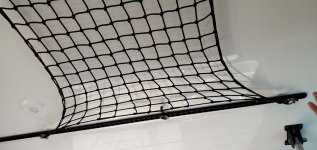
There are quite a few individual L track options. This is the interior ceiling L track option (ceiling net not included).
20230623_085135.jpg


20230623_085145.jpg


20230623_085151.jpg


This is the interior Kitchen wall L track option (bag not included, but gives one idea for use)
20230623_085420.jpg
 
Last edited:
Chadx

♫ Off road, again. Just can't wait to get...
There is an optional rear camera. It is pickup make/model specific and is mounted above the rear door. It plugs into the harness vacated when you remove the tailgate and unplug the stock pickup tailgate camera (so only works if your pickup has this feature). [Edit: Supertramp has moved to a sleeker camera housing since this image was taken]
20230623_095359.jpg


View of the optional exterior side L track with optional molle panel (this is from a well used camper; not new)
20230623_095216.jpg


20230623_095230.jpg

A new, cab-over leading-edge deflector that is being developed, will aid in branch deflection as well as weather protection and water ingress.
20230623_095257.jpg

20230623_095314.jpg
 
Last edited:
sn_85

Observer
Wow what a thoroughly detailed post on the Supertramp. I know you’re selling your OEV Camp-X as well. Does this mean you’re getting the Supertramp?

I’ve toured their facility and have seen their camper at the Expo’s a few times as well. They are just SUPERB campers and if I was going to pick between a Camp-X and Supertramp it would be Supertramp ALL DAY. I don’t know what it is but the Camp-X feels tiny and tight inside. The fabric and color choices in the Camp-X are very dark as well. They are practically the same size and yet the ST feels so much larger and spacious inside. There’s also a ton more storage. ST has an elevated floor so there is an integrated underfloor drawer and under bed storage is standard. The colors and bright and inviting. I would have gone with the ST but in the end decided I wanted to do more winter camping and went with a hard side flatbed instead. Otherwise ST would be my pick for a pop-up slide-in.
 

Forum statistics

Threads
188,216
Messages
2,903,935
Members
229,665
Latest member
SANelson
Top