Swapping 2003 E450 front clip with a 2008 - Tech Discussion and Howto

dtruzinski

4 Season Traveller
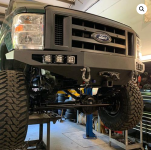
I have gathered all of the necessary parts and watched a number of YT videos on the front clip swap. I have noticed that a new hood latch and longer cable are necessary. I have also noted that most people build an adapter plate to mount the new hood latch. Has anyone done this? Will you share the dimensions of the adapter plate you made?
 

grpeterson

New member
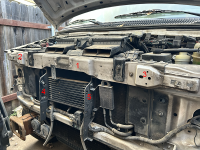
If you use the upper core support from the 2008+ the hood latch works without spacers *and* it allows you to use the 2008+ vertical & horizontal brackets to support the grill properly.

You need all parts numbered below.

1 - Upper core support, bolts in. Does not have holes for lower bolts of radiator mounting brackets. I'll probably drill/rivnut/bolt.
2 & 3 - Horizontal grill brackets. Need to drill into existing van chassis for rivnut/bolt at outer mounting point.
4 & 5 - Vertical grill brackets. Need to drill into existing van lower core support for rivnut/bolt at lower mounting points. There may be some additional tweaks for mounting the transmission/power steering coolers, but I stopped for the day.

IMG_7735.png
 
Last edited:
  • Like
Reactions: mog

dtruzinski

4 Season Traveller
If you use the upper core support from the 2008+ the hood latch works without spacers *and* it allows you to use the 2008+ vertical & horizontal brackets to support the grill properly.

You need all parts numbered below.

1 - Upper core support, bolts in. Does not have holes for lower bolts of radiator mounting brackets. I'll probably drill/rivnut/bolt.
2 & 3 - Horizontal grill brackets. Need to drill into existing van chassis for rivnut/bolt at outer mounting point.
4 & 5 - Vertical grill brackets. Need to drill into existing van lower core support for rivnut/bolt at lower mounting points. There may be some additional tweaks for mounting the transmission/power steering coolers, but I stopped for the day.

View attachment 855887
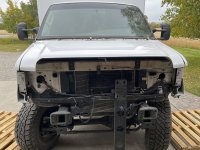
OMG, thanks so much. I have the fenders and hood mounted and was struggling with how the remaining parts would mount. Everything so far has been relatively straightforward. Nothing is bolted down tight, yet and I have stopped for the day as well.
 

Attachments

  • IMG_4902.jpeg
    IMG_4902.jpeg
    3.3 MB · Views: 7

grpeterson

New member
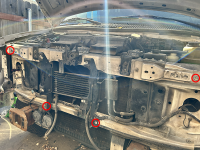
I installed M6 rivnuts in these 4 locations:

IMG_7737.png

The grill is solidly mounted and not even bolted to fenders yet.

IMG_7738.png

The power steering cooler bolts up to the 2008+ brackets but the transmission cooler will require some re-work. I may just install a larger one.
 

dtruzinski

4 Season Traveller
@grpeterson Great advice to get the updated cross member(1), left and right upper cross member grill support bracket (2 and 3), and the two support brackets that hold the trans cooler,power steering cooler, and provides additional grill support points (4 and 5). For 2 & 3 you could get away with self tapping screw to replace the missing hole and nut (obviously the rivnut is best).

I found aligning 4 and 5 easiest when following these steps. Attach both with the one bolt at the top of the radiator support bracket. Mount the power steering cooler to 5 in the upper holes. Then mount the bottom right of the trans cooler to 5. You will have to add a hole and a spring clip nut to 4 in the same location as the one in 5 to attach the bottom right of the trans cooler. With everything tight and straight, locate the bottom hole on both 4 and 5, and drill for either a nut & bolt or rivnut.

Right now everything is assembled rather loose. The todo list remains:
I need to reinforce the upper fender connections.
Attach the hood hold rod
Engineer a mount point for the trans cooler upper bracket
Get a new hood latch and the new hood latch cable.
Figure out the wiring for the new style connectors (and go back to the salvage yard for a missing connector) If anyone has the decoder ring please post
IMG_4958.jpg
 

dtruzinski

4 Season Traveller
I have figured out the headlight wiring. I had three wires on the 2003 going to the headlight: red/black (low beam), black (ground), and green/black (high beam). The connector on the new lights has numbered pins 1 (low beam), 2 (ground), 3 (high beam).

By the way this is a good time to upgrade from the halogen bulbs to LED. I had some Sealight H13/9008 Type X1 in the garage from a previous project and they are bright!

Amazon link for bulbs: Sealight H13
 

dtruzinski

4 Season Traveller
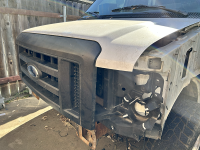
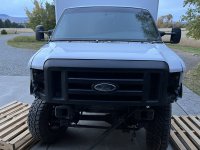
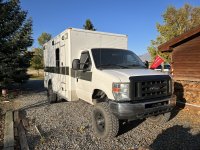
Here is a pic showing it nearly finished. Need to figure out blinkers and parking lights. Need to install new hood release cable (temp one hidden in bumper). More details tomorrow.
1728870411523.jpeg
 

grpeterson

New member
Here is a pic showing it nearly finished. Need to figure out blinkers and parking lights. Need to install new hood release cable (temp one hidden in bumper). More details tomorrow.

The 2008+ OEM-style headlights I got from Amazon have a clear side marker bulb behind an amber lens and a dual-filament running/turn amber bulb. Same with yours? I think I'll wire the side marker and one filament of the amber in parallel, looks like that may be what Ford did:

Screenshot 2024-10-15 at 12.03.55 PM.png
 

dtruzinski

4 Season Traveller
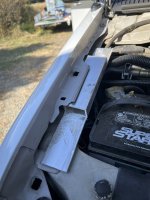
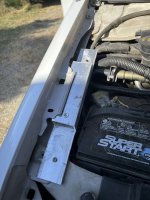
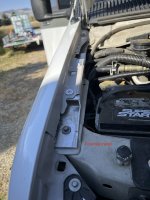
I will have a document soon that will show step by step this entire process. In the meantime, the only bracket I had to make was for the upper fender mounting points. There were two on the 2003 and the 2008+ has a different design. So I took a piece of alum rectangular stock 1"X2", cut it to about 13" for each side and then sawzalled the box section to flat stock on either end. Then I lined up the bolt holes and drilled to capture each. I added a nutsert on the top of the aluminum stock and a fender bolt. Hopefully the pics explain this better.

Test fitting
Test Fitting.jpeg


Hole alignment
Slide Bracket In.jpeg

Finished installBracket Bolted Down.jpeg
 

dtruzinski

4 Season Traveller
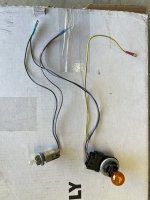
I completed the wiring of the other two bulbs (turn and park).

Right Side (passenger)
2003
White/Light Blue - Turn
Brown - Park
Black - Ground
2008+
Yellow/Violet - Turn
Violet/White - Park
Black/Gray - Ground


Left Side (driver)
2003
Light Green/White - Turn
Brown - Park
Black - Ground
2008+
Blue/Green- Turn
Violet/White - Park
Black/Green - Ground

So I tied the blacks together and the violet/whites together. The remaining wire on both harnesses went to the turn signal line.
Violet/White went to Brown
Blacks went to Black
Yellow Violet and Blue/Green went to White/Light Blue and Light Green/WhiteIMG_5021.jpeg
 

Forum statistics

Threads
188,337
Messages
2,905,702
Members
229,959
Latest member
bdpkauai
Top