The CrowsWing - Offroad Teardrop Trailer

jim65wagon

Well-known member
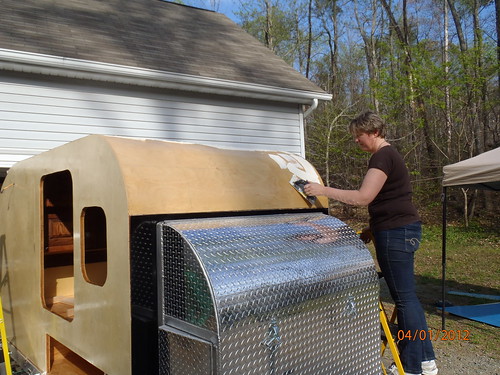
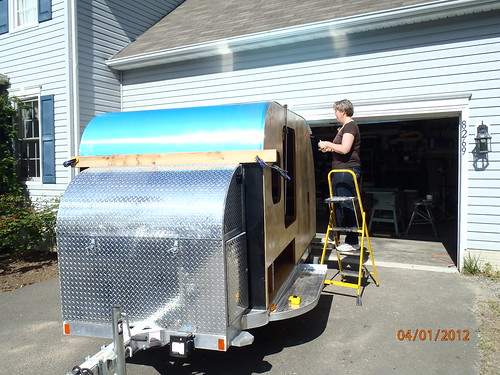
With the doors built it was time to move forward. We started at the top, with the roof.
A layer of outdoor carpet glue was troweled on. This will hold the aluminum skin down until we can get a few staples in and the trim on that will hold it permanently in place.
.
.
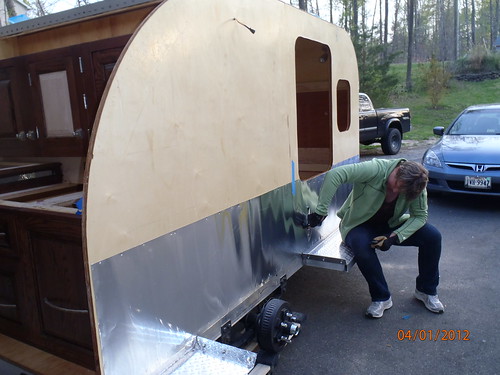
We added a layer of flashing to the bottom edge of the trailer. This overlays where the trailer meets the frame, and underlays where the upper aluminum skin meets the lower diamond plate. There is a bead of butyl tape where the wooden floor meets the frame, and 3M 4200 sealant along the edge of the flashing for further waterproofing.
.

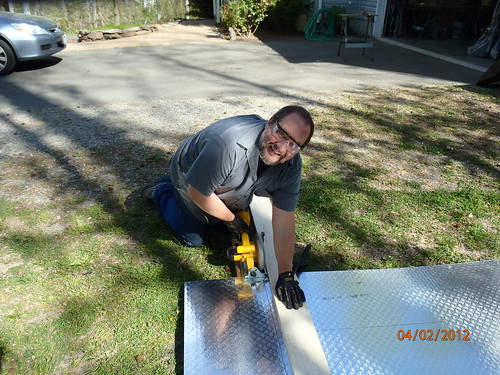
Then it was time for the diamond plate panel that surrounds the bottom 15" of the trailer. It cut easily with our DeWalt circular saw. A little nervous about this, Beth took this photo so the surgeon would have something to go by if I needed a facial reconstruction
.
We're using an H channel where the diamond plate meets the skin

.
The diamond plate gets a bead of 3M 4200 sealant around the back of it, then gets screwed to the trailer
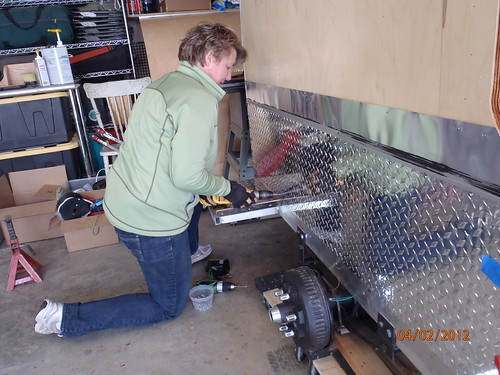
.

.
We (the kids and I) held up the 4x10 black upper panel to the trailer while Beth drew the outline of the traile, door and window on it. It cut easily with the saber saw, and after a bit of carpet glue on the wall, it clamped into place
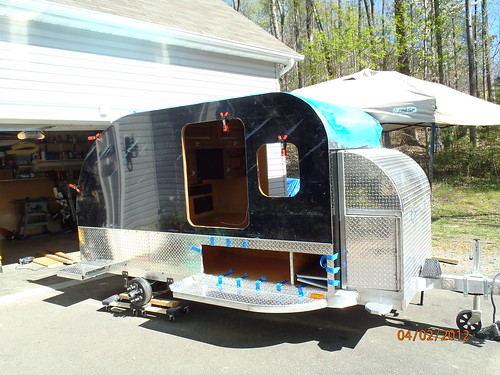
.
Then it got a few staples along the edge

.
Where the panel fit into the H channel we pressed in a black rubber window spline to hold it in place

.
and that's where it sits at the moment
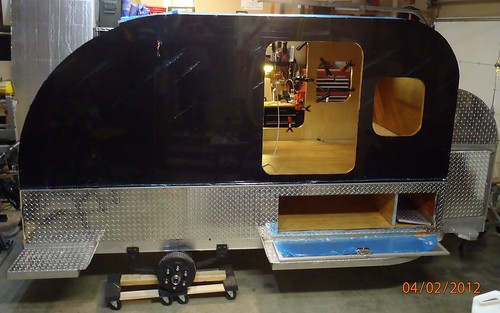
.
The cat is just plain bored with the whole idea
 
Last edited:

skibum315

Explorer
I know the finishing scheme (color/material) isn't the 'traditional' Ex-Po stark white ... but I really like it. Lucky you to be a guy who's wife actually goes for the black & bright diamond plate - it looks good.
 

medic83

Observer
WOW!!! This thing is crazy! Not sure if you mentioned it, but what are you and your wife's professions? This takes alot of skill, knowledge, and the right tools. Nice work!
 

jim65wagon

Well-known member
That looks like its gonna have some serious tongue weight with the axle that far back, what are you shooting for weight wise on the tongue?

Great looking progress!

~ Stump

Looks should be (hopefully) deceiving. The majority of the weight will be over the axle (water tank esp) and the entire kitchen is behind the axle. Kitchen cabinets fridge and the larder full of food and drink should offset the tongue box and batteries a bit. We're shooting for around a 2000lb total and I'll be happy anywhere between 200 and 300lbs for the tongue.

medic83 said:
WOW!!! This thing is crazy! Not sure if you mentioned it, but what are you and your wife's professions? This takes alot of skill, knowledge, and the right tools
She's been a Veterinarian for 21 years, and I've been with WalMart for 20. We're both college edumacated and acquired our skillsets through the Jack of All Trades course life provides, (and a massive amount of reading). We've rebuilt a farmhouse, a classic car, built cabinets, wooden bows and arrows, etc. We've amassed a large amount of tools over the years necessary for just about any job we might require. My current goal (after the trailer) is to learn to weld aluminum and start some new projects.....
 

Titanpat57

Expedition Leader
I think the hottest thing on this build is the accessible storage with the side drop down doors. I love Tears, but going through the side doors for everything you need kind of bothered me...but this design has the best of both worlds.

Nice progress and great workmanship!!
 

medic83

Observer
Looks should be (hopefully) deceiving. The majority of the weight will be over the axle (water tank esp) and the entire kitchen is behind the axle. Kitchen cabinets fridge and the larder full of food and drink should offset the tongue box and batteries a bit. We're shooting for around a 2000lb total and I'll be happy anywhere between 200 and 300lbs for the tongue.


She's been a Veterinarian for 21 years, and I've been with WalMart for 20. We're both college edumacated and acquired our skillsets through the Jack of All Trades course life provides, (and a massive amount of reading). We've rebuilt a farmhouse, a classic car, built cabinets, wooden bows and arrows, etc. We've amassed a large amount of tools over the years necessary for just about any job we might require. My current goal (after the trailer) is to learn to weld aluminum and start some new projects.....

Strong work!! Ive only had street bikes before I got my 4runner. I hadent even changed a tire on a car or truck. Soooo. I got my 4runner and started aquiring tools. I got sick of paying people to do my work. So I learned how to do it all. There is so much satisfaction in building your own stuff.
 

VanIsle_Greg

I think I need a bigger truck!
Looking better every update. I bet you guys are getting pretty stoked to see it coming along, and getting close to completion. LOVE the colour combination. And yes, your wife rocks!!

:)
 

Heifer Boy

Adventurer
Great job guys. I'm loving this build. I really like the design of your doors and am looking forward to them mounted in their frames.

What kind of seal are you going to use? Will it be attached to the door or the frame? Are the alloy parts of your door panels cut to fit inside the channel edging frame or do they slip inside the channel along with the ply. I'm guessing that the alloy framing bits (1/2" channel and 3/4" Z-section) are measured outside edge to outside edge. So depending on the thickness of these extrusions if you want a flush finish you should have about a 3/8" gap to fill with a seal? Right? :(

/rant on

Arrrgghh!!! I can't handle this imperial measurment nonsence. I keep having to open up online converters to work out what you are all talking about with a mixture of gauges and fractions and feet and inches and pounds. Metric is so much easier for this stuff.... a 12mm channel, 18mm Z-section, 2mm thick extrusions = 18-2-12 = 4mm gap. Easy :)

/rant off
 

jim65wagon

Well-known member
Great job guys. I'm loving this build. I really like the design of your doors and am looking forward to them mounted in their frames.

What kind of seal are you going to use? Will it be attached to the door or the frame? Are the alloy parts of your door panels cut to fit inside the channel edging frame or do they slip inside the channel along with the ply. I'm guessing that the alloy framing bits (1/2" channel and 3/4" Z-section) are measured outside edge to outside edge. So depending on the thickness of these extrusions if you want a flush finish you should have about a 3/8" gap to fill with a seal? Right? :(

/rant on

Arrrgghh!!! I can't handle this imperial measurment nonsence. I keep having to open up online converters to work out what you are all talking about with a mixture of gauges and fractions and feet and inches and pounds. Metric is so much easier for this stuff.... a 12mm channel, 18mm Z-section, 2mm thick extrusions = 18-2-12 = 4mm gap. Easy :)

/rant off
Ahh...welcome to the American measurement system, even we can't even understand it! Yes, metrics are easier, but we Americans are a stubborn lot and do not take change easily. As for the doors, we will post some better photos soon, so be patient. The diamond plate, plywood and aluminum sheet all fit inside the C-Channel, which is used to hold these pieces together in a one solid unit. The Z-Channel mounts to the opening in the trailer wall, and the seal will mount to it. As the door closes it will press the seal between the door and the Z. The pics on the camera will explain it better I hope.
.
I dig the fact that Australians (home of really cool trailers and overlanding gear!) are viewing this thread!
.
....and yes, my wife ROCKS!
 
Last edited:

Forum statistics

Threads
188,314
Messages
2,905,326
Members
229,959
Latest member
bdpkauai
Top