The Dirt Sherpa Build

GCecchetto

Adventurer
Ordered the aluminum for the roof yesterday and am waiting to hear back from Crane Composites on whether or not they are going to sell me another sheet of the siding for the roof.
 

GCecchetto

Adventurer
Got confirmation that I will be able purchase another sheet of the Noble Select siding from Crane for the roof. The shipping cost is going to be hard to swallow I'm sure. The roof will be seamless so the sheet being shipped will be 7'x10'. I have to wait until they are running the product to fill a larger order so it will be a bit of a wait. Need the time to finalize the construction details anyway.
 
Last edited:

xxfullsailxx

Observer
hey there-

just read your entire thread! the wife has been yelling at me to come help with dinner for the last half-hour!...

i have an old school FWC as well that i'm looking to re-furb this winter, though not nearly to the extent of tear down you undertook...

can't wait to see your roof build. are you sticking with the same basic design of the original? if so, did you think of trying to flip the existing roof framing over to mirror your 1/4" off set? just a thought. did you end up ordering the OEM lift panels for FWC as opposed to making your own? were they worth the coin?

also- are the exterior panels that you're ordering custom made to your dimensions? or are you working with something they already produce? i'm looking at different ideas for paneling as well and can't remember if you mentioned the cost of them?

thanks for continuing the thread! i'm really looking forward to seeing you re-attach the canvas!

-darin

:victory:
 

GCecchetto

Adventurer
hey there-

just read your entire thread! the wife has been yelling at me to come help with dinner for the last half-hour!...

i have an old school FWC as well that i'm looking to re-furb this winter, though not nearly to the extent of tear down you undertook...

can't wait to see your roof build. are you sticking with the same basic design of the original? if so, did you think of trying to flip the existing roof framing over to mirror your 1/4" off set? just a thought. did you end up ordering the OEM lift panels for FWC as opposed to making your own? were they worth the coin?

also- are the exterior panels that you're ordering custom made to your dimensions? or are you working with something they already produce? i'm looking at different ideas for paneling as well and can't remember if you mentioned the cost of them?

thanks for continuing the thread! i'm really looking forward to seeing you re-attach the canvas!

-darin

:victory:

Hey Darin;

Sorry for the delay in replying. The weather isn't cooperating so I'm kind of enjoying taking a break from all of this.

The roof will be similar in design to the original, but on steroids. The original roof is made from very light gauge 1" square tube, I'm using 1"x1-1/2" for the interior framing and 1-1/2"x2" for the perimeter. The 1-1/2" high profile of the roof frame causes me to have to come up with a special perimeter trim detail as the factory trim is sized for the 1" height profile. I do need to use the factory trim though, as it is a T shape, the leg on the back side of the trim keeps the fabric of the soft wall out of the pinch zone when the roof is down. I think I have the perimeter detail figured out but still have to figure out the best way to crown the roof so I don't get any ponding on the roof. Due to the rigidity of the fiberglass sheet that I am using on the roof, I have to make sure it is crowned in one direction only or it won't lay down on the adhesive tape correctly.

I did buy the new composite lift panels from FWC. Due to the custom spring loaded hinges and issues trying find the material, it became obvious that it was going to cost me more to build my own since I would be one offing it. Are they worth the $950 they cost? Doesn't really seem like they should be that expensive, but that's what they cost and it took FWC a long time get the new panels sorted out, so they have to recoup their investment. Unfortunately the materials involved are just soo expensive, just the cost of the hinges is crazy. I spent a lot of time trying to figure out another solution, possibly something like the gear drive lift panels at that Hallmark uses, but the FWC solution is somewhat elegant in its simplicity. The new panels are much more robust than the old wood paneling version but I'm still concerned about them being able to take the weight of the new roof. Buy the time to roof is completed and the uni-solor panels and 2 Maxx Air vents and lighting is installed, I could see the roof being in the 200 pound range. I might end up having to add the lift assist struts, which I really don't want to do since there is no good place to put them. I really don't like where FWC installs them in the interior so I'll probably end up installing a set on the front and rear of the roof on the exterior, which seems like a fairly common installation method for them, but I don't like the look of them on the exterior.

As far as flipping the existing roof, it's really not an option due to the crown, and the quantity of work involved to remove the aluminum roofing and headliner and swap it around. Way too much work to still be left with the original roof frame. I used three pieces of plywood sitting on top of the camper body to trace out the perimeter of the body to use as a template to build the roof to. With that on the ground, where it is easy to setup controls lines, I discovered that the cabover is actually straight. Bows in the walls from the welding create the illusion of the cabover being out of square. I do have a little out of square issue on the back wall though, so the body of the camper is a parallelogram. I thought my welder was joking when he told me his kids where using the piece of plywood the side walls were jigged up on as a skateboard ramp, but now I know he was serious. Both walls where jigged up off of the same control line so something got bumped out before they were welded. With the new roof built to fit, you'll never see it though.

The exterior siding and roof panel are all Crane Composites Noble Select product, and ordered in the size I need them. If I remember correctly they cam be a max of 10' wide with a max length of 58' long as a single sheet. It was easy to tell that the panels I ordered for the walls (5'x7') were cut from a larger sheet. They don't normally sell to private parties and don't normally sell in the small quantities I have bought. I got lucky through some constructions and have to wait for them to get other orders for the same material for them to run mine. Apparently it is all made to order. The cost of the sideing is $4.95 sq ft, plus a crating fee and shipping. It all comes from the west cost. If you decide you want to use this product let me know and I'll give you a phone number to talk to the guy that set me up.

Oh, one last thing. Since I have to build the roof now, I'm going to have FWC make me a new softwall with the arctic option. My existing softwall is in pretty good shape and is the insulated version but I don't want to ever have to get back into the roof so I'm going all new now. Hopefully I'll be able to sell my softwall and recover a few dollars.

Hopefully I've answered all of your questions.
 

GCecchetto

Adventurer
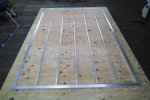
The roof is slowly getting under way. Started the layout and cutting of the aluminum and have detailed the front radius corners and emailed the dxf file to the shop that will water jet and roll the parts for me. Went with a much more complicated design with the pieces detailed to interlock to make it easier for my welder to keep the corners true, lesson learned from the cabover. Once I have the corner pieces, I'll get a day scheduled to go into the shop and get the roof welded together.

Starting to layout and cut the roof framing.

SDIM0270.jpg

Layout for one of the two Maxxair vents that will be installed on the roof.

SDIM0271.jpg

Here is an exploded view of one of the radius corners at the front of the roof.

Roof_Corner.jpg
 

Jeep

Supporting Sponsor: Overland Explorer Expedition V
Good to see the progress, sometimes it is far easier and a lot faster to buy a couple of proven components like the lift panels and upgrade to the arctic sides and do it all at once. You are actually saving time and money down the road. Do you have a good pic of the lift panels? I'm just curious more than anything on how they work.
Cheers,
Mark.
 

SLO_F-250

Explorer
KEEP IT UP! That camper will be AWESOME when you are done.

Mark, those lift panels pretty much act like a hing. Folded closed when the roof is down, and wide open when the roof is up. Pretty darn good design. Probably why nothing but the material had changed in 30 (+/-) years! :costumed-smiley-007
 

rschof

New member
In regard to the T-shaped trim that fourwheel camper uses on their roof trim. How necessary is the lip that goes toward the inside under the roof framing, and is that its only function , to keep the canvas material moved toward the inside during the top folding process ? I am in the process of building a new roof also, and was considering using a 3 piece outside trim. First an aluminum angle over the canvas with the leg turned in like four wheel camper does it. This goes over the canvas only. Then an aluminum flat bar about about 1/16 x 2" that is installed next. Then the aluminum roofing will be folded over that flat bar and fastened down with a traditional rv trim strip with a vinyl insert covering the screws. This gets the roofing on the outside of a proper flashing strip (the flat bar) that doesn"t rely on caulking to keep the water out.
In building anything, I've never been able to get around the fact that water always runs downhill. It does that without fail.
This detail would also allow common items to be used that I can get locally. Hard to ship 20 ft. strips from California.
I'm in the middle of a complete build of a four wheel style camper myself so your build thread is extremely helpful. Very good work and thanks for sharing with us.
I,m eager to see how you are progressing on your new roof and framing.
Oh, by the way, anyone know the thickness of the aluminum roof material in the new one piece four wheel camper roofs?
 

GCecchetto

Adventurer
Hey, sorry for the delay in responding. I've been in a holding pattern since my guy that water jets parts for me has been too busy to get to my stuff, and Crane has no orders to combine my order for the sheet for the roof. Found out yesterday that I'll hav the water jetted parts for the radius corners on the Roof Monday. I'm scheduled to be in the shop Wednesday the 2nd to get it welded together. Hopefully Crane will get another order for the material I need early in January. In the meantime I have ordered my King suspension and have Deaver making me a custom set of long travel leaf spring, setup for the weight of the camper.

Rschof, as far as I know, the leg on the back of the trim used on the roof is just to keep the softwall fabric out of the pinch zone. On the new FWC's, they install the softwall then wrap the one piece roof down over it and then install he trim so it is flashed correctly. The older roof like mine were not.

24hoursofnevada, for 30k, I might consider taking on another build:)
 

Jeep

Supporting Sponsor: Overland Explorer Expedition V
[24hoursofnevada, for 30k, I might consider taking on another build:)[/QUOTE]

That's reasonable for a full on hand built unit by a guy who cares about an eighth of an inch! Merry Christmas!
 

NothingClever

Explorer
Wow. I don't know what to say other than, "Can I hold your beer while you work?"

Your keen eye for refined materials, teak woodworking and aluminum joinery far outshine any scrutiny you might be perceiving from the internet peanut gallery. I'm sure your efforts are providing some ideas for FWC and ATC should they choose to offer upgrade options.

Keep up the splendid work!!
 

Forum statistics

Threads
188,443
Messages
2,905,016
Members
230,360
Latest member
TNielson-18
Top