You are using an out of date browser. It may not display this or other websites correctly.
You should upgrade or use an alternative browser.
You should upgrade or use an alternative browser.
The Dirt Sherpa Build
- Thread starter GCecchetto
- Start date
Enjoy your trip i will have my Hawk up my Union/Utica this weekend. Only time I really use 4x4 all year.
Sure have enjoyed your build.
Sure have enjoyed your build.
GCecchetto
Adventurer
Thanks guys! Just dropped the roof for a test fit and it fit like a glove. I'm a happy camper. The roof is heavy though, a hand full for two men. I'll need to add gas struts to assist lifting the roof.
GCecchetto
Adventurer
Got back from the Eastern Sierras last night around 10:00 PM. Not the smoothest trip I've been on. There is definitely a few things to take care of. One of my rear tie downs failed, the plastic coating on the cable is preventing the ferrel from adequately securing the cable. The cable is stainless steel and as soon as you strip the coating off the cable unravels and then it's impossible to get through the ferrel, so I've been forced to leave the coating on the cable. The off roading we did also settled the camper tighter against the front of the bed so I had to tighten both the front and rear tie downs. It's impossible for me to get the camper that tight against the front of the bed when I load the camper so this will be a issue each time heading out offroad so I think I'll rework the tiedowns. The front are fine so I'll leave those alone but I think I'll move the connection to the truck at the rear down to the bumper. I hate to have big long tiedowns but it seems like the best option now. I'm also quite frustrated with the impact having the roof down has had on the soft wall. There are creases that are of major concern. When looking at the soft wall from the inside when it's bright and sunny outside there are areas that clearly let more light through like the fabric has been compromised. I have some plans to hopefully mediate this, but not sure if it will work. I would recommend anyone planning to install a set of FWC's new lift panels to take the time to take some fine sandpaper to the corners around the edge of the panels. If you don't, expect premature wear on you softwall. I spent and hour easing the edges in the middle of the campground with the file in my son's multi-tool to limit the damage to my softwall. The weight of my roof is probably causing me some problems as well. I would guess it weights around 250 pounds, which it seems others probably have dealt with from the additional loads they put on their roof, but maybe not. I do know that I will be adding gas springs to help lift the roof for sure though. The icing on the cake was getting ready to head out to the Whoa Nellie Delli in Lee Vining for breakfast on our last day and noticing grease all of my inner fender well on the right side. Yep, tore the CV boot off 250 miles from home. My son and I managed to find enough supplies, thanks to the guys at the Shell Station, to pack in some new grease, clean the joint and then reattach the boot to the inner joint with duct tape and bailing wire, there isn't enough room to use a hose clamp. Amazingly, we drove 250 miles home and the barnyard fix stayed together.
On the bright side of things the truck handled the camper well. It started out feeling a little heavy and swaying more than I would like in the corners, but then while making a stop for a nature break for my son at lake Don Pedro, it dawned on me that I have to Kings with compression adjusters. I bumped up the compression damping 10 clicks and the handling was virtually like there was no load on the truck. So glad I paid the extra money for the adjustable compression damping. The truck and camper was also awesome offroad, just need to keep the CV boots in it.
In Camp
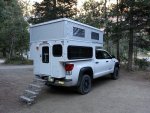
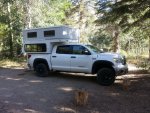
Getting ready to tear out a CV boot but what a view.
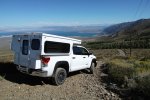
The torn boot.
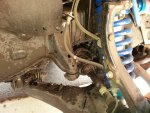
Here's our MacGiver Job on the CV boot.
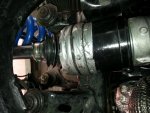
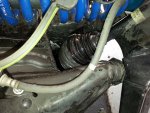
Headed back over Tioga checking the joint every half hour.
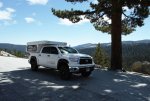
On the bright side of things the truck handled the camper well. It started out feeling a little heavy and swaying more than I would like in the corners, but then while making a stop for a nature break for my son at lake Don Pedro, it dawned on me that I have to Kings with compression adjusters. I bumped up the compression damping 10 clicks and the handling was virtually like there was no load on the truck. So glad I paid the extra money for the adjustable compression damping. The truck and camper was also awesome offroad, just need to keep the CV boots in it.
In Camp


Getting ready to tear out a CV boot but what a view.

The torn boot.

Here's our MacGiver Job on the CV boot.


Headed back over Tioga checking the joint every half hour.

Last edited:
GCecchetto
Adventurer
GCecchetto
Adventurer
Thanks SLO! Truck goes in tomorrow morning to get the boot replaced. Fortunately it's being covered under warranty.
GCecchetto
Adventurer
Installed the gas springs today. Had to make some aluminum spacers (didn't take a photo) to space the lower front brackets out to the clear the trim. It sure is nice to be able to lift the roof myself.
I used these Atwood marine stainless steel offset brackets.

The front.

And the rear.

I also cut the template for the foam for the bed at the cabover. Hope to pick it up this week.
I used these Atwood marine stainless steel offset brackets.

The front.

And the rear.

I also cut the template for the foam for the bed at the cabover. Hope to pick it up this week.
el chubasco
New member
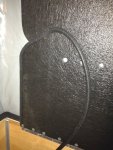
Sounds like a great trip. I had the same experience with the new FWC lift panels rubbing my sideliner. I installed some 1/4" trim lock around all the edges (one sided barb is enough). No problems since and I think it gives them a "finished" appearance.
GCecchetto
Adventurer
Sounds like a great trip. I had the same experience with the new FWC lift panels rubbing my sideliner. I installed some 1/4" trim lock around all the edges (one sided barb is enough). No problems since and I think it gives them a "finished" appearance.
Thanks EC. Can you post some pics and maybe provide a part number and supplier? Thanks
el chubasco
New member
Thanks EC. Can you post some pics and maybe provide a part number and supplier? Thanks
Sure thing, I picked up the trim lok from Grainger for about $26. One roll was sufficient, and I have an old 1998 FWC ranger which is close to a modern Eagle so you may want two packages.
http://www.grainger.com/Grainger/TRIM-LOK-INC-Vinyl-Edge-Trim-10C951
Here is a cell phone picture I took when I was installing it...not the best so if you want more, just let me know. It is tough to get onto the panel, but the key is persistance. Once on the panel it has never wanted to come off.
GCecchetto
Adventurer
Sure thing, I picked up the trim lok from Grainger for about $26. One roll was sufficient, and I have an old 1998 FWC ranger which is close to a modern Eagle so you may want two packages.
http://www.grainger.com/Grainger/TRIM-LOK-INC-Vinyl-Edge-Trim-10C951
Here is a cell phone picture I took when I was installing it...not the best so if you want more, just let me know. It is tough to get onto the panel, but the key is persistance. Once on the panel it has never wanted to come off.
View attachment 181140
Thanks. I just might do that, although the horse is out of the barn now, but a least it would limit any further damage.
GCecchetto
Adventurer
Working on the misc items that needed to be addressed from the shakedown trip. Below are some photos of the new rear tiedowns. I absolutely hate how this came out, it just looks neanderthal and like a cobbed together mess to me. Nothing elegant about it at all. I wanted to use Torklift's rear turnbuckles but they don't sell them separately and I didn't want to spend $165 for the set of four when I have no use for the fronts so I bought the Happijacks. With the Torklift's you can remove the short hook and bolt the turnbuckle directly to the Derringer quick release which makes for a cleaner system. Unfortunately the Happijacks aren't threaded on the short hook end so I decided to buy some threaded rod so I could bolt the turnbuckle to the Derringer as you see it in the photos. As it turns out Happijack says to install the turnbuckle on the bottom so they aren't upside down as I have them installed. This is temporary, I'll fab my own stainless turnbuckles and sell these, but I need the back end tied down for several upcoming trips so I'll have to go neanderthal for now. I also don't like the look of the tiedowns splayed out on the bottom but felt they needed to be to keep the camper centered when tossing it around offroad.
Sorry about the blurry photo.
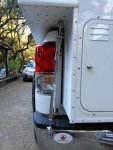
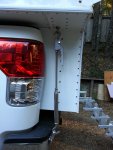
Sorry about the blurry photo.


GCecchetto
Adventurer
FWC ITEMS FOR SALE
It's time for me to start getting rid of some of the leftover FWC parts I have as well as some misc other stuff. I'm fine with shipping the small stuff but the larger items need to be local pickup. I'll add photos later of the items that currently don't have them.
I have the original roof and insulated softwall. The softwall is in very good shape, the windows look like new, and it is the preferred flap on the inside design like the new ones. $100 SOLD
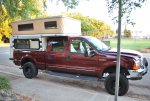
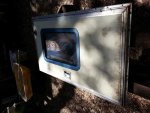
I also have the original square corner door in okay shape $25 Been out in the boneyard but will clean up okay. SOLD
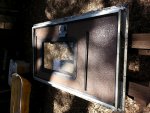
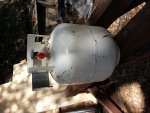
Also have a 20 lb horizontal propane tank (full) in good shape $75 SOLD
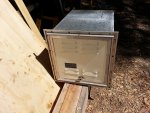
as well as the galvanized steel propane tank box with aluminum door $15 Same as the door, needs some clean up. SOLD
Front window $20. SOLD

Other stuff
Atwood stainless steel offset gas spring brackets (10mm ball end) 4 packs of 2 brackets $20

Soon to be available Happijack rear turnbuckles $50
It's time for me to start getting rid of some of the leftover FWC parts I have as well as some misc other stuff. I'm fine with shipping the small stuff but the larger items need to be local pickup. I'll add photos later of the items that currently don't have them.
I have the original roof and insulated softwall. The softwall is in very good shape, the windows look like new, and it is the preferred flap on the inside design like the new ones. $100 SOLD

I also have the original square corner door in okay shape $25 Been out in the boneyard but will clean up okay. SOLD


Also have a 20 lb horizontal propane tank (full) in good shape $75 SOLD

as well as the galvanized steel propane tank box with aluminum door $15 Same as the door, needs some clean up. SOLD

Front window $20. SOLD

Other stuff
Atwood stainless steel offset gas spring brackets (10mm ball end) 4 packs of 2 brackets $20

Soon to be available Happijack rear turnbuckles $50
Last edited:
westyss
Explorer
Working on the misc items that needed to be addressed from the shakedown trip. Below are some photos of the new rear tiedowns. I absolutely hate how this came out, it just looks neanderthal and like a cobbed together mess to me. Nothing elegant about it at all. I wanted to use Torklift's rear turnbuckles but they don't sell them separately and I didn't want to spend $165 for the set of four when I have no use for the fronts so I bought the Happijacks. With the Torklift's you can remove the short hook and bolt the turnbuckle directly to the Derringer quick release which makes for a cleaner system. Unfortunately the Happijacks aren't threaded on the short hook end so I decided to buy some threaded rod so I could bolt the turnbuckle to the Derringer as you see it in the photos. As it turns out Happijack says to install the turnbuckle on the bottom so they aren't upside down as I have them installed. This is temporary, I'll fab my own stainless turnbuckles and sell these, but I need the back end tied down for several upcoming trips so I'll have to go neanderthal for now. I also don't like the look of the tiedowns splayed out on the bottom but felt they needed to be to keep the camper centered when tossing it around offroad.
Sorry about the blurry photo.
View attachment 182111 View attachment 182112
congrats on getting it on the road and a job well done! I like the bumper sticker too.
Similar threads
- Replies
- 1
- Views
- 208
- Replies
- 1
- Views
- 86
- Replies
- 33
- Views
- 4K
- Replies
- 5
- Views
- 1K

