Get your tickets to THE BIG THING 2026!
You are using an out of date browser. It may not display this or other websites correctly.
You should upgrade or use an alternative browser.
You should upgrade or use an alternative browser.
The Jeep Expeditions Home Built Trailer
- Thread starter JeepExpeditions.org
- Start date
JeepExpeditions.org
Observer
I don't know how I missed that earlier..................
Trailer kit is from Harbor Freight. It is their Super Duty kit rated at 1980lbs.
Trailer kit is from Harbor Freight. It is their Super Duty kit rated at 1980lbs.
GoingLight
New member
Subscribed
Great build. Thanks for doing this and sharing it.
Great build. Thanks for doing this and sharing it.
Last edited:
JeepExpeditions.org
Observer
Looking very nice. I liked the write-ups in the JeepFreak magazine too.
Which reminds me, I need to post part two with all the options added. I had to wait until my article in JPFreek Adventure Magazine was published first.
I'll also have a part 3 in the next issue of the magazine that deals with the Cascadia 5 man roof top tent and the gas strut elevating platform/rack that will raise it about 16" above the trailer so I have access to the two lids.
I guess my next trailer project might be a tear drop trailer done from a kit. I think I can build that for about $2500 too before options.
Or perhaps a Military M101 A3 3/4 ton trailer that tracks perfectly behind a JK Wrangler. This build I think I can do for about $2500 with a custom lid and maybe a roof top tent included if I can get one of the trailers at a military auction for around $500 which is what the typically sell for.
rnArmy
Adventurer
Looking forward to part 3 of your trailer build.
Tear drop kit (one example anyways): https://bigwoodycampers.com/index.php? I have no connection to this company; I just collect interesting websites for future reference.
I'd love to follow your teardrop trailer built-from-a-kit thread. If you go that route be sure to start a thread.
Maybe my wife would be more willing to go exploring with me if I had a small teardrop camper.
I've wondered if Diamond Deluxe could build a teardrop body (with a lift-up latch in the back for a kitchen area) that could be mounted to a modified HD Harbor Freight trailer frame. I've read horror stories of wood-and-metal teardrop campers where they leak and the wood starts to rot.
As Scooter
Observer
I am really digging this trailer. There might be another one in Mesa, soon.
Or perhaps a Military M101 A3 3/4 ton trailer that tracks perfectly behind a JK Wrangler. This build I think I can do for about $2500 with a custom lid and maybe a roof top tent included if I can get one of the trailers at a military auction for around $500 which is what the typically sell for.
Picked mine up for $450 a few yrs back via gov.bids I believe it was. If you do this build, remind folks that these things are not, and were never designed to be, a dump trailer. They get those tongue disconnects all bass ackwards thinking they bought a dumper when they didn't.
Love your build btw. It was cool of you to document a home build like that along with the costs. It should be a bit of an eye opener when folks look at the price tags of what are essentially M416 clones.
JeepExpeditions.org
Observer
If I bought an M101 I would weld up the tabs that allow it to "dump". Not something I would need anyway but I've seen some good ideas using the bigger trailers and putting them all together gives me a bit of an urge to tackle this easy project.
Thats the disadvantage to most of the tear drop trailers, I am not sure how well the wood and aluminum/steel construction will really hold up for any long period of time off road. Think they are great on the highway but just not sure about on the road. If I could weld aluminum or know someone that can reasonably I would consider doing one right away.
The other thing is I really like doing projects the average person could do on their own without any special tools and as little welding as possible assuming most of us don't have a welder and can't weld anyway.
Now as for the M416 clones, they are way overpriced but then again, due to price and the low number in sales, the price needs to be high in order for a business to remain profitable. I get it but the average Jeeper can't afford $10,000 or more for a fully equipped trailer ready for the trail. I've seen the M416 clones with the options most people want selling for 10 to 12k and tear drops anywhere from 10K to 20K. I don't like my toys that well to spend that kind of money on a trailer. Besides, I want to spend most of my off-road budget on my Jeep ;-)
Last edited:
They don't really allow it to dump, at least not without modification. Modification being if you try to dump you'll rip out your wiring. Even if you fix that it makes a poor dump set up since the tail of the trailer hits the ground. What it's actually for is shipping. You disconnect under the trailer, not at the front, and then you can pivot the entire tongue up and against the front with the trailing end of the tongue now acting as a landing leg. It was for packing more of these into a smaller space when Uncle Sam decided they needed to be shipped somewhere. It could be a useful feature for the average Joe as well if he wanted to put it in storage and use as little space as possible.
Not sure it's something I'd want to build into an offroad camper. It's tall, fairly heavy, and big-ish. Makes an awesome general use trailer though.
Not sure it's something I'd want to build into an offroad camper. It's tall, fairly heavy, and big-ish. Makes an awesome general use trailer though.
GoingLight
New member
Looking forward to the additional updates.
How has your aluminum box held up to stresses of off-road use? I am seriously considering following your lead with getting a custom made Diamond Deluxe box for my winter trailer build project.
Also, do you have any pictures of your trailer in use at a campsite? I love to see how people pack and utilize their trailer in their camping setup.
Last edited:
JeepExpeditions.org
Observer
THE JEEP EXPEDITIONS HOME BUILT TRAILER - PART # 2
by: Mike Fissel - Founder, JeepExpeditions.org
Adding Options to our affordable trailer............
In Part #1 we introduced you to our awesome $2500 trailer built in a weekends time in my driveway. The trailer was the basic trailer, the type you've seen sold by plenty of commercial off-road trailer manufacturers that typically start out in the $5000+ range.
But for most of us, the basic trailer while providing a place for all the gear you can't fit in your Jeep,
just isn't the trailer you see many people on the trail with. People who buy those $5000 basic trailers add options to them that add to the total price. Recently I talked with a member in my club who paid $14,000 after all the options were added to his trailer. Now for most of us, a trailer that costs that much isn't in our future. We can take our basic $2500 trailer, spend as little as $2500 more or just go all out still having a trailer that will serve all of your future needs at way less a commercially one will cost you.
Keep in mind, options are just that. You can add them all at once or you can add them as your priorities and budget allow you. You might not want or need all of the options that I've chosen as a guide to see exactly where you can go with your trailer. Mild or wild, it's all up to you but in any case your end product will still cost you a fraction of what you would spend on a similar "store bought" trailer.
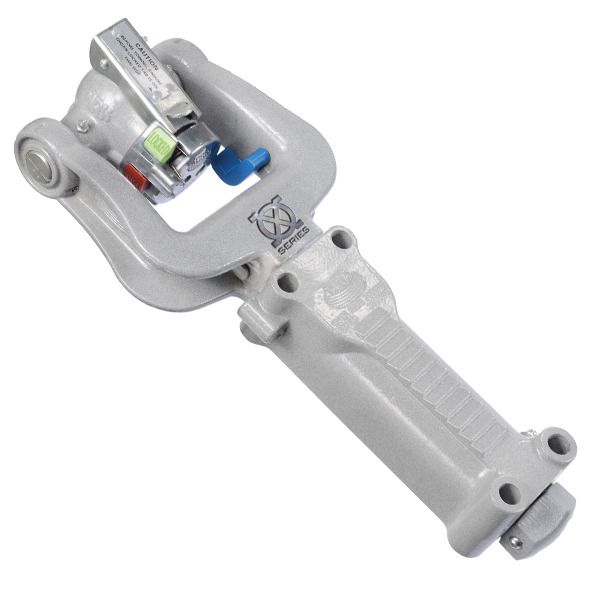
Our trailer kit came with a 2" ball coupler, something that would work for light off-roading but not something that most off-road trailers are equipped with. A fully articulating heavy duty coupler is what I've decided to go with. There are a number of very good ones out there and quite frankly none of them are cheap but after lots of comparing my choice was the ARK Heavy Duty Off-Road XO Coupler. Its design is revolutionary and nothing like I've seen anywhere. While it closely looks similar to a typical 2" ball coupler, this unit will fully articulate horizontally and vertically just like other off-road couplers. Where it really stands out is that it is so much easier to hitch up to your trailer unlike the competition. The coupler uses the world standard 50mm ball but don't worry, ARK will be importing them soon for use with their XO coupler.

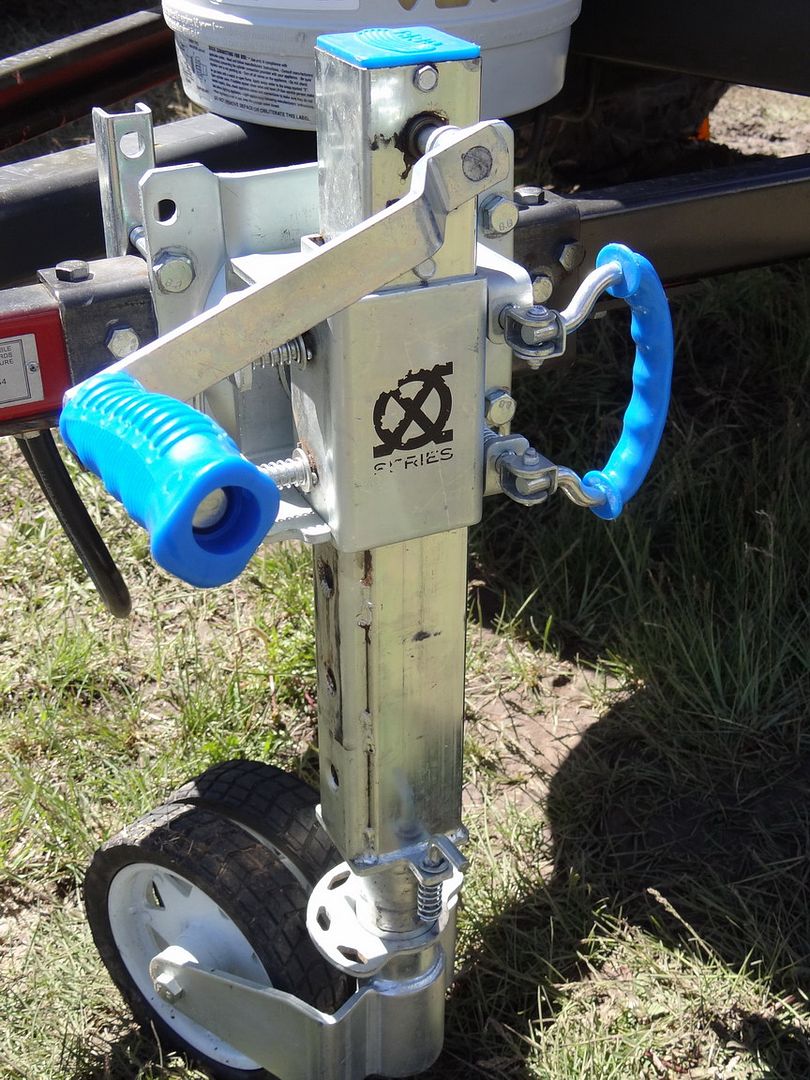
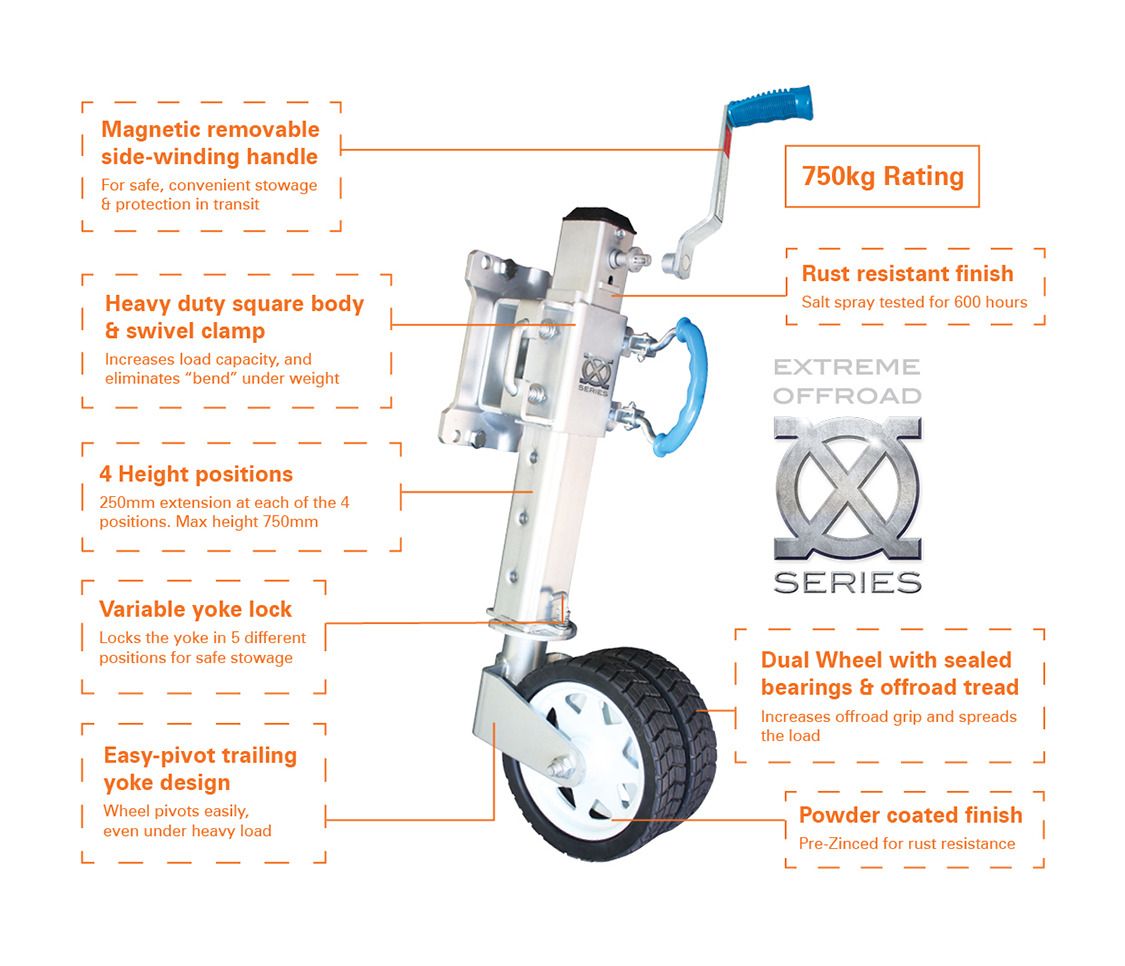
Another important option is your trailer jack. This is the part that you wind up or down to level your trailer on land or to hitch up to your Jeep. I've used plenty of the cheap ones in the past on trailers, you know the sub $100 ones. They work great on smooth pavement but can scare you out of your wits in dirt, stones and rough terrain. For an off-road trailer the ARK XO Jockey Wheel is the only choice. Anyone who has seen and worked with the ARK jack on my trailer is 100% sold on it. It costs more than double that of the cheap jacks but it is one thousand percent solid and will serve you well for many years without all the jiggles and excessive play you experience with typical trailer jacks.
With my trailer the first major option was electric brakes. Let's face it, when our trailer is fully decked out it's going to weigh in right around 2000 lbs. You've got a Jeep that you've put 33's or 35's on it and still are counting on your factory brake set up to stop your Jeep the way it should. Now add another 2000 lbs to the equation, going down a steep hill off-road. Uh huh, first time you experience that without electric brakes on your trailer, you will make it a priority before your next trip.
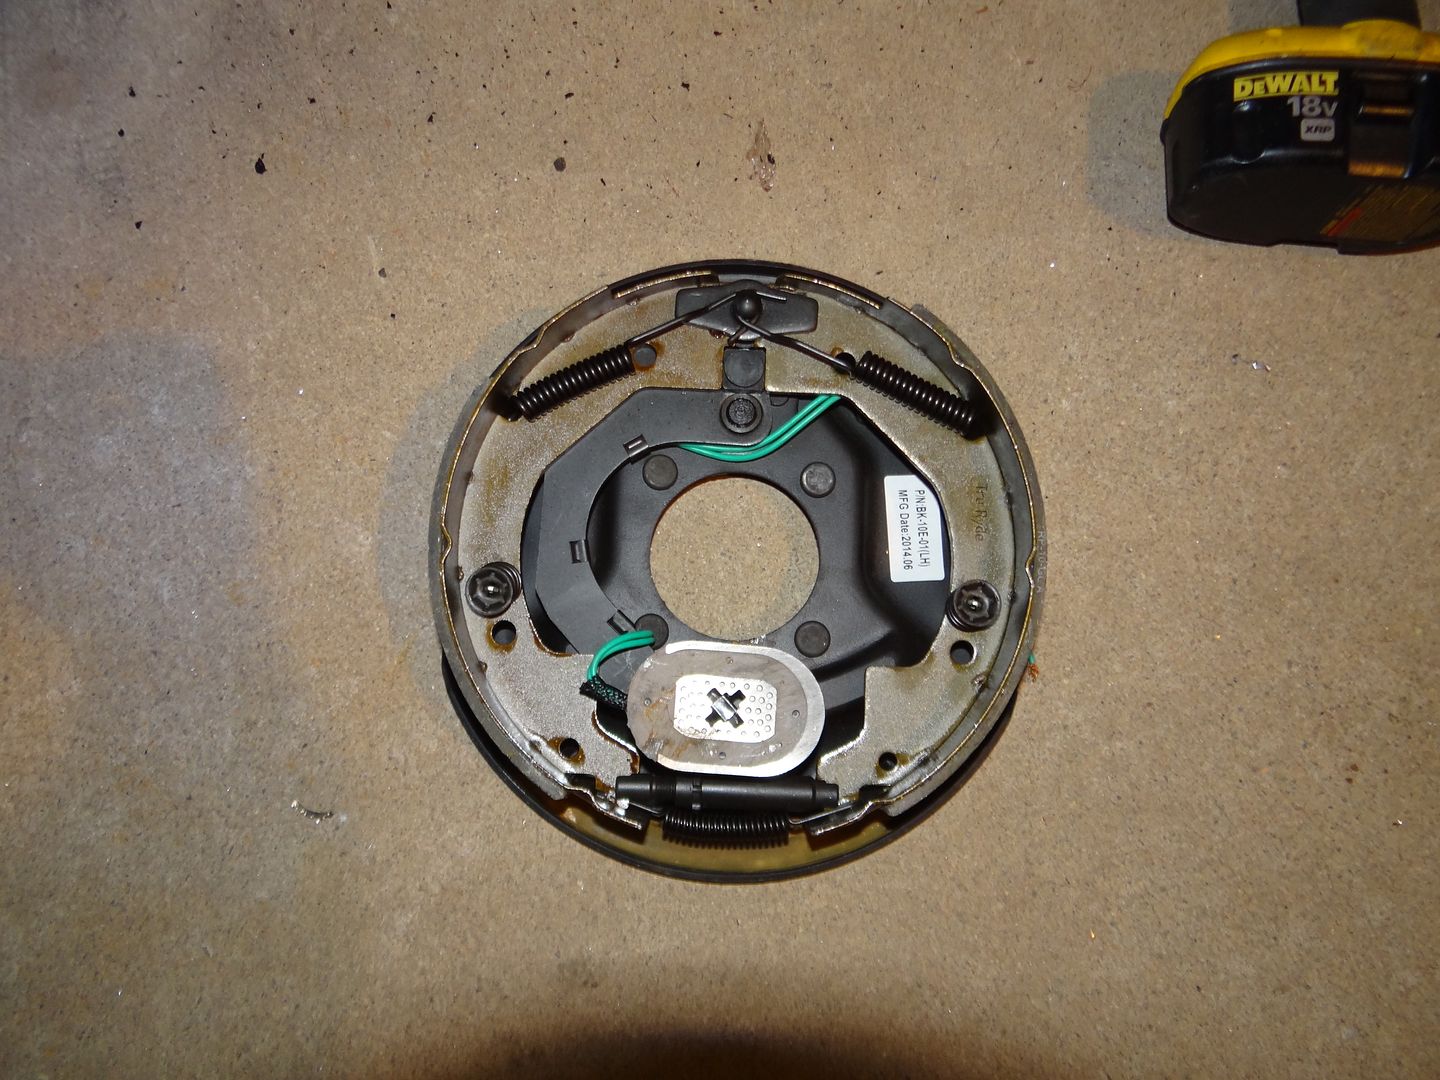
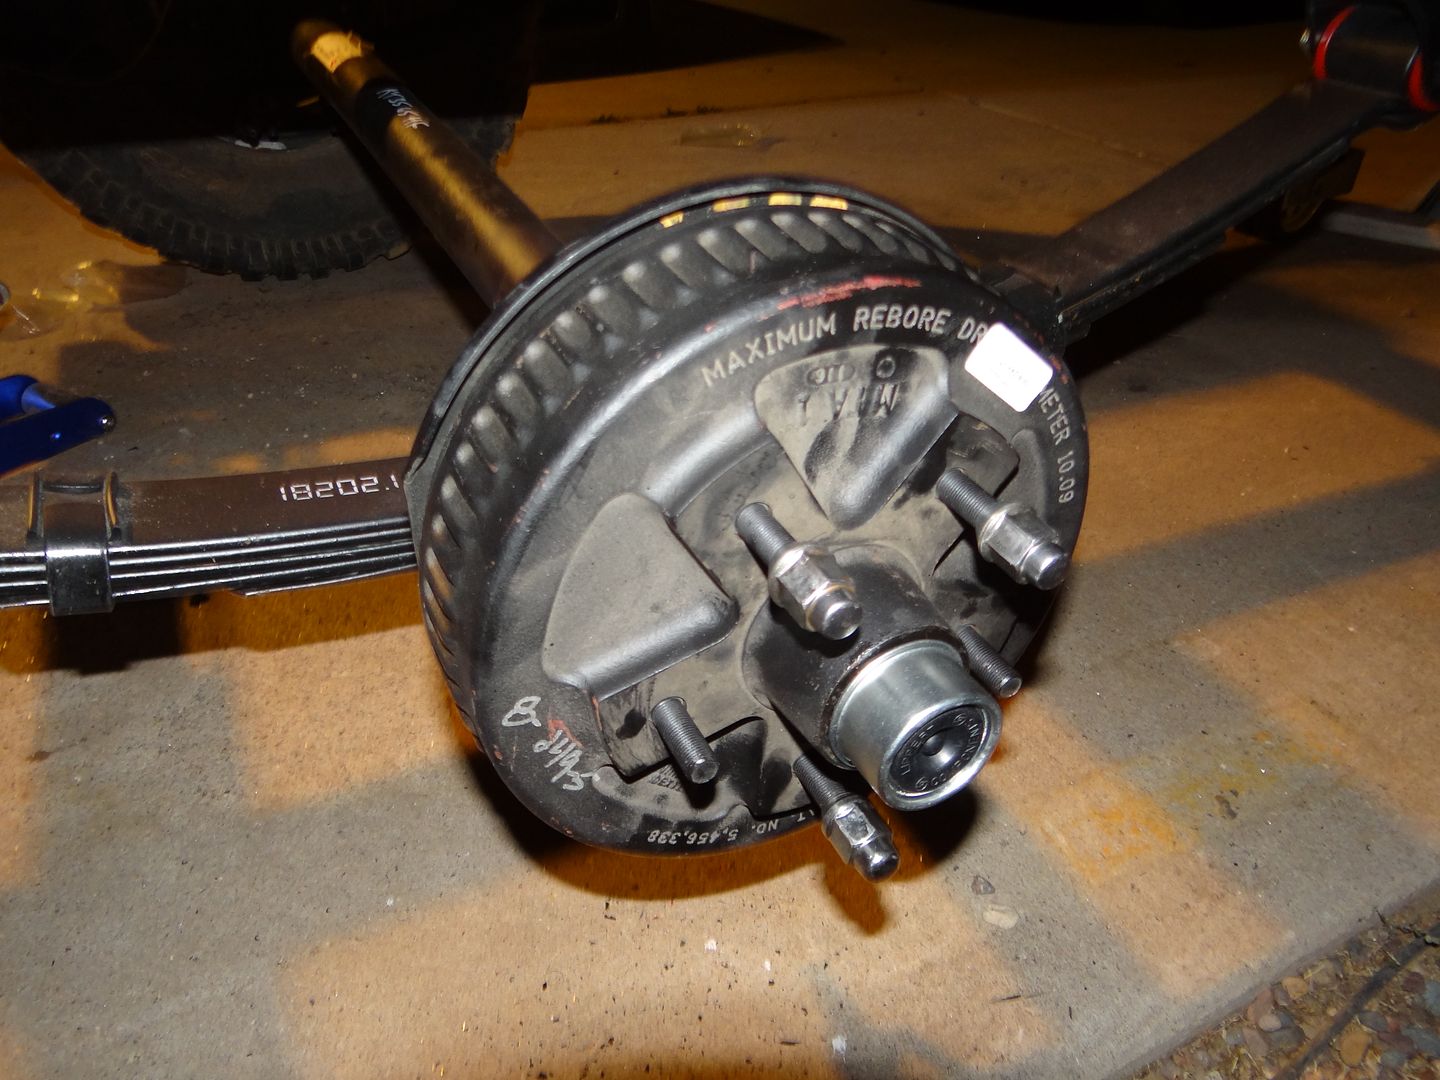
Electric brakes were an option that I added when I was building the trailer so I didn't have to go back and add them later. If you didn't do it then it's not difficult to do it in the future, or now. With the 3500# Dexter Axle Axle, the brake choice was simple as it is already set up for electric brakes. The guys at Auto Safety House in Phoenix quickly can reference all the parts you need and also recommend a brake controller. The brake controller is a necessary piece of equipment that does what its name implies, give you control over your trailers electric brakes. You can set up the controller to give as much or as little braking power to the trailer every time you hit your Jeeps brake pedal. With the controller, the trailer brakes can be activated manually with the push of a lever/button. There are advantages to braking the trailer off-road to better maneuver sharp turns and obstacles.
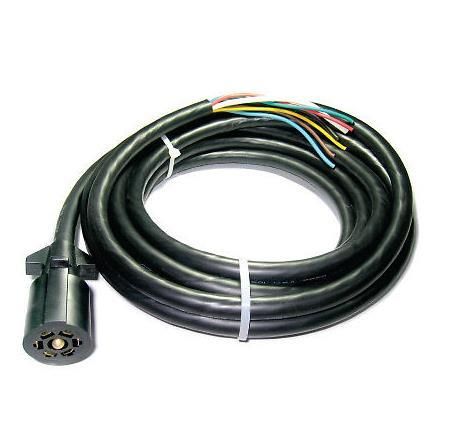
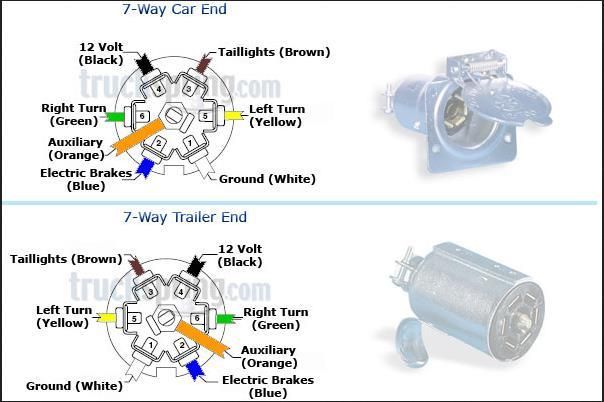
The electrical system needs to be upgraded on your trailer to add brakes and at the same time you might as well add provisions for a deep cycle battery and any other options you might want to add like utility lights. I upgraded the trailer wiring with a 7 wire HD trailer harness with a 7 pin connector already attached from Auto Safety House. This harness splices easily into your existing wires for trailer lights and adds the wire to control the brakes plus a 12v source to charge the trailer battery or run a fridge freezer when connected to your Jeep. You will also have to upgrade your Jeep to a 7 pin RV receptacle. For my battery, I went with an Optima Blue Top in a $10 battery box that's mounted in the trailer (to avoid theft). The battery will be able to power by fridge/freezer for about 3 days on it's own and any auxiliary LED lighting I might add to the trailer.
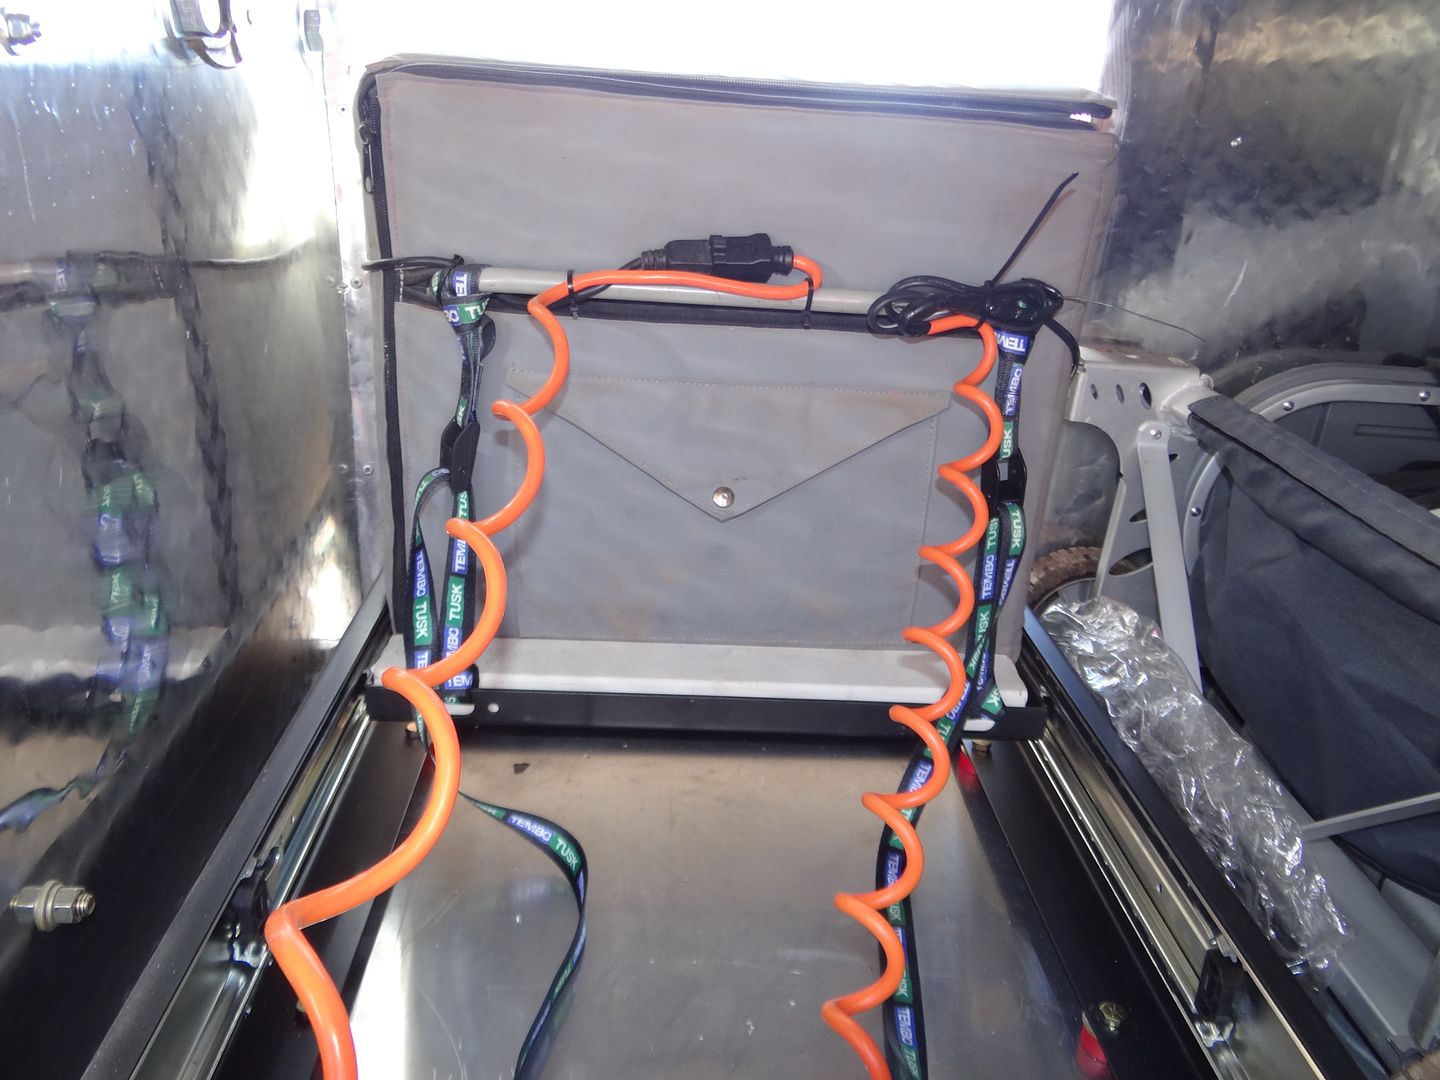
A few more things electrical to finish up. I'll be adding an external marine 110v socket mounted up front that can be used with an electrical cord for power from any 110v source. Near the 110v socket there are a 12v socket and two USB sockets, all weather proof. To keep track of the battery condition a voltage gauge will be mounted also on the front. I just happened to find the right panel on Ebay. To charge the battery and to maintain and condition the battery from 110v an ARK AC/DC battery charger will be installed. The ARK charger is probably the most impressive charger of its type I've ever used and is just what is needed in my trailer. Not only will the ARK charger charge my Optima when connected to 120 volt power, it will also condition and maintain the battery without overcharging. Dual retractable electric cables (found cheap on Ebay) will be used to power the fridge from 12v or 110v. The advantage to this type of cable is that it will be less likely to tangle up and I can keep it interfering with other gear in the trailer.

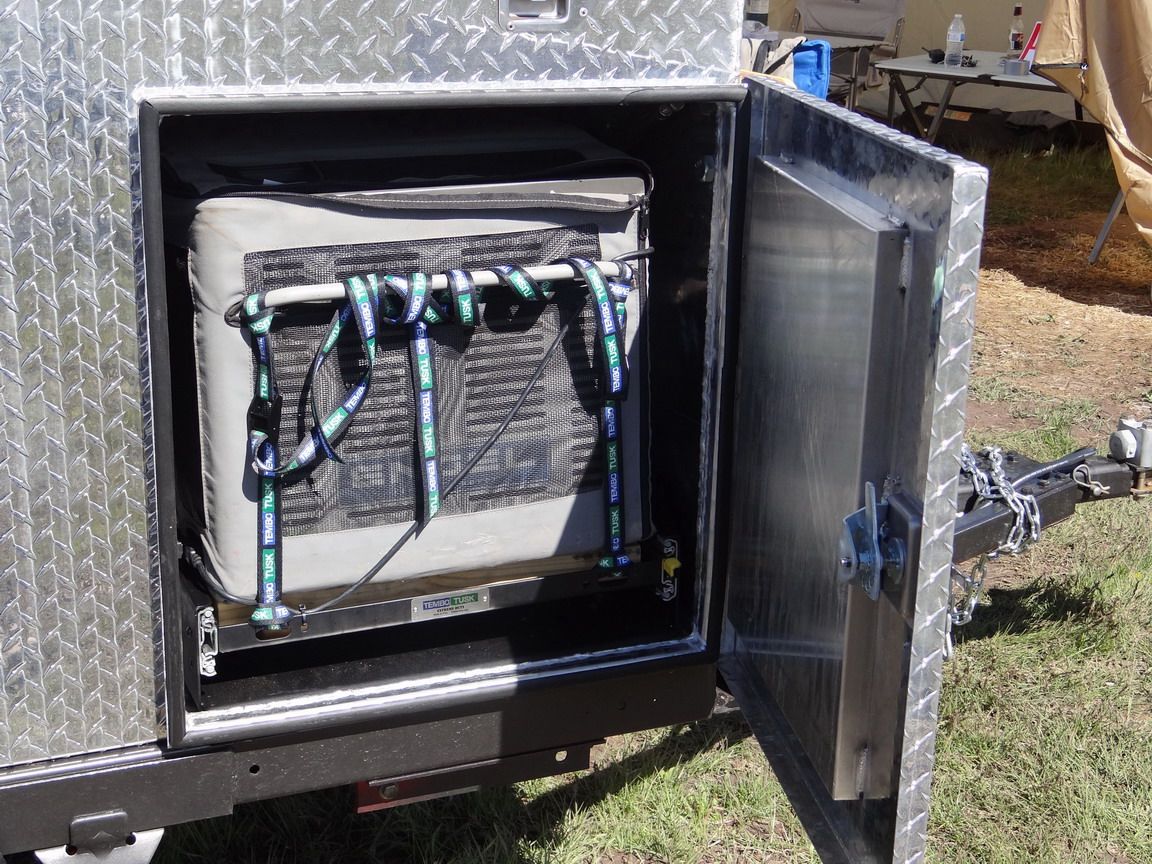
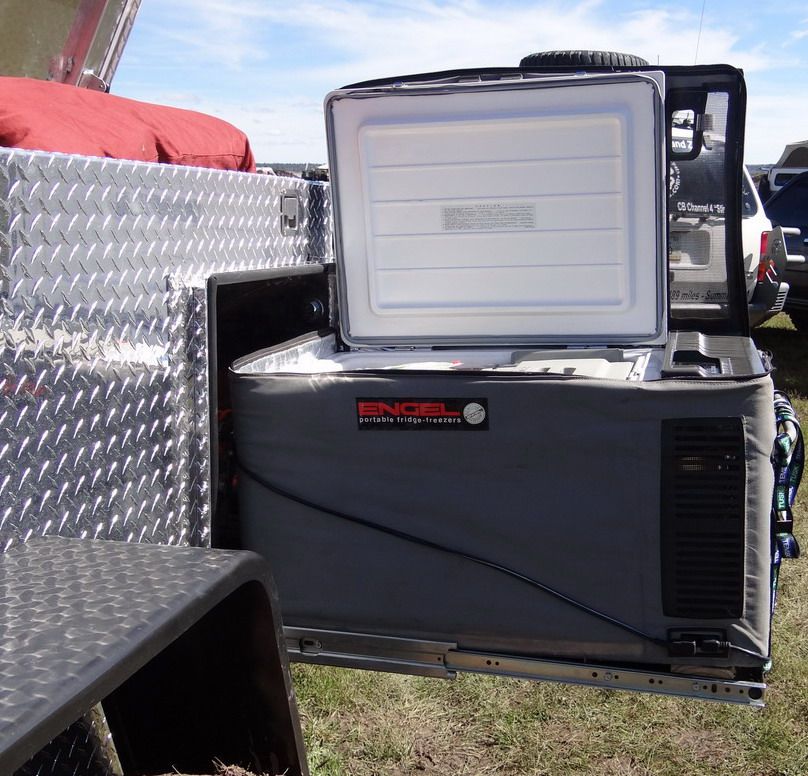
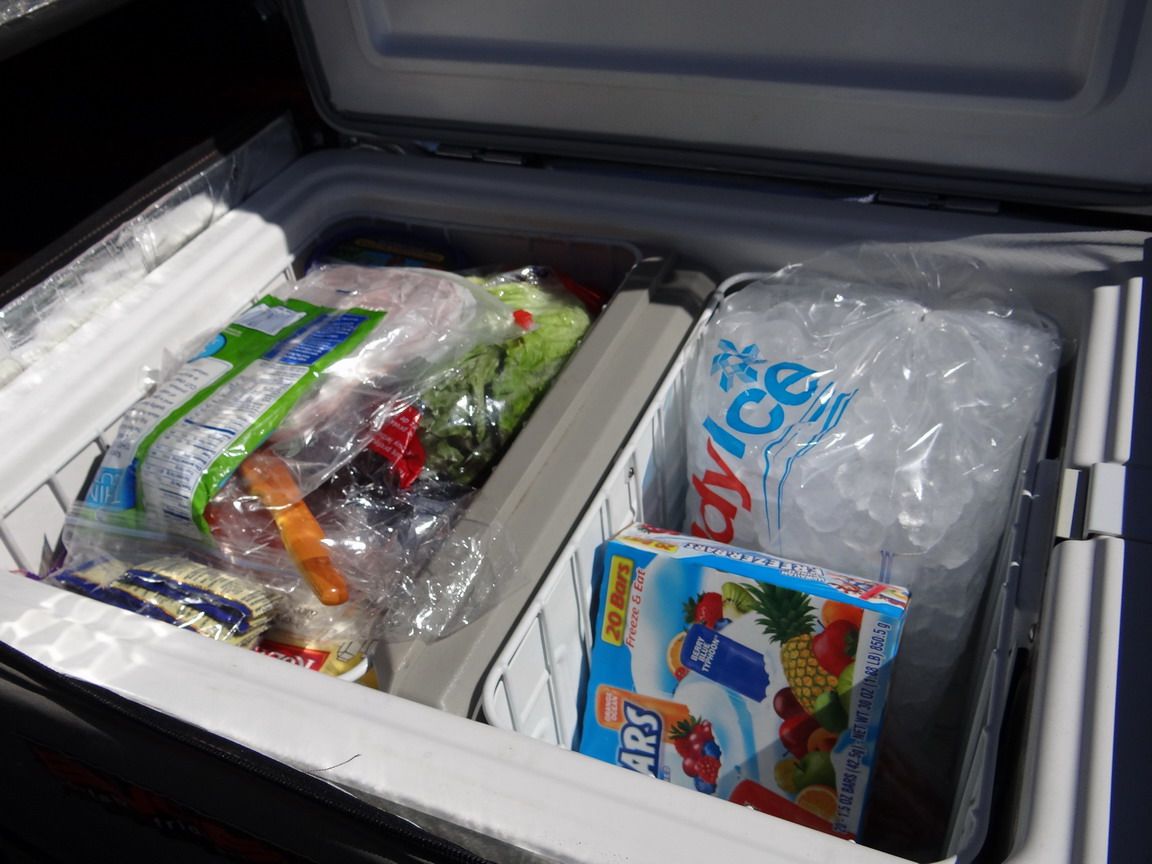
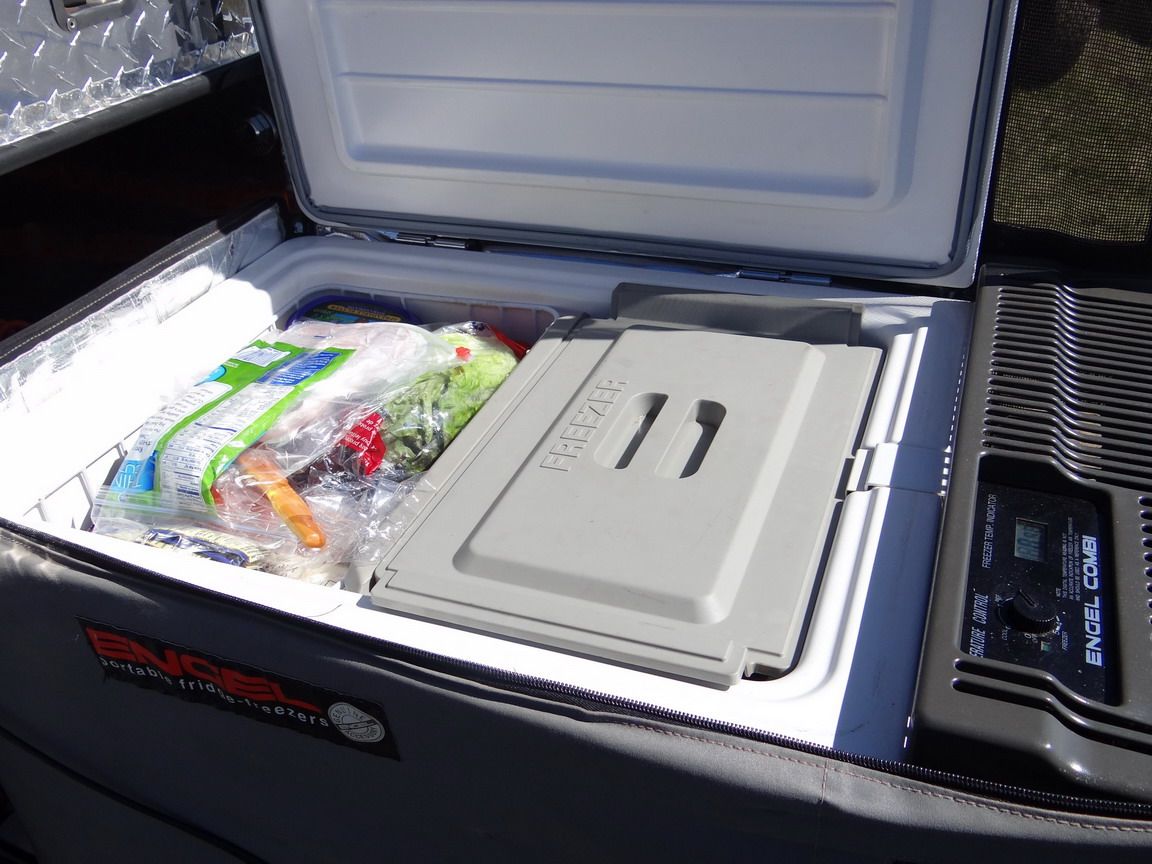
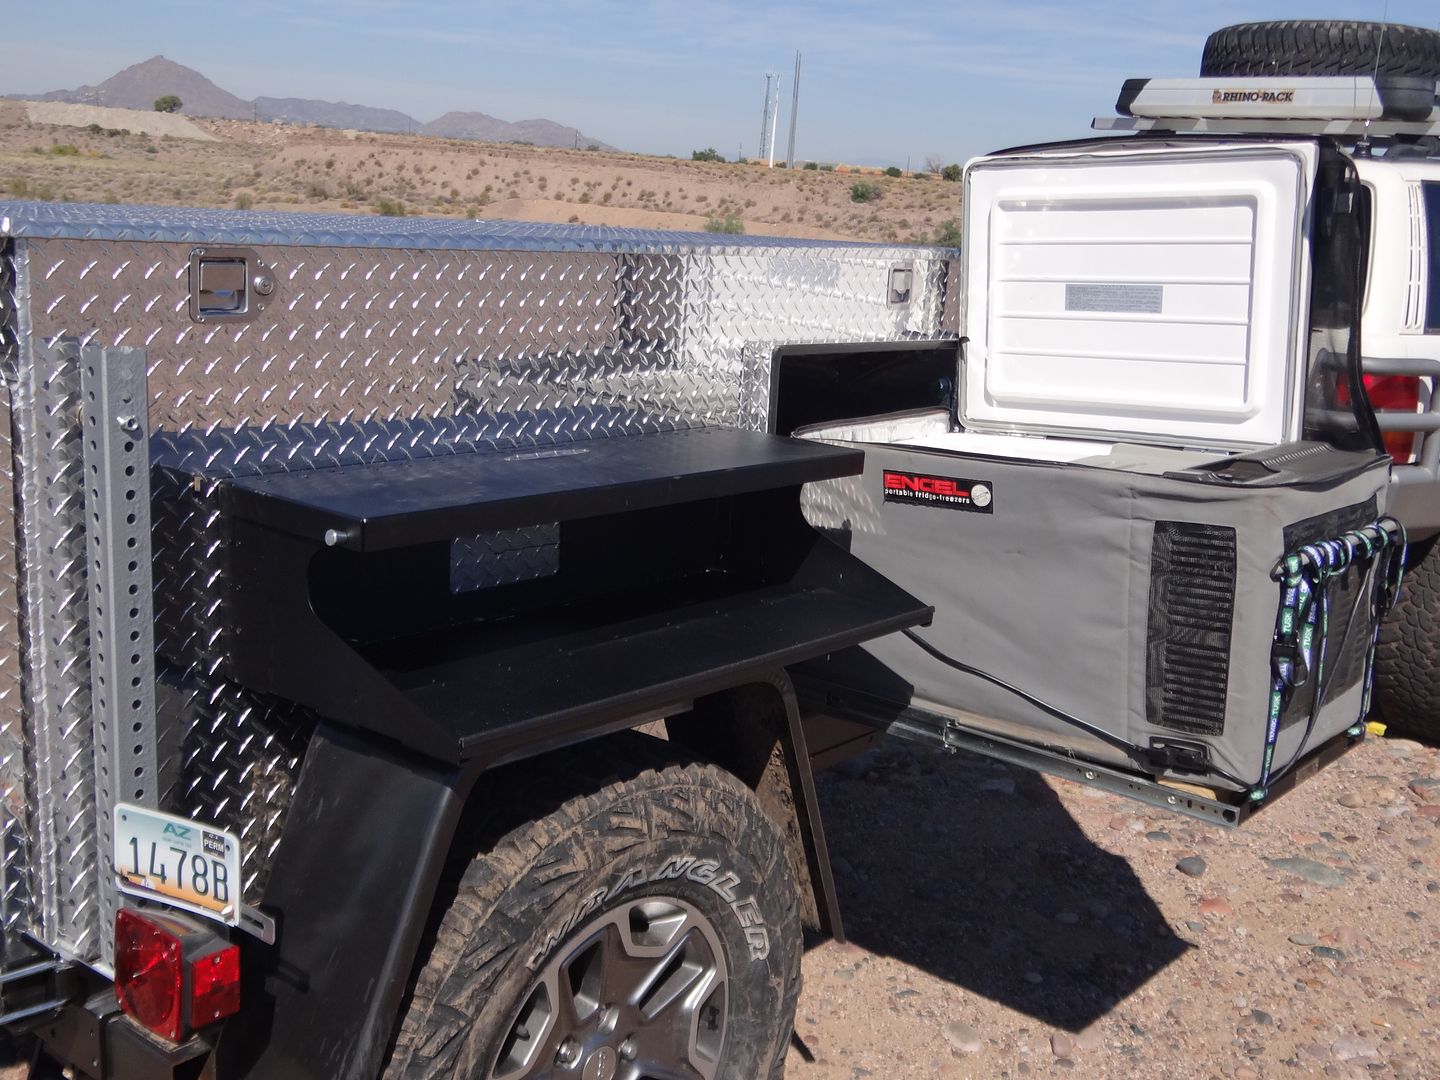
Now that the electrical part it done, it's time to add a fridge slide and a fridge/freezer. The fridge slide is an easy choice, the extreme duty Tembo Tusk fridge slide. The Tembo Tusk fridge slide will out last your trailer and all the trailers you might ever own in the future. Yes it is that good. I've been using their fridge slides for over 5 years now and there isn't a better, stronger fridge slide sold anywhere. I had the trailer designed with a side door that would accept the Tembo Tusk large slide to accommodate an Engel MT60 Combi fridge/freezer. The Engel MT60 is a big fridge with a separate freezer compartment, hence "combi" for combination. Its heavy duty design will take the punishment of off-road adventures and I know how reliable the Engel is because I've had this unit for over 5 years now mounted in the back of a modified M101 Canadian trailer, thousands of miles of trails and hundreds of days of operation. The Engel MT-60 Combi works just as well today as it did from new. The sixty quart capacity is more than enough to carry a weeks worth of food and ice or more.
What else do I want on my trailer? A rear spare tire carrier, a prep-kitchen, propane, spare fuel/water storage, perhaps some recovery equipment and maybe some LED utility lighting.
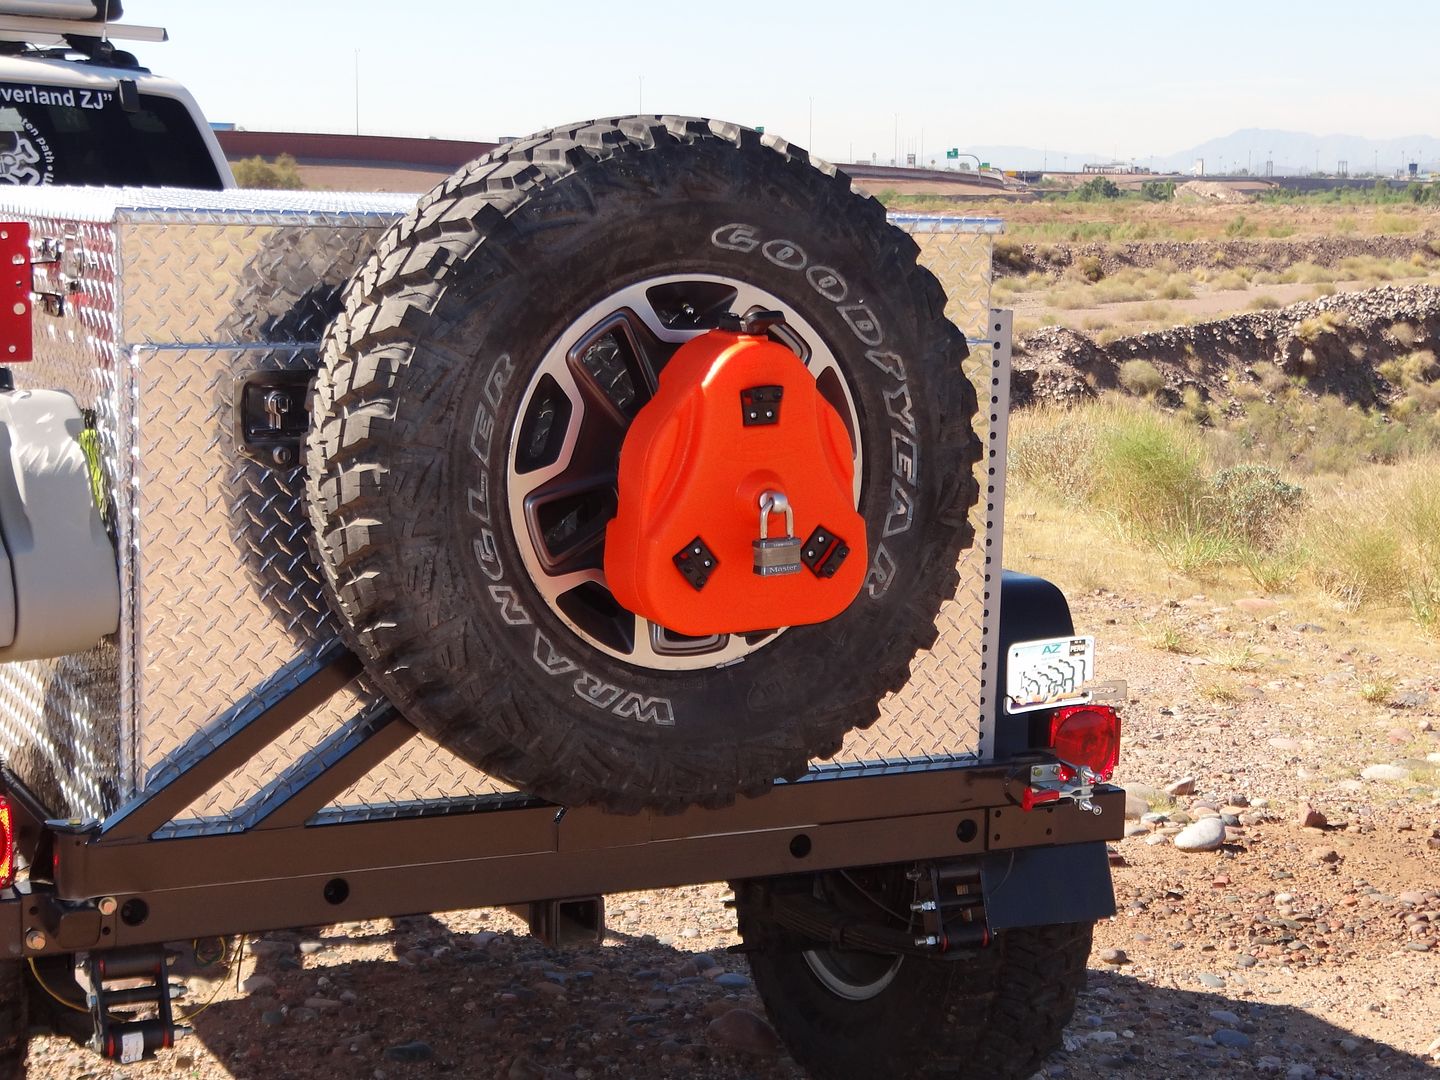
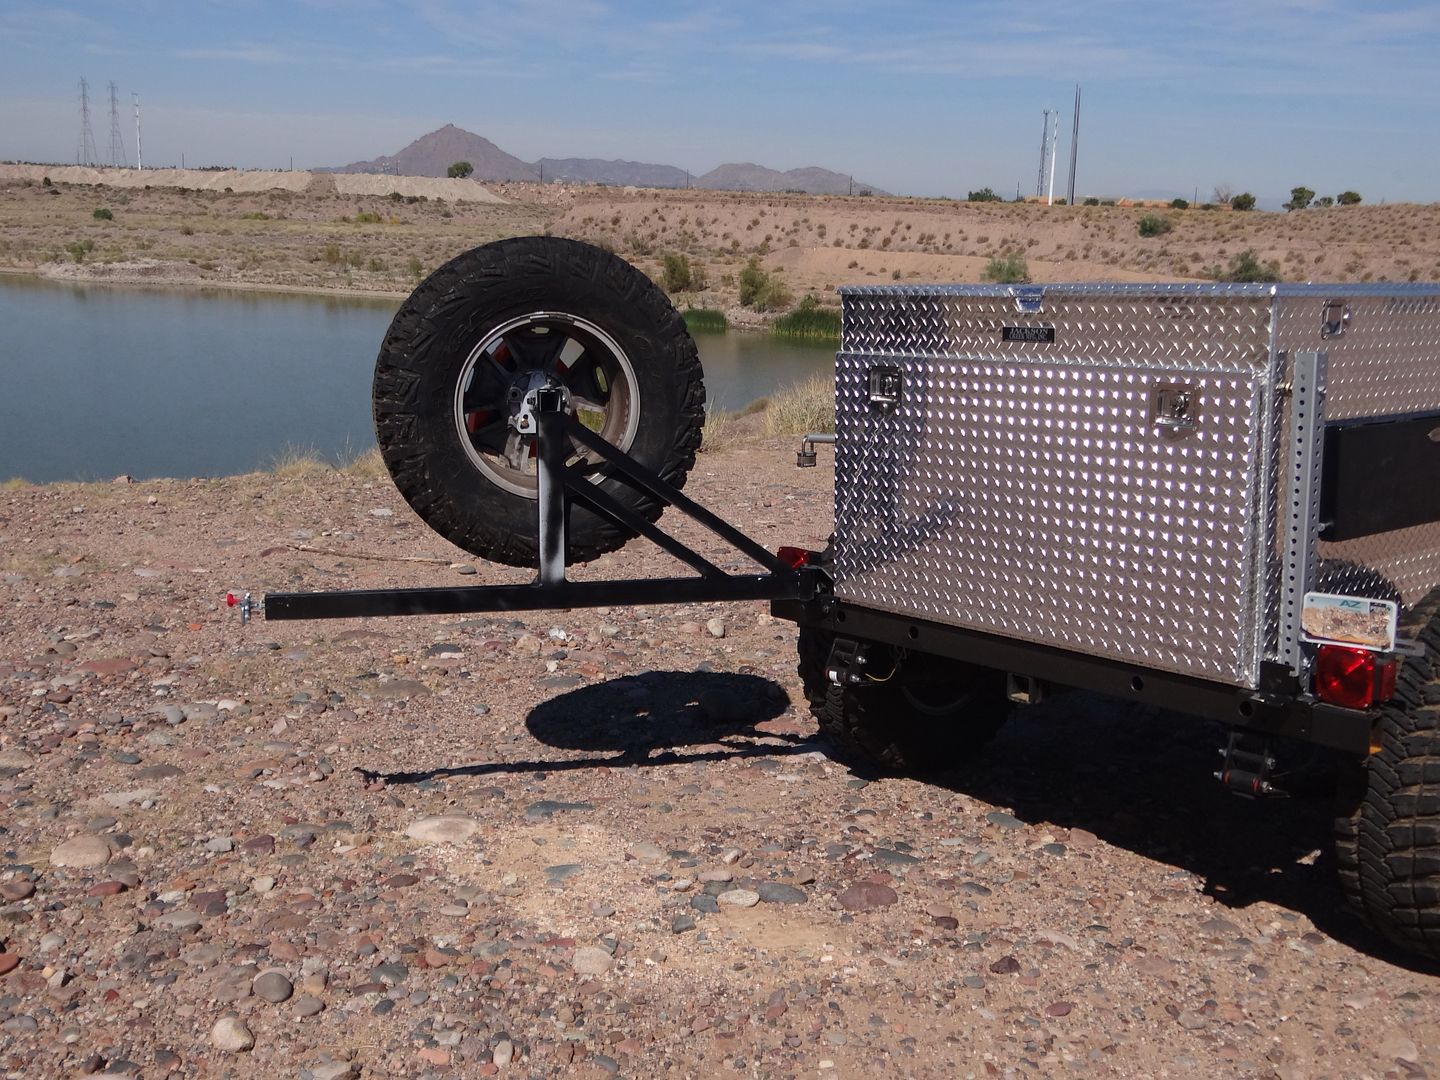
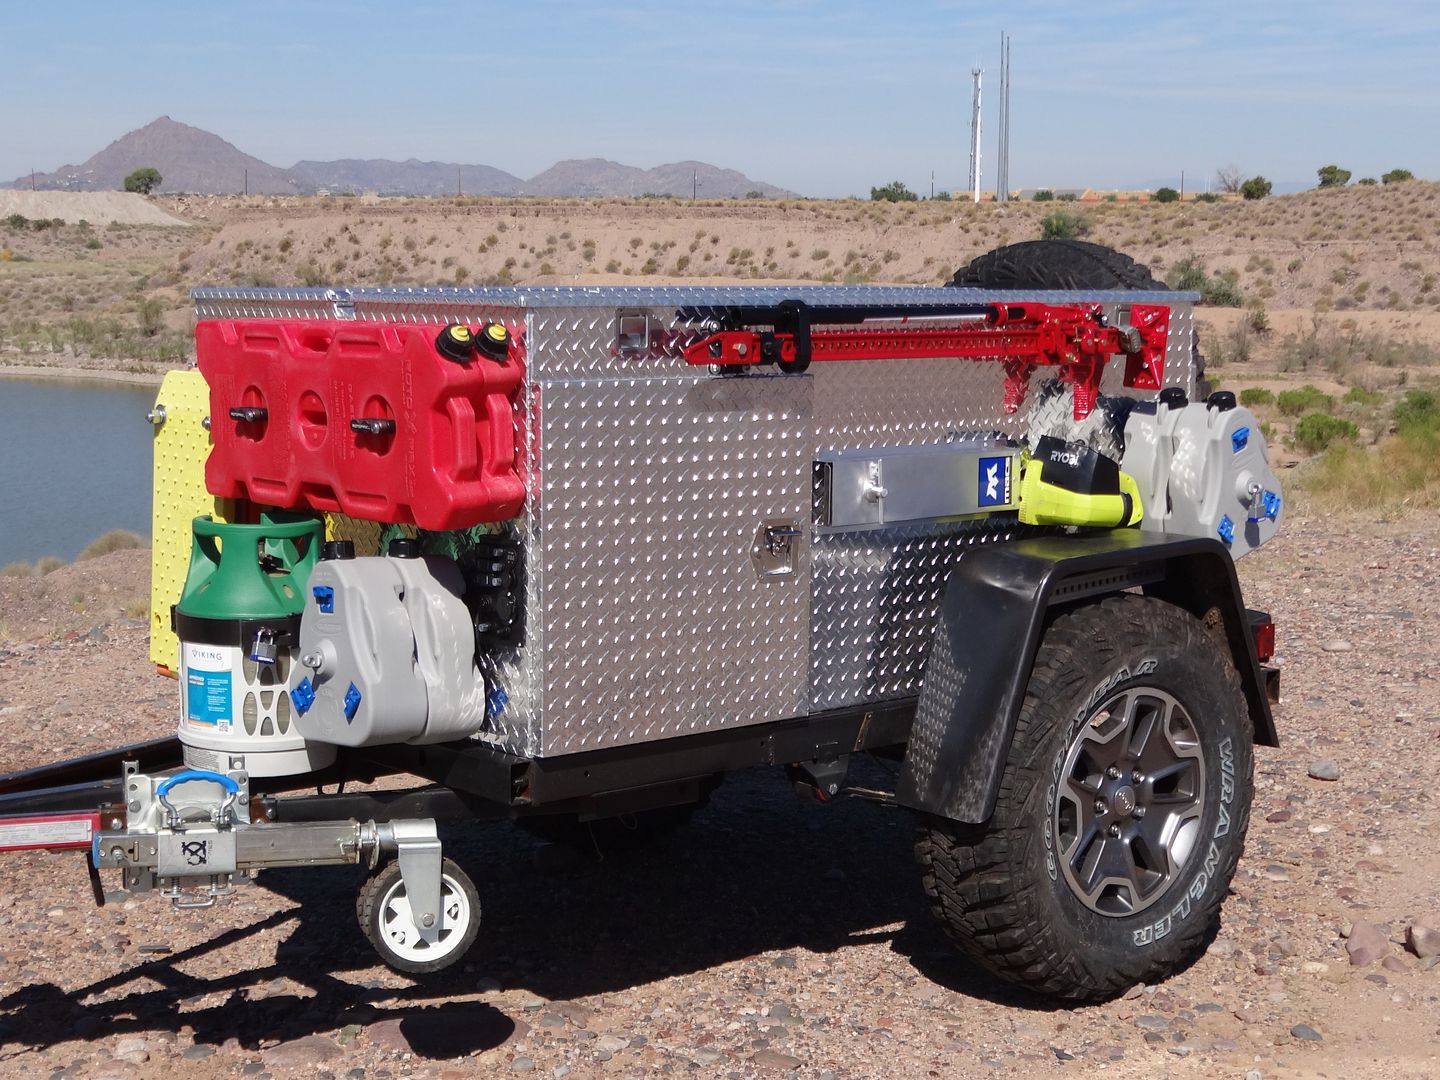
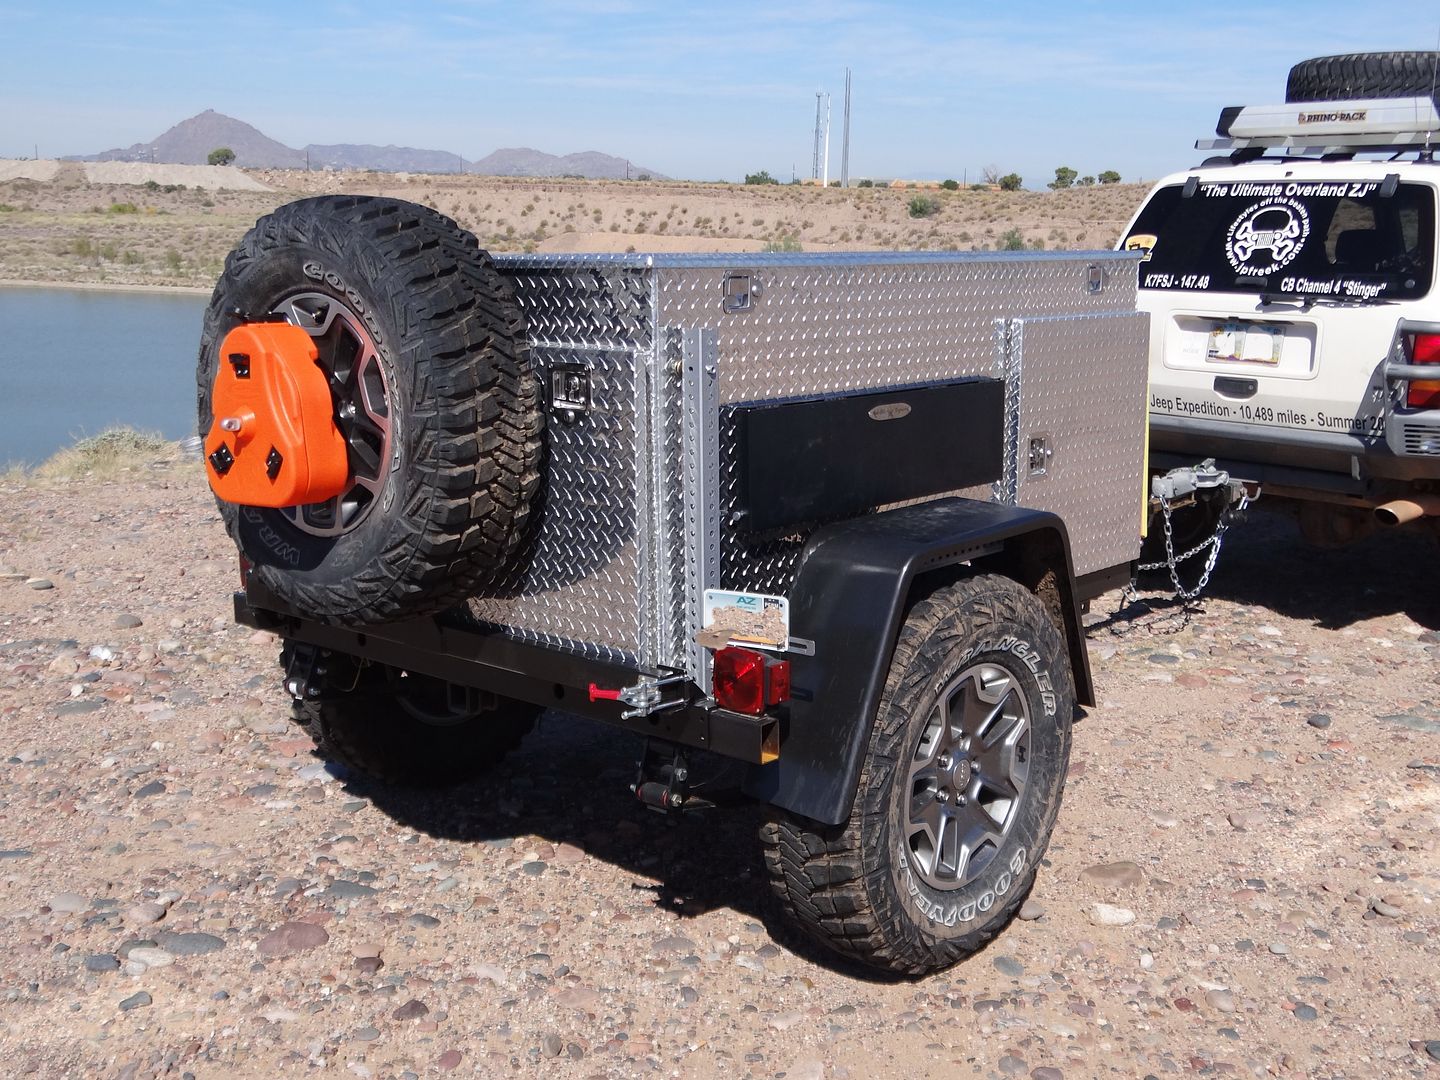
I wanted a swing away spare tire carrier for my trailer and looked many hours for something that was already built for a Jeep that I could adopt to the trailer. After many hours of searching I found something that might work that was designed for an XJ Cherokee bumper from Detours USA. I talked with Mark from Detours and he said it might work as is but he could build a set up specific for my trailer for about the same cost as the XJ set up. The advantage to me was that it will fit right out of the box without having to modify anything. Mark also made changes so that it would open from right to left. As you can see it looks great and fits like a glove. If you built your own trailer, Detours can build the same or similar tire carrier set up for you too.
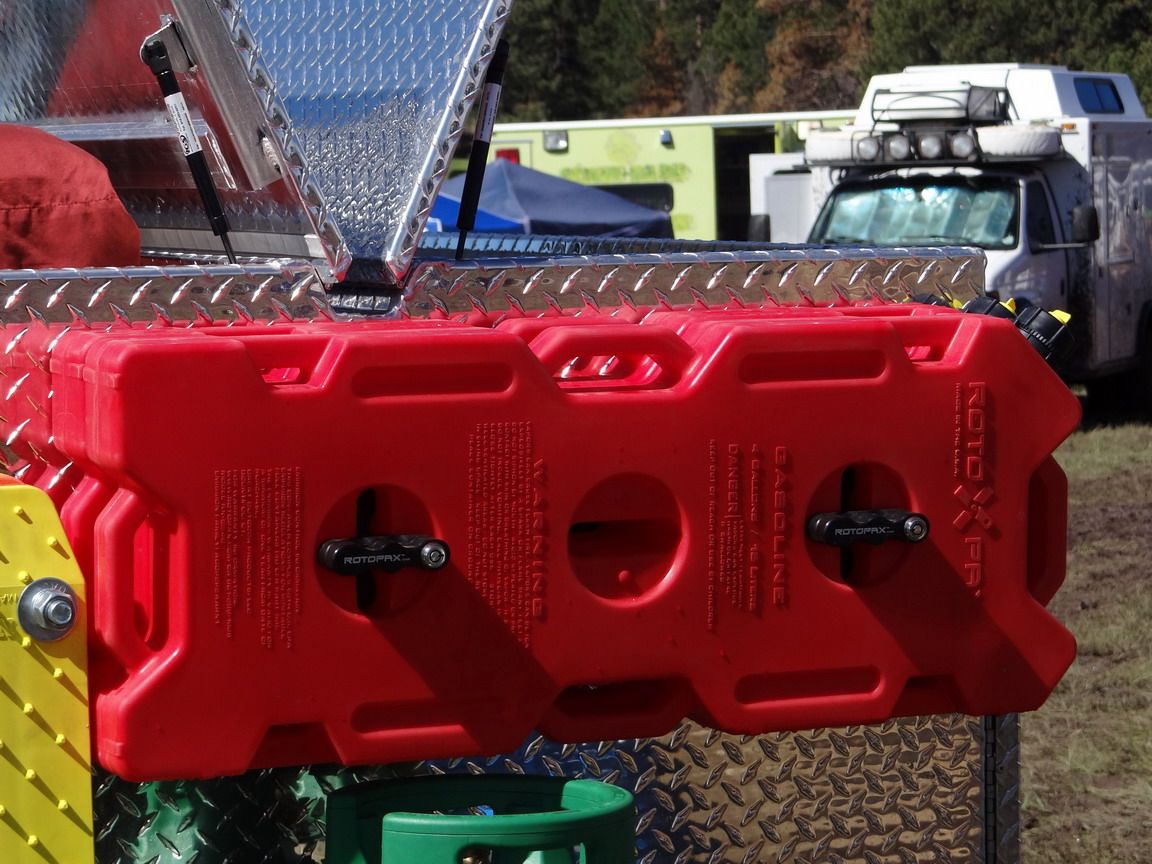
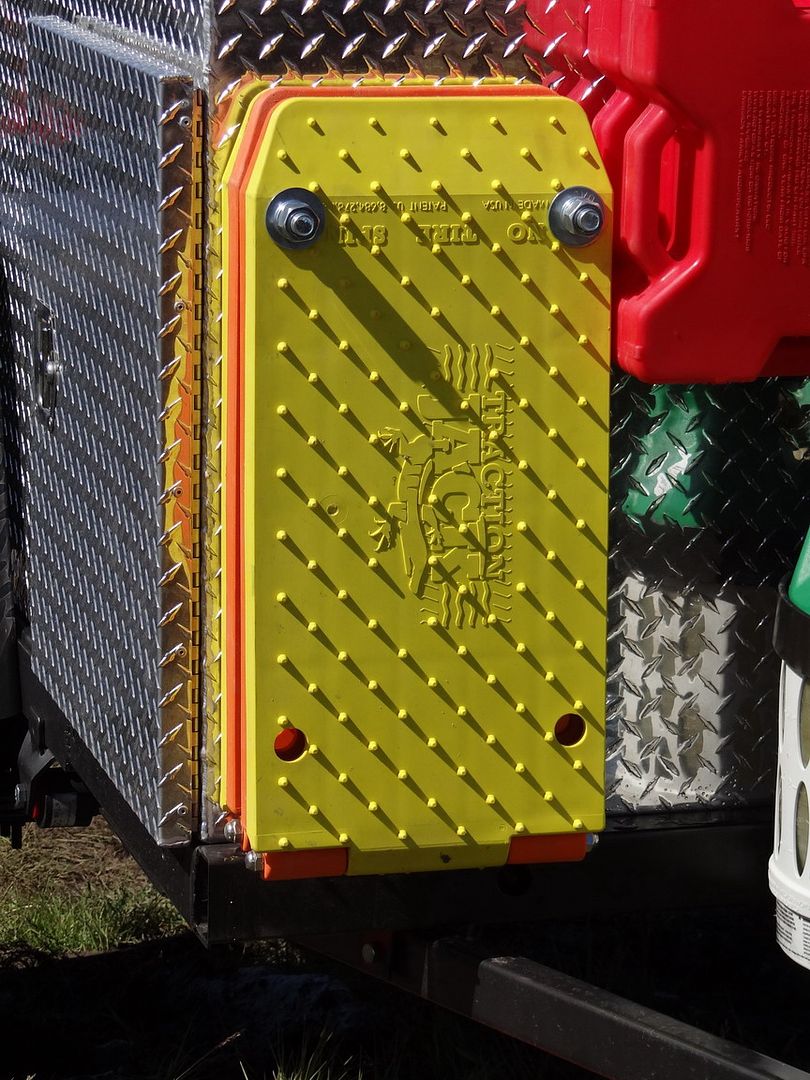
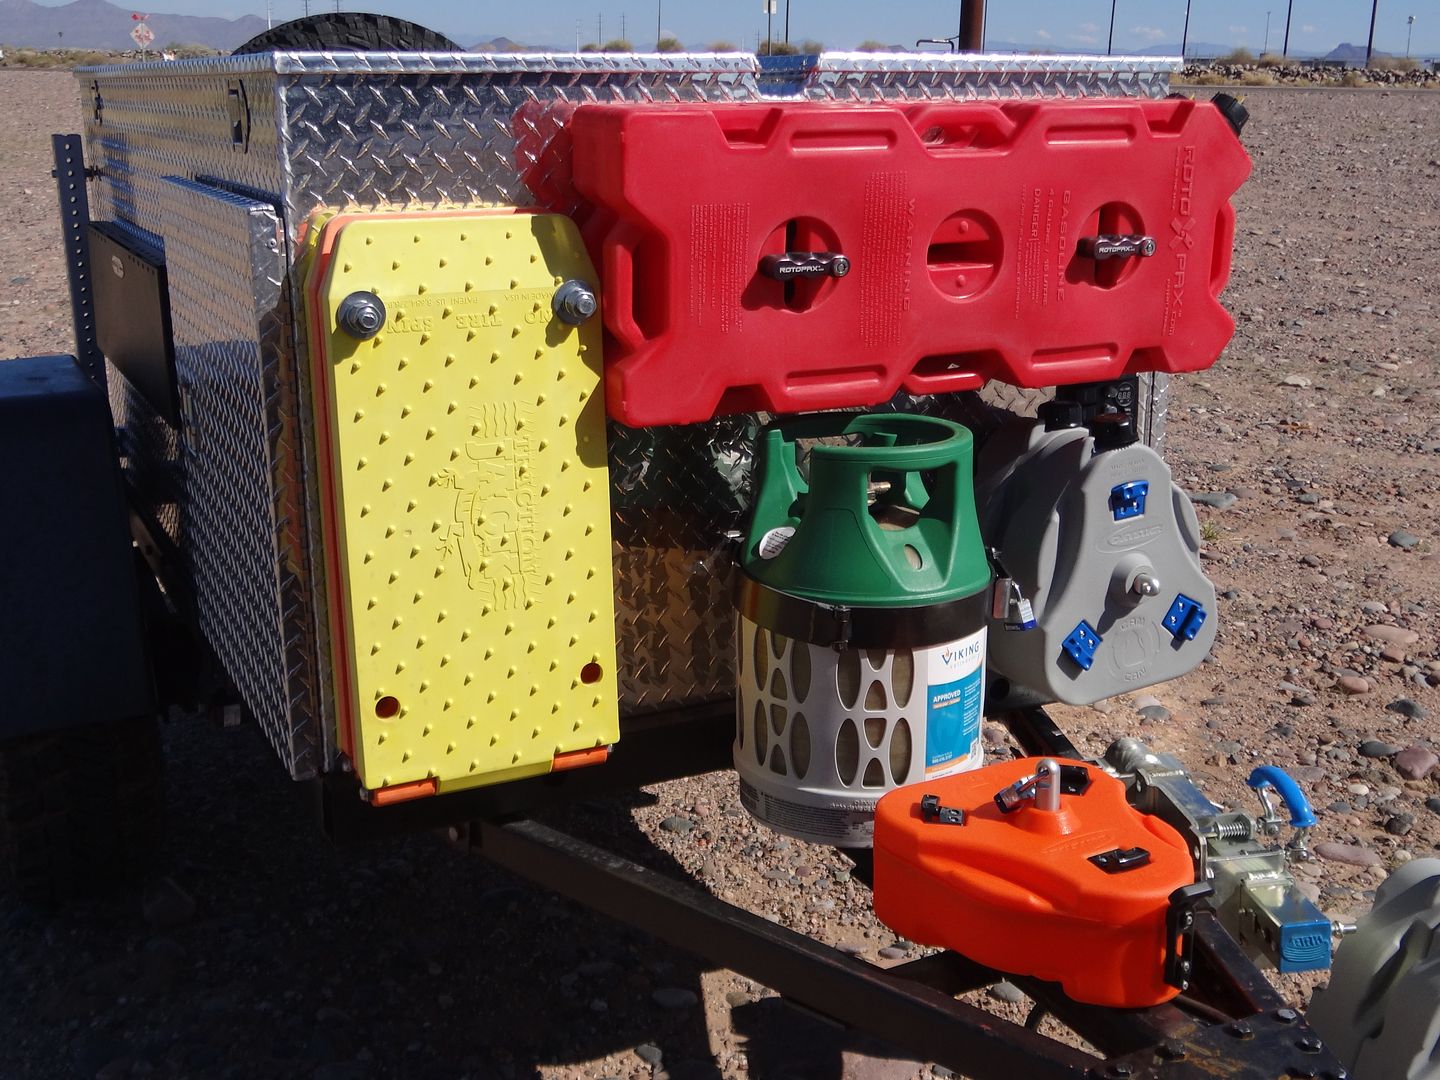
The front hitch area and the front of the trailer are prime real estate to add options. While some people might want to add a tool box, I decided to add other things. Like a set of Traction Jacks in case we get stuck in mud or sand, a pair of RotoPax 4 gallon fuel containers (you could easily add water storage here instead) and a propane cylinder. I've carried Traction Jacks in my Jeep in the past to assist me with extraction from mud or sand in the rare event I get stuck. It made sense to add a pair of these to my trailer. The RotoPax fuel and water containers, in my opinion, are simply the best fuel "cans" on the market. They are easy to handle, do NOT leak and their locking mount system is just genius.
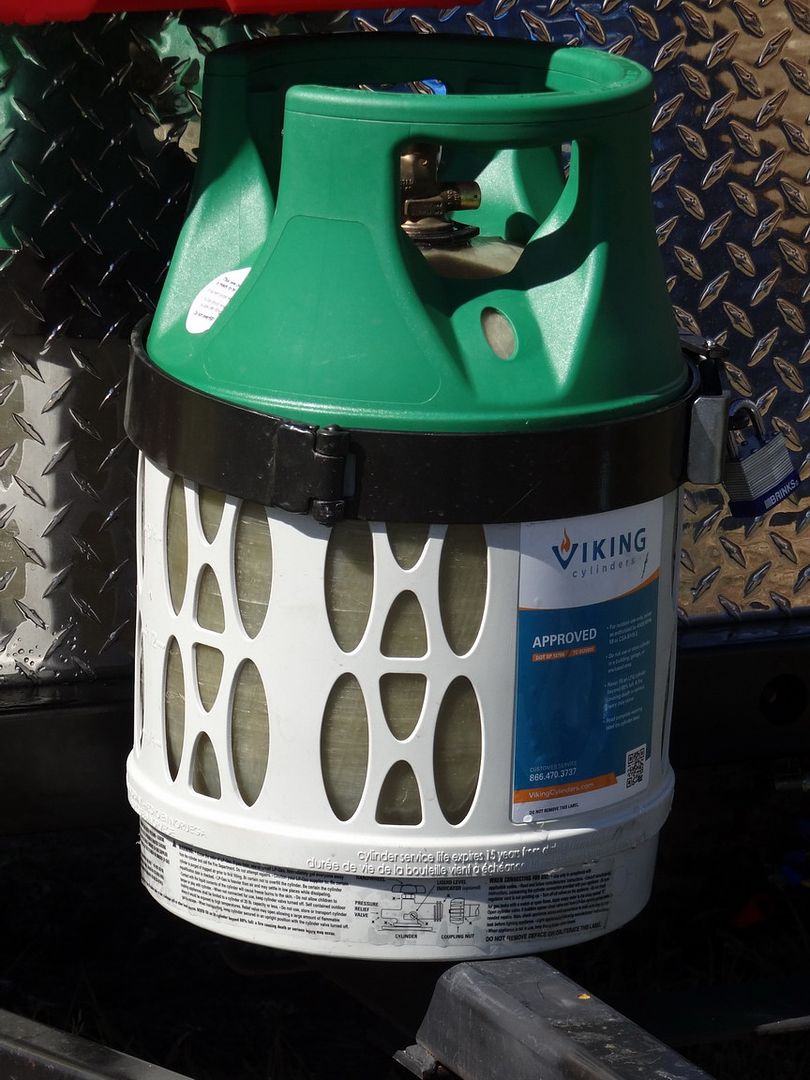
The propane cylinder is a composite design from Viking Cylinders. They have a DOT certification and have been the top selling composite propane tanks in Europe for many years. Not only are composite cylinders much lighter than their steel cousins, they are also much safer in the event of a collision or rupture. Sure they cost a bit more than steel ones but when weight and safety are concerned, the price difference is worth it for me. Now that the hitch area is pretty much spoken for, a piece of diamond plate to hide the a-frame/rails seems to be in order.
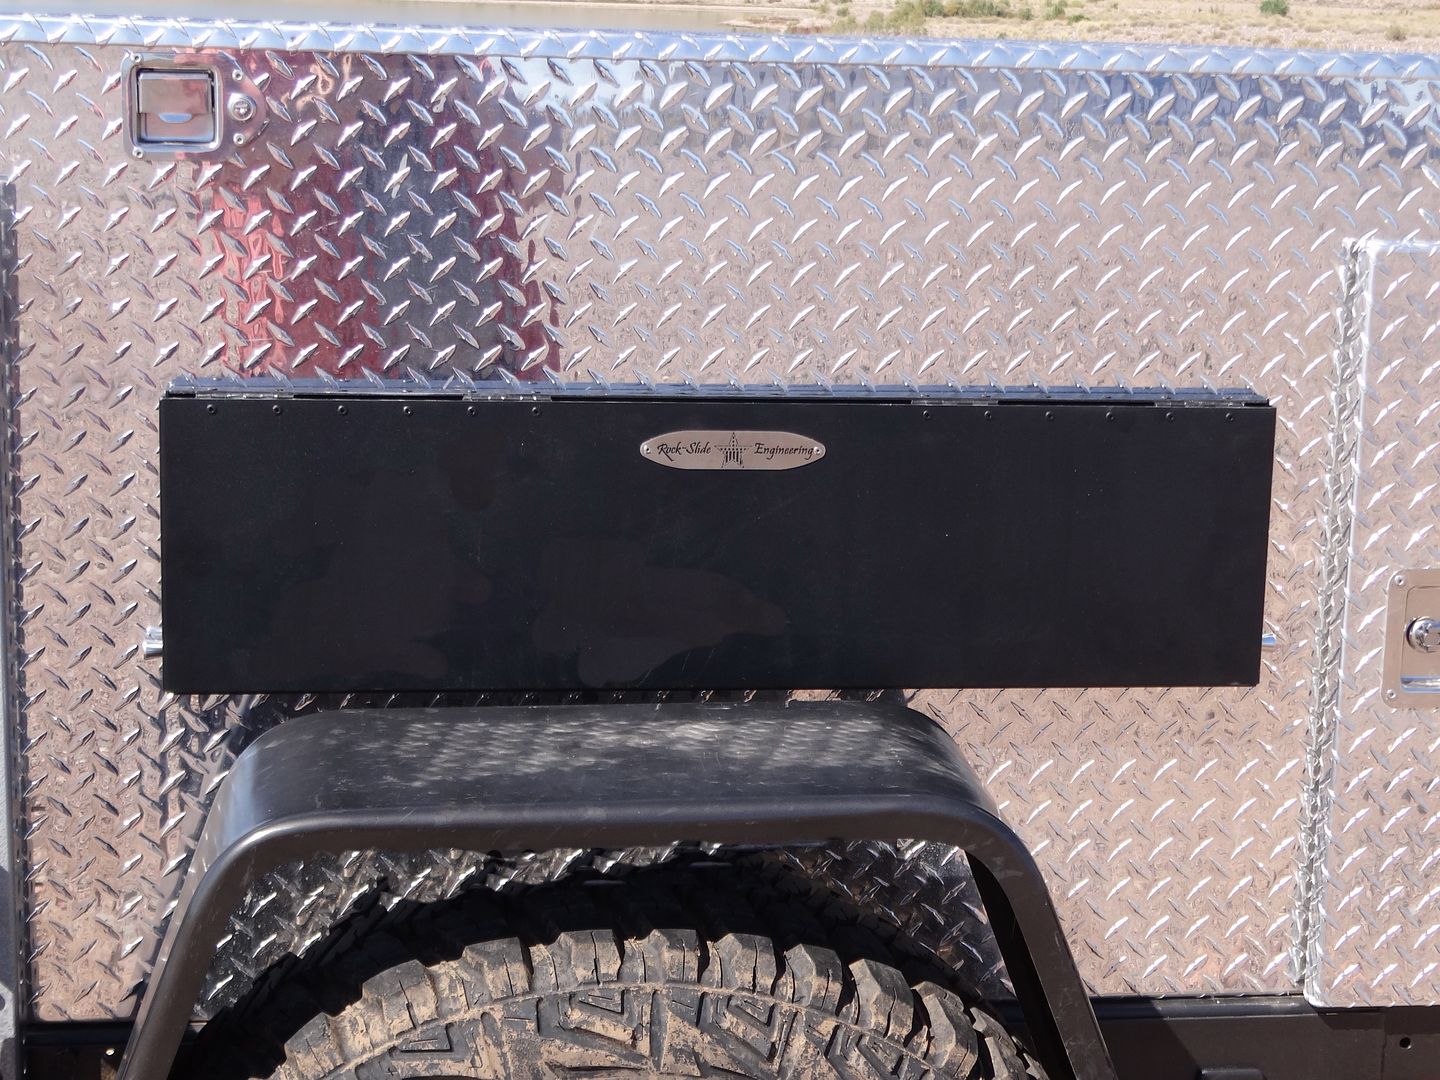
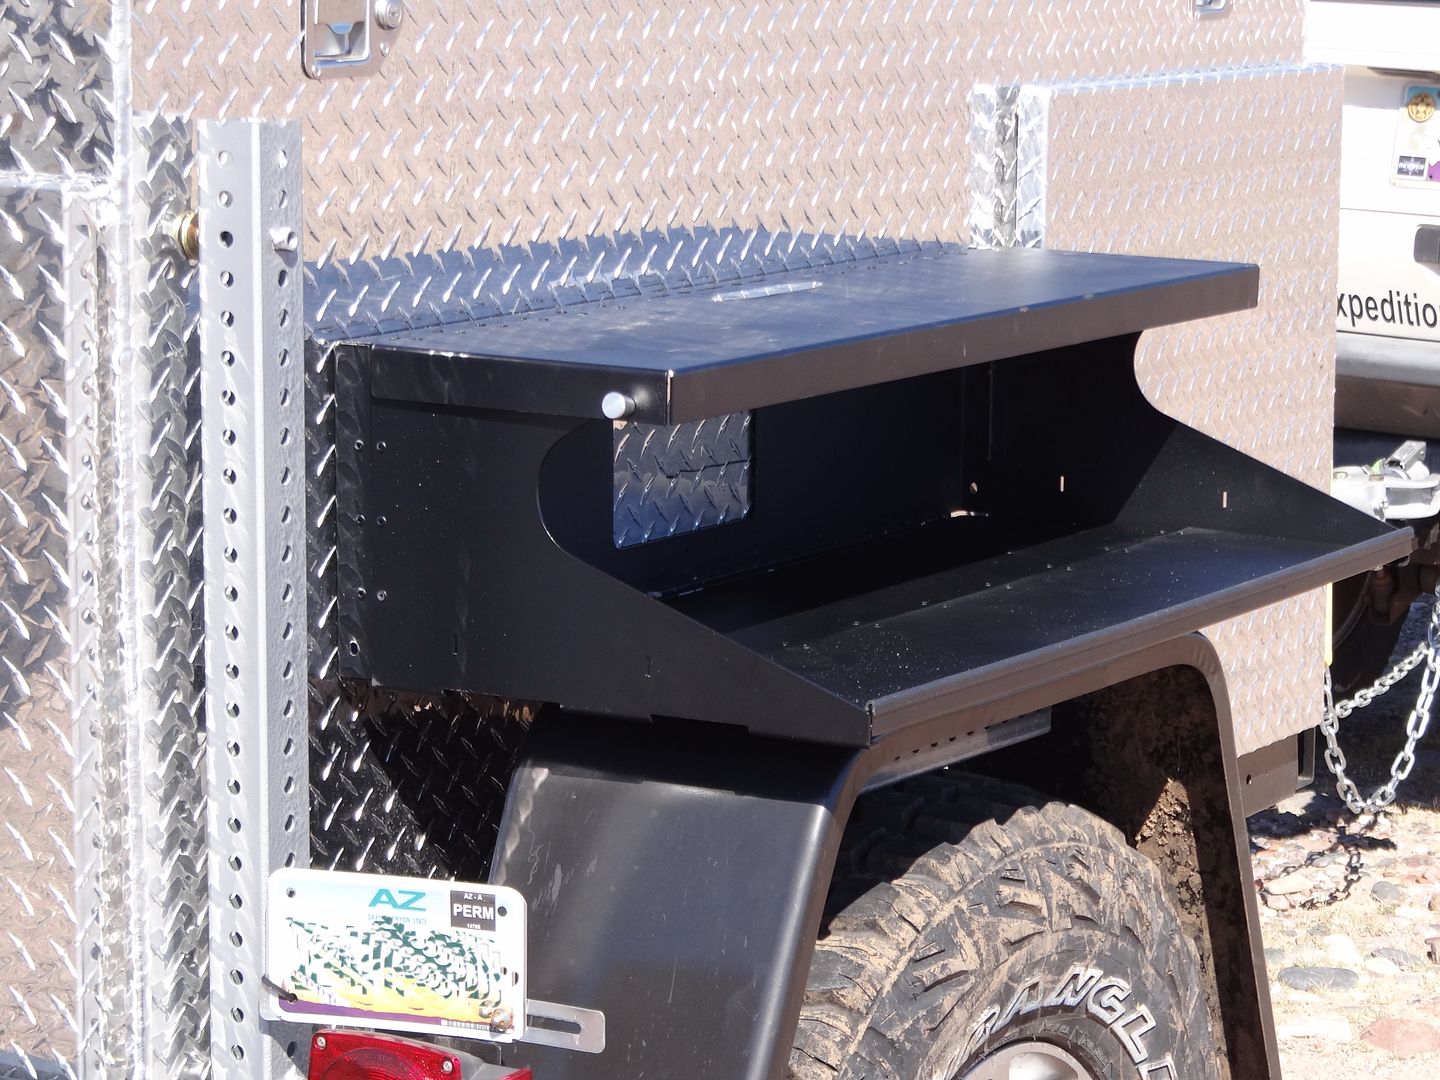
With my trailer looking so much like the Chuck Wagons of old, I needed to find something I could use to prepare food that took up little space, little weight and was portable. I found exactly what I needed from Rock Slide Engineering with their big version tailgate table. They took their regular sized tailgate table that is made for Jeep Wranglers (YJ, TJ and JK) and super sized it. It mounts perfectly on the side of my trailer above the fender and right next to my fridge door. This perfect kitchen solution for the trailer it is 36" long, has two shelves and folds up out of the way for going down the trail to only 1.6" thick. You can set up a one or two burner stove and have plenty of room for pots and pans along with room for food prep.
by: Mike Fissel - Founder, JeepExpeditions.org
Adding Options to our affordable trailer............
In Part #1 we introduced you to our awesome $2500 trailer built in a weekends time in my driveway. The trailer was the basic trailer, the type you've seen sold by plenty of commercial off-road trailer manufacturers that typically start out in the $5000+ range.
But for most of us, the basic trailer while providing a place for all the gear you can't fit in your Jeep,
just isn't the trailer you see many people on the trail with. People who buy those $5000 basic trailers add options to them that add to the total price. Recently I talked with a member in my club who paid $14,000 after all the options were added to his trailer. Now for most of us, a trailer that costs that much isn't in our future. We can take our basic $2500 trailer, spend as little as $2500 more or just go all out still having a trailer that will serve all of your future needs at way less a commercially one will cost you.
Keep in mind, options are just that. You can add them all at once or you can add them as your priorities and budget allow you. You might not want or need all of the options that I've chosen as a guide to see exactly where you can go with your trailer. Mild or wild, it's all up to you but in any case your end product will still cost you a fraction of what you would spend on a similar "store bought" trailer.
Our trailer kit came with a 2" ball coupler, something that would work for light off-roading but not something that most off-road trailers are equipped with. A fully articulating heavy duty coupler is what I've decided to go with. There are a number of very good ones out there and quite frankly none of them are cheap but after lots of comparing my choice was the ARK Heavy Duty Off-Road XO Coupler. Its design is revolutionary and nothing like I've seen anywhere. While it closely looks similar to a typical 2" ball coupler, this unit will fully articulate horizontally and vertically just like other off-road couplers. Where it really stands out is that it is so much easier to hitch up to your trailer unlike the competition. The coupler uses the world standard 50mm ball but don't worry, ARK will be importing them soon for use with their XO coupler.


Another important option is your trailer jack. This is the part that you wind up or down to level your trailer on land or to hitch up to your Jeep. I've used plenty of the cheap ones in the past on trailers, you know the sub $100 ones. They work great on smooth pavement but can scare you out of your wits in dirt, stones and rough terrain. For an off-road trailer the ARK XO Jockey Wheel is the only choice. Anyone who has seen and worked with the ARK jack on my trailer is 100% sold on it. It costs more than double that of the cheap jacks but it is one thousand percent solid and will serve you well for many years without all the jiggles and excessive play you experience with typical trailer jacks.


With my trailer the first major option was electric brakes. Let's face it, when our trailer is fully decked out it's going to weigh in right around 2000 lbs. You've got a Jeep that you've put 33's or 35's on it and still are counting on your factory brake set up to stop your Jeep the way it should. Now add another 2000 lbs to the equation, going down a steep hill off-road. Uh huh, first time you experience that without electric brakes on your trailer, you will make it a priority before your next trip.


Electric brakes were an option that I added when I was building the trailer so I didn't have to go back and add them later. If you didn't do it then it's not difficult to do it in the future, or now. With the 3500# Dexter Axle Axle, the brake choice was simple as it is already set up for electric brakes. The guys at Auto Safety House in Phoenix quickly can reference all the parts you need and also recommend a brake controller. The brake controller is a necessary piece of equipment that does what its name implies, give you control over your trailers electric brakes. You can set up the controller to give as much or as little braking power to the trailer every time you hit your Jeeps brake pedal. With the controller, the trailer brakes can be activated manually with the push of a lever/button. There are advantages to braking the trailer off-road to better maneuver sharp turns and obstacles.
The electrical system needs to be upgraded on your trailer to add brakes and at the same time you might as well add provisions for a deep cycle battery and any other options you might want to add like utility lights. I upgraded the trailer wiring with a 7 wire HD trailer harness with a 7 pin connector already attached from Auto Safety House. This harness splices easily into your existing wires for trailer lights and adds the wire to control the brakes plus a 12v source to charge the trailer battery or run a fridge freezer when connected to your Jeep. You will also have to upgrade your Jeep to a 7 pin RV receptacle. For my battery, I went with an Optima Blue Top in a $10 battery box that's mounted in the trailer (to avoid theft). The battery will be able to power by fridge/freezer for about 3 days on it's own and any auxiliary LED lighting I might add to the trailer.


A few more things electrical to finish up. I'll be adding an external marine 110v socket mounted up front that can be used with an electrical cord for power from any 110v source. Near the 110v socket there are a 12v socket and two USB sockets, all weather proof. To keep track of the battery condition a voltage gauge will be mounted also on the front. I just happened to find the right panel on Ebay. To charge the battery and to maintain and condition the battery from 110v an ARK AC/DC battery charger will be installed. The ARK charger is probably the most impressive charger of its type I've ever used and is just what is needed in my trailer. Not only will the ARK charger charge my Optima when connected to 120 volt power, it will also condition and maintain the battery without overcharging. Dual retractable electric cables (found cheap on Ebay) will be used to power the fridge from 12v or 110v. The advantage to this type of cable is that it will be less likely to tangle up and I can keep it interfering with other gear in the trailer.


Now that the electrical part it done, it's time to add a fridge slide and a fridge/freezer. The fridge slide is an easy choice, the extreme duty Tembo Tusk fridge slide. The Tembo Tusk fridge slide will out last your trailer and all the trailers you might ever own in the future. Yes it is that good. I've been using their fridge slides for over 5 years now and there isn't a better, stronger fridge slide sold anywhere. I had the trailer designed with a side door that would accept the Tembo Tusk large slide to accommodate an Engel MT60 Combi fridge/freezer. The Engel MT60 is a big fridge with a separate freezer compartment, hence "combi" for combination. Its heavy duty design will take the punishment of off-road adventures and I know how reliable the Engel is because I've had this unit for over 5 years now mounted in the back of a modified M101 Canadian trailer, thousands of miles of trails and hundreds of days of operation. The Engel MT-60 Combi works just as well today as it did from new. The sixty quart capacity is more than enough to carry a weeks worth of food and ice or more.


What else do I want on my trailer? A rear spare tire carrier, a prep-kitchen, propane, spare fuel/water storage, perhaps some recovery equipment and maybe some LED utility lighting.
I wanted a swing away spare tire carrier for my trailer and looked many hours for something that was already built for a Jeep that I could adopt to the trailer. After many hours of searching I found something that might work that was designed for an XJ Cherokee bumper from Detours USA. I talked with Mark from Detours and he said it might work as is but he could build a set up specific for my trailer for about the same cost as the XJ set up. The advantage to me was that it will fit right out of the box without having to modify anything. Mark also made changes so that it would open from right to left. As you can see it looks great and fits like a glove. If you built your own trailer, Detours can build the same or similar tire carrier set up for you too.


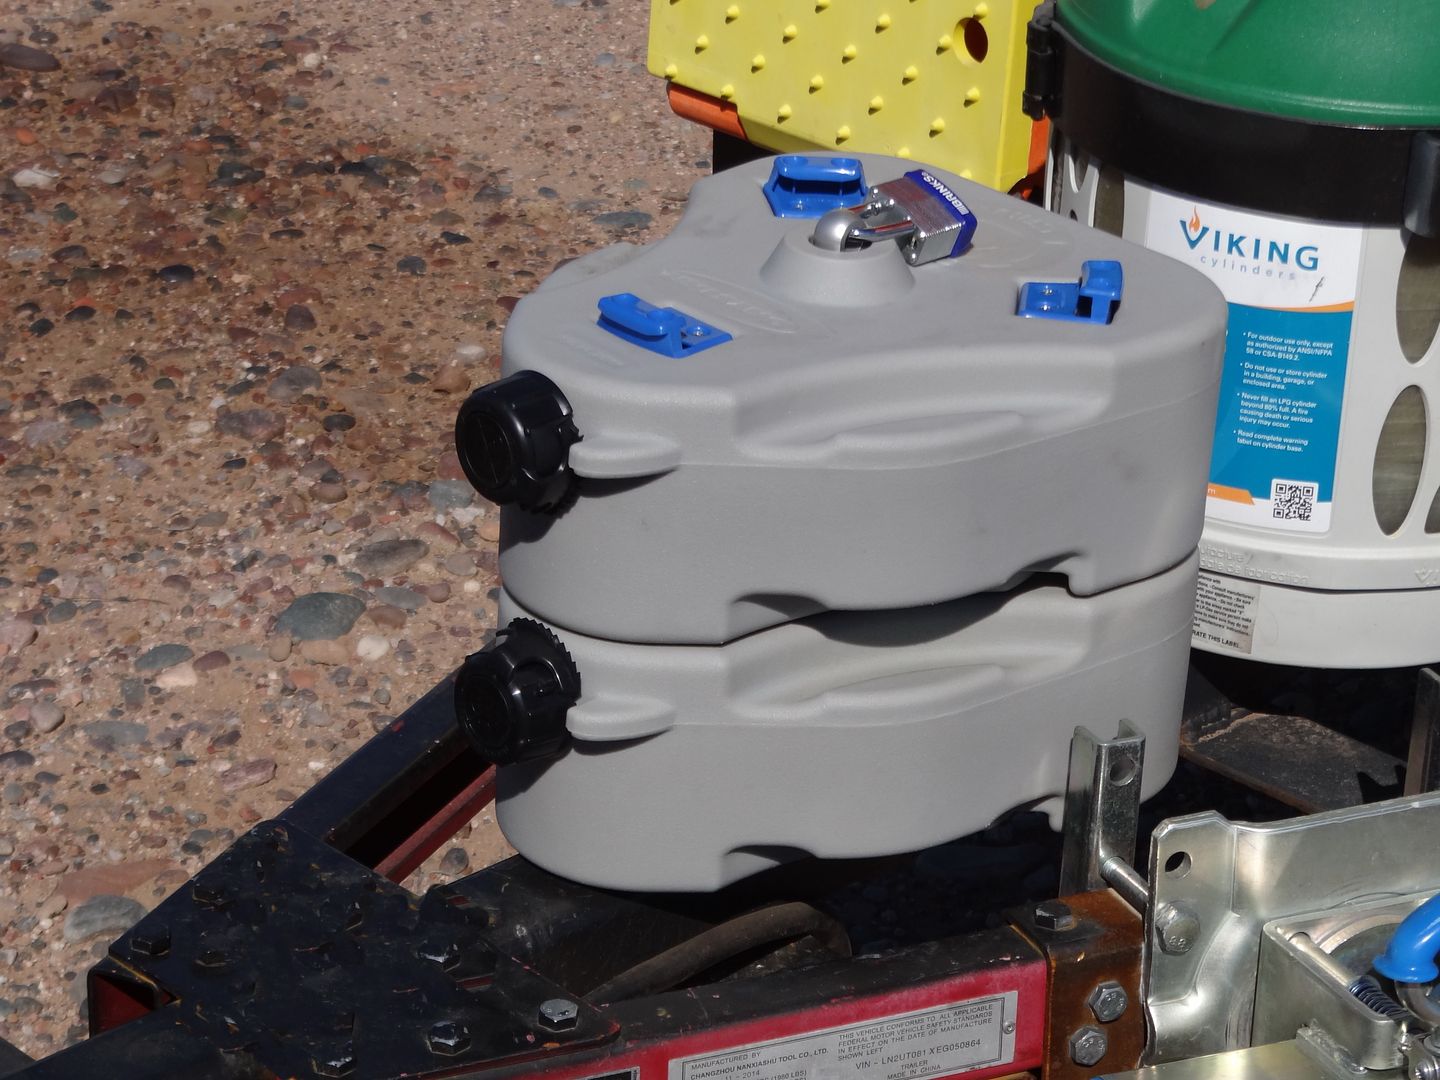
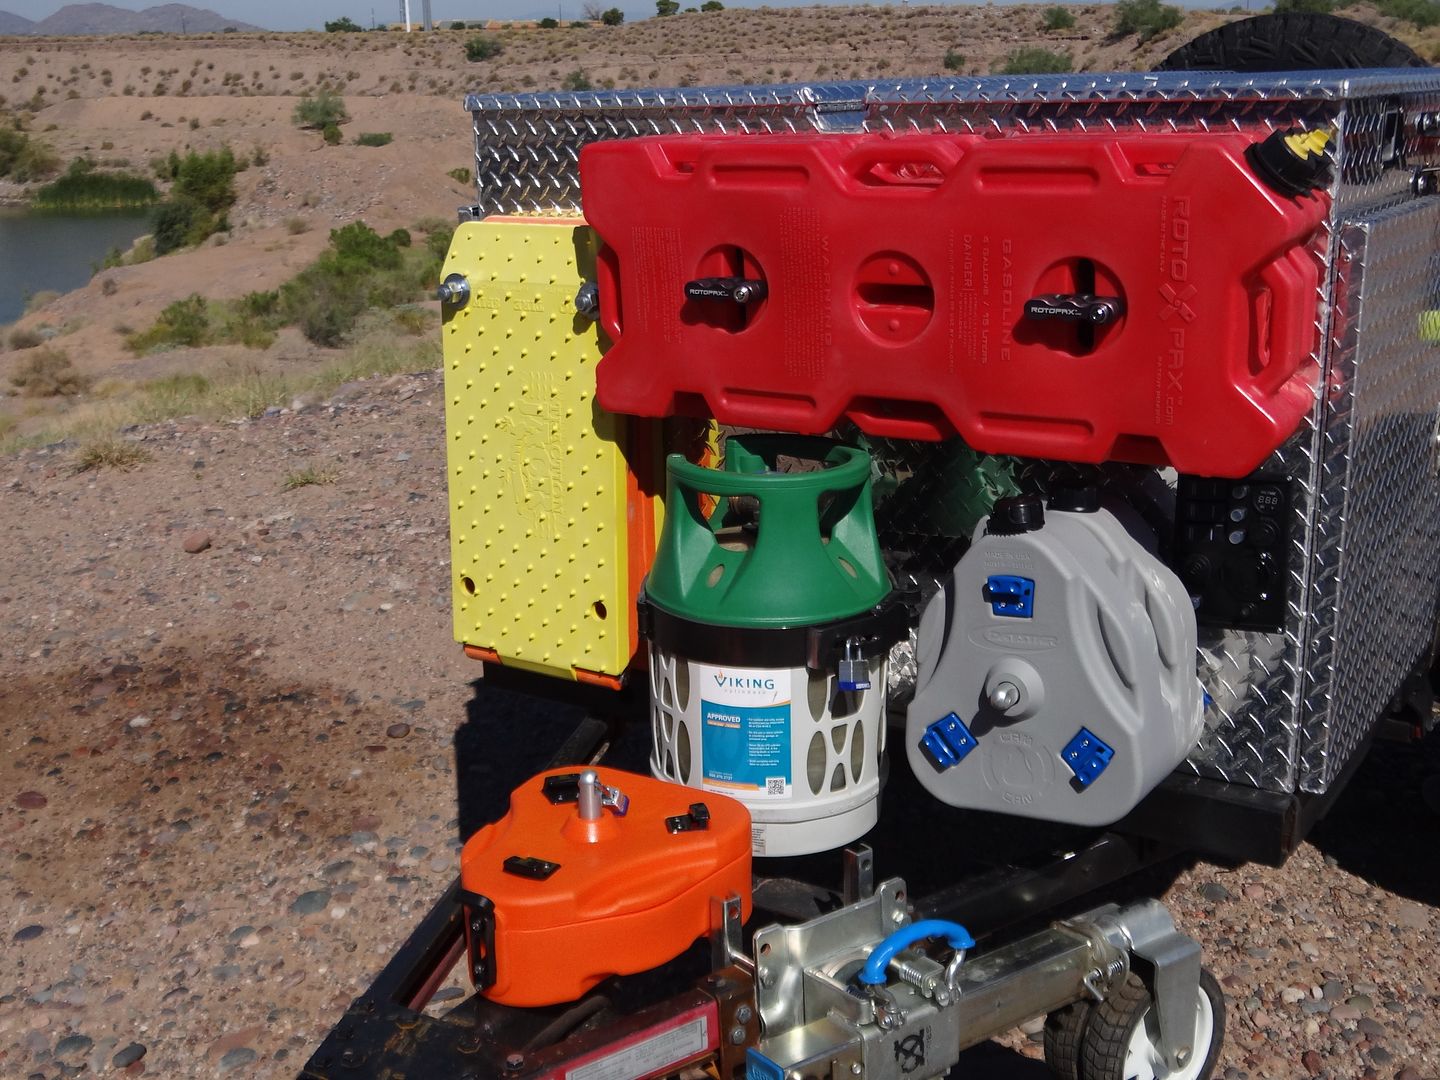
The front hitch area and the front of the trailer are prime real estate to add options. While some people might want to add a tool box, I decided to add other things. Like a set of Traction Jacks in case we get stuck in mud or sand, a pair of RotoPax 4 gallon fuel containers (you could easily add water storage here instead) and a propane cylinder. I've carried Traction Jacks in my Jeep in the past to assist me with extraction from mud or sand in the rare event I get stuck. It made sense to add a pair of these to my trailer. The RotoPax fuel and water containers, in my opinion, are simply the best fuel "cans" on the market. They are easy to handle, do NOT leak and their locking mount system is just genius.


The propane cylinder is a composite design from Viking Cylinders. They have a DOT certification and have been the top selling composite propane tanks in Europe for many years. Not only are composite cylinders much lighter than their steel cousins, they are also much safer in the event of a collision or rupture. Sure they cost a bit more than steel ones but when weight and safety are concerned, the price difference is worth it for me. Now that the hitch area is pretty much spoken for, a piece of diamond plate to hide the a-frame/rails seems to be in order.

With my trailer looking so much like the Chuck Wagons of old, I needed to find something I could use to prepare food that took up little space, little weight and was portable. I found exactly what I needed from Rock Slide Engineering with their big version tailgate table. They took their regular sized tailgate table that is made for Jeep Wranglers (YJ, TJ and JK) and super sized it. It mounts perfectly on the side of my trailer above the fender and right next to my fridge door. This perfect kitchen solution for the trailer it is 36" long, has two shelves and folds up out of the way for going down the trail to only 1.6" thick. You can set up a one or two burner stove and have plenty of room for pots and pans along with room for food prep.


JeepExpeditions.org
Observer
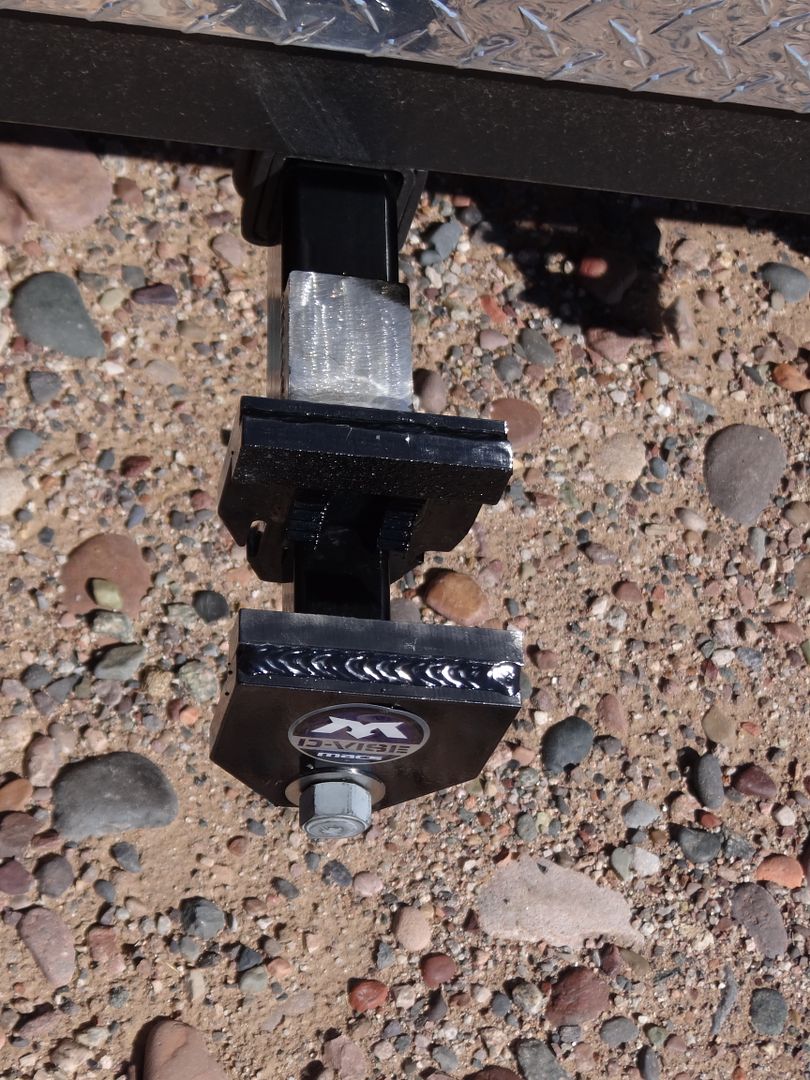
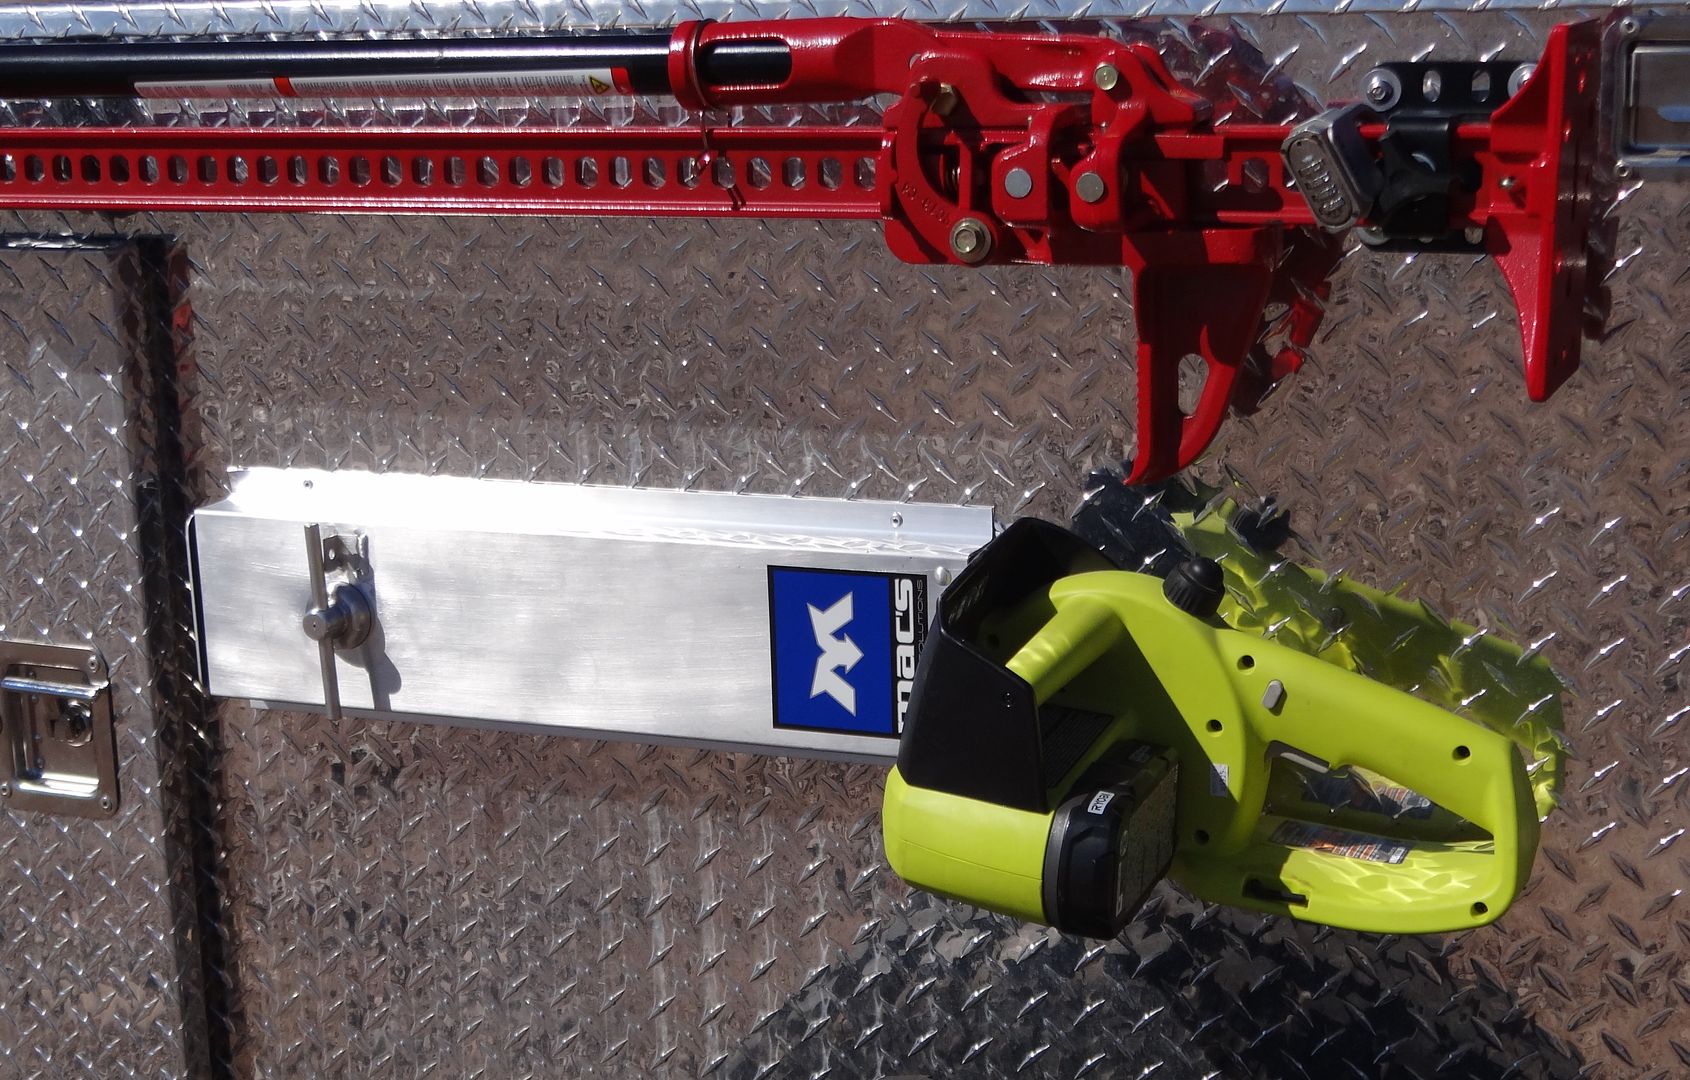
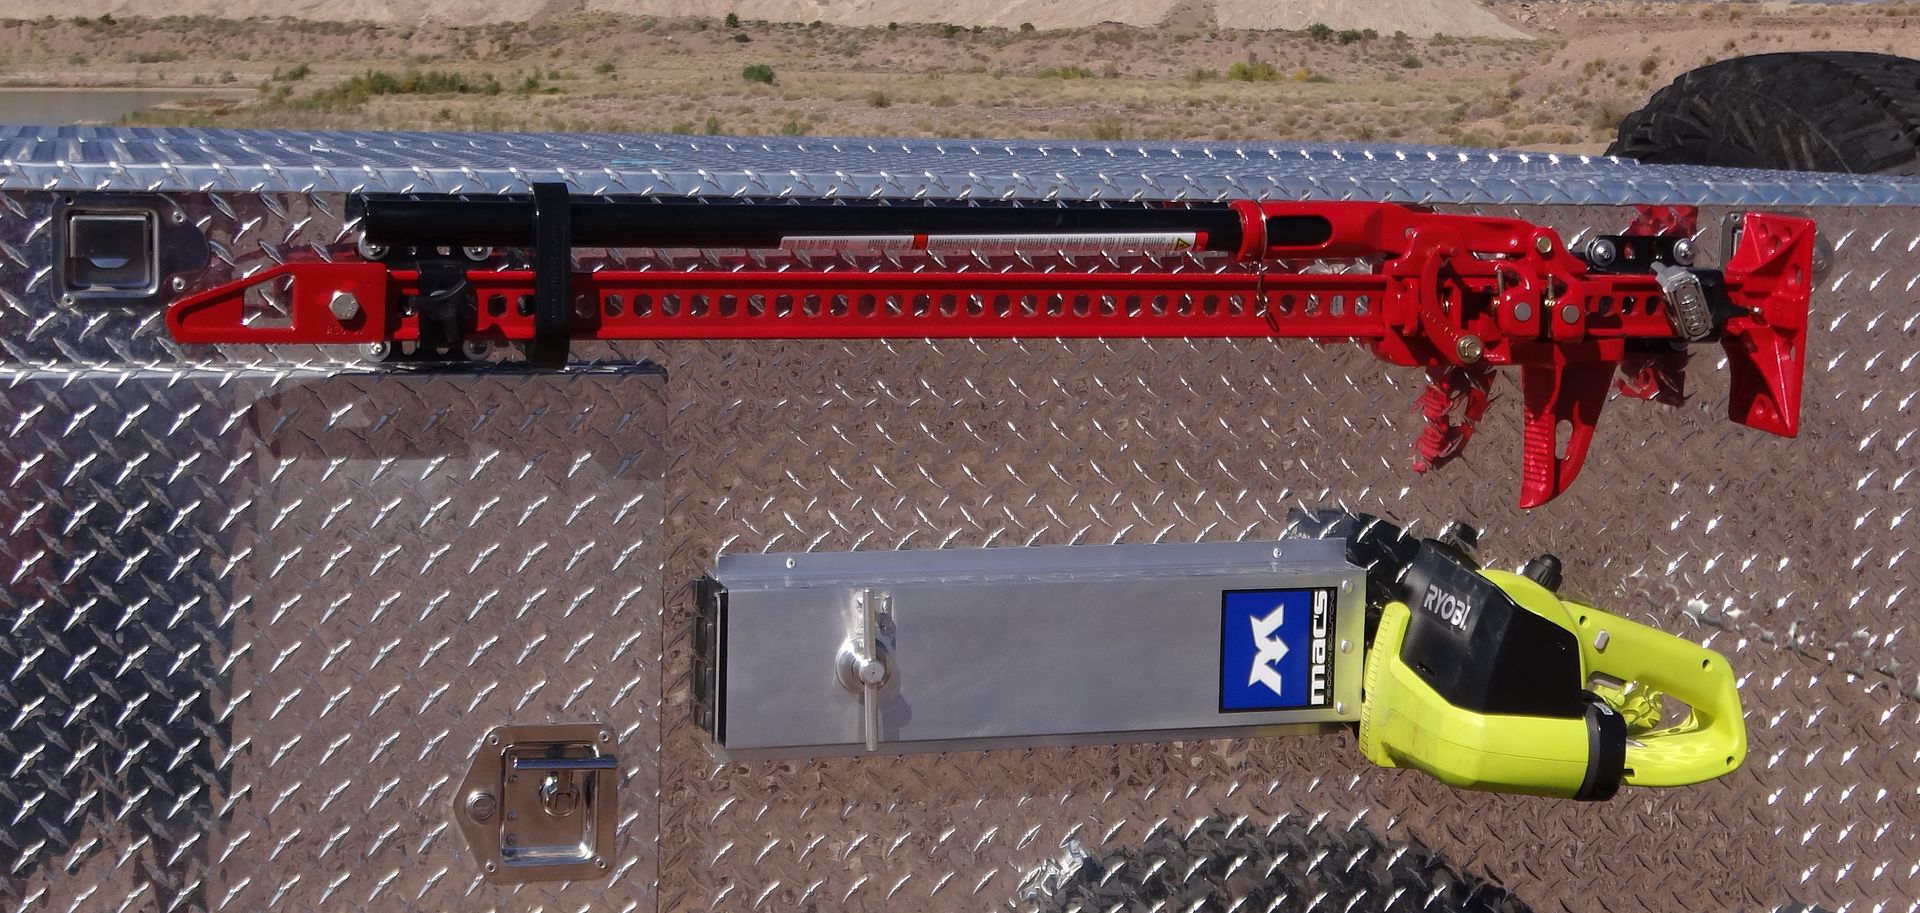
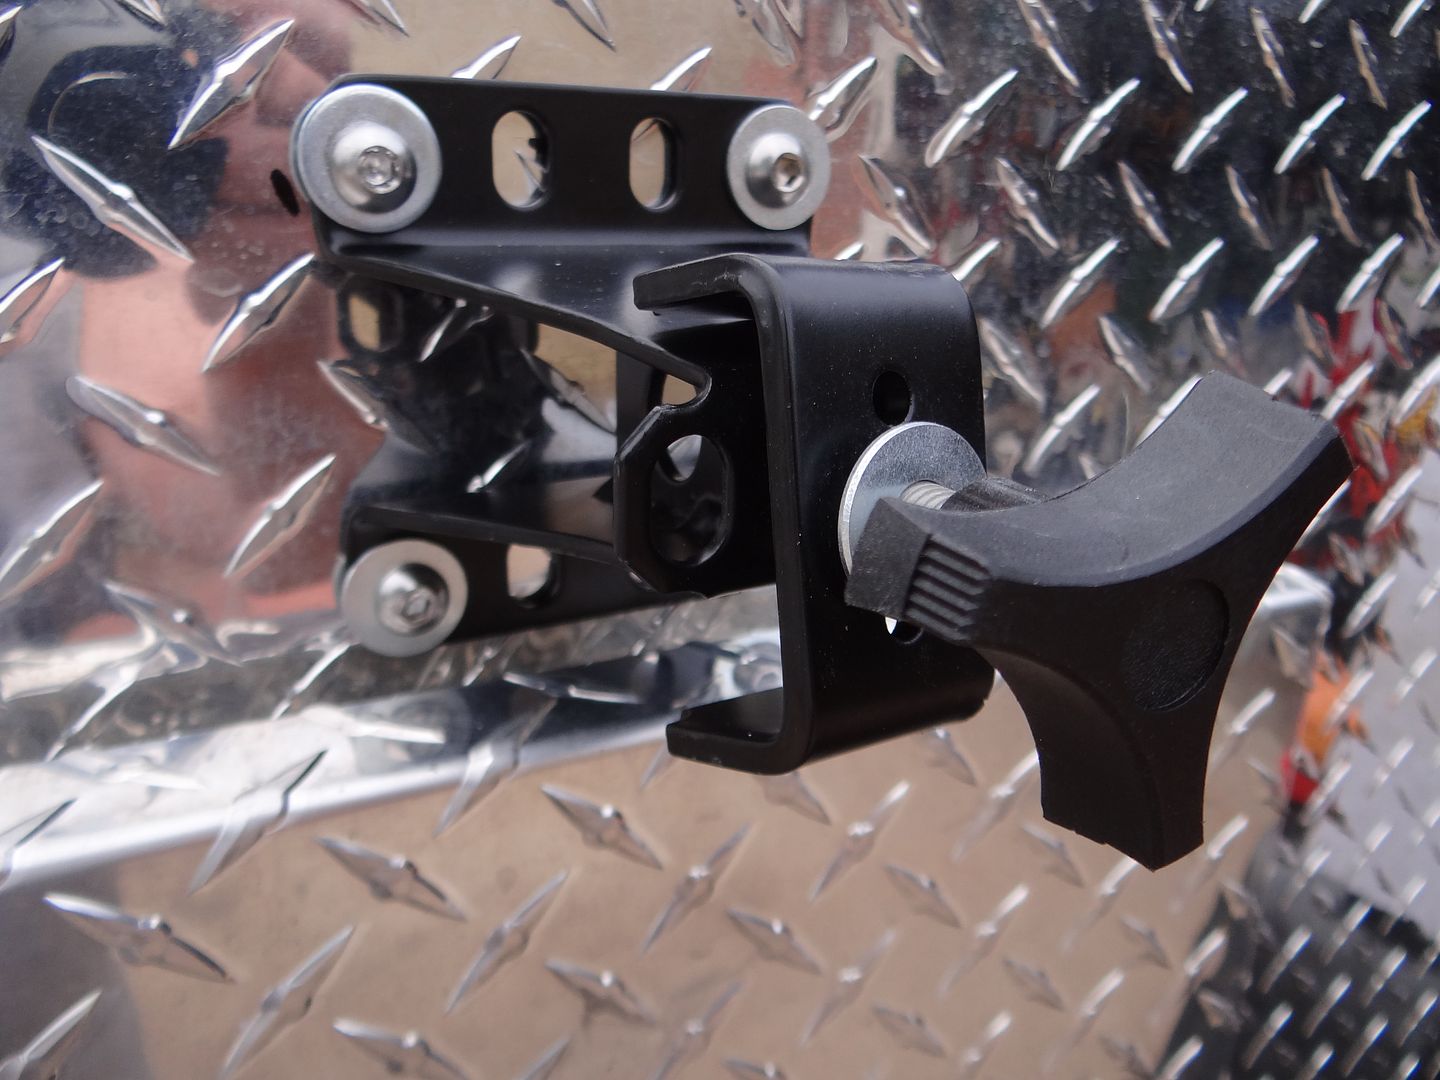
Am I done yet? Probably not, I have unused space on my trailer yet and there are plenty more ideas I can give you when it comes to optional gear. How about a vise for making trail repairs, especially to replace broken u-joints? Ever been on the trail after a storm or even a little used trail where a huge tree is blocking the road? How about mounting a chain saw? Just for occasions such as those I went to Mac's Tie Downs and got their Trail-D Vise, Ball Mount Sleeve and Chainsaw Scabbard with Universal Mount. For that rare flat tire, how about a Hi-Lift Jack and a way to mount it? We went to Hi-Lift Jacks website and chose their all cast 48" jack and found the perfect mounting solution at Warrior Products with their Hi-Lift Jack mount #4870.
And then there is the question of water storage. Originally I had thought about a frame mounted tank with an electric pump. When it was all said and done, the cost and complexity of doing this was just too much. With the amount of remaining space I had available both up front and on the sides, it made sense to use the Daystar Cam Can system for water. This compact and unique system of transporting fuel, water, tools and more will work perfectly with the remaining space I have left. Each can holds 2 gallons of water, are easy to put on and take off with their unique mounting system and can also be used to mount Cam Cans to your spare tire.
That's about it. I've tried to give you lots of ideas of the many options you could choose to outfit your new trailer with. Some of them very necessary, some of them not but all of them something to consider. Was this a complete list? Not by far and as you've probably already guessed, I've added a bit more than $2500 in options to my trailer. Still, I might add a shovel or Max Axe. Maybe some of MAC's tie down tracks in the inside to keep things secure. An awning from Cascadia Tents to keep me dry in wet weather or shady in the hot sun? LED lighting from Rugged Ridge for when you get back from that day on the trail and the sun's gone down? What about storage containers inside? There are lots of options available for that including my favorites the Rubber Maid Action Packer storage boxes.
The point is YOUR list of options is as little or as much as you think you need and can be added as your wallet will allow.
In the next and final Part #3 (February 2016), we'll add a Cascadia (CVT) Roof Top Tent and build our levitating rack system to mount it to and perhaps a few last options.
STAY TUNED !
Supplier Listing:
Cascadia Tents - http://www.cascadiatents.com/
Industrial Metal Supply - https://www.industrialmetalsupply.com/
Auto Safety House - http://www.autosafetyhouse.com/
ARK Corporation - http://www.arkportablepower.com/
RotoPax - http://home.rotopax.com/index.php
Detours USA - http://www.detoursusa.com/
Daystar - http://www.daystarweb.com/
SUSPA - www.suspaparts.com
Rugged Ridge - http://www.ruggedridge.com/
Steinjager - http://steinjager.com/shop/index.php
Rock Slide Engineering - http://www.rockslideengineering.com/
MAC's Tie Downs - http://www.macscustomtiedowns.com/
Hi-Lift Jack - http://www.hi-lift.com/index.html
Optima Batteries - http://www.optimabatteries.com/en-us/
Tembo Tusk - http://www.tembotusk.com/
Engel - http://www.engelcoolers.com/fridge-freezers/fridge-freezers/portable-top-loading-models
Traction Jack - www.tractionjack.com/
Viking Cylinder - http://www.vikingcylinders.com/
Warrior Products - http://www.warriorproducts.com/
Flag Pole Buddy - http://flagpolebuddy.com/
Bumper Dumper - http://www.bumperdumper.com/
Outback Porta Privy - http://portablecampingshowers.org/portable-shower-tent/outback-porta-privy


And then there is the question of water storage. Originally I had thought about a frame mounted tank with an electric pump. When it was all said and done, the cost and complexity of doing this was just too much. With the amount of remaining space I had available both up front and on the sides, it made sense to use the Daystar Cam Can system for water. This compact and unique system of transporting fuel, water, tools and more will work perfectly with the remaining space I have left. Each can holds 2 gallons of water, are easy to put on and take off with their unique mounting system and can also be used to mount Cam Cans to your spare tire.


That's about it. I've tried to give you lots of ideas of the many options you could choose to outfit your new trailer with. Some of them very necessary, some of them not but all of them something to consider. Was this a complete list? Not by far and as you've probably already guessed, I've added a bit more than $2500 in options to my trailer. Still, I might add a shovel or Max Axe. Maybe some of MAC's tie down tracks in the inside to keep things secure. An awning from Cascadia Tents to keep me dry in wet weather or shady in the hot sun? LED lighting from Rugged Ridge for when you get back from that day on the trail and the sun's gone down? What about storage containers inside? There are lots of options available for that including my favorites the Rubber Maid Action Packer storage boxes.
The point is YOUR list of options is as little or as much as you think you need and can be added as your wallet will allow.


In the next and final Part #3 (February 2016), we'll add a Cascadia (CVT) Roof Top Tent and build our levitating rack system to mount it to and perhaps a few last options.
STAY TUNED !
Supplier Listing:
Cascadia Tents - http://www.cascadiatents.com/
Industrial Metal Supply - https://www.industrialmetalsupply.com/
Auto Safety House - http://www.autosafetyhouse.com/
ARK Corporation - http://www.arkportablepower.com/
RotoPax - http://home.rotopax.com/index.php
Detours USA - http://www.detoursusa.com/
Daystar - http://www.daystarweb.com/
SUSPA - www.suspaparts.com
Rugged Ridge - http://www.ruggedridge.com/
Steinjager - http://steinjager.com/shop/index.php
Rock Slide Engineering - http://www.rockslideengineering.com/
MAC's Tie Downs - http://www.macscustomtiedowns.com/
Hi-Lift Jack - http://www.hi-lift.com/index.html
Optima Batteries - http://www.optimabatteries.com/en-us/
Tembo Tusk - http://www.tembotusk.com/
Engel - http://www.engelcoolers.com/fridge-freezers/fridge-freezers/portable-top-loading-models
Traction Jack - www.tractionjack.com/
Viking Cylinder - http://www.vikingcylinders.com/
Warrior Products - http://www.warriorproducts.com/
Flag Pole Buddy - http://flagpolebuddy.com/
Bumper Dumper - http://www.bumperdumper.com/
Outback Porta Privy - http://portablecampingshowers.org/portable-shower-tent/outback-porta-privy
rnArmy
Adventurer
Very nicely outfitted. It's nice when your trailer and all the additional "stuff" still comes in under price-wise what a bare empty off-road type trailer would cost.
How much is that ARK XO coupler thing? I'm wondering how it compares cost-wise to other multi-axis couplers.
I wish Diamond Deluxe would start advertising in the truck/Jeep/4x4 magazines their trailer tubs. A lot of folks out there know they want an off-road/expedition trailer, can build or modify a HF trailer frame, but then are lost when it comes to a trailer tub. These diamond plate aluminum tubs are perfect.
Last edited:
Similar threads
- Replies
- 2
- Views
- 718
- Replies
- 3
- Views
- 572
- Replies
- 0
- Views
- 1K
- Replies
- 7
- Views
- 626