The rebuild of a 1994 Northern Lite 8-4

adamavis

New member
Hey all, I wanted a place to document this build from the beginning to the end. Hope you find it interesting!

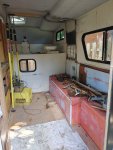
So the story starts with facebook marketplace. I see a northern lite camper for sale. I jumped on it as soon as I could and arranged to go see it. It was about 1hr away from me.

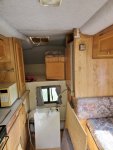
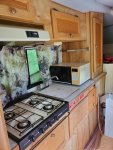
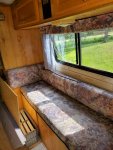
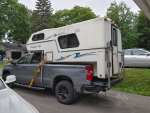
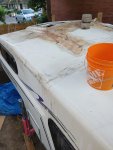
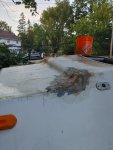
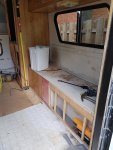
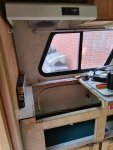
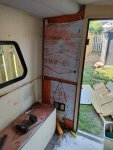
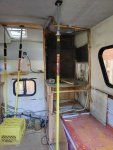
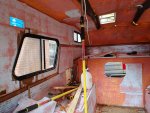
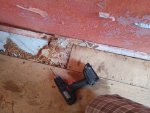
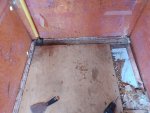
When I arrived the camper was in worse shape than the pictures. The roof has accident damage, which I wasn't told about. I took the owners word that it only needed like 1 more coat of fiberglass. There is substantial water damage, like everything is rotten and will need to be gutted. Knowing I have ZERO free time and that this project will likely take the better part of a year, I did the logical thing and got him down a bit and took her home with me! :D
 

Attachments

  • frontext.jpg
    frontext.jpg
    33.8 KB · Views: 178
  • extleft.jpg
    extleft.jpg
    61.7 KB · Views: 189
  • incenter.jpg
    incenter.jpg
    402.6 KB · Views: 190
  • inleft.jpg
    inleft.jpg
    483.2 KB · Views: 183
  • inright.jpg
    inright.jpg
    599 KB · Views: 174
Last edited:

adamavis

New member
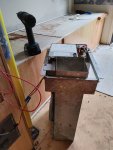
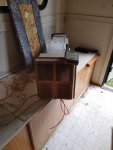
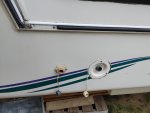
Initial thoughts about the interior. Seeing as the camper has significant water damage, It was accidented and the sleeping cab has mold and all the panels are rotten. 90% pf the cabinets are also rotten. Everything is coming out down to the structure. Even the foam. The foam is extremely heavy because it actually absorbed water. Its all garbage inside. Every frigging seal on the outside of the camper leaks. that's lights.. fill ports, extention cord hookup, fridge vents, access doors...

There's a lot of things about my newly acquired 1994 northern lite 8-4 that i dont like. Space is a serious premium and im retrofitting this to sleep 2 adults and 2 kids. The work will entail fiberglassing a lot of holes from things and extending the bench to an L shape to fit 2 kids.

1) What is the purpose of that knee high tiny window in the front? Im planning on removing it. When I look into the window I see the backdoor of the camper.

2) there is a 54liters (15 ish gals) fresh water tank. Why? There's no shower, no bathroom, just a single unheated water line to the sink. Im going to ditch the tank because it's broken and also leaking. I'll probably use the 2 jugs under the sink thing.

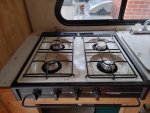
3) a 4 burner stove top. Gordon Ramsey is not coming on any trips sadly. DELETED! Also removing the vent and patching the hole.

4) a 10000 btu propane heater. Unless youre sleeping on Mars, a candle or even a fart could warm this thing up. Way overkill. I put it on for 30 mins and temps went over 100f..
Deleted!

5) The fridge is also broken. I turned it on and this intense ammonia smell came out.. What I read is that it's expensive to fix. I'm going to the cheap route and putting in a 1.7cu ft 120v one. Ill be shore power mostly. Ive done this inverter / 120v system for a fridge before and it worked fine. Need to patch a big hole in the side of the camper and the roof.
 

adamavis

New member
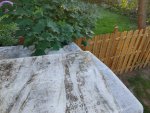
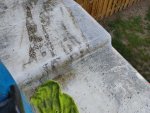
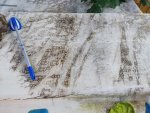
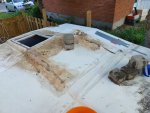
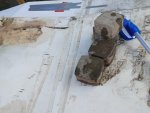
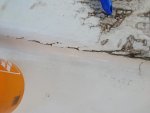
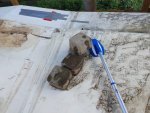
Alright, progress report... the roof was covered in a couple years of dirt and moss, so the first order of business is to clean it up. Under the dirt, the cracks start to appear... Also the previous fiberglass repair seems to be .. questionable. The previous owner is using polyester resin. I will have to research what NL used in production as poly doesnt stick well to epoxy. The inverse is ok though, epoxy (like West marine 105) will stick to poly. Poly also has less strength than epoxy.. So I'm not sure what Im going to use at this stage.
 

Attachments

  • 1.jpg
    1.jpg
    6.4 MB · Views: 85
  • 2.jpg
    2.jpg
    6.2 MB · Views: 78
  • 3.jpg
    3.jpg
    6.1 MB · Views: 71
  • 4.jpg
    4.jpg
    6 MB · Views: 70
  • 20210706_193709.jpg
    20210706_193709.jpg
    1.7 MB · Views: 79
  • 20210706_193721.jpg
    20210706_193721.jpg
    5.3 MB · Views: 85
  • 20210706_193724.jpg
    20210706_193724.jpg
    5.4 MB · Views: 78
  • 20210706_193726.jpg
    20210706_193726.jpg
    4 MB · Views: 74
  • 20210706_193738.jpg
    20210706_193738.jpg
    5.5 MB · Views: 75
  • 20210706_200014_HDR.jpg
    20210706_200014_HDR.jpg
    1.8 MB · Views: 72

adamavis

New member
The smell in this camper is a combination of ammonia, mold, dead dog and something else vile. After looking at my wish list and seeing the roof, I'm deciding to do a full gut down to the fiberglass shell. I'd rather attach the patches to the fiberglass from both sides anyways. My end goal here is to build this out so that my wife and 2 young kids can sleep in the camper. To accomplish that, I need to create an L shaped bench on the lower unit.

I decided to remove the entire propane system. I rarely cook inside and 4 burners is overkill. It takes up 30% of the counter.if I do cook its to make coffee and I have a butane burner for that. The heater is ridiculously overkill for this camper, so I took it out. I may keep a sink on the counter, but I have an outdoor camp kitchen, but would like a small system inside so the kids can brush their teeth (or dad can pee) Fridge comes out, because it was broken. I will move a new one to the left side of the rig. For now, it's time to remove some rotten panelling, flooring and cabinets.....
 

Attachments

  • 20210709_164547_HDR.jpg
    20210709_164547_HDR.jpg
    1.4 MB · Views: 97
  • 20210709_165852_HDR.jpg
    20210709_165852_HDR.jpg
    1.2 MB · Views: 90
  • 20210709_172308_HDR.jpg
    20210709_172308_HDR.jpg
    4.8 MB · Views: 87
  • 20210710_144014_HDR.jpg
    20210710_144014_HDR.jpg
    2.3 MB · Views: 94
  • 20210710_144036_HDR.jpg
    20210710_144036_HDR.jpg
    1.6 MB · Views: 94
  • 20210710_151220_HDR.jpg
    20210710_151220_HDR.jpg
    1.6 MB · Views: 101
  • 20210710_153003_HDR.jpg
    20210710_153003_HDR.jpg
    1.6 MB · Views: 104
  • 20210710_162201_HDR.jpg
    20210710_162201_HDR.jpg
    1.9 MB · Views: 107

adamavis

New member
There's going to be a lot of holes to fiberglass up aside from all the damage. Here's a short list...

  1. Water fill ( I removed the 54 liter tank).
  2. Water drain hole
  3. 7 pin connector is being relocated. old hole to be be filled.
  4. removing front window. (big hole)
  5. fridge lower vent (20" wide!)
  6. fridge roof vent
  7. furnace vent
  8. Stove vent
  9. 4 propane line holes
  10. 4 stock tie down brackets and holes. (Brackets wont work for tie downs. I will use the jack mounts
I think thats it?

Plus there's damage in about 11 different places of the camper. Some more extensive...
 

NOPEC

Well-known member
I have recently done two versions of your project, one mild and one radical. A few suggestions for your "holes to be filled" list .....?

I would suggest getting the rid of the little goofy light/handle thing by the door(I am sure the lens has long since UVed into a 100 pieces). I had one of these on each of the builds I did, so I chased the wires from them higher up the back inside the outer shell and put in a dedicated marine LED light and then covered in the original hole and added a proper handle. I also removed the windows (there were two on my camper) from the door and put fiberglass plates over most of the door, inside and out. These RV doors are pretty crappy to start with and the window hole makes them even more floppy and these thin plates really stiffened them up. When you get a minute, pull one of your clearance lights and check how large the hole is that houses the bulb assembly. Mine were huge in diameter so I glassed over almost all of each of the holes except for a small space to allow the wires to protrude. I then used small LED clearance lights, much brighter, easier to seal and kinda cool.

If you are looking for a cheap source of flat, good quality fiberglass, look around for a plain style truck canopy for a long box. Something with a one level roof line and as few poofy bends and twists as possible. Some will have two layers of glass, held apart by a paper mesh. You have fiddle a bit with them to glean the good stuff but being in a small town with no commercial access to proper sheet material, they worked great for my projects. The ones I ended up with were pretty beat up cosmetically and I had to pay a considerable bribe after getting the stink eye when they arrived in the yard at our house but at the end of it, I was still ahead. Cost me a case of beer each (plus the domestic payoff, which was way more..).

I used West Systems 105 epoxy and TotalBoat TotalFair fairing compound and was delighted with how each performed. You will probably ending up using three times what you figure on initially so I suggest just bite the bullet and start off with the "large" sizes!! I went to my local marina and got all of my supplies, including sikaflex products, for a price matching of Amazon and other online sources (suspect the margins are pretty high on these products so they seemed to have some wiggle room in their pricing).

Anyway, just some thoughts. Good luck with the project and I look forward to following your success!!
 

adamavis

New member
@NOPEC Man you read my mind on a lot of your suggestions.. I bought some bondo resin for the smaller holes and I'll lay that up with cloth. For the bigger holes and the roof repair I think I will do the west marine 105/205 system. I starting ripping out the rigid foam today. So much of it was water logged and delaminated.
Did you ever go down to the shell? Do you know what they glued it with? It's all pink..

Just checked those marker lights, they are perfect (3/4" LED)

Oh, Im going to delete the city water and drain. If anything I'll have a 2 jug system.

I had 5 windows in mine, 2 on each side (lower/upper) and a center one. I deleted the center one today I thought about removing the left side one in favor of wall to wall cabinets. Maybe an A/C too.. So many ideas...

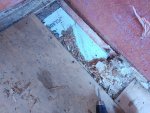
Almost done the gut... the floor was pretty bad from the so called "repair" the owner did. Rotten... After I seal everything I think I will epoxy in the new foam....
 

Attachments

  • 20210718_121122_HDR.jpg
    20210718_121122_HDR.jpg
    5 MB · Views: 103
  • 20210719_101311.jpg
    20210719_101311.jpg
    4 MB · Views: 92
  • 20210719_104228.jpg
    20210719_104228.jpg
    6.2 MB · Views: 92
  • 20210719_104231.jpg
    20210719_104231.jpg
    5.6 MB · Views: 92
  • 20210719_104234.jpg
    20210719_104234.jpg
    5 MB · Views: 89

NOPEC

Well-known member
@NOPEC Man you read my mind on a lot of your suggestions.. I bought some bondo resin for the smaller holes and I'll lay that up with cloth. For the bigger holes and the roof repair I think I will do the west marine 105/205 system. I starting ripping out the rigid foam today. So much of it was water logged and delaminated.
Did you ever go down to the shell? Do you know what they glued it with? It's all pink..

Just checked those marker lights, they are perfect (3/4" LED)

Oh, Im going to delete the city water and drain. If anything I'll have a 2 jug system.

I had 5 windows in mine, 2 on each side (lower/upper) and a center one. I deleted the center one today I thought about removing the left side one in favor of wall to wall cabinets. Maybe an A/C too.. So many ideas...

Almost done the gut... the floor was pretty bad from the so called "repair" the owner did. Rotten... After I seal everything I think I will epoxy in the new foam....

Good For you, the gut is going well.

Couple other things to add.

Yes, I did get down to the inside of the exterior shell in a few places, but nothing as extensive as yours, my campers started off in much better condition than yours. I had the same pink stuff, I think it was some sort of non permanent contact glue, it was still tacky in a few spots after all of the years being in place.

My last build, the radicalish one, had a different objective than I think yours does. We wanted the "New Old Perfect Expedition Camper" (thus my Avatar.....NOPEC) to be as good as the fancy dancy late model Bigfoot 8.2 we had, but just simpler and with all of the systems that we wanted and none that we didn't want. So I built it exactly the way we wanted it, not holding back on anything once it was decided on. Our situation is different in that we are retired, childless, travel a lot all year around and are well into senior citizenhood. So we wanted good cold weather performance, pressurized water, the shower, convenient stovetop cooking inside, N/S bed and especially, the bathroom. (your day will come.....). So this build worked for us and is different that your needs as you have described but hopefully, some of the ideas might be of some use to you.

We too got rid of the external city water and fill spigots. Glassed over. We replaced our original water tank with a new one and included a 6 inch top cleanout hatch so we just fill with a hose from and screw on filter from the inside, right into the tank.

At the back end, couple of thoughts. We glassed over our back hatch (like yours) and built our interior cupboards so we had access to the same space from inside. My experience, especially with propane hatches located at the back of the camper is that the water and mud just swirls around back there and seems to inject itself into everything. It is hard enough keeping the door moisture and dust sealed, without having stuff back there you don't need.

I added a stainless Steel/LED exterior license plate bracket which did I had my interior ripped apart. Totally easy. With the length of these 8+ feet campers, it is hard to see the license plate down on the bumper. I like having it up so that the police and the border crossing cameras can see it easily.......

I am sure the crappy RV quality "door hold latch" has mostly disintegrated by this time. There are nice SS ones out there that look pretty snappy, will last and work really well.

Still trying to fill holes, I went to surface mount LED taillight instead of having the honking big holes that came from the factory. Glassed over.....

Another product for small areas that I have used with great success is PC-11 white epoxy adhesive. It is two part, equal amounts of A/B, very easy to apply and is rock hard when dry.

Anyway, just a few more thoughts. It is Happy Hour in BC so will leave this here. Cheers
 

Photomike

White Turtle Adventures & Photography
I had a 1992 9'6" NL I bought back in the 2000's. It had some issues when I got it but nothing like yours.

The one thing that I STRONGLY recommend is pull the windows and all the vents, clean, clean and clean and reseal really well when installing. Also clean the tracks on the windows so water can drain out.

I had a couple leaks when I got it (Window, exhaust vent over the stove and roof vent).

Window I got easily by cleaning the caulking, running a small bead around the outside of the frame and opening the drain holes in the track.

Roof vent every time I resealed it It would be fine for 6 - 8 months then leak AGAIN. Finally pulled the vent off, tossed the old one, cleaned the fiberglass lightly with a power sander to remove all the gunk. rebuilt the wooden frame inside between the fiberglass and the inside roof so the screws had something to bit into, sealed really well and installed. Never leaked again.

The exhaust vent was the hardest. Would only leak in extreme rain, but when it leaked it was a river. Pulled the vent, cleaned and resealed. Leaked. Pulled again and resealed, leaked. This went on for years. Finally one day I pulled the exhaust fan completely out. Pulled the outside vent and started digging around with my finger. After a while I found the problem. When NL cut the hole for the vent they punched a hole in then router-ed out the opening. Problem was the hole was slightly lower then the opening and went through the fiberglass and into the insulation. It was filled with caulking but water would still find a way in. I cleaned it out with a screwdriver and build a ledge out of caulking and wood. Then made a piece that had a little lip running out and down the side so water could only go out and down and not back up. A lot of work but it never leaked again.

I love NL's as they are a great unit but they do act as a terrarium when water gets in.
 

adamavis

New member
I will pull all windows, technically with the walls down to the fiberglass they are all loose and no longer bonded. I went back and forth about how to seal them and now I plan on resealing with 3m automotive windshield adhesive.

3M 08693 Auto Glass Urethane Windshield Adhesive Cartridge - 10.5 fl. oz.3M 08693 Auto Glass Urethane Windshield Adhesive Cartridge - 10.5 fl. oz.
 

dongboyz

New member
What do you think the weight is of the NL8-4? I'm trying to find more information about the older Northern Lites in the 6-8ft range. I'm confused because I've seen an ad for a NL8-4 like yours that lists the weight as 1800lbs. I also saw an ad for a NL9 (that looks like yours) and the picture of the sticker says 448kgs. Did Northern lite make a 9ft and 8-4ft model? Confused how the NL9 would weigh less than the NL8-4. The owner of the NL8-4 does not have a sticker posted to confirm the model number or weight.

Also, is your truck bed a 6.5ft?
 

adamavis

New member
What do you think the weight is of the NL8-4? I'm trying to find more information about the older Northern Lites in the 6-8ft range. I'm confused because I've seen an ad for a NL8-4 like yours that lists the weight as 1800lbs. I also saw an ad for a NL9 (that looks like yours) and the picture of the sticker says 448kgs. Did Northern lite make a 9ft and 8-4ft model? Confused how the NL9 would weigh less than the NL8-4. The owner of the NL8-4 does not have a sticker posted to confirm the model number or weight.

Also, is your truck bed a 6.5ft?


Truck is 6.5 feet, yes.

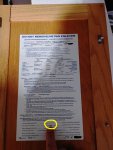
The weight of this one stock was 440kg. Mine is stripped so I must have taken out a good 300-400lbs. The inside layout is almost the same as the 6-10 model. I forget what year it was but they changed the model and it became the newer style 8ft model and it became heavier. Has a bathroom, basement, etc...
 

Attachments

  • thumbnail.jpg
    thumbnail.jpg
    310.8 KB · Views: 30

Forum statistics

Threads
187,898
Messages
2,899,718
Members
229,072
Latest member
fireofficer001
Top