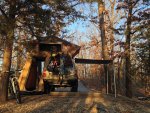
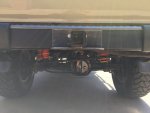
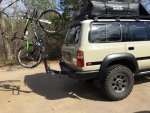
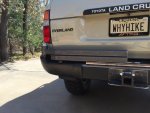
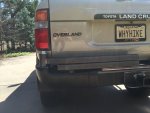
The Restoration And Build Thread For My 1992 FJ80

Summit Cruisers Jr

Well-known member
How did you come up with your lift combination?

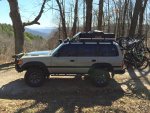
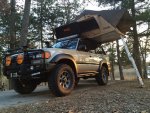
It just kind of happened. I started with the Ironman kit. As soon as I added the bumper and winch, the front settled so we did the custom spacers to level the ride height. It had a slight lean so the 15mm Metal Tech spacer really leveled it out so it sits perfectly. When we redid the body mounts, gaining height was not in the plan. The body had settled since the addition of the roof rack and RTT, and the pinch weld was rubbing on the slider outriggers. One by one, the mounts came out in pieces so I made new mounts 1/2" bigger than what came out thinking that would return it back to stock height, but it ended up giving it a half inch body lift.
 

Summit Cruisers Jr

Well-known member
Lover your Land Cruiser. Thanks for posting for everyone to enjoy.

What bike rack are you using? I'm very interested.

Thanks. The bike rack is a Northshore NSR-4.

Here's their website.
https://www.northshoreracks.com/NSR 4-bike.htm
It holds all sorts of mountain bikes without them hitting. I have been really pleased with it. The only downside that I have found, is that it rubs the paint on the my white fork's crown. Due to the way it holds the bikes around the crown and head tube, it won't hold road bikes FYI.
 
Last edited:

Matttathome

New member
Having been one of the "cruiser" people that stopped to check out your truck at Coffee and Cars I can say that it is one of the cleanest and most well thought out trucks I've seen! Very good attention to detail and looks as good close up as it does in pictures! It was a pleasure speaking with you and your dad about your rigs.
 

Summit Cruisers Jr

Well-known member
Ozarks and Swing Out Outrigger

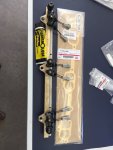
Camping trip went well besides the injector leak that developed. New OEM gaskets and parts are on the way, as are some new 4 hole injectors off ebay. Hopefully new injectors will give a little more power and fuel efficency to the 3FE.
image.jpg
image.jpg
image.jpg

Made some really good progress on the swing out yesterday.

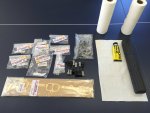
Here's the materials I have/will be using

A really beefy 1 3/4 spindle from Comp4x4
http://www.comp4x4.com/Tire-Carrier-Hinge-Kit-HEAVY-DUTY-1-3-4-Spindle.html

A spring action locking T pin
http://www.amazon.com/gp/aw/d/B00GA...&dpID=31k-d7LiTZL&ref=plSrch&pi=AC_SY200_QL40

A Powertech latch action toggle clamp
http://www.amazon.com/gp/aw/d/B004K5YW0K/ref=pd_aw_sims_1?pi=AC_SY230_QL60

A pair of clear LED brake/turn signals
http://www.amazon.com/gp/aw/d/B00J9...light+oval&dpPl=1&dpID=41QV21elNTL&ref=plSrch

Various Supplies
1/4" plate
2x4x3/16 square tubing
2x2x3/16 square tubing
Aluminum flat strip
2 1/8 hole saw
2" reciever tube
Polyurethane

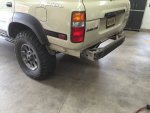
I started by removing everything on the back of the truck. Mud flaps, bumper wings, reciever hitch, aluminum step plate, and the trim on the driver's side bumper wing. I then unbolted the factory tire carrier underneath alone with its mounts.
image.jpg
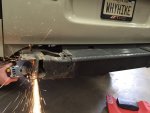
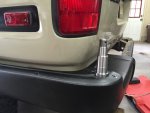
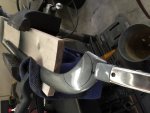
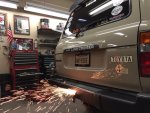
Then out came the grinding wheel. The bumper wing support had to come off in order to make room for the arm that will hold the spindle.
image.jpg
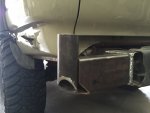
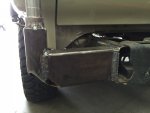
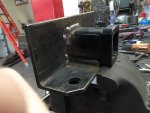
Then using a 5x4 piece of 1/4" steel, we welded that on to cover up the holes in the frame and give us an even stronger place to mount the spindle arm.

In order to get the bumper wing to fit, we had to trim the bottom of the sleeve and the arm.

image.jpg
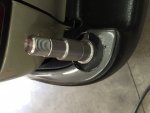
Then we measured and cut a hole in the bumper wing. Then we tacked the arm to the 1/4" plate and the 6.2" spindle sleeve to the arm.
image.jpg

In order to take he bumper wing off once the spindle is welded in place, we needed to enlarge the hole. I traced out where the spindle cover reached and used a rotozip to cut it out. This allows enough wiggle room to remove the bumper wing when the spindle is welded in.
image.jpg

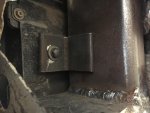
I then fully welded up everything, and welded on a piece of angle iron to bolt down the bumper wing with.
image.jpg
image.jpg
 
Last edited:

Summit Cruisers Jr

Well-known member
Cleanly Installed Spindle

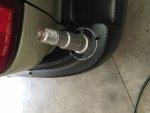
With the wing bolted on, our focus turned to the bumper trim. On the swing out builds I have seen, the bumper trim wasn't used, but I wanted to use it to keep it looking as OEM as possible. I traced out where the spindle sleeve sat and then transferred those measurements over to the trim.
image.jpg
To hold the trim and keep it from getting bent, we dropped out two holes in a piece of wood that the studs on the back could sit into. Then various clamps were used to keep it down and to try and reduce vibrations when it was cut with the air saw.
image.jpg
I tried to save the paint from getting damaged, but we had to repaint it anyways. We also sanded down the edges to clean up the cut.
image.jpg
Then it was sprayed with a self etching primer and satin black to prevent rust.
image.jpg
I also started making the polyurethane stop plates that the swing out will stop into and drilled the end of a piece of 2x2 to fit into the spindle sleeve. Hopefully I will have it done and ready for paint next Saturday. Right now I'm thinking about painting the swingout to match the gray trim/wheels, gloss black, or bed liner.
image.jpg
 
Last edited:

Summit Cruisers Jr

Well-known member
Osidetiger Injectors and Relocated Receiver Hitch

Cool build so far.....

Thanks!

We spent 10 hours yesterday installing new Osidetiger 4 hole fuel injectors after an injector started leaking. The install went pretty good until tightening the intake back down. Using a torque wrench at the required spec in the FSM, one tired bolt just broke before it was tight. I would recommend buying new bolts if you are replacing injectors/gaskets to save a lot of headache.

The truck seems to start up smoother and quicker, and also has a little bit better throttle response initially. It also seems to be smoother while idling. Haven't driven it much since the install, but hopefully fuel mileage will stay the same, if not improve.
Gaskets from Cruiserdan on Ih8mud
inj1.jpg
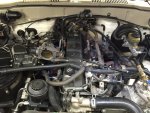
This was the most this engine has ever been apart.
inj2.jpg
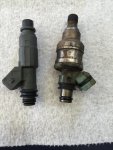
New injector on the left and the old OEM one on the right.
inj3.jpg
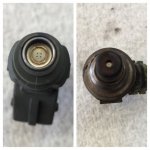
4 holes vs 1 hole
inj4.jpg
New injectors lined up on the cleaned fuel rail. It was nice having so much apart. Got to clean a lot of things that had also been out of reach.
inj5.jpg

Since the EGR system had been deactivated years ago, we also planned to remove that entire mess, but couldn't find plugs and caps locally. That stuff will have to stay for a little while longer.

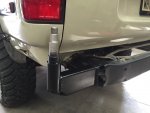
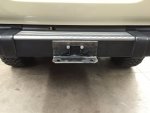
Once that was completed, we started working on relocating the receiver into the rear cross member. We trimmed down an old plate we had that went behind a pintle hitch. The plate will also hold the latch points for the swing out latches.
re1.jpg
Plasma cutter made short work of the thick metal
re2.jpg
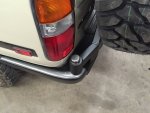
The 2" receiver was welded in with a spacer below. The welds had to be ground down a little bit to allow the bolts to fit.
re3.jpg
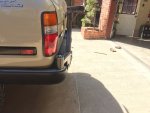
Definitely looks much better than having a big nasty receiver hanging down.
re4.jpg
Now I have 28" of clearance between the ground and the bottom of my bike.
re5.jpg
 
Last edited:

Summit Cruisers Jr

Well-known member
Swing Out Arm

With the receiver/latch plate completed, we could start building the swing out arm. I could have just done 1 2x2, but didn't want to see a gap between the top of the bumper and the bottom of the swing out. Notching and bending the 2x2's to be flush with the rear cross member was the trickiest part. It took a couple of tries.
so1.jpg
so2.jpg
so3.jpg
I welded up the backside and the notched portions and then the welder ran out of wire midway through welding up the front. Hopefully getting this project finished next weekend.
so4.jpg
 
Last edited:

lt1fire

Adventurer
I've been thinking of doing the same kind of swing out also.

Good to see another 3FE 80 out there. I used to tell people don't tell me about slow untill you've driven a 3fe with stock gears and 37" tires. Now I tell them don't tell me about slow untill you've driven a 3FE with 4.88s and 39" tires. My home brew turbo kit in my garage may help with that soon enough though and the planned H55 (manual transmission) swap in a few years will help even more..... then who knows?? A 2FE with a mega squirt system???

Love the color combo also.
 

dubbinchris

New member
I've been thinking of doing the same kind of swing out also.

Good to see another 3FE 80 out there. I used to tell people don't tell me about slow untill you've driven a 3fe with stock gears and 37" tires. Now I tell them don't tell me about slow untill you've driven a 3FE with 4.88s and 39" tires. My home brew turbo kit in my garage may help with that soon enough though and the planned H55 (manual transmission) swap in a few years will help even more..... then who knows?? A 2FE with a mega squirt system???

Love the color combo also.

Megasquirt is a cool idea. I come from the modified German car world where mega squirt is well known.
 

Summit Cruisers Jr

Well-known member
I've been thinking of doing the same kind of swing out also.

Good to see another 3FE 80 out there. I used to tell people don't tell me about slow untill you've driven a 3fe with stock gears and 37" tires. Now I tell them don't tell me about slow untill you've driven a 3FE with 4.88s and 39" tires. My home brew turbo kit in my garage may help with that soon enough though and the planned H55 (manual transmission) swap in a few years will help even more..... then who knows?? A 2FE with a mega squirt system???

Love the color combo also.

Homebrew turbo? That sounds good. I have ideas floating around in my mind, but too much uncertainty and not enough time for a turbo build.

Impressive thoughtful quality....well done!

Thanks!

Did you notice any mpg gain with the injectors??

What mpg are you getting? With the RTT??

MPGs have seemed to increase. Usually I get around 10-11 mpgs with and without the RTT. I only have 86 miles on it right now, but my fuel gauge is definitely not as low as it would usually be.
 

Summit Cruisers Jr

Well-known member
Swing Out is Almost Done

Once the arm was welded up, we could weld it to the outer spindle housing. It took at least two hours just to get the arm to have a level look with the bumper.
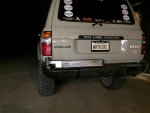
image.jpg
Early the next day, we started on the upright, stop plates, wheel plate mount, and the gussets. I ended up grinding down the welds on the front and then smoothing it out with a flap disk for a very clean smooth look.
-
I wanted the tire slightly tilted because it was higher than the tailgate and I wanted it parallel with the lower metal on the hatch. Getting the right angle for this also took longer than expected.
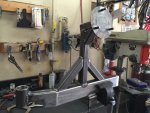
image.jpg
-
Then came the stop plate. It is 1/4" angle iron spaced out slightly to follow the shape of the bumper wing. Behind it is a polyurethane stopper that has a recessed place for the nut to hold it on.
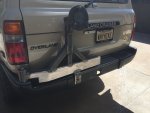
image.jpg
image.jpg
After using the receiver for a week, I wanted to redo the design and place bolt holes further out for more strength. The bolts right around the receiver in the factory 4 holes made me nervous. Especially when I hauled several bikes.
-
The latch hook was welded onto the receiver plate. The swing out also needed a stop pad that would keep the arm from flexing and putting stress on the spindle. So I made another polyurethane spacer with a slightly slanted top that the swing out stop slide into. Then I recessed hole for a self tapping steel screw.
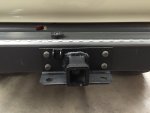
image.jpg
-
In order to make the hollow aluminum cross step stronger, we went to the local hardware store and bought a 48" strip of 1/8" flat aluminum. Cut that into three pieces and pushed them into the cross member. We also put some gorilla glue tape between the pieces to keep them together and make it a really tight fit.
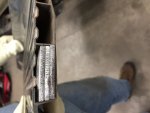
image.jpg
-
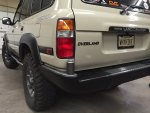
To address the issue of the license plate being covered up, we used some aluminum U channel with nylon spacers behind it to bolt it on. Eventually, I will mount the license plate on the swing out with the cooler, but for now this will do.
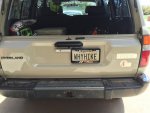
image.jpg
-
Using a hopper gun, we shot on a healthy coat of Rustoleum Bed Liner.
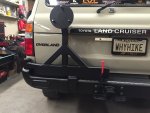
image.jpg
Top cap painted to match trim
image.jpg
Also painted the receiver with the same bed liner. This is the same stuff the bumper wings, flares, hood vents, and rear cross member are sprayed with.
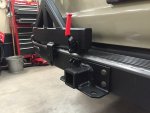
image.jpg
 
Last edited:

Forum statistics

Threads
188,392
Messages
2,906,569
Members
230,176
Latest member
Arcadia1415
Top