You are using an out of date browser. It may not display this or other websites correctly.
You should upgrade or use an alternative browser.
You should upgrade or use an alternative browser.
The Rolling Restoration & Customization Of My 88' Range Rover Classic
- Thread starter rrclassicbt550
- Start date
rrclassicbt550
Farmer Jon
rrclassicbt550
Farmer Jon
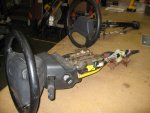
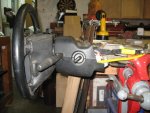
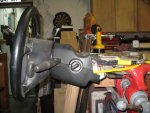
Does anyone have or can get me pictures of the steering column support that attaches to the firewall in a 1995 RRC? I will post a couple of pics from the Land Rover manual to show what I am talking about. I would loved to be able to get ahold of an actual Land Rover made part, but due to my time constraint if I could get pictures and some measurements that would save me a load of time.
Thank you in advance for any help you can provide!
Jon
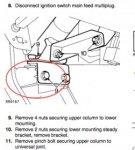
Thank you in advance for any help you can provide!
Jon

rrclassicbt550
Farmer Jon
I have a set of early brackets (both sides with flip and tuble) that I have been working on modifing for my seats. Not sure its the best option, and to be honest, I hate the Disco seats. horrible to sit in for long highway stretches, not great off-road, but I typically don't notice as much.
It must be my simple/lazy side, but i want easy access from the drivers side. right now I open the rear window (slider) and get access that way.
Hi-jack off
How is the progress coming. you are slated to leave in August yes?
There is nothing lazy about that, having access to a space is key. If a space is a pain to get to, it is likely to be used, and if it isn't getting used what is the point in having it? Sort of a pack rat's motto! haha
To be honest the progress is coming along much slower than I would like it to be. Yes it is looking like the 1st or 2nd of August is going to be my departure time. It was supposed to be the end of July but I left a little bit of a buffer space just in case, and it looks like I am going to use up every bit of that buffer to get this thing done in time. I still have a page long list of stuff to do.
Series1Rangie
Adventurer
There is nothing lazy about that, having access to a space is key. If a space is a pain to get to, it is likely to be used, and if it isn't getting used what is the point in having it? Sort of a pack rat's motto! haha
Its amazing how much of a deterant not having easy/quick access can be. I have spent the last couple of weekends reorganizing the garage because of this.
. I still have a page long list of stuff to do.
Every trip I take the rangie on there is a list before I go. Normally about the length of my arm. D-Day approaches, and I get the need done (at about 2 am) and the list is still there when I get back. I took one trip (my GF is loooong suffering) where the only heat shield between our legs and the transmission tunnel was the pieces of cardboard we found on the way to keep from burning ourselves. Don't stress on getting everything done, to the point where you bodge your way through it. pick the really important things, do them right, so that you only have to do them once, and make sure the fluids are fresh. I am constantly amazed at what a classic will put up with.
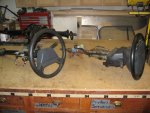
Love the steering wheel mods. Keep it up. :sombrero:
rrclassicbt550
Farmer Jon
Status update..
So the status update right now is...a LARGE amount of work going on! The count down has begun! The interior goes back in Thursday (except for the drawer system which will most likely be Friday or Saturday), and the rest of the remaining days are going to be spent either under the hood or under the Rover itself. I am testing everything on the 2nd of August and leaving on the 3rd so as of right now I am one BUSY boy!
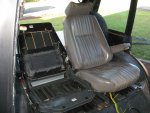
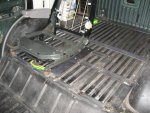
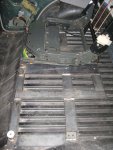
-The rear seat structure is finished and just needs to be painted. I also need finish drilling the holes in the floor and then bolt it in.
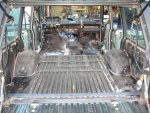
-I have cut out the areas of the floor that need to be patched. I am fabricating the patch panels for the floor tonight and will be installing the ASAP.
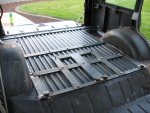
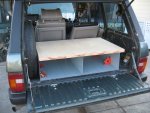
-I am fabricating the rear drawer system and mounts.
-I located a nice set of seats for the rear that were not so nice when I found them and I am currently bringing them back to life while trying to figure out how to make the backs detachable.
-Fabricating the rear side consoles.
-Prepping for the spray in sound deadener (goes in tomorrow or Wednesday)
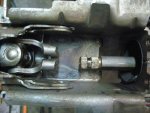
-Still trying to source the steering column support! If anyone can help me out on that I would be truly thankful because if I don't locate one or get pictures of one in the next few days I will have to put the original column back in and I REALLY do not want to do that.
-etc. etc. etc. (I really don't want to post it all because even the "need to do's list" is an amazing amount of work)
Lets just say the list is extensive! I am glad that part of the testing on the 2nd involves SLEEPING inside of the Rover.
As far as the rear seat structure goes...
The only slight hurdle I had to figure out with the rear seat structure was the seat belt mountings. When I finished it, and bolt the seats to the seat frame and put it in the Rover the area between the two seats was way to tight to mount the two receivers that attach directly to the seats. So I decided to use the original receivers that were from the rear seat belts and mount them to the fabricated seat structure. So really, all the seat belts that the Rover originally came with are still be utilized except the rear center lap belt but the whole point of this job was to get rid of that center seat anyway so it really doesn’t matter.
Sorry for the lack of pictures, I have been so busy working on everything that stopping to take pictures has been a little hard. I will take more and post them as soon as I can.
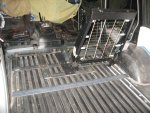
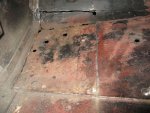
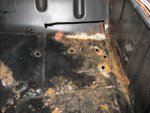
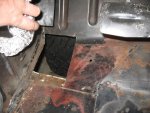
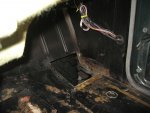


Series1Rangie
Adventurer
Sounds like you have it in hand. Keep it up. Very interested in how you decided to make the rear storage, and back seat wheel well compartments.
Keep the picts coming.
I always start off with great pictures for the first 4 uninteresting steps, then its nothing till the end. oh well
Mike and Myles
We will be out and about in NE UT /SW WY that weekend. email me if you might have time to breeze through. mmmalone40atgmaildotcom
Keep the picts coming.
I always start off with great pictures for the first 4 uninteresting steps, then its nothing till the end. oh well
Mike and Myles
We will be out and about in NE UT /SW WY that weekend. email me if you might have time to breeze through. mmmalone40atgmaildotcom
rrclassicbt550
Farmer Jon
The many many MANY phone calls I have been making finally paid off though. I found a small wrecking yard that had a 1995 Discovery that was literally cut in half and had pretty much all of the parts I needed. Hopefully I will be able to make it all work in the next two days. There is going to have to be some firewall modifications which may suck up too much time...so I will have to see how it goes.
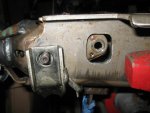
Unfortunately I wasn't the person that removed it from the Discovery and only managed to get photos of the area after the mount was removed. So it would still be very helpful to get a picture of the actual mount fully installed as a reference.
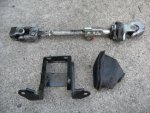
Unfortunately I wasn't the person that removed it from the Discovery and only managed to get photos of the area after the mount was removed. So it would still be very helpful to get a picture of the actual mount fully installed as a reference.

rrclassicbt550
Farmer Jon
I am sorry I have been gone so long...
Hello everyone,
I am sorry for the long absence and lack of updates. Its a really long story but the shorter version ( still fairly long though) is this; five days before I was scheduled to leave for the 6000 mile month long road trip I met the woman of my dreams. I know that may not seem like a big deal to you, but it was/is huge to me. There was a a couple of catches though, the first time I talked to her she was already on a road trip of her own. She was already camping in the Yellowstone and Grand Tetons area (which is exactly where I was headed in five days). The reason this was a catch was because she was coming back a day before I was leaving. Sounds pretty good right…I get to go out with her once before I leave for a month. Well here is the second catch; in just over a month and a half from the date I would leave for my trip she was re-deploying and would be gone for three months leaving basically two weeks to get to know and spend some time with the woman of my dreams.
Well during our many long conversations following the first one we were both hugely disappointed that we weren't going to be able to really spend time together before she left for three months. During one of those conversations a joke started up about if I blew my dead line by a few days I could pick up a girlfriend/passenger/ navigator. We knew that we were both right for each other from the beginning and the more we talked the more the joke turned from a "joke" to an actual question. If I blew my deadline would she go with me? Well what would you do!? We agreed that we should have a few days to really spend with each other before we actually made the decision. So I agreed that I would hang back a couple of extra days and she would leave to come home a couple days early.
We ended up spending a large majority of the next five days together and said why not go on a huge road trip together. She however having just been the direction I was going to go, had first hand knowledge of the conditions and camp site statuses. She persuaded me to change my plans and head to Yosemite where she spent every summer as a kid/teen and could show me around. Since I had no real plan and was just pointing my car to the east until I hit the Atlantic; I figured what the heck…just do the big trip next time. Besides I had never been to Yosemite and it was my back up destination for a smaller road trip if I weren't able to do the big road trip for some reason and she was definitely a good reason to head to Yosemite instead.
So we decided to head from Washington State where we both live to Yosemite for a week and then Southern California to meet her parents, then to Las Vegas, then back to Southern California one more time and back home via Nevada again. We left a couple days later and spent three weeks sight seeing, having a hugely fun time, and experiencing a quite large adventure where we had to depend on each other. I tell you, every couple should have to spend three weeks together right off the bat.
Here is the only real downside; we didn't take my Rover. In all the excitement I had come to a dead stop on its progress and wasn't able to finish it in time because I was spending the time with her. Once we got back I made the decision that I would spend time with her before she left for three months and then work on the Rover after she had gone.
So here is the status update on the Rover:
Rear seat frame is done and paint is drying
Rear seats have been modified so that the seat backs detach
Drawer system mounts are fabricated, have been final test fit, and the paint is drying
Drawer system is about 50% complete
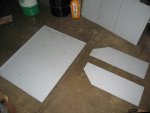
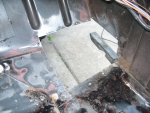
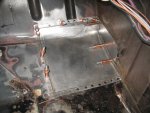
All of the five patch panels for the floors have been fabricated and are welded in
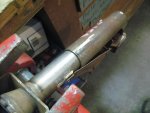
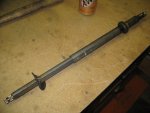
I test fit the 95' RRC steering column and found that there was so much fab work to do to the 88' RRC pedal assembly, firewall/floor, and upper mounts that it would be easier to just get the parts off of another later model rover and then make those fit
I was lucky enough to find a 96' Discovery that was being parted out while on a parts run for my brothers RRC (because someone rear ended him in his RRC while I was off doing all the traveling).
From that Discovery I not only got the upper dash support, pedal assembly, the very important nuts & bolts, and tons of reference pictures/measurement but I also managed to talk the guy into letting me cut out the actual portion of the firewall/floor that it all attaches too.
The upcoming jobs are:
Install all of the nice parts that were obtained from the Disco
Then final fit the 95' RRC steering column
Seam sealer on all of the joints that need it
Sanding down the floors
Prime the floors
Then spray in the Lizard skin sound deadener and ceramic heat shield
Once all that is done, re-install the interior and finish up under the hood and sort out the electrical for the all the new bits. Then the home stretch will be to finish up what was supposed to be the only project in the first place, which was the rear storage system.
Sound like a lot? It is, but I will have it all done by the end of the month. I will be posting pics as I go so keep checking back for future updates.
Once again everyone, I am sorry I was gone for so long but I am back into it now and will be finishing it up soon.
I am posting some pics of the progress, they are a couple days behind current but I will try to post current ones soon.
Thanks for all of your previous advice, help, comments, and most importantly your patience.
Have a good one!
Jon
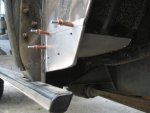
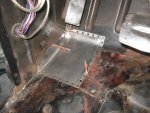
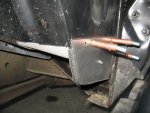
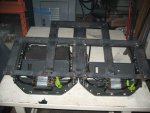
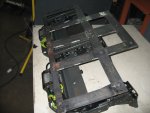
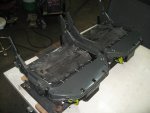
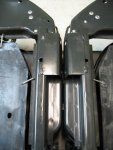


rrclassicbt550
Farmer Jon
rrclassicbt550
Farmer Jon
Modifying, Cleaning up, and Reassembling Range Rover Classic Seats
So during one of many trips to countless wrecking yards to find yet another sad sight (a Land Rover being parted out) I was lucky enough to find more than why I had originally intended to find. I had originally come to find a rear seat belt because one of mine broke. While i was removing all of the seats belts (so I would have spares incase any of the others decided to break as well) I was looking around that Rover wondering what small issue condemned it to the wrecking yard. While I was looking around it, my eyes landed on the front seats which looked like they had been in decent condition before sitting in a closed up in an excessively damp Rover for an extended period of time. The seats were covered in mold and were pretty dirty under that mold but I wasn't all that bothered by it because so were the seat belts I was buying as well. I asked how much they would want for the seats and they told me $100 dollars would take it all. Thinking about at it...was I willing to risk 80 bucks on these seats. Sure, why not especially since they had good switches I could sell to recoup some money!
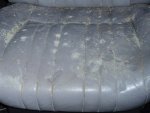
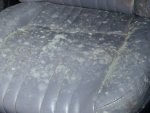
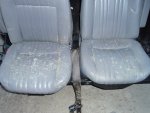
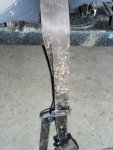
Here is the what I did to not only restore them to their previously good condition but also to modify them so that the seat backs will detach so I can take them off to unfold a sleeping platform off the top of the drawers system and out over the rear seat bases.
First things first, COMPLETELY strip down of absolutely every bit of upholstery that could be taken apart and scrub thoroughly "multiple times" with bleach water inside and out (including: seat covers, foam pads, head rests, trim plates, backing covers, and the seat frame.
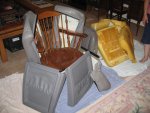

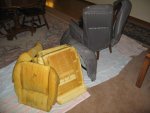
So during one of many trips to countless wrecking yards to find yet another sad sight (a Land Rover being parted out) I was lucky enough to find more than why I had originally intended to find. I had originally come to find a rear seat belt because one of mine broke. While i was removing all of the seats belts (so I would have spares incase any of the others decided to break as well) I was looking around that Rover wondering what small issue condemned it to the wrecking yard. While I was looking around it, my eyes landed on the front seats which looked like they had been in decent condition before sitting in a closed up in an excessively damp Rover for an extended period of time. The seats were covered in mold and were pretty dirty under that mold but I wasn't all that bothered by it because so were the seat belts I was buying as well. I asked how much they would want for the seats and they told me $100 dollars would take it all. Thinking about at it...was I willing to risk 80 bucks on these seats. Sure, why not especially since they had good switches I could sell to recoup some money!


Here is the what I did to not only restore them to their previously good condition but also to modify them so that the seat backs will detach so I can take them off to unfold a sleeping platform off the top of the drawers system and out over the rear seat bases.
First things first, COMPLETELY strip down of absolutely every bit of upholstery that could be taken apart and scrub thoroughly "multiple times" with bleach water inside and out (including: seat covers, foam pads, head rests, trim plates, backing covers, and the seat frame.


Last edited:
rrclassicbt550
Farmer Jon
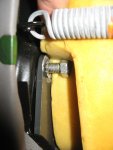
Next, I disassembled the seat frames. Then cut off the nuts that were welded onto the uprights of the seat base and welded them to the seat back frame. I also had to weld the armrest onto the seat back frame so the whole seat back can be taken off as one unit.
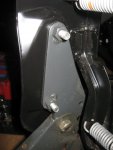
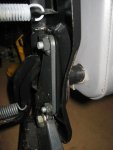
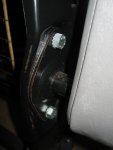
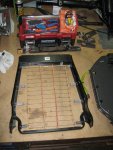
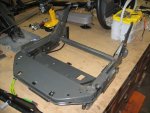
So now to remove the seat backs the bolt is accessible from the by just taking the seat back cover off and inserting a ratcheting wrench.
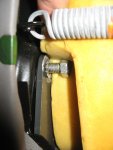
Next, was the reassembly of the seats. I haven't found to much out there to show this process so I thought I would give it a whirl. I am not upholsterer but I have had to tear down and restore 5 or 6 of these seats which gives me a pretty good knowledge of what not to break when taking them apart (I learned the hard way).
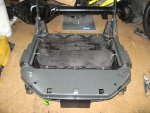
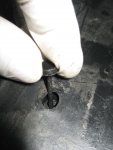
Start off by putting the rubber seat support back into the seat frame. Then re-install the plastic hold downs through the the two holes that are in the rubber support and attach the wire that slides through the foam and will eventually hold down the seat cover.
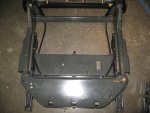


So now to remove the seat backs the bolt is accessible from the by just taking the seat back cover off and inserting a ratcheting wrench.

Next, was the reassembly of the seats. I haven't found to much out there to show this process so I thought I would give it a whirl. I am not upholsterer but I have had to tear down and restore 5 or 6 of these seats which gives me a pretty good knowledge of what not to break when taking them apart (I learned the hard way).
Start off by putting the rubber seat support back into the seat frame. Then re-install the plastic hold downs through the the two holes that are in the rubber support and attach the wire that slides through the foam and will eventually hold down the seat cover.


rrclassicbt550
Farmer Jon
Next, place the foam back onto the seat base making sure to slide those seat cover wires through the holes in the foam seat cushion
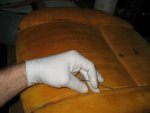
Then, get the seat cover and start feeding the wires through the fabric sleeve on both sides.
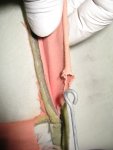

After you have done that, slide the plastic card hold down through the slot in the foam and then make sure it is laid flat on the bottom of foam seat cushion.
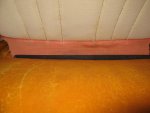
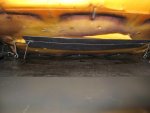


Then, get the seat cover and start feeding the wires through the fabric sleeve on both sides.


After you have done that, slide the plastic card hold down through the slot in the foam and then make sure it is laid flat on the bottom of foam seat cushion.


rrclassicbt550
Farmer Jon
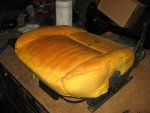
With that done your are ready to put the longer plastic hold downs throughout the other end of the seat cover hold down wire, then push it through the foam seat cushion and then push it on through one holes that are on each side of the seat frame, then place the lock washer onto the end. Do this on both sides.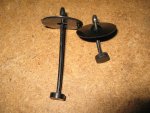
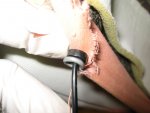
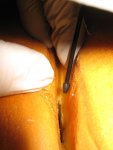
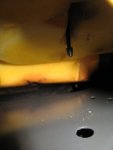

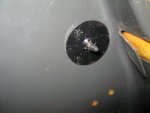
Once that is done on both sides, just fold the edge of the seat cover under the edge of the seat frame and tuck it in between the bendable tabs and the seat frame and then bend the tabs back snuggly.
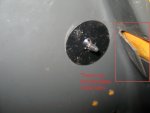
Once you have done that, basically done with the seat base.
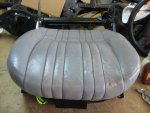
Now just need to clean and condition the leather.


Once that is done on both sides, just fold the edge of the seat cover under the edge of the seat frame and tuck it in between the bendable tabs and the seat frame and then bend the tabs back snuggly.

Once you have done that, basically done with the seat base.

Now just need to clean and condition the leather.
rrclassicbt550
Farmer Jon
The seat backs are similar in assembly but are much less complicated. Like the base cover there are two hold down wires that slip through fabric sleeves and another plastic card that goes through a slot and lays flat on the other side of the foam pad.
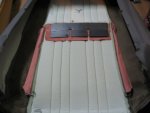
The two metal wires are fed through the foam pad and attach to the metal support screen. A time saving trick is to feed the top of the wires through the foam and then attach a zip tie to the lower L-shaped end of the wire and feed the zip tie through the foam pad.
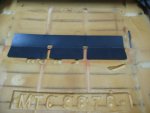
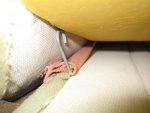
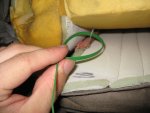
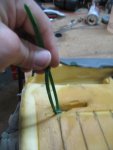
Then connect the top of the wire to the support screen and use the zip tie as leverage to pull the lower end through the pad and attach it to the support screen. Once those are attached fold the seat cover over the edges of the of the seat back frame and light tap the clips into place.

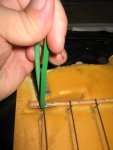
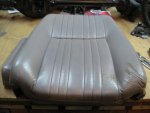
Then, clean and condition the seat back and reassemble. Please keep in mind that i modified my seat frames...the bolt is usually on the other side. I just made it so I could pop the seat back cover off and take the top of the seat off. Also, I still need to clean and condition the headrests and seat back covers so I do have them, they are just not pictured at this moment. I will post a picture of the when I they are all together.
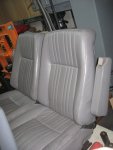
Don't underestimate the amount of time this takes. It a full day, maybe a day and a half worth of work so plan to do this on a weekend if your going to do it.
Thanks everyone, I hope this helps someone.
Have a good one!
Jon

The two metal wires are fed through the foam pad and attach to the metal support screen. A time saving trick is to feed the top of the wires through the foam and then attach a zip tie to the lower L-shaped end of the wire and feed the zip tie through the foam pad.


Then connect the top of the wire to the support screen and use the zip tie as leverage to pull the lower end through the pad and attach it to the support screen. Once those are attached fold the seat cover over the edges of the of the seat back frame and light tap the clips into place.


Then, clean and condition the seat back and reassemble. Please keep in mind that i modified my seat frames...the bolt is usually on the other side. I just made it so I could pop the seat back cover off and take the top of the seat off. Also, I still need to clean and condition the headrests and seat back covers so I do have them, they are just not pictured at this moment. I will post a picture of the when I they are all together.


Don't underestimate the amount of time this takes. It a full day, maybe a day and a half worth of work so plan to do this on a weekend if your going to do it.
Thanks everyone, I hope this helps someone.
Have a good one!
Jon
Similar threads
- Replies
- 4
- Views
- 696
- Replies
- 4
- Views
- 2K
- Replies
- 2
- Views
- 1K
- Replies
- 0
- Views
- 176

