The start of my own Ambo Expo rig

java

Expedition Leader
Java: In my 97 ambo, the coach builder had 2 horn circuits and spliced into the oem wiring under the engine compartment battery. If you haven't checked there.

Thanks!
Mines a little different since it wasn't an ambo, but just an emergency vehicle, so I have no idea who did the upfitting.

In my case the wiring for the sirens and horn appear to be seperate, the siren wiring was just unplugged for the controls lol. That was a quick fix.

Its nice to be single, I can do what I want lol!

Thats nice. The controls are gone for mine, the PO took them. But the horns are still there. Just need a new driver.

Being married has its perks too :)
 

flightcancled

Explorer
Java you are probably missing a ground or something. There's no reason for the sirens to delete the stock horn as it wouldn't pass state inspection without the horn, and they usually draw too much power for the small gauge wire the factory uses.

I'd manually trigger the horn itself from the battery with jumpers then see if it will work with just the positive wire. If it doesn't you probably lost your ground in the upfit/down fit. From there you can work backwards: jump power from the fuse, check the fuse, check the switch itself etc.


Sent from my iPhone using Tapatalk
 

java

Expedition Leader
Java you are probably missing a ground or something. There's no reason for the sirens to delete the stock horn. It wouldn't pass state inspection without the horn anyway.

I'd manually trigger the horn itself from the battery with jumpers then see if it will work with just the positive wire. If it doesn't you probably lost your ground in the upfit/down fit. From there you can work backwards: jump power from the fuse, check the fuse, check the switch itself etc.


Sent from my iPhone using Tapatalk

Yeah I was more wondering if they used the horn switch as a trigger for the sirens. I will try to track it down this summer. But there is a huge mess of wiring under my dash...


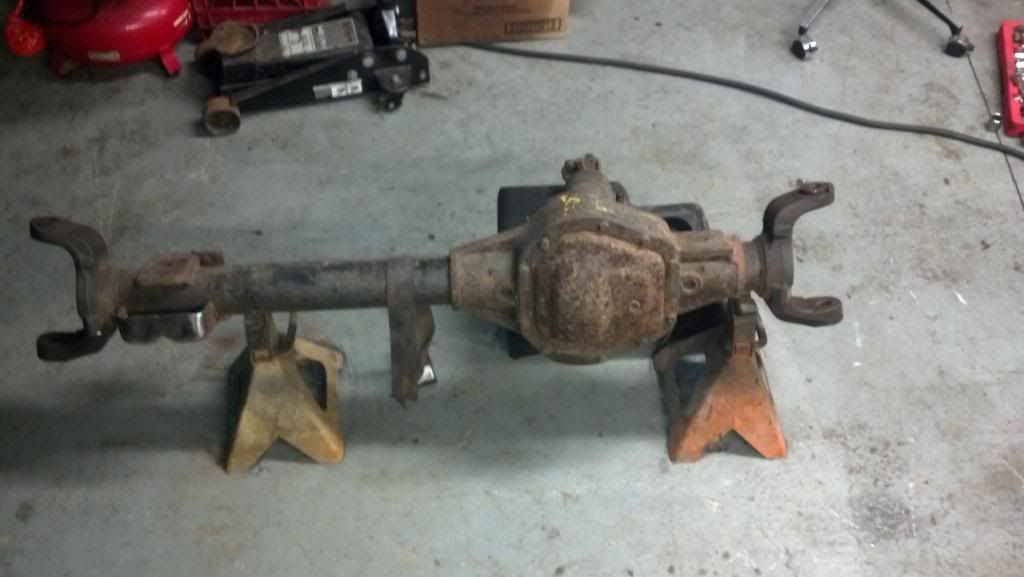
Freshly stripped 4.10 geared 60. Came apart as well as a Michigan 60 can be expected, had to beat the hell out of the drivers unit bearing to free it from its home. Going to use the hot wrench tomorrow to remove the ball joints then send off the passenger knuckle to be machined for cross over steering.

Quick question but is it a necessity to install new knuckle seals back onto the shafts? I say no as I'm not using the standard vacuum hubs but what's to group opinion? I'll wire wheel it out the a couple coats of black paint and reassembly can start once the steering parts show up. I need to get a new ficm so I can start the big pig so I can start the 6leaker fixes.
 
Been getting work done son!

Front axle got cleaned up and painted. Looks damn good!

Inside I started the last major fab work.

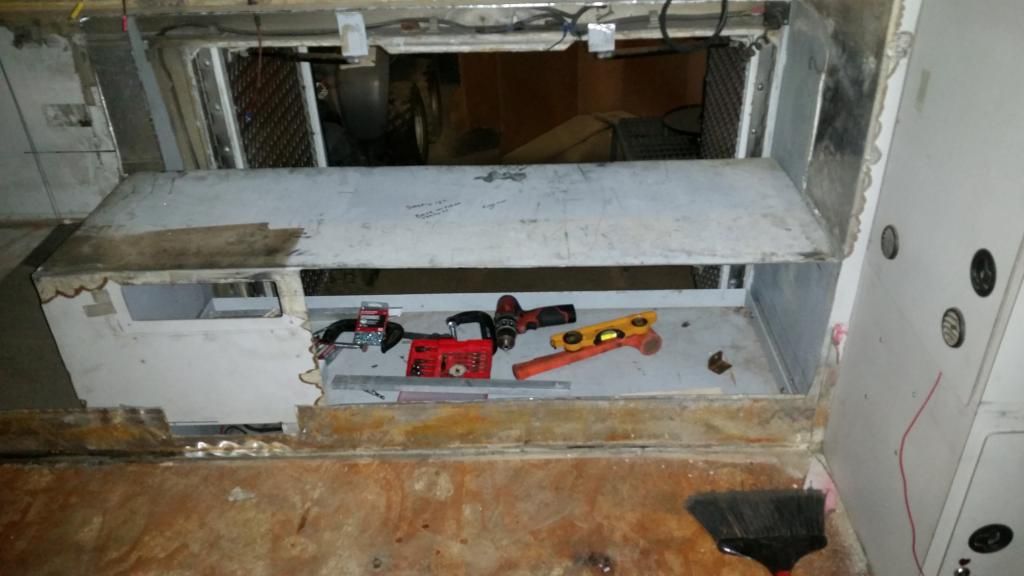
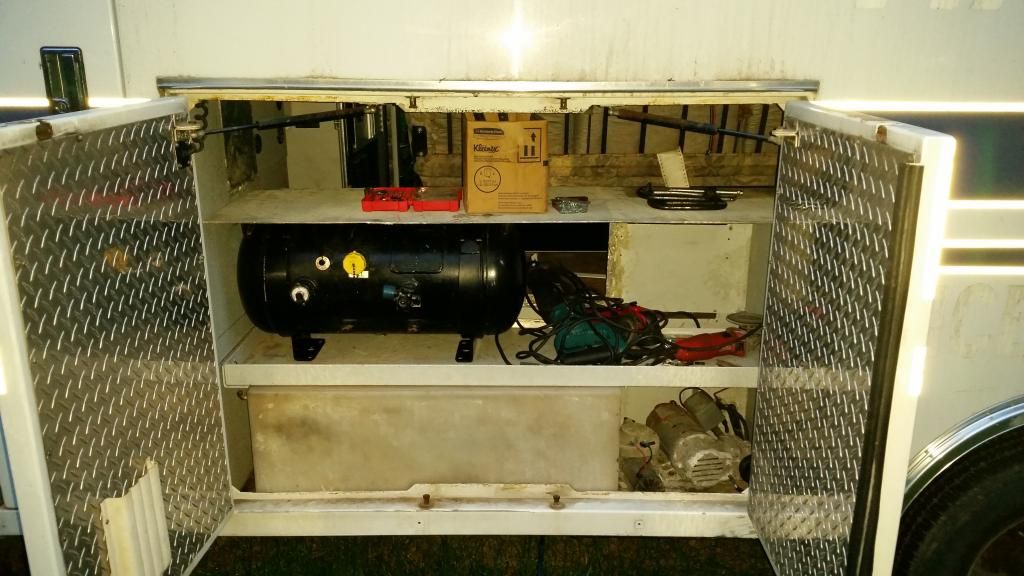
I repurposed the aluminum shelf and mounting hardware that was originally in this cabinet and have transformed it into a water tank hold down/shelf.


I also trimmed down the cabinet I cut out earlier and have started to retro fit it back into the space. This will serve as the base for the jack knife sofa bed.
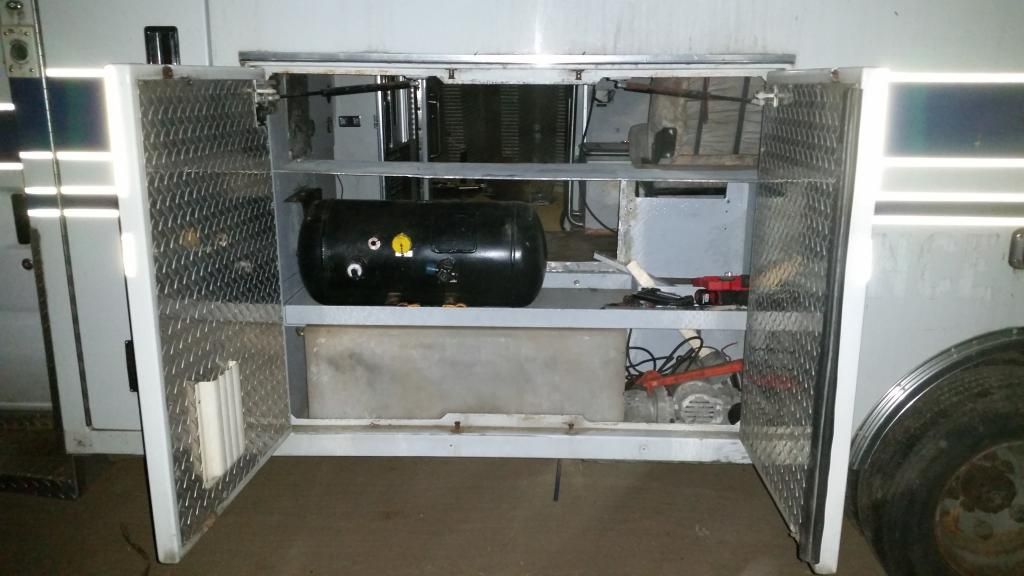
A question I have is what are the thoughts about my propane tank placement. The compartment that its in will be completely sealed from the interior and have vents to the outside. The tank will be supported from underneath as well. I really dont have much room underneith to mount it and I dont like the idea of it being below the frame rails.

Im hoping to order the last round of parts that I need so I can start the 4x4 conversion come July.
 
Last edited:
Still keeping busy puttering around with this.

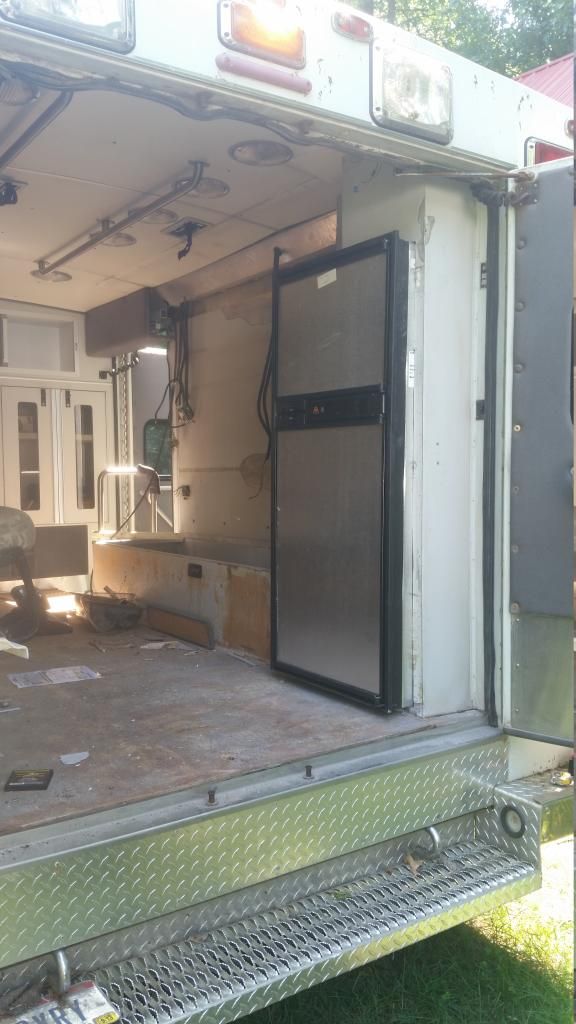
I picked up a like new Atwood RV fridge with weekend and carved out a place for it. Fits like a glove! I plan on installing a window A/C unit in the place above the fridge then framing and facing everything out.

I ordered new propane tank mounts so now I can finish mounting the tank and final mount the firewall panel. Ive also started work on framing out the shower area. I wanted to get the tub more recessed into the cabinet but that isnt going to happen unless I totally chop the tub apart and i dont want to do that right now. I picked up a new base cabinet from Home depot a few weeks ago, I need to install the flooring that Im buying today before I can start carving into the cabinet frame.

I sent my passenger knuckle to be machined for crossover steering, so Im still waiting on that. I need to order front ubolts and brake lines then when parts arrive I plan to complete the 4x4 in a weekend time. I cant wait to start!
 
Last edited:

polksfinest

Observer
Make sure to seal off the back side of the fridge real good as it gets real hot I was told by a local rv place to but a small computer fan at the bottom of the fridge and aim it up toward the vent that I installed


Sent from my iPhone using Tapatalk
 

flightcancled

Explorer
That fridge looks awesome!!!

Gotta agree with polksfomest! My back compartment vents to the rear of the box which had a large gap, not sure if you have something similar to vent into.


Sent from my iPhone using Tapatalk
 
That compartment has vents in the door and I plan to put in a small fan for extra ventilation.

I should have my steering and rear lift parts by July 3. Off hand does anyone know what length front ubolts I should buy? I measured off my 02 F250 that has a small lift and I'm figuring 10-12" ubolts for my 6" lift springs up front
 
Finally got the last of my parts in this week. New ubolts, drivers side lower spring plate, new leaf spring bushings, extended brake lines, all the crossover steering and rear shackle flip kit.

I installed the new ball joints into the knuckles and waiting on the paint to dry before I can reassemble the front axle. I need to get the 4 caliper bracket mounting bolts and I'm good to go!

Plan is to start this Saturday morning and if I'm good I'll be 6" higher come Sunday.
 

Forum statistics

Threads
186,737
Messages
2,887,645
Members
227,160
Latest member
roamingraven
Top