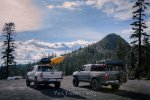
The War Wagon: A 2005 Toyota Tundra AC's transformation to Overlanding Rig

All-Pro Offroad

Supporting Sponsor - All-Pro Offroad
Looks amazing! Thanks for sharing these photos and for all your support! We will be posting some of these on our PackRack thread and link to your build.
 

rickashay

Explorer
Haven't tuned into this thread in a while... the truck has come a long ways and you've given me a lot of excellent ideas. I'm going to start collecting parts for my 04' Tundra build right away and will be referencing this thread often as this is definitely one of the most well thought out and informative 1st Gen "Expo" style builds out there.
 

CrewServed

"That" guy
Haven't tuned into this thread in a while... the truck has come a long ways and you've given me a lot of excellent ideas. I'm going to start collecting parts for my 04' Tundra build right away and will be referencing this thread often as this is definitely one of the most well thought out and informative 1st Gen "Expo" style builds out there.

Thank you, Rick. That's a helluva compliment. Just for knowing - changing the front bumper really took a chunk out of my fuel "economy." I snicker as I write the word "economy" while referencing a V8 pickup.

Okay, so what's new? Ah, right. Comms.

I really, really dislike the idea of being fully out of comms range when I'm in the sticks, and on my trip out to the Mojave last March with some friends, we were relegated to FRS for inter-vehicle comms. Not the most efficient or effective. Other than that, the only other way to communicate was to stop the rigs, get out, and talk. It was a little lame, and I was set on getting myself squared away to become an amateur radio operator. Two weeks after returning from the desert, the girlfriend and I attended a Ham Cram in Mountain View, CA. Spent six hours studying the test material, and then took the test at the end. Total cost was $30, which included the $15 FCC fee.

Fast-forward to about a month ago, and I finally bought a Baofeng UV-5R with a Tram 1185 mag mount antenna. That, as some of you other hams out there might know, is not the be-all end-all for 2m/70cm operation, so I resolved to do something about it. Seeing as how setting up a mobile rig is quite pricey and disposable income is a touch tight these days, I will have to do this install in stages. I've already got the little handheld tranceiver (or H/T, as we radio dorks call it), so the best way to use its 5 watts of output is to use an external antenna. I mentioned that I had the mag mount antenna before, but I don't like sloppy-looking stuff so it had to go.

So I drilled a hole in the middle of the roof.

jQT67jd.jpg


aE85wUG.jpg


Some ham-nerd content follows:

I first started off with a completed feedline with connectors. It was an RG316 coax with a 3/8" NMO connector at one end and an SMA-F connector at the other end, with an adapter to UHF-M to hook up to the radio. I tested VHF SWR and got 5:1. Wide open. I couldn't for the life of me figure out where my connection issue was, and just decided to put some money in the actual feedline/connectors that I wanted. I found a Browning RG-58 coax feedline with a 3/4" NMO connector and UHF-M connector on Amazon for something like $15. I got that hoss installed, got a SWR of 1.2-2:1 across the VHF band, and called it good. Next day, I went back to Ham Radio Outlet in Oakland and all but threw that POS cable back at them. The old guys on the repeater 10 miles away gave me a good signal report.

The antenna is a Comet SBB2NMO antenna, and it's doing the job for now. It is a VHF 1/4 wave and UHF 1/2 wave. It has its purpose, and will serve it well enough, but as soon as I feel more comfortable shopping for antennas, I'll be replacing it with something that either folds over or has a spring base. Or maybe I could stop spending money so frivolously and just take it off when I don't have clearance. I plan on keeping a 5/8 wave antenna in the truck, also, for the times when that flatter signal pattern is more appropriate, such as in the desert where terrain features are things you drive around, not over.

I had to pull the headliner down to get this installation complete. There's bracing on the roof right above the center dome light, so I drilled a hole just forward of there. I routed the coax diagonally forward to the stripped A-pillar and then down to floor. I routed the coax forward toward the firewall, and then pulled up the carpeting underneath the pedals to route the cable across to the center console. The carpet is held in place with velcro. I pulled off the doghouse beneath the center console, which is just a matter of pushing out the center pins on two grommets from behind the doghouse, and I had all the room in the world to work. After coiling the coax to take up slack, I reinstalled everything, re-tested SWR, and Bob's your uncle.

Next step is to buy a mobile rig. I'm leaning toward a Yaesu FT-8800, and it will mount to the transmission hump between the driver and passenger floorboard. Most likely. I don't know, we'll see. I've got some months to think about it while I save money for it.
 

CrewServed

"That" guy
Ham[mer] Time! Lots of pictures!

Okay, got the Yaesu FT-8800R installed! This was quite an involved installation process and took two afternoons after work, which was mostly because I only barely have a clue what I'm doing when it comes to this stuff. Luckily, I've got the /r/amateurradio subreddit and an old fella named Chip that I talk to on a nearby repeater to ping when I run into issues or need advice. I did my best to go whole-*** on this installation instead of going half-***. It mostly has to do with my fear of burning my truck to the ground because I created a situation where the system was susceptible to shorting and then bathing my beloved truck in flames.

Enough talk. Picture time!

Getting the dashboard ripped apart. Again. I've become quite good at doing this.
dbdEsCx.jpg


I bought a PanaVise InDash mount #751371900 to use for the microphone holder. Installation was pretty straightforward.
j5oXWy9.jpg


But I installed it too low, and the screws that came with the mount interfered with a female harness receptor in the dash bezel. Here you see the Sharpie marks for the new holes.
INUFBPF.jpg


Dry fit. Man, that is clean
YcZsPGo.jpg


Getting the lower panel of the center console off is just a matter of pushing on the back sides of grommets on either side, and then pulling the panel free of its spring-loaded clips. If it's not obvious by this point, DISCONNECT THE LEAD FROM THE NEGATIVE BATTERY POST. There are some airbag controls here, and you don't wanna risk deploying that or causing a short while you're fudging with wiring.
HyTyTFg.jpg

eL9Oxo0.jpg


This seemed like a great place to install this speaker. It's this RoadPro CB speaker deal I found on Amazon. Nothing special, but it works and comes with all necessary hardware.
MIv0LMj.jpg


The microphone clip that comes with the Yaesu (left) is a bit janky. Replace it with a Motorola clip (right), and you'll be pleased with years of failure-free service. We use these Motorola jobbies at work, and they just don't break.
r5LdXZK.jpg


The supplied power leads don't come with ringed lugs; you'll have to install them yourself. Don't cheap out on these, and definitely don't be cheap or lazy when it comes to insulating your work. Use heat-shrink insulation, not cheapo electrical tape. Your non-burned truck will thank you.
uXpxlk5.jpg


Here I'm doing a bench test to make sure everything works before routing wires and getting everything screwed down.
rm0S6zE.jpg


Hook the power leads up directly to the battery. After this bench test,I routed the wires through a grommet in the firewall and stuffed all the wires in the engine bay into split tubing to protect them from rubbing (and shorting out!). I'll have to do something about that hot mess that is the positive battery lead. So many things hooked up to it. Also, I didn't realize how badly corroded those posts are. Yuck.
iqDrchz.jpg


The only place I could mount the radio cabinet inside the truck was under the passenger seat, and the only easy way to access it was by taking the passenger seat out. Remove four bolts, apply force, and voila, it's all easily accessible.
3jfJMEV.jpg


Before pulling wire, I zip-tied them together at about 12" intervals. Cut off the excess zip-tie, obviously. I did that after snapping this picture.
8TvahF7.jpg


There, got the power leads and antenna feedline pulled through.
9F3VKEJ.jpg


I got the remote speaker and control head cables pulled through, and the radio cabinet mounted. The rear of the cabinet is facing forward in relation to the truck to make the data port more easily accessible for programming. Also, I want to make sure the fan has all the air it needs to cool off the radio.
7OqIl8e.jpg


I removed the radio fitment bezel and drilled a 1/2" hole in the rear using a unibit "step bit." This is for the control head cable.
2pI3LYH.jpg


I used some leftover kydex from a project that struck my fancy to make this mount for the control head bracket. Shaping it is simple - just a matter of heating it up where you want it bent, and then bend it over a straight edge, like a ruler or the edge of a table or bench.
0BmFVJx.jpg


Ahhh, that's nice.
JeuHOyf.jpg


Got the Motorola mic hanger mounted to the PanaVise mount.
qooPSSQ.jpg


Aww yiss.
Ewh7yPL.jpg


Mmmmmm. A successful radio installation is really, really satisfying.
5sIkTpT.jpg


-=-

One minor nuisance issue, however. I've got some radio frequency interference (RFI) in the form of a "thud" when I key up on VHF. I chased down the problem to an unshielded RCA cable for the amplifier supplying power to my subwoofer. I'll either do ferrite chokes at either end of the RCAs or replace it with a shielded cable. Ferrite chokes are faster and easier. I'll try that first.
 

CrewServed

"That" guy
Wow, been a while since I've updated.

Not a whole lot of work on the truck, since it's been in a good place so far as performance goes. Spent the money on the truck up front and now have been doing all the adventures. Small problem, though. My Firestone air helper springs have sprung a leak somewhere (I suspect the air lines), and I've decided that I don't want to depend on them for my suspension and ride height needs, even after the leak is fixed. The time has come to do an add-a-leaf mod.

So, any of you guys got any experience with AAL?

And speaking of adventures, a couple of pictures from the last two times I've been out in the woods.

Barker Pass (Something on this trail pushed my air bags to their limit)
Barker Pass.jpg

Hat Creek Rim in Lassen National Forest. I was supporting a group of PCT hikers I'd met the week before when I was doing a section hike between Burney State Park and Belden, CA. Randomly met up with them a few days later and decided to use the rest of my vacation following them along the infamously hot and dry Hat Creek Rim.
Hat Creek Rim.jpg

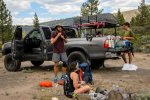
These are the hikers I was talking about. L-R: Sheep Wagon (Ben), Lady Hawk (Rachel), only partially visible behind the truck is Toast (Ellie), and Cougar (Jackson). This is at Old Station, CA when I was dropping them off at the trailhead where I'd found them loitering.
Old Station.jpg

Backpackers call it "slackpacking" when they're not carrying all of their kit but are covering miles on the Trail. We spent 2-1/2 days on the trail together, me shadowing them on nearby powerline tracks and forest service roads, them along the PCT. I used the Garmin 24k topo map to do my routefinding and put me at trail crossings so I could meet them every few miles to refill water and provide snacks.

Anyway, add-a-leaf input. I'd love to learn what you all know.
 

AaronK

Explorer
Man all these first gen Tundra threads are making me want to spend money...

Sent from my OnePlus One using Tapatalk.
 

dyogim

Explorer
AAL's will help with height adjustment, but may not help a whole lot with payload capacity. For that, you'll probably want to look at a custom leaf pack from Deavers. The other option is the 63" chevy swap. They helped all around when I swapped over.
 

Climbermac

Observer
I ran the Wheelers AAL 3 leaf pack for a number of years with firestone airbags over daystar cradles. They did the job well enough but now I have stepped up to full custom Alcan springs with SS6 Slam airbags. The springs are night and day different. I ran the AAL's with the OEM overload leaf and they rode pretty well and gave some lift, but flex wasn't what I had hoped. I also started to have more weight back there than they are really designed for so it became too dependent on the airbags. I've trashed a several sets of bags over the years and using them offroad and with the lower plate disconnected voids the warranty.

I'm just getting these SS6 bags running but they seem like they will be a substantial improvement. The other route I looked at was the Firestone red label bags but they cost a good bit more per bag and I honestly can't see what exactly is different other than the pressure rating. I have debated ditching the bags for a sumo spring or progressive bumpstop but I use the bags a LOT. I really like using them the level the rear in camp for my RTT and towing. I have my old springs with AAL's installed sitting in my shop for sale, I just haven't posted the sale thread on Expo yet, its on TS. PM me if you are interested.

As for the bags your running, I've bush mechanic-ed them more times than I want to say but SLIME is your friend.

HTH
 

CrewServed

"That" guy
SLIME. Holy crap, I hadn't even thought of that. That's brilliant! I've got the 200 psi lines coming in soon, and once that's installed I'll watch how well everything holds pressure over time. If that doesn't solve the problem, I'll SLIME the piss out of the system and call it good for the time being. What's been your method? Do you take the springs off of the mount to swish it around inside the bags? Are you squirting it into the valves or directly into the bags?

Funny thing about the weight issue I'm having in the rear is that I've actually begun to minimize my gear. I took up long-distance backpacking last year (I section hike the Pacific Crest Trail annually), and I've been shaving weight off of my kit. Every ounce matters when you're carrying your life on your back. This has bled over to my overlanding kit, and I pack less and less gear with each trip that I take out into the woods. I figure if I can live without it for long stretches on the trail, I can certainly do without it in my rig.

Anyway, thanks for the input so far, fellas. Keep it coming. I think that saving up some scratch over time to do the job right with custom spring packs is shaping up to be the best option. In the meantime, I'll make my air bags stretch out until winter when my adventure season comes to a halt (strictly 3-season dude, here) and I'll have more time and money to make changes and upgrades.
 

Climbermac

Observer
My setup is pretty simple for SLIME. When I first installed the bags I just ran the lines up right above and drilled thru the frame rail. When I added a manual leveling controller I spliced into the line with a "t" and kept the schrader valve as a back up method to push air into the system. To slime them I have always just pulled the core from the schrader and pumped into the lines. Another thing I have found helps hunting leaks in the lines is to check all the push-to-connect fittings, I have a tendency to push them to re-seat them under pressure.

I know the feeling thinning the kit. I backpack myself and always felt that a lot of overland kit is excessive. I had gotten things thinned down over several seasons and now have a baby in tow, so things have ballooned quite a bit...
 

Forum statistics

Threads
188,132
Messages
2,902,554
Members
229,582
Latest member
JSKepler

Members online

Top