Unimog U1300L 435 1986 - Restore to former glory & add custom camper

Simon dix

Active member
Pop tops work well in warm climates, but when it is wet and rainy, it like being in a tent. A hard side pop top works, the ones that slide up, but things like windows are harder to make work, and the mechanisms add weight. Weather proofing is important, so dust seals need to work well or you will end up with a dusty interior.
Thanks Iain, I did not consider the hard side pop top. ?
 

Simon dix

Active member
Hi Gents, Need some input please! Its good to hear other’s points of view because I could have made a massive blunder rushing.

I was going to send Mogone in for spraying tomorrow or early next week, but I think I am rushing a bit. Need to give more thought for the walk through – Cab to Camper box. I sent a message to Iain wrt the walk through and he has changed me from doing what I recently posted wrt to the cab to camper design. Thanks again Iain. I was going to make it way too small. I thought I was keeping the integrity full by not cutting at all and still complying with QLD regs. Glad I am on this forum. I will probably do a very similar cut as Iain did on the rear of his cab.

I feel sometimes all this gets a bit tedious and I am really itching to get it painted and functional. I am contradicting my whole patience and perseverance speech. I also find that I am arsing around with tyre system designs which at this point are not important at all but it’s fun. Priorities need to be checked. ?

Today at work I took a long break and gazed at Mogone in awe for about one minute even though its dirty, dusty and far from even being driveable again. I then re- assembled the roof rack and tyre hoist with the help from handy Jack. I took snaps of the roof rack with the roof turret closed and opened and wondered if I really need this roof rack but more so, I am not sure that the roof turret is necessary. Yes, it’s cool and awesome if you don’t have aircon! Roof rack, or no roof rack I think turret might become part of the roof structure. Any comments?

Wrt the roof rack, the only reason that I am thinking of not using it is because I am now considering one of the few options to be an over-cab camper but the over-cab frame will be a light weight pop up tent or something simple (probably not as high as the drawing Sitec Adventurer posted). The BIG question is………..what would a safe height distance be from top of cab to underside of over-cab camper frame to compensate for change in axle angle?

Thought I would post some close ups of what I did a while back for the wheel hoist. My first attempt was not very successful as i did not have the reinforcement top plate as shown in the first few pictures. As you can imagine there is a lot of weight when you put that wheel on and start hoisting. For the wheel hoist I integrated the original hoist with a frame that I made from left over hollow section. I even used the original pulleys ?
 

Attachments

  • file.jpeg
    file.jpeg
    167.5 KB · Views: 39
  • file1.jpeg
    file1.jpeg
    167 KB · Views: 39
  • file2.jpeg
    file2.jpeg
    182.1 KB · Views: 37
  • file3.jpeg
    file3.jpeg
    117.5 KB · Views: 42
  • file4.jpeg
    file4.jpeg
    162.7 KB · Views: 47
  • file10.jpeg
    file10.jpeg
    160.2 KB · Views: 48
  • file5.jpeg
    file5.jpeg
    161.8 KB · Views: 45
  • file11.jpeg
    file11.jpeg
    160.3 KB · Views: 45

Simon dix

Active member
I mentioned in an earlier post that I would get better pictures of the heavy duty auxiliary battery box. Its a beast and I think its quite neat and very easy to access the batteries. Welded some small angle brackets today so that the battery box lid can be secured but also access to remove lid is very easy.
 

Attachments

  • file6.jpeg
    file6.jpeg
    171.5 KB · Views: 34
  • file8.jpeg
    file8.jpeg
    211.6 KB · Views: 34
  • file7.jpeg
    file7.jpeg
    194.4 KB · Views: 35
  • file9.jpeg
    file9.jpeg
    229.4 KB · Views: 31

Sitec

Adventurer
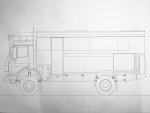
Soooo, I totally get where you are at.... You are looking at this great truck, you can picture it done, so you want it painted as it 'get's it closer to finished'... Here's the hard bit... You can't do anything until you have a plan, and by plan I mean a scale plan. I started with my truck (a Merc 1222A as that is what I know and wanted). I then drew basic body designs, looked at a few options etc etc. I finally bought an ex mine coach body that has 'the look' I wanted, and was the right length at 6m. With rough ideas in my head and a layout sketched I started work on the body. It soon became apparent that trying to keep all this stuff in my head and on scraps of paper just wasn't going to work, so I downed tools and drew two accurate drawings at 1:10 scale, and put together a sectioned folder with internal rooms, external, costings etc. Straight away I knew that was what was needed. I now have a scale plan for the layout (needed for step position, toilet, plumbing, wiring, lockers, doors, bed size etc etc etc... The list is long). I also now have a scale side view of my truck. I have something accurate to follow. It is stuck to the side of the body I'm converting, and everything I do relates back to this drawing. With accurate plans, you can then factor in house battery locations, water filtration and storage, switchboard and charger locations, etc etc. In my view, (and I'm by no means an expert), by having a plan, I have hopefully foreseen most things, and now have things where I want them and where they need to be. Little things like the cab access to body doors... They were in the center (as that seemed logical).. and they were going to be sliding as that also seemed logical... Now I have a scale plan and can see it, they changed. The opening is offset to the right nearer to the driver (because if the crawl thru is being used whilst mobile, it's not being used by the driver!) The passenger has better access. Now instead of 2 sliding doors, I am having one sliding door (cab side that slides behind passenger seat), and one hinged smaller door (body side), which opens into the cab (thru sliding door opening and against drivers seat). This makes it secure and a proper draft free door. Little things keep evolving as I go, but the bulk of the plan is staying the same. Get the tape measure out and then put pen to paper before doing anything. With that you can then play truck! :)

Side View (final).JPG
 

Sitec

Adventurer
With the scale pic above, I have the awning boxes in line with the rear locker tops (purely for looks and aesthetics)... This has now changed... They have dropped 50mm as they would have clashed with the kitchen counter tops inside. Had I not consulted 'the plan' I wouldn't have thought about this, and would have found it as an issue much later in the build as I was fitting the kitchen. By then it's too late. The roof rack will change (as I'm just not happy with it). Your drawing will change as you draw it, as you'll discover things that don't work outside, because there's something in the way inside! I've seen lots of trucks with a living access door above a wheel! No room for fold out steps, or a sunken foot well... Good luck!!
 

Simon dix

Active member
With the scale pic above, I have the awning boxes in line with the rear locker tops (purely for looks and aesthetics)... This has now changed... They have dropped 50mm as they would have clashed with the kitchen counter tops inside. Had I not consulted 'the plan' I wouldn't have thought about this, and would have found it as an issue much later in the build as I was fitting the kitchen. By then it's too late. The roof rack will change (as I'm just not happy with it). Your drawing will change as you draw it, as you'll discover things that don't work outside, because there's something in the way inside! I've seen lots of trucks with a living access door above a wheel! No room for fold out steps, or a sunken foot well... Good luck!!
Thanks pal. Looks like you spent a while on your project. I have always planned to use solid works as I used this at University when it Was in its infancy. The down side is I am going to have to learn this again and it’s not a cheap program but invaluable. My other option is Autocad which I have used to design my side steps, roof rack and more. I can’t agree with you more about a real plan. Just itching to get the truck to a point where I can move it around looking great so I can start manipulating the tray to suit. Need to decide on my camper box design and then get into it. Thanks again for your post ?
 

Sitec

Adventurer
I have always planned to use solid works as I used this at University when it Was in its infancy. The down side is I am going to have to learn this again and it’s not a cheap program but invaluable. My other option is Autocad which I have used to design my side steps, roof rack and more.

I'm not a fan of computers... It'd take me longer to learn Auto Cad or Solid Works than it would to build the thing! ;) Mine was done with pencil and then pen!
 

Simon dix

Active member
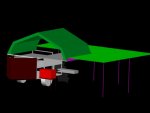
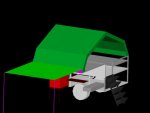
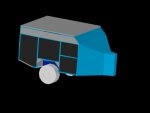
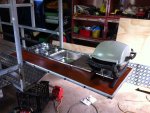
Thought I would share one of my unfinished projects. Think this baby is accumulating rust at this point in time. I was using 3D AutoCAD which is not the most user friendly but it sure gives you perspective for interaction of opening and closing parts
 

Attachments

  • CG OPEN 1.jpeg
    CG OPEN 1.jpeg
    20.1 KB · Views: 15
  • CG OPEN.jpeg
    CG OPEN.jpeg
    22.2 KB · Views: 16
  • CG TRAVEL MODE.jpeg
    CG TRAVEL MODE.jpeg
    17.9 KB · Views: 18
  • Early Days - Camper in the making.jpg
    Early Days - Camper in the making.jpg
    139.4 KB · Views: 19
  • Sink, 4 gas hob burner, Baby Q Weber - OPEN.jpg
    Sink, 4 gas hob burner, Baby Q Weber - OPEN.jpg
    115.4 KB · Views: 19
  • WATER TANKS.jpg
    WATER TANKS.jpg
    115.6 KB · Views: 17

nathane

Active member
Sw is super expensive. I have been using Autodesk fusion, which is equally capable, and offers start-up licences for free for non commercial users. Being able to create an integrated design, with full material properties which supports mass and stress analysis has been massively helpful. I'm essentially building the thing virtually up front, seeing how everything fits before making mistakes later! In addition most component suppliers (electrical, water, appliances etc) can provide step files to integrate.
 

Simon dix

Active member
Sw is super expensive. I have been using Autodesk fusion, which is equally capable, and offers start-up licences for free for non commercial users. Being able to create an integrated design, with full material properties which supports mass and stress analysis has been massively helpful. I'm essentially building the thing virtually up front, seeing how everything fits before making mistakes later! In addition most component suppliers (electrical, water, appliances etc) can provide step files to integrate.
Hi Nathane, many thanks for such information. I will be googling Autodesk Fusion straight after this. I am meeting someone from SW on Monday morning but I know from last time i checked the price was sky high.
Cheers
 

nathane

Active member
If you do try fusion there is a series of super helpful instruction videos on YouTube by a Danish guy called Lars Christiansen https://www.youtube.com/user/cadcamstuff. It took me an afternoon to get going and a few days of working to get proficient, but it's worth taking the time IMHO.

Here in the UK I'll need an engineer's report on my build to get registration docs and being able to show full structural and systems detail in the CAD system will help I hope.
 

Simon dix

Active member
If you do try fusion there is a series of super helpful instruction videos on YouTube by a Danish guy called Lars Christiansen https://www.youtube.com/user/cadcamstuff. It took me an afternoon to get going and a few days of working to get proficient, but it's worth taking the time IMHO.

Here in the UK I'll need an engineer's report on my build to get registration docs and being able to show full structural and systems detail in the CAD system will help I hope.
I have down loaded the program and checked out Lars demo on creating the electrical conduit box. This program will change my life. The icons are the same as AutoCad so the plus side is that I can recognise what each icon is for. Thanks for sharing
 

Iain_U1250

Explorer
One thing to keep a constant eye on is weight, things have a habit of getting heavier and heavier. I kept a very careful check on the weight, and it still managed to creep up above what I origianally wanted, so I increased the GVM from 7500kg to 8000kg, took a bit of doing, had to add a second set of brake calipers to the rear, and new springs and then a mountain of paperwork to persuade the "engineer" it was all safe and legal.
 

nathane

Active member
Good point Iain. Great thing about a cad system is that every component gets included in the mass and cog calculation. Even to the level of properly calculating the mass of my home laminated foam/carbon sandwich panels. It allows you to really accurately track mass.
 

Forum statistics

Threads
188,251
Messages
2,904,519
Members
229,805
Latest member
Chonker LMTV
Top