Unimogadventures - Our build and travel thread

Iain_U1250

Explorer
Some of the realities of driving a large truck on tracks created by much smaller vehicles.

I would not to have even tried these tracks without the extensive bar work we have,and our truck is smaller than most Unimogs. The angled roof helped a lot, without it, we would have had to do a lot more branch cutting, and would probably have sustained a fair bit more damage than a couple of clearance light, and aerial and a broken window.
2025-01-05 15.22.28.jpg

2025-01-05 15.25.39-1.jpg2025-01-05 15.22.21.jpg


And after 300km of very rough tracks, with tight turns, and sharp rocks everywhere, and didn't have any problems, but we were driving down a pretty flat beach at about 60kph when we hit something buried in the sand.2025-01-03 09.19.53.jpg
 
Last edited:

DzlToy

Explorer
Kevlar (aramid) and epoxy resin are your friends for abrasion resistance. Back the repair with carbon fiber if you also need high tensile strength. Kevlar isn't nearly as rigid as carbon.
 

Iain_U1250

Explorer
Kevlar (aramid) and epoxy resin are your friends for abrasion resistance. Back the repair with carbon fiber if you also need high tensile strength. Kevlar isn't nearly as rigid as carbon.
Thanks, not much to repair. Most of the scatches will polish out, as I used an industrial machinery paint not a car paint. Will do some hand polishing with a heavy cutting compound today. Our camper has a 2mm thick aluminium skin, not fridge box material so is pretty tough, we have a few dents, but no real damage.
 
Last edited:

Iain_U1250

Explorer
Not really sure, but could have been when we were doing a lot of long highway trips at high speed. The first lower consumption would be when we were running the new engine in, and had turned the boost down. Since we fitted the new transmission around 60,000km things seems to be pretty steady.

Because we have two fuel tanks, the graph is a rolling average as otherwise the data is all over the place, we try not to fill up both tanks at the same service station when we are in the Outback, so might just drive another 2km to the next one in town to fill up the other tank. We have a 160L tank and a 190L tank. Realistically we have range of around 1350km in mixed off-road and road driving. The big tank doesn't have baffles, and so that leaves around 35L in the tank before it starts to suck air in at the fuel pickup. We can then transfer that across via a transfer pump system and get all the fuel out, but that means stopping on level ground and running the little pump for 15min or so This gives a range of around 1500km which can be very usefull in the Outback when fuel can cost over $4.00/L, whislt in town is is around $1.70/L . We have some fuel pricing apps that let us find the cheaper fuel so can skip the really expensive ones mostly.

The most we have gotten is 1800km between refueling, on the Gibb River road between Kunnunara and Derby, when we had another 90L of fuel in jerry cans as well, we still had about 40lts left, but the truck will stop when we get to 20-30lt left in the smaller tank when we are going up a hill, so that was cutting it fine. We always a 20Lt of "emergency fuel" jerry can with a fuel pickup, which as a last restort, we can plumb into the system and then drain the fuel out the smaller tank to get every last drop of fuel used, that would theoretically give us another 150km. That means that in theory, we can get just over 2000km with all the fuel we can carry.
 
Last edited:

Iain_U1250

Explorer
I did some more data manipulation of the records. Because we don't fill up the tanks when they reach any particular level, and sometimes don't fill them completely if the price is high and we know it is cheaper in the next town, the records of each tank give pretty strange results. With the price of fuel a lot higher now than it was 9 years ago, our refueling strategy has changed a lot, and we look at ways of saving money by planning our refuels. If the price is high, we don't fill up the tank, just enough to safely get us to the next cheaper fuel.

I think an average over 5 refuels seems to give a more realistic version, the high fuel consumption correlates to the serious off-road/desert driving and the lower consumption the dirt road driving where we are doing about 80kph for long distances.
Screenshot 2025-01-24 072614.jpg
Screenshot 2025-01-24 072701.jpg
 

Neil

Observer
I'm pretty sure my 1017a with OM 352a engine at about 10.5t is averaging about the same in normal use.

Altitude has a big bearing. Everytime we crossed the Andes hitting 5000m I think my consumption nearly doubled.

Good info

Neil
 

Iain_U1250

Explorer
A bit of an update. Since the rear axle is off, and I am still waiting for some seals, I'm doing a lot more of the other things on the truck that need doing.

The turbo dump pipe I made 10 years ago cracked, probably due to the weeks of chassis twisting we did on this trip.
2025-02-08 09.07.58.jpg

I'll make a new one, and this time with 4" pipe, for no other reason other than that's what the "performance" exhaust seller have on theirs, and it should be a strong then the 3".

2025-02-08 12.57.22.jpg

The exhaust is quite long on out truck, and is route through the chassis out the rear of the truck. As we are rated for passengers in the rear, the rules over hear require the exhaust to be behind the last sealed bulkhead - so has to go out the back. It is a straight through pipe - no muffler and was quiet enough - the turbo does a good job of being a muffler it seems
Turn up the sound on the videos. :)


2025-02-08 12.55.06.jpg

We also damaged the snorkel head on a tree on this trip, so I've decided to make a new one.

Screenshot 2025-02-17 201522.jpg

This will be lower then the original, and I'll have it sucking the high pressure air from under the windscreen overhang, so that may reduce the 0.9psi of restriction I measured in the intake system.
2025-01-05 15.22.32.jpg

In side the air filter, there is this plate, which helps reduced the dust load in theory, but after 50,000km, there is hardly any dust on our air filter, despite a lot of our trips being on very dust roads. We just don't sit in other people dust clouds for any length of time.

2025-02-16 09.26.13.jpg


I'm going to take it out and see what effect it has on the restriction of the intake.


2025-02-16 09.26.33.jpg

I am making too many changes at the same time to determine what the exact cause is, but I can measure the changes in the intake restrictions, and will put in a few ports into the exhaust to measure the back pressure. I was planning on putting some ports into the original exhaust to measure back pressure before deciding on what diameter pipe to use, but I have the truck apart so will do it all at the same time instead.
 

Iain_U1250

Explorer
Finished my new exhaust, 4" from front to rear. It is quite a tight fit, so I have added a lot of extra hangers to stop it moving around.

I have two flex joints, as the movement will be concentrated in the section between the engine block and the camper subframe. I have a semi rigid support from the back of the dump pipe, to the clutch cover, so that not all the load is taken on the turbo/exhaust brake flange.2025-03-24 14.58.18.jpg

I built it using V bands - will not use them again, as it makes it more difficult to line up when you take it on and off. When I make the 3" one 11 years ago, V-bands did not exist for normal use, and I thought they would be a good idea, and all the "experts" say they are the best thing to us. I suppose for a standard exhaust on a car, it might make it easier getting it on and off again. But because the rotate, it means that every time you put it back on, you have to rotate each section to the exact angle. With flanges, one you have them in place, putting the bolts in makes it automatically align.

2025-03-24 17.59.37.jpg

A 4" exhaust is no doubt overkill for a 200hp motor, and I was worried it would be a bit noisy, so this time I added a straight through muffler to cut some of the noise out. Having this quite close to the transmission, I was worried about the radiant heat. I had the whole exhaust ceramic coated, to minimise the heat coming out, but also decided to make some heat shields to protect all the potentially sensitive areas, like the shift cylinder, air line connections etc.

2025-03-30 13.31.43.jpg

This one is a Carbuilders Heat shield, which uses stand off brackets which are clamped to the muffler. it should protect the whole side of the transmission, with the range change cylinder, speedo sensor, etc.

2025-03-30 17.52.08.jpg


The flex joints are also close to sensitive things like the hi-lo range cylinder, the centre diff lock/4WD connection. I made a heat shield out of a piece of embossed aluminium, if fits around the lower section of the second flex joint. It took a bit of fabrication, but it fits quite nicely. I put a 40mm hole in the bottom, to minimise any built up of dirt, but it will probably need regular cleaning out if we do a lot of driving in the mud. It is quite rigid, with the front and sides being doubled up to add strength.


2025-03-30 17.40.55.jpg

I also extended the heat shield on the front, to protect the airlines and wiring that runs up the left hand side of the chassis.


2025-03-31 15.56.42.jpg

It is a tight squeeze up through the chassis, coming close to the ALB, and over the chassis subframe. I will replace the foam heat shield along the battery box, that is looking a bit worse for wear after 10 years of service. using the embossed aluminium shielding. I gave up on the v-bands here, a this one need perfect alignment to miss everything.

2025-03-24 18.00.24.jpg

There are seven different pieces to the exhaust, as it needs to be able to come out with back axle in place. To do this, I need to remove one of the air tanks, take the left hand fuel tank off, and the jerry can holder, and the rear wheel as well. I am hoping I never have to take it off again, and that's why I decided to spend the money to get the whole exhaust ceramic coated.

I decided on a polished stainless tailpipe, just because it looks nice.

2025-03-25 17.23.37.jpg


Space is quite tight, but I think it will be enough with minimum of 25mm all around. The camper box is rigid, so it is just flex between the chassis and the sub frame that need to be catered for, and the rear section of the chassis doesn't move as much are the front section. There are four hanger on the rear section which restricts the movement, as the sub frame will not move, there is enough for any expansion and contraction, but it is a lot more rigidly connected than the old one.

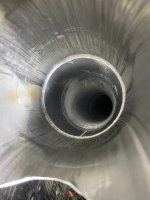
I will be firing it up in the next few days, just need to put a few things back on before I start the engine up. Overall, I have only one 90 degree bend, with the rest being 45 degrees or less, and overall this new one has three less 90 degree bends than the old one. It should be a lot less restrictive, you can almost see the turbo from the tailpipe :)

2025-03-25 17.25.00.jpg
 

Forum statistics

Threads
188,968
Messages
2,911,510
Members
231,449
Latest member
4ROAMER1
Top