Durability (cont'd)
SunTek ceramic tint(privacy and UV/heat protection) complete, although I'm not yet sold on it's heat-blocking properties compared to the 3M Crystalline in the G. The van has many more/larger windows than the G, but it feels hotter inside the van after it sits outside in the sun. I'll have to do a more direct comparison after they both sit in the sun at home. I do like the look though; wish the fronts matched the rears a bit more, but 35% front is max legality for Oregon.
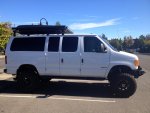

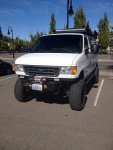
Bushwacker flares are on, although they turned out a lot glossier than I wanted, perhaps due to the flex agent they applied over the paint. I was thinking about having them re-sprayed in a true flat black after the UT trip, but now I'm debating about painting them body color, we'll see. They do cover the tires very well.
Safety (cont'd)
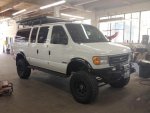
I've expedited 8 FrontRunner rack feet that are 2.4" shorter than what originally came with my "Tall" G-rack. This is about the max distance between the bottom of the under-rack camp table and the van roof, so it's going to be incredibly close, but we can shim up the rack a smidge if needed. Overall though, this will help with clearance issues on trails and keep the CG lower. This means I need to take the rack assy off again, center the table so it clears the van roof, move the awning and Maxtrax brackets in as close to the rack as possible. Much of this is now occuring due to running the White Rim Trail.
Brad hadn't gotten to a tire swingout stop yet, so in order to save the new LED taillight from being crushed by a rogue swingout, and also to keep the swingout from closing when on an incline, Russ at Racetech made this trick limiter and rotating swing arm rod. The limiter keeps the swingout from going too far to the driver side, the swing arm rod keeps the swingout from going towards the pass side. With the swing arm rod deployed, the swingout will stay at its maximum open angle. (There are custom spring-release "pins" on their way, just not here yet so we're using the hitch pin setup for now). Very nicely done, using the existing bolts on Brad's awesome custom rear bumper.
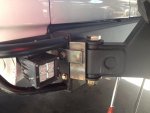
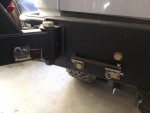
(sorry for blurry pic)
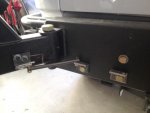
Comfort and Convenience (cont'd)
I was very lucky to have Michael at MG Metalworks find time amongst his busy schedule to head the 2nd row cloth non-reclining Sienna seat install. What a genuinely nice and hugely talented guy--amazing shop too!
We mounted the RR seat inboard, so outside bolts on the UJOR bracket are lined up with outboard in floor. We then mounted the LR seat outboard as much as possible(the plastic on the seat is basically almost touching the plastic interior panel, so IIRC inside bolts on the UJOR bracket are lined up with inboard in floor. I'll post more pics soon. While MG's leather recliners are incredibly comfortable, these cloth seats are terrific for the money and will suit me fine for the time being(biggest concern is keeping them clean since they're so light in color)...eventually I'll probably upgrade to the leather recliners. Bench seat is now out, but is so easy to install/remove, I'll keep it and factory seatbelts around shall I need this setup.
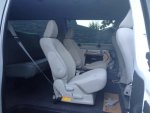
MG had a terrific idea about the seatbelt situation(Ford and Toyota seatbelt males/females are different between the brands), and I got that solved with Joe at Bright's Auto Upholstery, so now the Ford/Toyota hybrid should work. They rock, very fair price, quicker turnaround than expected. They also built a custom leather pull strap to help the shorter ladies up into the van via the side cargo doors. He even used a VW seatbelt mounting piece--love my euro's too! Pics to follow once installed.
More to come.......


