Wikid

wikid

Adventurer
Wikid has a few extended length features
After the Overland Expo and seeing the Camping Labs display, I thought this would be a great addition to make trips more enjoyable. Fernado and Camping Labs is a great guy and his tents are very nice and cost effective. I have not deploy it yet, but will tomorrow and do a write up on it with more pictures.
I also needed a suitable roof rack and Sergio at Baja Racks had just the right fit. I chose the Baja Expedition 1 piece rack. Install was a breeze and it is very light weight. I was concerned about my CB antenna since it was already hardmounted to my roof but it seemed to work out well as long as I moved the tent back a few inches. I will devise a pulley system in my garage for easy removal and install of the tent
Here are a few picture
DSCN2569.jpg


In this picture you can see the few inches I allowed for the cb antenna

DSCN2570.jpg


It actually fits in my garage with about 4 inches to spare ( I still have room for 35's if I decide to )
DSCN2567.jpg
 

wikid

Adventurer
Very appropriate screen name, your truck is indeed wicked.
Thank you Sir
I tried to get the whole build on at once so it would all be together. You jumped in the middle somewhere:sombrero:
I appreciate the nice words
 

RocKrawler

Supporting Sponsor
Looking good, did the thermal insulation reduce interior temps noticably or was it mainly for sound deadening?
 

proto

Adventurer
Holy Batmobile! (Or is it Starship?!) That's a lot of pretty cool tech to cram into a Cruiser. It took a lot of attention to detail to get all that secured and out of sight. Good job!

My one question: what's with the bare 110V light bulb on top of the dash?
 

wikid

Adventurer
Looking good, did the thermal insulation reduce interior temps noticably or was it mainly for sound deadening?
Thank you
I do believe it helped with cabin noise. It definitely helped with keeping the cabin cooler. It was 114 today, I had my a/c cranked to past glacier setting, and it got the cabin to a cool 67F, with the air set to recycle. I also did insulation and sound deadening around the drivers rear fenderwell (since it was apart) I still need to do the passenger side. I will have remove all of the dual battery system, ecu's for the camera system, battery and fuse panel to sound deaden that side along with the insulation.
If I do that, I will fab up a one piece aluminum cradle for all of it to make it as modular as possible and get rid of some of the wood weight. My recovery box is going to get remade into a composite material for strength and weight as well. All of these mods were custom made and of course, I am using the configuration that works well, but changing materials.
Thanks
Don
 

wikid

Adventurer
Holy Batmobile! (Or is it Starship?!) That's a lot of pretty cool tech to cram into a Cruiser. It took a lot of attention to detail to get all that secured and out of sight. Good job!

My one question: what's with the bare 110V light bulb on top of the dash?
Thank you
Strolling through Wallyworld after I got my truck, near the checkout and I spotted the infamous lightbulb mod. I got the picture in my head, about turning the bulb on when I decide to do something fun on a trail, and could see it mounted on my dash. Another member of the group around here, was pissed when he saw my lightbulb mod, he thought of the same thing, but it was too late, I already had one:wings: Its actually powered by 3, AA batteries and sits in a cradle, so its just double face taped, to the dash.
So it is a point of curiosity for most who see it.
See it worked again... you asked.
thanks
Don
 

winkosmosis

Explorer
Those cameras are totally sweet. I've always wanted to try something like that.

Did you switch the wheels to steelies? I prefer those to the alloys
 

wikid

Adventurer
Those cameras are totally sweet. I've always wanted to try something like that.

Did you switch the wheels to steelies? I prefer those to the alloys
yes I did, It was a mistake to get too "blingy". Too many problems with fancy wheels. When I bend a steelie, I can find another one for cheap.
I do want to get 16's with 35's for my next set. I am looking for the right set to run that combo with.
 

wikid

Adventurer
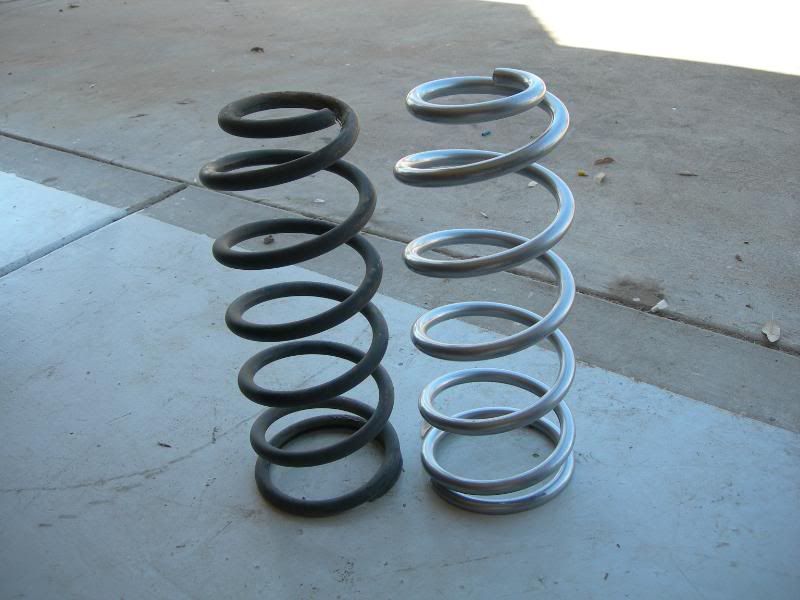
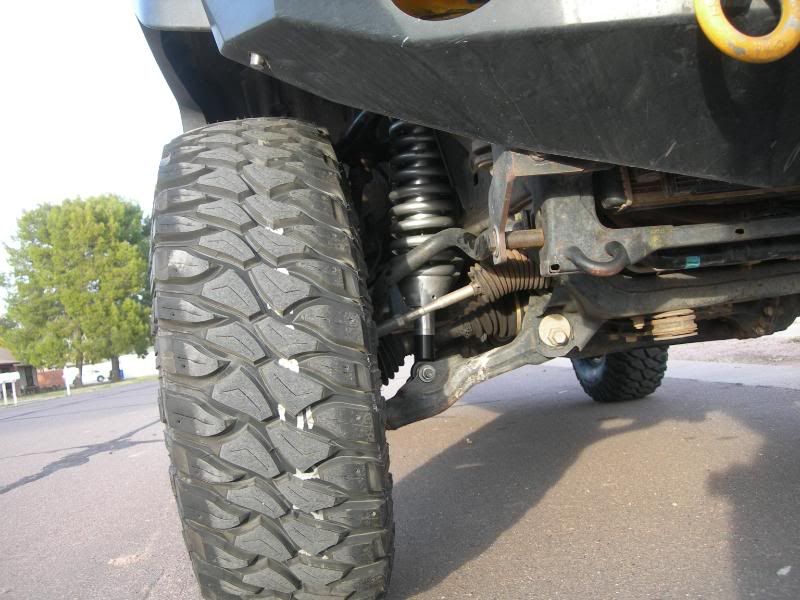
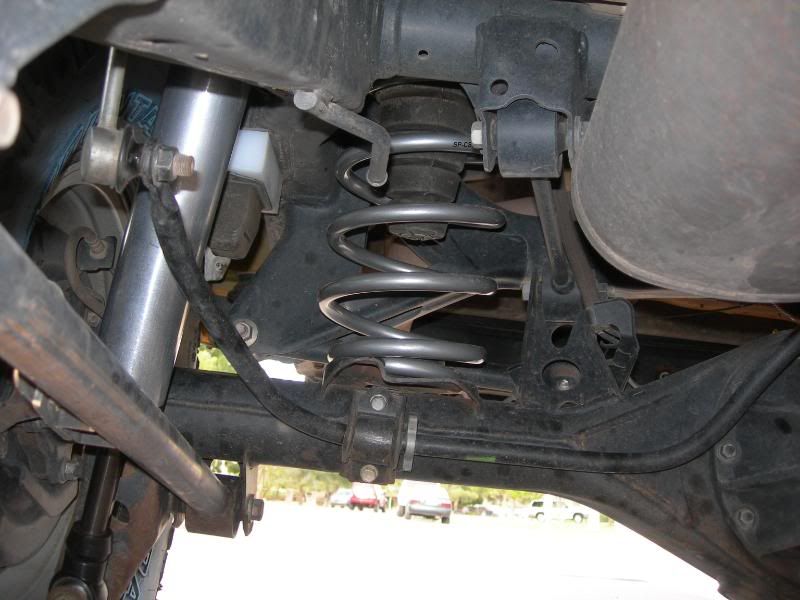
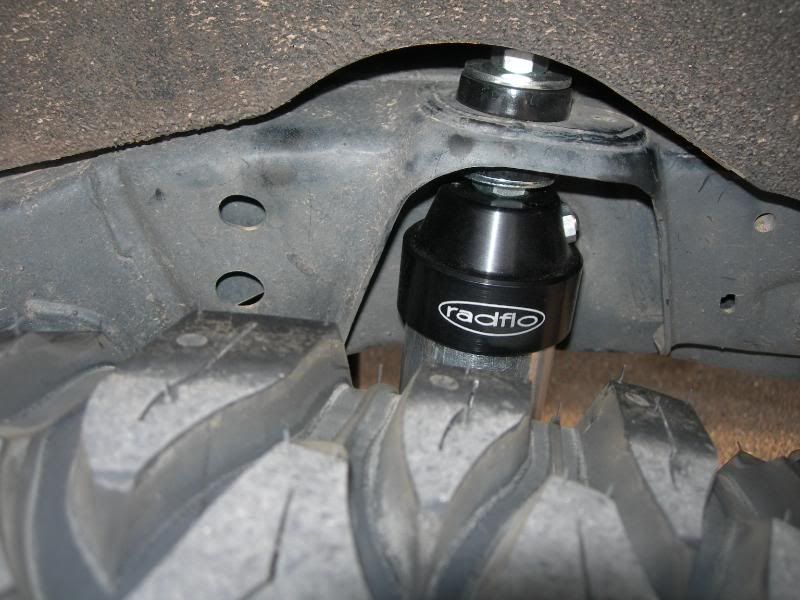
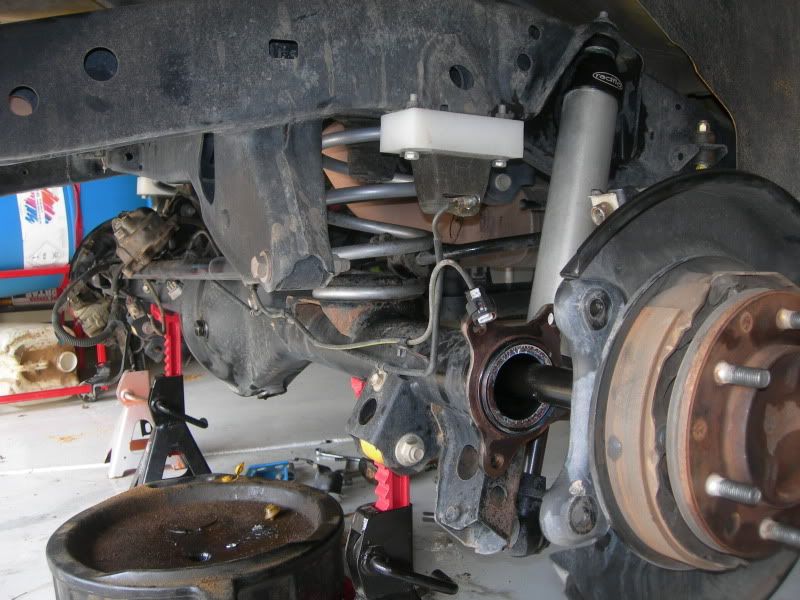
Newly installed Overland Warehouse, designed Radflo 2.5 coil overs, rear springs and 2.5 rear shocks.

DSCN2824.jpg

DSCN2809.jpg


The full install was time consuming but, working on my rig is the best therapy in the world. I took my time and had Zero, issues with the kit. Overland Warehouse emailed the install instruction that were clear and thorough.
I have had many experiences installing suspension components, so I already know what to do. I review of the instructions, helped, because I forgot some of the tool list.

I decided to put the front swaybar back on. I took a ride after the rear shock install . Then brought it back, to start leveling it.
I have exactly 7 inches between the top point of the tire to the bottom lip of the fenderwells, on all corners. My gas tank was close to empty. I took another ride down the highway and got gas. I came back and had to crank up the drivers side a bit to level it again. I may crank it another 1/2 inch on both fronts, then ride for a few hundred miles, then check it again. After I level it again , I will take it in for a front end alignment.
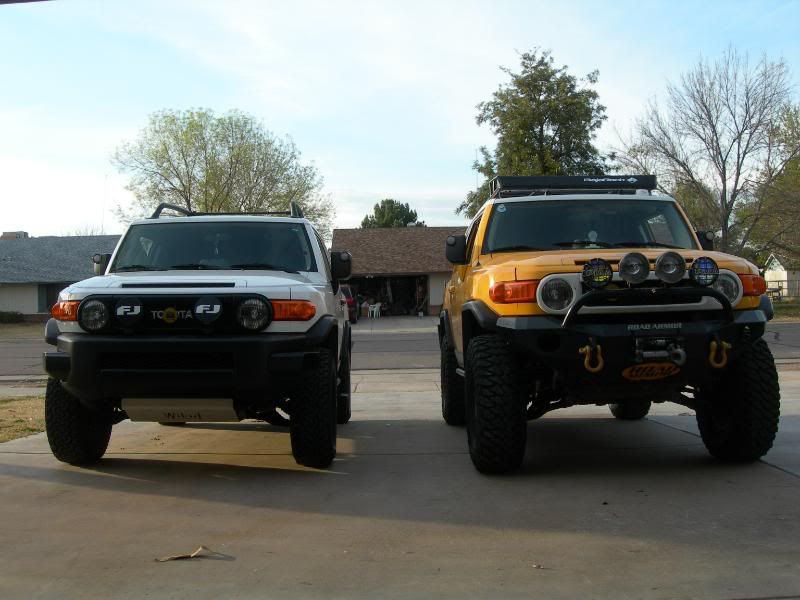
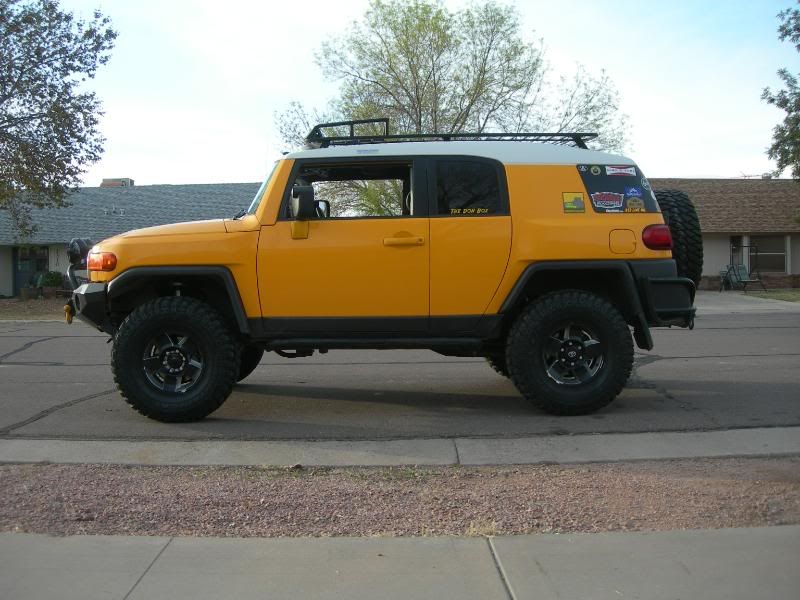
Here is a pic of our 2 FJ's The TT has a 2 inch spacer lift and stock 265/75/16's Compared to about 3" on Wikid. 315/75/16's . The difference in height is pretty dramatic, as you can see

DSCN2857.jpg


Suspension porn shots
DSCN2847.jpg


DSCN2853.jpg


DSCN2850.jpg


As it sits, it's almost perfectly level, I may want it slightly higher than level, we shall see.
DSCN2854.jpg
 

wikid

Adventurer
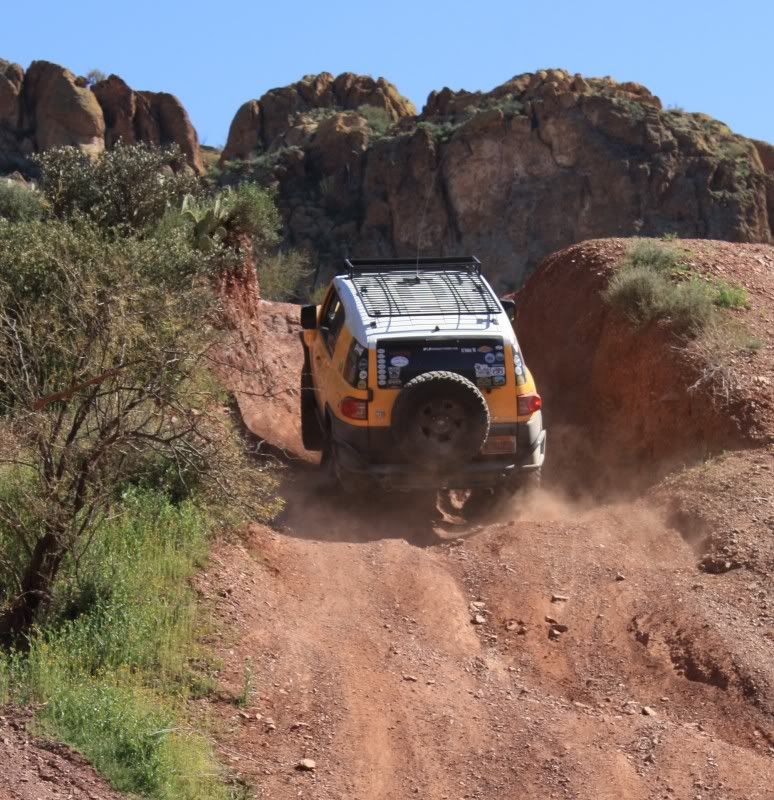
After grenading my rear dif , this may have been the culprit hill, but it just started making a funny noise on the way home

I took wikid to Toyota.
I have 79000+ on the odometer but I have the extended 100,000 mile warranty. Unlike Toyota, after the warranty company saw all of my mods, they wanted it torn down before authorizing my repair. The feeling was, they would deny it. The rub is, the tear down cost was about 400 bones. then the new dif from Toyota would have been about 1800
So here's what I decided to do. I limped my truck back from the dealership, got on the phone with East Coast Gear Supply Drivetrain Specialists East Coast Gear Supply and ordered 2 built 3rd members front and back with 4,56 Nitro Gears. I think I will just do the install myself and try to do a little write up. For less than the cost of 1 dif from Toyota.
My thinking was, even if they warrantied it, I would still be stuck with factory weak 3.73 gears. I needed the upgrade with 35's anyway, so why not kill another birdie while I got greasy?
I couldn't swing the locker, it just wasn't in the cards, bank cards, that is
I should get the difs later next week, but I will begin the tear down now, to be ahead of the game
More to follow
 

wikid

Adventurer
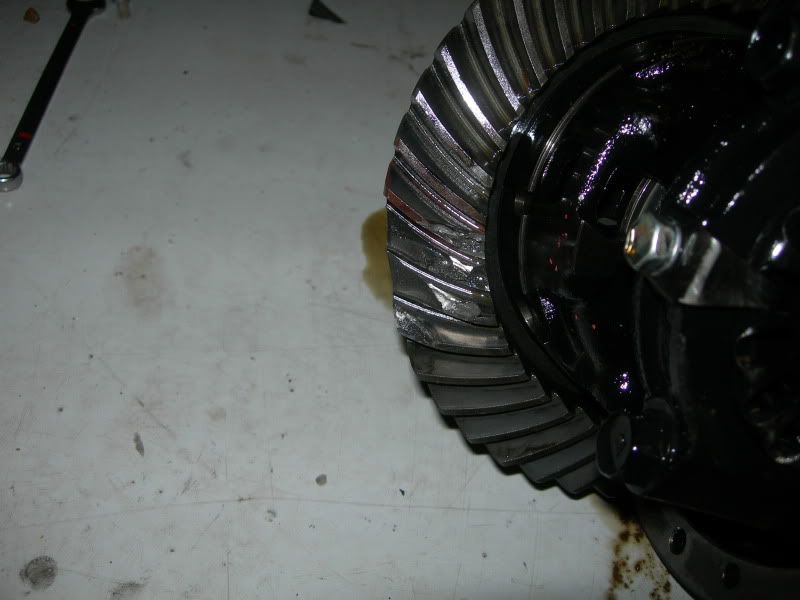
I did tear down and found the troubled spot
DSCN3224.jpg

DSCN3225.jpg


I received the (2) diffs on Friday. Since I am under a serious time crunch, I needed to get busy and begin the fun. I really don't have too many in process pictures because, I had no camera man available.
The rear was pretty straight forward. I posted this pic to show one unnecessary step. I actually removed the brake caliper, on the passenger side, thinking it was necessary. After a brief thought, I realized all I had to do is disconnect the brake line. So that's what I did on the other side.
DSCN3226.jpg

Here it is all put back together. I actually had it done in a few hours. That left me the weekend to tackle the front
DSCN3234.jpg


Since this was my very first diff swap, front or back I had some challenges on the front. A friend helped me tear down the front and pull the front diff out. He took one side, I took the other and we just slid tools back and forth.
He also helped me get the diff out and on the bench. I had to email East Coast gear Supply, because we could not figure out how to remove the output shaft and gear on the old diff, to transplant to the new one. As I thought, the gear is removed in the same fashion as a CV shaft removal, from the diff housing. Just a clip that you have to pop the shaft out, to release it.

Old diff with suspect shaft
DSCN3230.jpg


New diff needing such shaft
DSCN3231.jpg


That ended Friday evening. My friend was to come over to help me install the diff back in Saturday morning
After we muscled it back into place, we realized how hard it would be to install the breather bracket, on top of the diff in place, so we pulled it back down.
After the bracket install, we could not fit it back up because the bracket made it wider, then my friend had to leave, because if prior commitments.
I struggled trying to install it alone, even having my wife working the jack, for one attempt.
I gave up frustrated and tried to recruit help.
Sunday morning, my other friends grandmother died. Again I lost my help .
Here's what I came up with after getting pissed and not settling to wait for more help.

2 ratchet straps one one side they are attached to the transfer case cross member. The other side attached to the front bumper, with the ratchets close to where the diff was to go up. I cradled the diff and began hoisting a little at a time, till I got it in position to rotate it in place. Then I pulled one bolt from the back diff mount, so it would swivel enough to push the diff in place
DSCN3233.jpg

3 hours later I was filling the front diff, for it's test drive.
One problem I encountered when I started it, was...
The locker light was on, along with ABS,VSC. I gingerly took it down the road and realized the locker was infact ON.
After a e-mail to Chase at East Coast Gear Supply he told me to pull the rear locker motor, With my finger push the gear to the drivers side and re-install the motor. It was confused to what position the gear was in.
I learned lots, I could do a cv trail exchange, along with removal of a rear diff to nurse a truck home
I am in the process of making a special trail tool to make this sort of repair a breeze
I just wanted to go through my trials and errors, for others to learn from. Doing your own maintenance and projects makes you a handy person when things go wrong on the trail. (You may not want to broadcast that too loudly)
thanks
Don
 

wikid

Adventurer
I had to use 1/4 in spacers to keep the new tires off my uca's at full lock. They are a little iffy on how much thread used, but ,so far no problem. They torqued nicely, and the trip to Moab was fine. Many trails many miles, and pulling a trailer.
Factory 16" alloys I think I need a wider rim though. I have a few thoughts on which rims I will get.
Here are a few pics
IMG_5114.jpg

IMG_4544.jpg

IMG_4980.jpg

IMG_5388-1.jpg

IMG_4932.jpg
 

Forum statistics

Threads
190,185
Messages
2,924,840
Members
233,522
Latest member
Petersmithinak
Top