CreeperSleeper
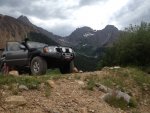
Looking for bigger rocks.
Step Six:
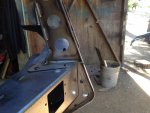
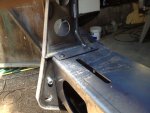
Now that the center section is adjusted and bolted up tight, you need to mark where to drill for the cross bolts. This bumper is designed to have adjustment every way possible, so use that to your advantage. You will notice the bolt holes in the bracket are slotted. You may want to make your mark in the middle of that slot to give you more adjustment if needed. ***Note: People with body lift brackets have a lot less adjustment! Make sure that you mark the INSIDE of the frame. I don't have any good pictures of this, but it will be obvious once you see it.*** Once you have marked where the hole needs to be, it's time to take everything back off of your truck and start drilling. To make this easier on yourself, make sure to use sharp drill bits. You will also want to drill a small pilot hole first, so the big bit doesn't walk on you. Last word of advice, make triple sure that the drill is level and plumb before you start drilling and keep an eye on it throughout the drilling process.


Step Seven:
Repeat steps Three through Five. After that, slide the two top cross bolts through the brackets and the holes you just drilled (bolt, washer, bracket/frame, washer, nut). At this point, I would leave all of the bolts holding the bracket onto the frame a little loose. Chances are you are going to adjust the fit a little bit once the wings are on.
Step Eight:
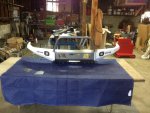
It is time to bolt on the wings. You will notice that the wings have holes cut in them to slide over the black bolts holding the center section onto the brackets. This is very helpful, especially if you are going this by yourself! Now bolt the wing up to the plate/hoop/brush guard using the shorter stainless steel allen bolt, two washers, and a nut. If you have the full brush guard, you would use the same method on the outside mounting plates as well.


Step Nine:
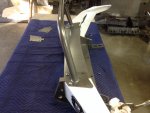
Now it is time to put the bumper caps on. There is a left and a right, so pay attention! Once they are on, you can slide the bottom bolt that goes through the frame in the same way you did the top ones. Then you will use the six longer stainless steal allen bolts to attach the cap on the front. You will also use two washers and a nut for each of these.


Now that the center section is adjusted and bolted up tight, you need to mark where to drill for the cross bolts. This bumper is designed to have adjustment every way possible, so use that to your advantage. You will notice the bolt holes in the bracket are slotted. You may want to make your mark in the middle of that slot to give you more adjustment if needed. ***Note: People with body lift brackets have a lot less adjustment! Make sure that you mark the INSIDE of the frame. I don't have any good pictures of this, but it will be obvious once you see it.*** Once you have marked where the hole needs to be, it's time to take everything back off of your truck and start drilling. To make this easier on yourself, make sure to use sharp drill bits. You will also want to drill a small pilot hole first, so the big bit doesn't walk on you. Last word of advice, make triple sure that the drill is level and plumb before you start drilling and keep an eye on it throughout the drilling process.
Step Seven:
Repeat steps Three through Five. After that, slide the two top cross bolts through the brackets and the holes you just drilled (bolt, washer, bracket/frame, washer, nut). At this point, I would leave all of the bolts holding the bracket onto the frame a little loose. Chances are you are going to adjust the fit a little bit once the wings are on.
Step Eight:
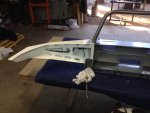
It is time to bolt on the wings. You will notice that the wings have holes cut in them to slide over the black bolts holding the center section onto the brackets. This is very helpful, especially if you are going this by yourself! Now bolt the wing up to the plate/hoop/brush guard using the shorter stainless steel allen bolt, two washers, and a nut. If you have the full brush guard, you would use the same method on the outside mounting plates as well.
Step Nine:
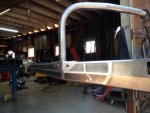
Now it is time to put the bumper caps on. There is a left and a right, so pay attention! Once they are on, you can slide the bottom bolt that goes through the frame in the same way you did the top ones. Then you will use the six longer stainless steal allen bolts to attach the cap on the front. You will also use two washers and a nut for each of these.

