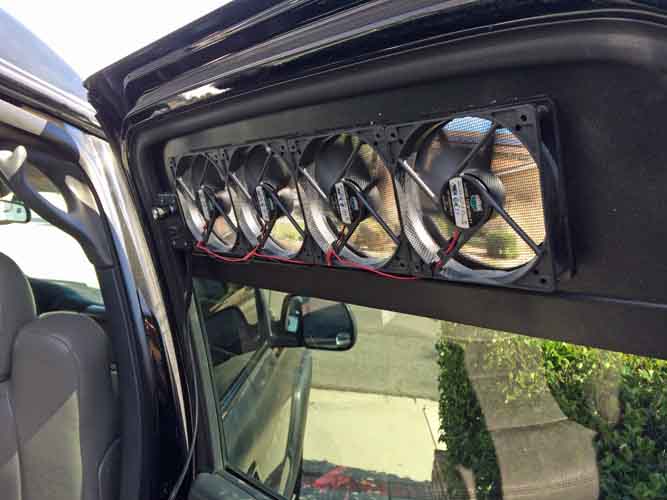
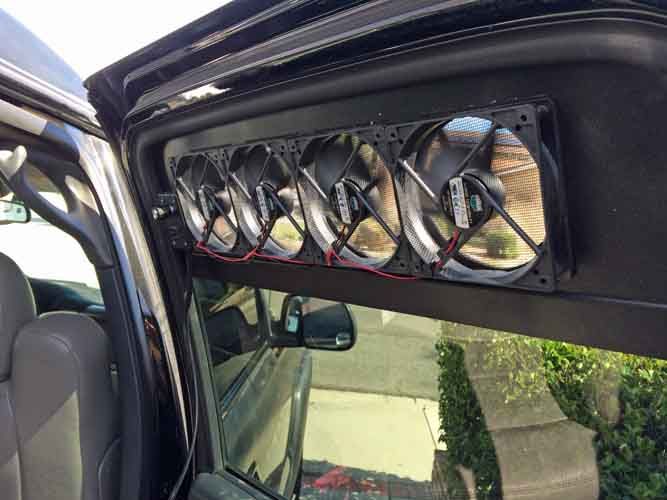
Window insert for 12VDC fan ventilation

wvracer821

Observer
I'm glad I stumbled on this thread. I have been dreaming up an idea to build a setup like this for moving air in my roof top tent.
 

rayra

Expedition Leader
Easy and cheap to do, especially with 12VDC-native computer fans. And they're usually built to be quiet and low power draw. And nowadays there's all kinds of lit ones too.
 

Pinnacle Campers

Chateau spotter
Hope you don't mind if I post my take on a similar idea. Seems this thread is gaining some attention so I thought some more input would be appreciated.
Although we typically camp in the cooler areas and in the shade, I did see a need to move some air through the van occasionally. Most importantly its nice to move moisture out and keep condensation to a minimum. I wasn't quite ready to install a roof fan yet so I made this little gem.
208w87m.jpg

It runs using a pair of computer fans wired up to a cig lighter plug. The substrate is 1/8" ABS.
The water proofness of the ABS combined with the window deflector keeps water out. At the top it fits tight into the window channel. At the bottom its channeled so the window goes inside creating a nice tight fit.
5b750w.jpg

Folded up and cord wrapped for storage.
24qk2eh.jpg


👍🏼
 

rayra

Expedition Leader
Nice! By all means, please do post other ideas. The hinged extension is a fantastic solution for that sort of window opening. Really solves the open space dilemma without making the insert odd-shaped or a PITA to transport
And same for shaping the whole thing to be a cord wrap, as well. Some of the louvred fan grills I found were 6"x6" overall, but able to mount 120mm (4-3/4") fans. That would create a very similar flange / lip.


And in the realm of related ideas, I'm looking at my ratty stained, twin spring-steel loop windshield shade screen - the kind you twist into a smaller hoop for storage - and thinking to get some 'no see-um' mesh from ripstopbytheroll.com and convert a hoop to cover my moonroof opening. If the hoop is large enough to cover it completely, I can just pop it to full size, mount or sew in a few small rare earth magnets around its rim and just plop it on the roof over the opening. With the screened moonroof wide open, the solid roof rack deck and the fan insert, the vehicle interior should be no hotter than ambient in the summertime. AND my awning project, no hotter than ambient in the shade temps. Those four mods together should be a nice improvement in SoCal.

Another option is to make yet another insert, a simple pressboard frame, and cover it with mesh, fit it all so it just lays in the opening.

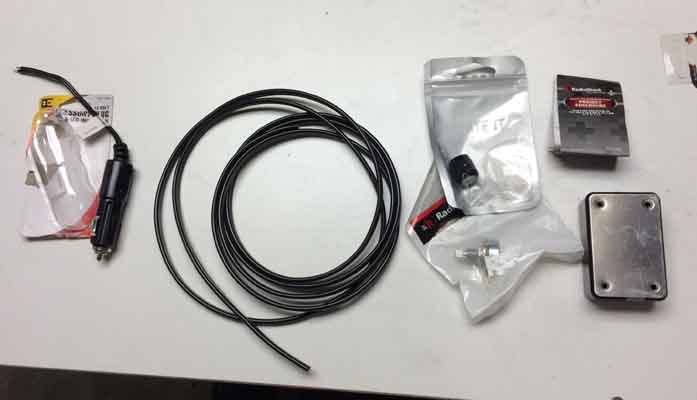
Spent about $20 on materials the last couple days. A 12v cig lighter plug, ~$3; 8' of 18ga 2-conductor wire meant for low voltage yard lighting, <$3, a rheostat, matching knob and 1"x2"x3" 'job box, ~$14 for all three at RadioShack.

windowfaninsert18.jpg


And a quick mockup of how I'm thinking of placing it.

windowfaninsert19.jpg


And as I'm looking at it now, I'll likely try to put the knob facing up or to the side, if the rheostat will fit, just so the knob doesn't stick out. That way I can slide the whole thing into a fitted transport bag and not have the knob sticking out to be broken off in transport.

Also thinking to mount a couple smallish J-hooks on the interior side of the thickened bottom piece, to wrap the cord on when not in use. I have a factory 12v cig lighter 'power port' on the back face of the center console, facing the 2nd row. it's only about 4'+ direct to the fan power switch. (Oops forgot to check if that rheostat was also a switch. Poop.), so an 8' cord should be plenty long enough.

I'll probably get it all put together tomorrow.


3400
 
Last edited:

rayra

Expedition Leader
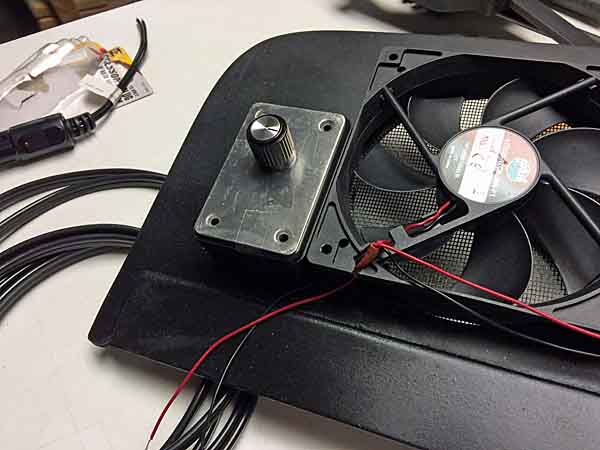
Screwed around yesterday and today a bit and got the window fan insert assembled and tested. Got lazy and said f it and put the rheostat control knob jutting out the front face of the job box instead of the top or side. The fit of the rheostat inside the box for those side orientations was going to be very close and I didn't want to put that much effort into it. I'll probably wind up regretting it later.

You can see how I came up short on the wire splicing. That wire run should have been long enough to tuck into the bottom side of the fan bodies. I cut down each fan wiring loom with the intent of soldering them together in a way that made them wired in parallel, sort of like old school side pipes where each pipe flows into the next. I cut them about 1/2" too short for how I wanted to fit them.
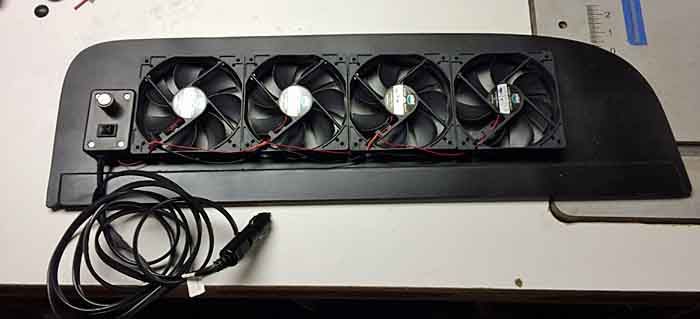
windowfaninsert20.jpg


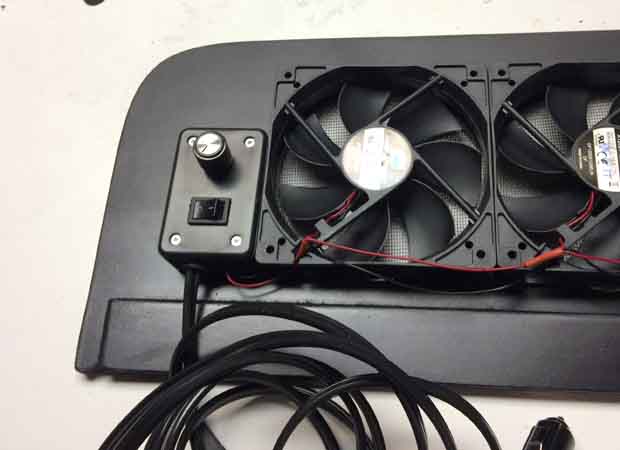
Aligned the small job box with the bottom of the fans. This placement would have worked great with the knob on the top. Put in a small on/off switch as well.
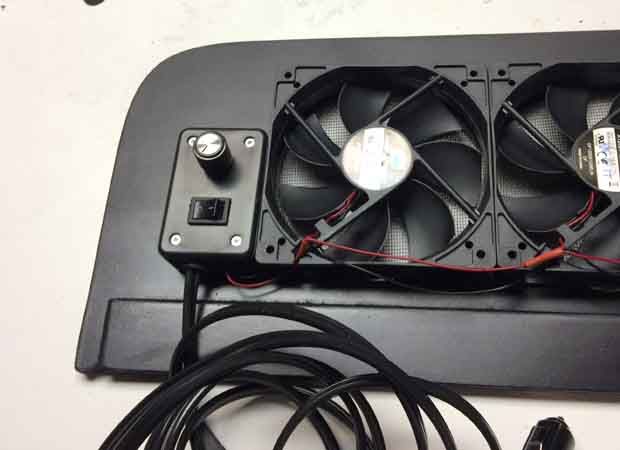
windowfaninsert21.jpg


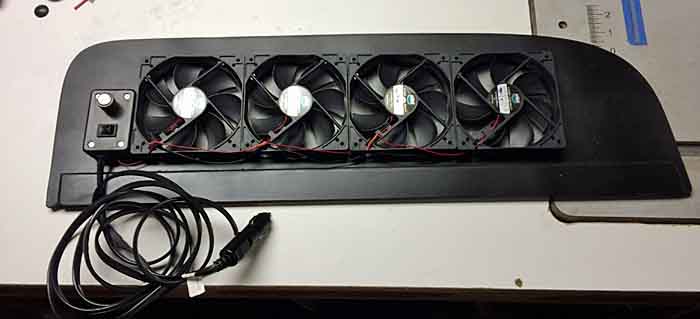
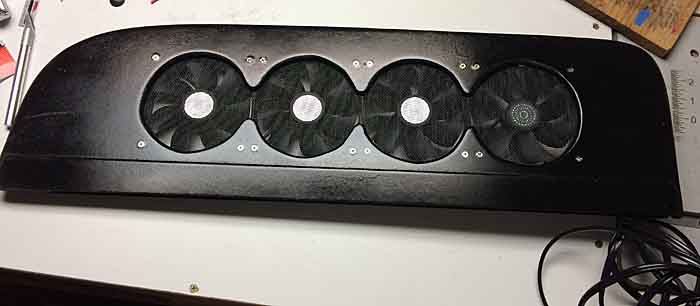
And the outer face. Also with a minimum effort paint job. Just couldn't be arsed with making it super pretty. This was more about finishing up a bunch of unfinished projects, than making it super nice.
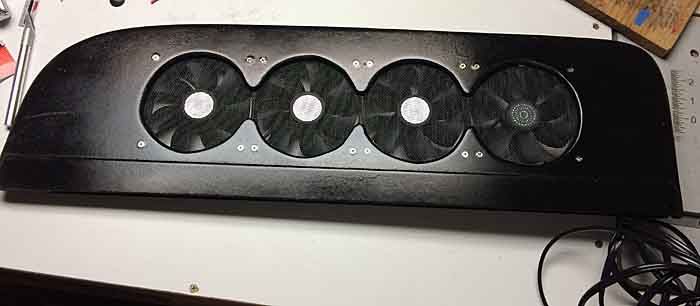
windowfaninsert22.jpg


3540
 
Last edited:

Burb One

Adventurer
Screwed around yesterday and today a bit and got the window fan insert assembled and tested. Got lazy and said f it and put the rheostat control knob jutting out the front face of the job box instead of the top or side. The fit of the rheostat inside the box for those side orientations was going to be very close and I didn't want to put that much effort into it. I'll probably wind up regretting it later.

You can see how I came up short on the wire splicing. That wire run should have been long enough to tuck into the bottom side of the fan bodies. I cut down each fan wiring loom with the intent of soldering them together in a way that made them wired in parallel, sort of like old school side pipes where each pipe flows into the next. I cut them about 1/2" too short for how I wanted to fit them.

windowfaninsert20_zpsolrxscuj.jpg


Aligned the small job box with the bottom of the fans. This placement would have worked great with the knob on the top. Put in a small on/off switch as well.

windowfaninsert21_zpszsyaehld.jpg


And the outer face. Also with a minimum effort paint job. Just couldn't be arsed with making it super pretty. This was more about finishing up a bunch of unfinished projects, than making it super nice.

windowfaninsert22_zpsq00u7w4s.jpg


3540

That's not nice? lol. Great work. I would love to be able to make a solution like that. If you ever decide to make a prettier one, I'm first on the list to buy it.
 

rayra

Expedition Leader
If there's enough of a market, I just might. Then I could justify buying a 4-1/2" / 120mm hole saw. They're kind of spendy, $35 for just the bit, that's more than the whole insert costs. And when you start making more than a one-off, it makes more sense to make some templates / jigs and then things are really easy to build.
If you want one, I'm willing to do it for cost, be an excuse to further refine my build tech methods and make proper templates while I'm at it.

Would be pretty easy to do this for other vehicles, too. Customer would just need to use some newspaper or wrapping paper and trace their window opening and glass top edge, measure the thickness of their glass, and take a couple pictures of of the inside and outside of the window channel. Mail me the tracing and I could make the insert. And not even that, if I've already done that model vehicle.

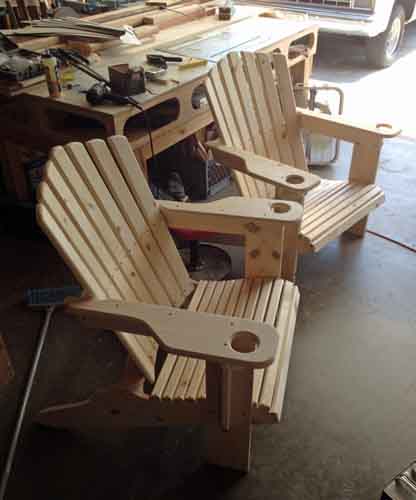
I use a set of templates to build these oversized adirondack chairs, build 5-6 a year as people try them out at our house or those of prior customers. Not a real moneymaker, I do too much 'extra' stuff to them and have to keep the price down because of cheaper import wood versions and $12 plastic ones abound. But I like building and tweaking things like the shape of the back rest.

Jakes14.jpg
 
Last edited:

rayra

Expedition Leader
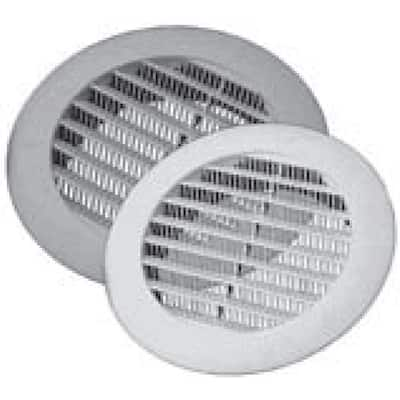
I'm also looking at things like soffet vent covers to use as directional nozzles on the inside. With the right sort of mounting board they could be spinnable, turn them how you want the air moving. Or they could be fixed the way I described earlier, with the foremost aimed forward, the next aimed down, the rearmost aimed towards the rear of the vehicle.

41XJaErJWfL._SY300_.jpg
82189001-06e2-491f-bbcf-e0c357c7b3d7_400.jpg
regal.gif


And I'm still thinking the next time I have my rear cargo area apart and have access I'm going to just put 12v to the rear AC squirrel cage fan and see what happens. Could just put a diode on the factory power line to prevent backfeeding the vehicle wiring and put an always hot line and a switch right above the rear AC in the cargo sidewall panel and just be able to slap a switch and have moving air in the back.


eta and in related news, I'm looking into making some cable pull handles at the rear liftgate for manually unlatching either the window glass or the whole Liftgate from inside the vehicle, in the back. Either integrating some e-brake release handles or something as simple as a ring on some wire, The internal latch / transfer bars are right behind the plastic trim panel. Just have to add some wire and orient the pull in the right direction to open the unlocked latches. And the lock switch is already on the passenger side D-pillar.
 
Last edited:

DanCooper

Adventurer
"And I'm still thinking the next time I have my rear cargo area apart and have access I'm going to just put 12v to the rear AC squirrel cage fan and see what happens. Could just put a diode on the factory power line to prevent backfeeding the vehicle wiring and put an always hot line and a switch right above the rear AC in the cargo sidewall panel and just be able to slap a switch and have moving air in the back."


Dammit Sarge, you're gonna burn your truck to the ground!

Sincerely, V.
 

rayra

Expedition Leader
What 's one more electrical modification, amongst insurance adjusters?

I haven't even got around to the Aux battery feeder circuit for another aftermarket fuse panel for my dash switches / off road lights / radio stack/console. Or the front hitch / winch SB175 Anderson coupler. Probably going to rig a long heavy gauge set of jumper cables with a matching coupler on one end, then I can just jack them in at either end of the vehicle to jump someone.

/I want ALL the electrical options. And a nice fresh bag of marshmallows for the inevitable fire.
 

rayra

Expedition Leader
OMG IT SPINS!

windowfaninsert23.jpg


No strong force to it and very quiet, even at full blow.Just quietly moving the full vehicle volume of air, every minute.

Pretty much done with it. I'll sew up a sturdy bag for it and put it in my storage drawers, keep it with the vehicle. If I get motivated I might clean up the fan wiring, maybe put it in some split loom and fasten it to the sides of the fans in a more protected position. If I get supermotivated, I might re-do the job box so the control knob sticks out the top, in a more protected position. Maybe I'll get it all right on Geron's build.
 
Last edited:

Burb One

Adventurer
OMG IT SPINS!

windowfaninsert23_zpse5ryfa86.jpg


No strong force to it and very quiet, even at full blow.Just quietly moving the full vehicle volume of air, every minute.

Pretty much done with it. I'll sew up a sturdy bag for it and put it in my storage drawers, keep it with the vehicle. If I get motivated I might clean up the fan wiring, maybe put it in some split loom and fasten it to the sides of the fans in a more protected position. If I get supermotivated, I might re-do the job box so the control knob sticks out the top, in a more protected position. Maybe I'll get it all right on Geron's build.

Man that looks awesome! Would be huge improvement over my old style fans handing over the rear window. Let me know if you ever move on that!
 

Forum statistics

Threads
188,349
Messages
2,903,642
Members
230,227
Latest member
banshee01
Top