Hello stereo!
It's just fine with me to post your roof rebuild questions here. In retrospect, this thread ought to be renamed "Skamper Roof Rebuild."
I'll take a stab at your questions. I had to have a couple cups of coffee just to digest it all

You may want to grab a cup of coffee, too, before you begin reading, because this is lengthy.
1) Do you have any ideas what's causing my two sides to be at different heights?
A few things come to mind:
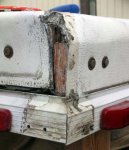
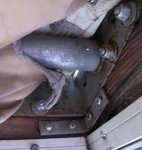
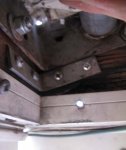
1. In one of your photos you refer to the bent arms that would adjust the fore-aft position of your roof. But what I noticed was the "scabbed" sections where the bolts pass through. They're the short section inserted and perhaps riveted in place. I'm guessing that the roof height has been an issue with a previous owner and this adjustment may have been made to compensate for something else. This would really cause some geometrical issues, especially if one side is longer than the other.
2. I'm wondering if everything is symmetrical with the actual lift mechanism. I would measure the arm attachment point from each side of the crank to see if both sides are equidistant. If the lift mechanism unit has been apart at any time, it may not have been properly reassembled. I know mine came apart due to the bolts backing out right after I brought it home. When I reassembled it the first time, one gear was a tooth off from the other on the opposite side. It really threw things off.
This could be the reason for the scabbed sections and why you have to pull the arms in, if they are over extended.
3. If the torsion rods are not set equally, it may be skewing everything else (see 5 below). If you are having to pull one side in to lower the roof, the torsion rod may be working against you if it was reassembled improperly by a previous owner. The rods should cause the arms to naturally rotate to the inside of the camper.
2) I love the bed rail reinforcement idea. When you re-fastened the L-brackets, how did you determine where to position/bolt it? Did you have the roof up or down?
Thank you, but I can't take credit for the idea. And I believe it does take a lot of the stress off of the roof (I'll explain more in 3 & 5). I used a highly refined technique that I'll call "set the roof on and bolt it in place." I extended the roof to it's highest point and bolted it from there. I tried to use the old holes as a guide, but everything on mine was so out of skew it really didn't help all that much. If you use some sort of bracing system with the torsion bar brackets, I don't know that it will really matter at what height the roof is positioned.
3) Since most of the plywood is in good shape, do you think I could just cut the bad end off and replace just that section? I'd use lamello wafers, poly glue, and a metal reinforcement, perhaps like your bed rail. And since there's two layers of plywood, I would offset the cut (joint) location. Or do I need the strength of a full-length piece?
If you are going to use a metal reinforcement, you probably could get away with just replacing the ends as you described. However, I don't think it would be any harder, perhaps even easier, to replace the whole section on the back. I don't think you will have to remove the roof. I would suggest checking Paul's (SLO F250) thread for great instructions on how he did his.
http://www.expeditionportal.com/forum/threads/38813-Budget-Skamper-Fix-Build/page4 He's the inspiration behind this whole rebuild I'm trying to pull off

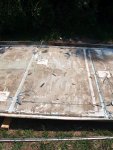
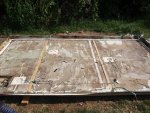
4) Like yours, my roof is constructed of an outer aluminum skin, inner core of foam insulation (of a density similar to styrofoam), and the ceiling board. What I don't understand is how the outer rim of plywood is attached to the skin and foam. The trim piece that goes all the way around is screwed to the plywood and overlaps the aluminum a little bit to cover the edge. But what holds the aluminum and the foam to the plywood? The small area I opened up doesn't suggest that the aluminum is glued to the plywood originally though that's been done on the re-builds. But how is the aluminum originally secured to the plywood frame?
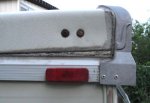
Glue! And lots of it! While it may not look like it was originally glued, it was. That's all that is holding that roof together, well, for the most part. I tried to rebuild my roof just like it was originally produced by the manufacturer, so hopefully the photos in this thread can give you some ideas of what's inside there. The trim on the sides is held in place by screws into the plywood. That trim and the corner brackets give it the "box" shape and sturdiness. If you remove the corner brackets, the roof can be flattened into a sheet. Remove the trim and it can be bent and folded without much effort.
5) You warn about the "torque" in the lifter mechanism but say there's no spring inside. If I support the roof with T-braces from inside, won't that take all the stress off the lifters, even if they're not fully extended? It seems like a simple scissor mechanism.
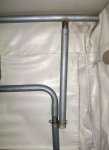
While there is no coiled spring inside, there is a spring-steel rod with a hexagonal cut on each end that fits into the socket in the lifting frame on one end and the corner bracket on the other. When the roof is fully extended, the tension is relieved from the rod, but not fully relieved. When the roof is in its retracted position, it loads up the tension by twisting the rod.
In a sense, it is a simple scissor mechanism. But it also has the hidden torsion bar inside. That's what is causing the bent grain in you plywood. I believe it is also causing that unevenness between the side and the end. You will definitely want to have your roof fully raised to relieve any torsional stress before you remove any bolts from the corner brackets. Supporting the roof with a T-brace should work fine. I just used blocks of wood between the lifting mechanism and the roof.
Once you remove the bolts and have lifted the roof a bit, check to make sure the corner brackets are at the same angles. I'm guessing that they may not be, which would cause possible unequal pressure when lifting or retracting.
To remove the brackets, you will have to lift the rear of the roof a few inches and then slide the brackets out the rear. The torsion bar may or may not come out with them. When you reinstall them, remember to preload some torsion into them by placing them at an angle and then twisting them into place. This is kind of difficult, which is another reason I went with the angle iron. Remember, ratchet straps are your friends

Once you start reassembling everything, you'll understand the torque/torsion issue and that the rear section of the roof is under a lot of strain, especially when the roof is retracted, which is most of the time. The only thing structurally taking all that stress is the plywood. That's why I opted for some steel reinforcement. And I even used OSB. I has no torsional stress on it now.
6) I unscrewed the rear trim piece but I'm having a heck of a time disengaging it from the skin because the caulk/mastic is so gummy (which may be my answer to Question 4). It's not like silicone that you can just slice off. Do you have any solutions for removing that stuff? And what did you use to seal that joint when you put the trim piece back on?
Your solution is to give me your current Skamper and find one that has completely fallen apart. Well, that's how mine was when I brought it home. I actually had to throw some trim pieces inside it and stop on the way home to strap the roof back down so it didn't blow off!
An easier suggestion might be to try a utility knife with a sharp blade. Just go easy with it, take your time and don't slice the skin--yours or the aluminum!
When I put mine back together, I used a generous helping of clear silicone caulk. I'm sure there's better stuff out there, but that's what was available to me at the time.
7) We have a hard time closing the roof because one corner is tight against the wall while the opposite side has more than enough room. Is there anything I can do during the rebuild to goose the roof over?
My guess is that if you check out everything in 1-5, number 7 won't even exist. I think it's a torsional/geometric issue. My guess is that the roof has had issues before and a previous owner did his best to repair it, but just didn't get it quite right. It's not rocket science, but does take some patience and a lot of coffee breaks :coffeedrink:
Good luck, stereo! Let us know how it goes. And some of these other members may also have some great advice that I may have overlooked or from different experiences.
Oh, and I love those aluminum caps!
