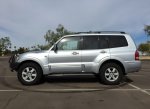
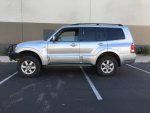
"Yoshi" - 2005 Limited Build & Adventure Thread

SONICMASD

Adventurer
9/28/18: So I'm minding my own business at work one day and Toasty messages me wondering if I know anyone that might be interested in his pristine 2005 for a good price? I say, "yeah, me." and then I bought it.

Ok, so that's not exactly how it happened. It wasn't a split second decision, I mulled it over for quite awhile. At first, I tried to convince my wife to replace her daily, a 2011 Kia Sorento EX V6 with Toasty's Gen3. I brought it over to the house on an extended test drive and had her drive it but she wasn't sold. She liked her car's many amenities like keyless entry, push button start, dvd player, mpg, bluetooth, and insanely fast acceleration. I don't blame her, I admit that her Sorento is a better daily driver. But that couldn't just be the end of it; even though I already had 2 Monteros and was still in the process of testing which Gen was better for my needs, I just couldn't pass up such a clean and well maintained Montero (some of you guys also get how that goes).

So now I had 3 Monteros, my daily driver 2013 Hyundai Sonata, and my wife's Sorento. The fleet was strong but not sustainable.

The reason I pulled the trigger is because I was nearing the end of my Gen2 vs Gen3 tests and could already see the writing on the wall. I was leaning heavily towards the Gen3 so now the question became which Gen3 to go with? It was a familiar position to be in. First came the General Li, then Black Betty, then Lawrence, and now this new challenger. The idea of starting over for the 4th time was so daunting but once again, I decided to take a chance.

517648


Here are the specs on the new addition to the family, Yoshi.
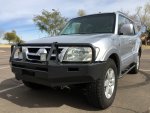
  • 2005 Limited
  • 167k
  • 2 Owners (old lady who used it as a daily and kept it stock and on pavement; and Toasty, who wheeled it a few times but the majority of his miles were put on as a city mobile.
  • CA & AZ car
  • Pristine interior, Exterior has a few small dings and scratches but nothing compared to what I'm used to and will soon inflict upon it
  • Custom Toasty Fabbed Rock Sliders
  • ARB bumper
  • LED bumper lights
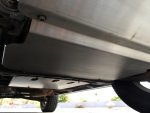
  • 3 ADD Skids: Front, Middle, and Transmission - This was the ADD Gen3 test rig. Chances are if you got Gen3 ADD parts, their lineage comes from this vehicle.
  • 265/70R17 Nitto Terra Grapplers
  • Climate Control relocation
  • Timing belt maintenance done at 135k
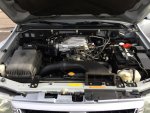
517649
517650
517651
517652
517653
 

SONICMASD

Adventurer
2/2/19: Fast forward about 5 months and I actually started working on this rig. I was busy doing my head to head Gen2.5 vs Gen3 tests with my other Monteros and Yoshi was just used as a spare vehicle for both myself and my wife. I sold her Sorento because we're moving to Flagstaff this summer and I want her in an AWD vehicle, plus it had weak ass A/C even when operating correctly with a full charge, and had a slightly annoying timing cover oil leak that wasn't worth fixing. So she drove the Montero around until I found her a replacement vehicle, a 2011 MDX with perhaps the best and most Japanese traction system name ever: "Super Handling All Wheel Drive"! It's a good vehicle but has some defects and quirks that erk me but she loves it so I'm gonna leave well enough alone right now.

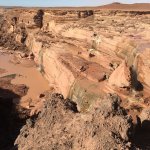
We ended up taking Yoshi to Flagstaff on a weekend trip too. I also randomly wheeled it 3 times over these 5 months: I ran Bulldog Canyon, and on the Flagstaff trip the I-17 was backed up big time because of an accident at Black Canyon City so we just got off and went around it on the Maggie Mine Trail, and then once in Flagstaff I drove the entire O'Leary Peak Trail and then overlanded to Grand Falls. It did great on all the trails and like my other Gen3, Lawrence, this one impressed me each time.

518007
518008

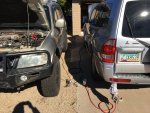
I noticed that the fuel economy on this Montero though was significantly worse than Lawrence which doesn't make much sense considering that Montero is on 33s and lifted. But it has 4.90s and Load C tires whereas this one has the orignal 4.30s, more armor, and Load E tires. But still, it was a huge difference like 13mpg vs 17mpg mixed driving so it caused me to investigate. The exhaust had a heavy gasoline smell to it so I suspected it was running a little rich. So I smoke tested the intake and exhaust system and found that the dreaded Butterfly O-ring was indeed leaking but interestingly, not enough of a leak to trigger a CEL. I think this vac leak was causing the intake manifold to suck in extra air, in turn detected by the O2 sensors downstream, which the computer then tells the injectors to add more fuel to balance out. That's my theory but at this point, 3 months later, I'm still in the middle of finding out and Yoshi is all torn apart so I'll post back with more on that later.

518013


Ok, let's get to some mods!

1. I teamed up with Ernest to buy a 2001 XLS with a bad motor which Johnny B was kind enough to store at his place for a few weeks while we pulled parts off of it. I took the standard whip antenna and replaced my power one with it. Not because my power antenna was broken but because I was annoyed that there was no way to retract it and still have the stereo on and I knew that it would get bent on a trail and then get jammed. So I just nipped that in the bud proactively. But not before running an experiment - I noticed that overseas Monteros got a switch to retract the power antenna mast (though I've heard from some overseas forum posts that it only brings it down halfway) and I also noticed that if you remove the center switch panel cover US Monteros have an empty female wire connector. I compared the pins/colors, and layout and confirmed that it does indeed match the antenna switch so I found a used switch on eBay UK and ordered it. It plugged into the empty wire harness perfectly but sadly, it doesn't do anything. After further research it looks like there might be a relay deeper in the dash that is needed. Oh well, it was an interesting expirement and way to waste $35 for the cause; anyone want to buy an antenna switch?

518006

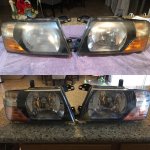
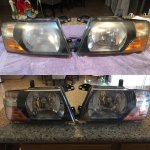
2. I also pulled the headlights from this 2001 and polished them up using the best headlight refinishing kit I've found so far and I've tried quite a few of them. This Powerball kit works great because it comes with everything and attaches to a power drill unlike the 3M kit. Another thing I did was try out Meguiar's "Keep Clear Headlight Coating" to hopefully protect my polishing job and keep it from fading in the AZ sun. But the weird thing is it went on great on one headlamp with no issues but on the other it left an orangepeel finish and made the lens less clear. I sanded it off and tried it again but sadly with the same result. I don't know why it worked on one lens but not the other so now it will be interesting to see if the one with the coating stays clearer longer.

519006

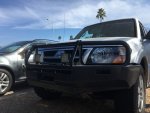
The pics of Yoshi that I posted in the first post where actually from 6 months before I bought the truck and the headlights had yellowed significantly since then so that's why I did it. Also, I think the Black bezels of the 01-02 look better than the chrome ones of later years.

PS - It's impossible to get the headlights in and out if you have the ARB front bumper, it is just a few millimeters too tight which I was not happy about. But it was a quick fix, just remove a the top bolts and loosen the bottom ones holding the bumper to the ARB mounts and pivot it out a little, you only need a tiny bit of extra room and it was enough to switch out the lights.

518011


518012

(Side note - that's my new 2012 TDI Jetta Sportwagen in the background. I found the 2013 Sonata I had recently bought to be horribly underwhelming in all aspects and hated driving it. I could feel it sucking away my soul with each commute. Post Dieselgate TDIs are the best deal in cars of the last decade (at least, maybe ever!) and I had to jump on one. Best decision ever, I feel exactly the opposite compared to the Sonata every time I drive it and can't get over it. It's truly a feat of modern engineering - fast, sporty, insanely spacious, attractive, comfortable, and economical. I've been getting around 35mpg with a heavy foot around town and am looking forward to taking it on its first hwy road trip soon. I've owned 17 vehicles so far in my life and of course driven countless others and this one is definitely at the top of my list when it comes to general use/daily driver duties.)

3. Then I took off all of the faded wiper arms and repainted them and put on new wiper blades.

4. Next, I applied Shin-Etsu grease to every rubber door, window, and body trim piece/gasket/seal on the whole truck. This stuff is a miracle product. You just work it into any rubber piece and it shines it right up, rejuvenates it, and makes it soft again and look like new. I can't recommend it enough to keep rubber components from drying out and cracking.

5. Then I cleaned out the sunroof track (not by taking the whole thing out, just by opening the sunroof and cleaning the rails and exposed chain parts) and applied new VW sunroof grease to it.

As you can tell, I took Shovel's Sunroof repair guide on the ADD forum to heart: https://forum.adventuredrivendesign.com/index.php/topic,698.0.html

6. I lubed all the window tracks with silicone spray grease.

7. Cleaned all the sunroof drain tubes by running a piece of weed wacker chord down them and then flushing with water. They weren't clogged by I just wanted to make sure they weren't in the process of building up a clog.

8. Lastly, I replaced the PCV valve just because it looked original, was a cheap expense, and easy to get to.

It was a full afternoon of enjoying the great Phoenix February weather and sprucing up my new rig.
 

Attachments

  • VMOY9488.JPG
    VMOY9488.JPG
    1.1 MB · Views: 34
Last edited:

SONICMASD

Adventurer
Forgot to mention in the last post that one of the first things I did was replace all of the interior overhead and door sill lights (10x T10 20-SMD LED 6000k White Super Bright Interior Light Bulb 194 168 2825 W5W ) with LEDs from eBay. Big difference though hard to tell in this crappy photo.

518920


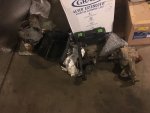
2/19/19: I found a set of 4.90 diffs on Car-Part.com at a junk yard in Missouri and they arrived today. The front vacuum housing was smashed during shipping but I didn't really care because all I wanted was the gears to have transplanted into my super clean housings. Also, you can kind of spot the winch I bought a few days before - A Superwinch Talon 12,500 with Synthetic Rope! It has an external brake instead of being inside the rope spool which in theory keeps the synthetic rope from getting hot which is a good thing because synthetic winch rope has a very low working temperature before it starts to lose strength. The only thing is I'm not sure if it will be a plug and play fit in the ARB bumper because of the side mounted solenoid box but we'll see when the time comes because I can't mount it now as the stock springs are already super sagged with just the added weight of the ARB bumper (see pic above at the Cinders OHV area in Flagstaff).

518922

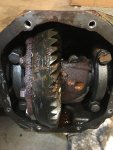
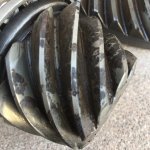
So I started tearing apart the diffs to get at the gears and although the rears looked good, the front housing had a little bit of moss growing on the outside and when I opened it up I discovered that water had gotten in and sat and created a lot of rust .

518923

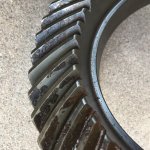
Although the carrier and other parts looked really bad, the gears themselves are made of a hardened steel and the rust mostly wiped right off. But there were a few bad spots with more intense pitting and discoloration. I took them to the mechanic doing the gear set up and he said he wouldn't recommend installing them with that damage so I opted to buy a different front set of 4.90s rather than spend time trying to file or treat these with rust removing chemicals, etc.

518925
518926
 

Attachments

  • IMG_5503.JPG
    IMG_5503.JPG
    1.6 MB · Views: 23
Last edited:

Travoski

New member
2/2/19: Fast forward about 5 months and I actually started working on this rig. I was busy doing my head to head Gen2.5 vs Gen3 tests with my other Monteros and Yoshi was just used as a spare vehicle for both myself and my wife. I sold her Sorento because we're moving to Flagstaff this summer and I want her in an AWD vehicle, plus it had weak ass A/C even when operating correctly with a full charge, and had a slightly annoying timing cover oil leak that wasn't worth fixing. So she drove the Montero around until I found her a replacement vehicle, a 2011 MDX with perhaps the best and most Japanese traction system name ever: "Super Handling All Wheel Drive"! It's a good vehicle but has some defects and quirks that erk me but she loves it so I'm gonna leave well enough alone right now.

We ended up taking Yoshi to Flagstaff on a weekend trip too. I also randomly wheeled it 3 times over these 5 months: I ran Bulldog Canyon, and on the Flagstaff trip the I-17 was backed up big time because of an accident at Black Canyon City so we just got off and went around it on the Maggie Mine Trail, and then once in Flagstaff I drove the entire O'Leary Peak Trail and then overlanded to Grand Falls. It did great on all the trails and like my other Gen3, Lawrence, this one impressed me each time.

View attachment 518007
View attachment 518008

I noticed that the fuel economy on this Montero though was significantly worse than Lawrence which doesn't make much sense considering that Montero is on 33s and lifted. But it has 4.90s and Load C tires whereas this one has the orignal 4.30s, more armor, and Load E tires. But still, it was a huge difference like 13mpg vs 17mpg mixed driving so it caused me to investigate. The exhaust had a heavy gasoline smell to it so I suspected it was running a little rich. So I smoke tested the intake and exhaust system and found that the dreaded Butterfly O-ring was indeed leaking but interestingly, not enough of a leak to trigger a CEL. I think this vac leak was causing the intake manifold to suck in extra air, in turn detected by the O2 sensors downstream, which the computer then tells the injectors to add more fuel to balance out. That's my theory but at this point, 3 months later, I'm still in the middle of finding out and Yoshi is all torn apart so I'll post back with more on that later.

View attachment 518013


Ok, let's get to some mods!

1. I teamed up with Ernest to buy a 2001 XLS with a bad motor which Johnny B was kind enough to store at his place for a few weeks while we pulled parts off of it. I took the standard whip antenna and replaced my power one with it. Not because my power antenna was broken but because I was annoyed that there was no way to retract it and still have the stereo on and I knew that it would get bent on a trail and then get jammed. So I just nipped that in the bud proactively. But not before running an experiment - I noticed that overseas Monteros got a switch to retract the power antenna mast (though I've heard from some overseas forum posts that it only brings it down halfway) and I also noticed that if you remove the center switch panel cover US Monteros have an empty female wire connector. I compared the pins/colors, and layout and confirmed that it does indeed match the antenna switch so I found a used switch on eBay UK and ordered it. It plugged into the empty wire harness perfectly but sadly, it doesn't do anything. After further research it looks like there might be a relay deeper in the dash that is needed. Oh well, it was an interesting expirement and way to waste $35 for the cause; anyone want to buy an antenna switch?

View attachment 518006

2. I also pulled the headlights from this 2001 and polished them up using the best headlight refinishing kit I've found so far and I've tried quite a few of them. This Powerball kit works great because it comes with everything and attaches to a power drill unlike the 3M kit.

The pics of Yoshi that I posted in the first post where actually from 6 months before I bought the truck and the headlights had yellowed significantly since then so that's why I did it. Also, I think the Black bezels of the 01-02 look better than the chrome ones of later years.

PS - It's impossible to get the headlights in and out if you have the ARB front bumper, it is just a few millimeters too tight which I was not happy about. But it was a quick fix, just remove a the top bolts and loosen the bottom ones holding the bumper to the ARB mounts and pivot it out a little, you only need a tiny bit of extra room and it was enough to switch out the lights.

View attachment 518011

View attachment 518010

View attachment 518012

(Side note - that's my new 2012 TDI Jetta Sportwagen in the background. I found the 2013 Sonata I had recently bought to be horribly underwhelming in all aspects and hated driving it. I could feel it sucking away my soul with each commute. Post Dieselgate TDIs are the best deal in cars of the last decade (at least, maybe ever!) and I had to jump on one. Best decision ever, I feel exactly the opposite compared to the Sonata every time I drive it and can't get over it. It's truly a feat of modern engineering - fast, sporty, insanely spacious, attractive, comfortable, and economical. I've been getting around 35mpg with a heavy foot around town and am looking forward to taking it on its first hwy road trip soon. I've owned 17 vehicles so far in my life and of course driven countless others and this one is definitely at the top of my list when it comes to general use/daily driver duties.)

3. Then I took off all of the faded wiper arms and repainted them and put on new wiper blades.

4. Next, I applied Shin-Etsu grease to every rubber door, window, and body trim piece/gasket/seal on the whole truck. This stuff is a miracle product. You just work it into any rubber piece and it shines it right up, rejuvenates it, and makes it soft again and look like new. I can't recommend it enough to keep rubber components from drying out and cracking.

5. Then I cleaned out the sunroof track (not by taking the whole thing out, just by opening the sunroof and cleaning the rails and exposed chain parts) and applied new VW sunroof grease to it.

As you can tell, I took Shovel's Sunroof repair guide on the ADD forum to heart: https://forum.adventuredrivendesign.com/index.php/topic,698.0.html

6. I lubed all the window tracks with silicone spray grease.

7. Cleaned all the sunroof drain tubes by running a piece of weed wacker chord down them and then flushing with water. They weren't clogged by I just wanted to make sure they weren't in the process of building up a clog.

8. Lastly, I replaced the PCV valve just because it looked original, was a cheap expense, and easy to get to.

It was a full afternoon of enjoying the great Phoenix February weather and sprucing up my new rig.
The antenna switch on my 2002 Pajero allows the antenna to retract half way only I added another switch next to it and cut the antenna wire from my head unit(after market)and went through the new switch if I am listening to CD or USB the antenna stays down now
 

SONICMASD

Adventurer
3/5/19: So with gears purchased, next came deciding on what suspension to get. I had OME HD Springs and Nitrocharger Shocks on my 03 Limited and liked them but when I took this build on, I did so not to just redo everything I already had in my 03 but with a desire to try something new. Having learned a lot from my previous builds and also with my life in a different place than before, the theme of this build is Innovation + Quality + Speed = Comfortable, Reliable, and Adventure Ready. So, in the words of Jurassic Parks' John Hammond: "I spared no expense". Haha, ok so I do have to spare some expenses because I'm not an eccentric billionaire cloning dinosaurs but this is definitely not going to be a budget build. I'm going to put this thing together faster than any other vehicle I've ever owned, going to farm out a lot more of the work because my time is limited now with a new baby, and I'm going to test out lots of cool products in the process to add knowledge to our community and to hopefully end up with a better vehicle in the process.

With that in mind, I decided to go with Lovell's Springs + Bilstein Shocks after reading hundreds of posts and reviews on every possible Montero/Pajero site I could find: Facebook Groups, Pajero 4wd of Victoria Forum, Pajero Owners of South Africa Forum, Expo, 4x4Wire, etc. It seems to be what the vast majority of the international guys, especially the Aussies, are running and most of them are very very happy with the set up. I gave serious consideration to Koni and Dobinsons MRR but limited availability, support, and info on the Konis; and poor reliability reviews on the Dobinsons ultimately ruled them out. King coilovers would be awesome too but the cost was outside of even this build's scope for now (lots of other work being done outside of suspension so funds are tight) and having to modify the control arms for them to clear was another downer. If King fixes the fitment issues I'll probably go to them in a couple years once more pressing needs are taken care of.

The Lovells raised height springs supposedly offer a little more lift than OME so that'll be a nice little bonus if it turns out to be true (time will tell). Lovells offers 3 spring choices for the front: Standard, Heavy Duty, and Extra Heavy Duty and 2 for the rear: Standard and Heavy Duty.

I wrote down all of the added weight that I was planning for this build for the Front, Middle, and Rear of the vehicle. I then referenced the selection guide on Bushskinz' site: http://www.bushskinz4x4.com.au/bils...oQJDjg98VcmnjdvybcDDycxzUMLZIDYRGUqX2HU3VLhGw

And also noted the following the post from the greatest USA Gen3 build to date and only other USA Montero owner that I was able to find running Lovells:

519001

I'm planning on running the same front seteup as montypower: Full Skids, sliders, 31M Battery, 12.5k winch, and ARB bar. So not wanting my 1.5-2" lift to sag to .5"-1" over stock I was leaning towards the EHD front and HD rear.
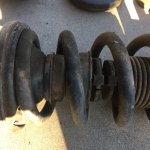
I contacted Lovell's USA distributor, Andy Kollar of Kollar Racing, and he sent my added weight info over to Lovells engineering and they confirmed EHD Front and HD Rear was their recommendation as well. Unfortunately, from there Andy gave me a much higher price than what montypower had paid a few years ago and when I asked him if there was a way I could use my own carrier to help lower the shipping cost from Australia he was a ******** to me so I contacted Super Spares in Australia via email and placed the order with them directly and it saved me $100.

It only took about a week to get the springs and the only downside is that they didn't double box them so the factory cardboard box got destroyed on the way over but the springs were fine.

519002

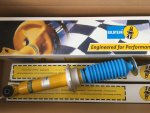
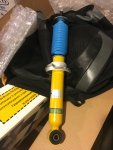
I got the Bilsteins stateside, here are the part numbers:

Front: 24-062718
Rear: 24-062725

The sky blue on both the springs and shock boots should match each other really nicely.

519003
 
Last edited:

SONICMASD

Adventurer
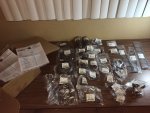
I've been ordering a boat load of parts in preparation for this big overhaul. Here's what has been ordered so far:

NAMEPART #MAKEQTY
BUSHING,FR SUSP COIL SPR MR374546MITSU2
BUSHING,FR SUSP COIL SPR MR374547MITSU2
PAD,FR SUSP SPRING,UPR MR448173MITSU2
PAD,RR SUSP SPRING,U MR418548MITSU2
BSHG,RR SUSP CROSSME MR554076MITSU1
BSHG,RR SUSP CROSSME MR418671MITSU1
INSULATOR,FR DIFF MOMR374569MITSU1
INSULATOR,FR DIFF MOUNTING MR374574MITSU2
OIL SEAL,RR DIFF DRIVE PINMR580530MITSU1
O/SEAL,RR DIFF SIDE BRG MR350883MITSU2
OIL SEAL,FR DIFF SIDEMB393883MITSU1
OIL SEAL,F/DIFF DRIVE PINMB664285MITSU1
GSKT,INTAKE AIR SURGMR561582MITSU1
GSKT,INTAKE AIR SURGMR561581MITSU1
GSKT,INTAKE AIR SURGE TANKMR561584MITSU1
GASKET,ROCKER COVER MD303148MITSU2
DAMPER,FR SHOCK ABSORBER MR448172MITSU2
PAD,RR SUSP SPRING,L MR418047MITSU2
PAD,FR SUSP SPRING,LWR MR448174MITSU2
INSULATOR,FR DIFF MOUNTINGMR374575MITSU1
SHIM SET,F/DIFF DRV PIN,FRMB569391MITSU1
SPACER SET,FR DIFFMB241925MITSU1
O/SEAL,F/AXLE FREEWHL CLMB620515MITSU1
BUSHING,ENG RR MOUNTING 2910A066MITSU4
BUSHING,ENG RR MOUNTING 2910A065MITSU4
Water Pipe O-ring MD030764MITSU2
Rear Cam Shaft Seal MN176208MITSU2
Radiator Hose LowerMR404876MITSU1
Radiator Hose UpperMR404869MITSU1
Thermostat 1305A191MITSU1
CV Joint Boot 1032882 (103-2882)BA2
CV Joint Boot 1032260 (103-2260)BA2
Spark Plug Wire Set6716279 (671-6279)DENSO1
Spark Plug 3403DENSO6
Spark Plug Tube Seal ES721201FELPRO6
Spark Plug / Coil-On-Plug Boot 58991NGK3
Inner Tie Rod Split Washer MR510266MITSU2
Bottom Gaskets Inlet Manifold MR561678MITSU2
Inner Tie Rod Boot - LeftMR510271MITSU1
Inner Tie Rod Boot - RightMR510272MITSU1
Motor Mounts MR510056MITSU2
Full Synthetic 75W-90 Gear Oil -1qtVV7590VALVOLINE3
Updated Rear Diff Drive Flanges3715A083Mitsubishi2
Trans Filter & Gasket B225ATP1


So here's the first big phase of the build plan broken down into 4 parts:

1. Suspension: Bilstein + Lovells + All new OEM rubber bushings. I also noticed that both inner tie rod boots are torn. The tie rods feel good and don't have any play in them so I'll start by just replacing the boots and seeing how that goes. I'm hoping to delay doing the front suspension/steering refresh for at least a year which would be at around 180k.

2. Axles: Refresh Front CVs (new boots & grease), Replace Rear Axle Drive Flanges to fix defective circlip issue that causes the axles to come out of the diff at the worst possible time, Diff ReGear from 4.30 to 4.90, Replace all Diff Mount Bushings (8) while everything is apart (this "while everything is apart" will be a common theme here haha), Install Rear Locker, All new Diff Oil Seals, and new gear oil (Valvoline for the first 500-1,000 miles, then drain and replace with Amsoil).

3. Engine: Spark Plugs & Wires, Valve Cover Gaskets (driver side has a small leak so might as well change them both at the same time), Rear Cam Seals, Coolant Crossover Pipe O-rings, Thermostat, Rad Hoses, Butterfly Valve Inspection and Vacuum Leak Repair, and Motor Mounts.

4. Transmission: Fluid & Filter Change, Crossmember Bushings

5. Exhaust: Muffler Tuck

519201

519200
 

SONICMASD

Adventurer
3/30/19: While waiting for the one and only Montero Master Mechanic, Ernest, to finish up with an engine swap he was working on for someone else, I got started on the Rear Suspension.

I used this video as my guide throughout:
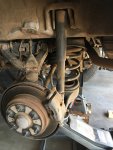
Original Equipment with 170k on them and still riding really well despite the age and one shock being partially blown.
519202

You can never have enough jack stands IMO:

519203
519204

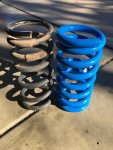
OEM vs Lovells HD. As you can see, they're about the same height but the Lovells HD is waaaay thicker so it shouldn't sag much at all. It'll be interesting to see how they do with the normal expedion load and then when I am towing a 2,800lb camper. If they sag too much with a camper then I'll probably add airbags but I don't anticipate that being a problem.

519205

I replaced all of the rubber bits at this time. The lower coil pads are the ones that take all the abuse and are pretty thin so mine had some holes in them but the top rubber pads looked great and could have definitely been reused if needed.

All done:
519206

519207

I took it for a quick shakedown run around the block and it was hilarious because of the tilt I was looking down at so much asphalt with the sagged front end and raised rear end. The new rear suspension felt great though on this quick trip around the neighborhood and a few speed bumps. My initial impression was: Firm (as expected with an empty load in the back) but smoother than OME HD on the rebound.
 
Last edited:

SONICMASD

Adventurer
4/10/19: A week and a half later I found time to tackle the front. Having already gotten the experience in taking apart the front end of my 03 Montero a few months back made the tear down and reassembly a lot faster. I've done struts several times too but these were by far the beefiest and most challenging to assemble.

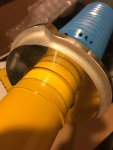
The Bilstein Front Shocks are beautiful pieces of art and can be adjusted to 3 different heights by moving a circlip into a different channel. They come from the factory preset to the lowest position which I'm assuming gives you the most travel and softest ride. I left them as is:

519208
519209


Out with the old:
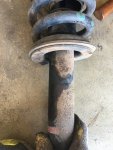
519210

519211
519212
519213


519216
 

Attachments

  • IMG_4888es.jpg
    IMG_4888es.jpg
    790 KB · Views: 226
Last edited:

SONICMASD

Adventurer
4/10/19 Contd:

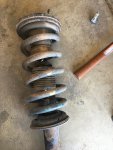
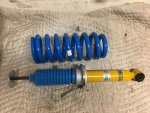
OEM vs Lovells Extra Heavy Duty. These are the thickest springs I've ever seen, they dwarf the OEM ones and are still significantly thicker than Old Man Emu HD. I'm kind of scared that they are going to be too firm but am trusting the engineers at Lovells on this one.

The flat spring top is a really important and useful feature:

519229

519218

Lovells EHD (21mm) vs Old Man Emu HD (18mm) Diameter:

519220


OEM Shocks vs Bilstein 4600. As you can see, the Bilsteins have their dampers built into them already so it turned out that I didn't need that replacement part (MR448172, Qty: 2).

519221

Again, all new rubber bits went in with these shocks and coils.

519227

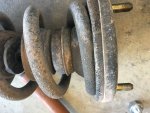
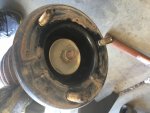
Old Shock Tower Bushings vs New; the compression these took over 170k was significant and I have to believe limits the struts ability to absorb impact and soften the ride:

519222

519223

Like jack stands, I like to go overboard on spring compressors. Not only is it safer but often times 2 won't give you enough compression to get the top nut on so I always use 2 sets (just go borrow the set from 2 different auto parts stores). I tried to be really careful when doing this so as not to damage the pretty paint job on the springs but the coils are so thick that they don't fit into the grooves of a typical MacPherson Strut Compressor and I ended up scratching them all to hell. My recommendation is get those spring compressors that have talon-like hooks on the end instead to avoid this.

519225
 

SONICMASD

Adventurer
4/10/19 Contd:

It's pretty hard to reinstall these by yourself since they are so heavy and you need to be able to hold them in place while reaching into the engine bay to secure the top nuts so my wife helped me out with that for a minute.

519230

Before final assembly, I touched up all of the scratches from the spring compressors with the closest shade of blue paint I could find...in my garage. I'm a bit bummed that my pretty springs got some scratches right out of the gate but they're going to get scratched up from flying rocks pretty soon and from a couple feet away you can't even tell anymore.

Then after torquing everything down, I marked the bolts with Torque Stripe per Toasty's helpful tech tip.

519231

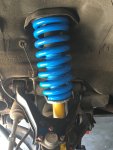
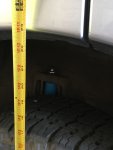
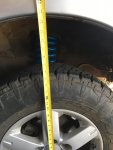
Right after finishing the suspension lift I measured from the bottom of the fender flares to the center of the wheel center cap and both were right at about 23inches. I didn't remember to measure before hand so I don't have anything to reference that to right now but getting the stock measurements shouldn't be hard (and not like remembering would have helped me because my front was so sagged down from the ARB bumper that was on there already). I'll remeasure soon to see how much they've settled before installing more weight like a bigger battery and winch.

519232
519233

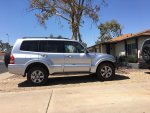
Pretty funny looking on 31.5" tires. The Front looks a little higher than the Rear right after install but the Rear has been on there for a week and a half so it's settled a little and soon the front will have an extra 100lbs on it so I'm hoping it will balance out nicely. If not, a tiny spring spacer in the rear should do it:

519234

519235
 

Michael Brown

You followed me, so now we're both lost
Who have you been using as your source of original Mitsubishi parts? Most of my sources have started to go away in the last 5 years.
 

Forum statistics

Threads
188,177
Messages
2,903,349
Members
229,665
Latest member
SANelson
Top