What's new at Coyote RV/Phoenix Pop up?

18seeds

Explorer
Sorry i didn't take any pics but i'll explain the best i can.

Entrance is through the rear
All the "standing area" is behind the rear roll bar. The passenger sides houses a combination sink stove. I believe it was a little higher than counter height. Propane is stored just to the left of the rear door on the driver side. I can't remember what was on the driver side. Sleeping area was from the rear roll bar forward.

offroadguy, what kind of suspension upgrade would be needed for this application?
 

jrueppel

Adventurer
Nice looking work in the JK top. Definitely would be interested in seeing photos of how how the interior feels and fits together.
 

Terrainist

Explorer
You really have something going on with those little campers for jeeps, etc... if you have any photos of your campers/extensions bolted down to fullsize rigs like the Ford Bronco, Dodge Ramcharger, or similar GMC/Chevy (fullsize Blazer), would be great to see (any year). Similar to the Scout II photo you posted. Having a legitimate cab to cabin pass thru is a huge plus, but on a fullsize platform. The Jeeps and Landcruisers are just too small to do anything with.

Thanks, and cudo's for taking on something no one else want to do.
 

Stan@FourWheel

Explorer
We got a chance to finally meet Rob & Cari in person at the Denver Show.

(it was great to put a name to a face)


They seem like a really nice couple.

And they are putting together some pretty cool campers !


Keep up the good work.

:)


.


.
 

offroadcamperguy

Supporting Sponsor
Thank You!

Thank You Stan!

We were very pleased to meet Stan and the 4 Wheel guys as well!! Stan, thank you very much for the compliment, and thank you for keeping our family's legacy going. Folks just go on and on about how they love their 4 wheel campers on this forum, and many others.


We entend to support the pop up camper industry, help all the original companies (Alaskan, 4 Wheel, Hallmark, Outfitter, and so on) continue to survive and thrive! There's so much excitment and interest out there for this kind of product, I believe there is room for all of us to keep on truckin'!

You guys all keep up the good work as well!!
 

wannaby

Adventurer
Sorry for butting in here but I think you are missing a big opportunity here by not posting a whole bunch of picks on your site and here ...I mean gee whiz how hard is it to take photos these days you have just about everybody here chomping at the bit for photos yet you have a feeble exuse like sorry its stuck in the memory card ....come on......you guys have a nice product and do exellent work and you might not even need the extra advertizing....but heck we want picks and tons of them. Granted a lot of people might be like me and just looky looz but Ya might just get a few extra sales out of it ......sorry for the rant and dont take it personal just thought ya needed a kick in the butt to get some picks out here.Den
 

offroadcamperguy

Supporting Sponsor
JK pictures thursday for sure!!

You're right! I owe some pictures of the JK PULSE top. I am so sorry for being so slow. The morning after the ISE show (where we took all of the interior pictures) I had to take off of town on some personal business. Since the plane took off at 6:55 am, we had to get out of the house at about 4 am, I remembered the lap top, and I simply forgot the camera. We will return tomorrow morning, and pictures will be posted for sure, first thing! For those who are interested, I will go ahead and put up the step by step "build process" picture set later on.

Here are a couple of exteriors that I downloaded before the show.

145.jpg


148.jpg


Thank you all for the compliments, the interest, and the encouragement!:wings:
 
Last edited:

Bob599

Observer
Wow

That is Freekin Awsome! Yeah I want to see interior shots and re-thinking my F150 project. Can the Pulse be removed after installation and at what degree of difficulty?

Thanks,
 

offroadcamperguy

Supporting Sponsor
Romoving the PULSE from your vehicle.

That is Freekin Awsome! Yeah I want to see interior shots and re-thinking my F150 project. Can the Pulse be removed after installation and at what degree of difficulty?

Thanks,

The PULSE is designed to be as "non-invasive" as possible to your vehicle. Therefore, as long as your installation does not require cutting the top (like on a disco, cherokee, or suburban) then the unit is designed to quickly bolt on and bolt off, just like your original top!
 

wannaby

Adventurer
Thats better... I realize you may be pretty busy with such an awsom product....mayby you need to hire your kid or something to take picks and post em up here.That thing is missing the front fender flares right.:elkgrin:
 

The Swiss

Expedition Leader
The PULSE is designed to be as "non-invasive" as possible to your vehicle. Therefore, as long as your installation does not require cutting the top (like on a disco, cherokee, or suburban) then the unit is designed to quickly bolt on and bolt off, just like your original top!
Does this mean that the original roll bar remains untouched?

As many mentioned before, really looking forward to some interior pics :drool:, even if they are of an un-finished or preliminary design.
 

kjp1969

Explorer
The PULSE is designed to be as "non-invasive" as possible to your vehicle. Therefore, as long as your installation does not require cutting the top (like on a disco, cherokee, or suburban) then the unit is designed to quickly bolt on and bolt off, just like your original top!

Okay, several questions:

Like a '95 Bronco?
Retaining its rear set?
With a bed above?

And. . . . pricing?
 

offroadcamperguy

Supporting Sponsor
Bronco Camper

Okay, several questions:

Like a '95 Bronco?
Retaining its rear set?
With a bed above?

And. . . . pricing?


Hi kjp,

'95 Bronco takes a great PULSE top! Such a nice sized vehicle, and no cutting required!! Nice.

Most folks want to remove their back seat and then have a long couch that folds into a lower bed. but, if you would rather have your stock seat... no problem, that's why we do custom.

Queen size bed in the "loft" is what you get. Then it also comes standard with all of the great Phoenix pop up PULSE features, like the 3 way refrigerator, 3 burner stove, sink with water system, stove, screen door, triple layer insulated pop up liner, and much more.... price $18,495

Broncoandpop-up001.jpg
 
Last edited:

offroadcamperguy

Supporting Sponsor
Jeep JK Camper top build

Finally have a few free minutes to show the Wrangler Unlimited Build. We have done a good number of these before, starting with the "idea" of the nice sleep unit on an SUV, even before they were called SUVs. 1973 my Dad built the one onto our Scout II. Not even a pop up, just a BOX with a bed and heater bolted onto our Scout II. So, then came the advent of the pop up top, the ultra light flexible off road structure, and then the adaption to other vehicles like Blazer, Bronco, Trailduster, and later 4Runner, Suburban, Range Rover, Land Rover, Jeepster, and CJ5.

So, an adaption of the family's original off road 4x4 sleeper cabin that is as complimentary to your beloved off roader as possible, while being comfortable to live in too.

Here's how we did it here in 2011

1. Find out what the customer wants inside and out on their custom PULSE. Get the vehicle in the shop, and measure measure measure, and make lots of patterns. Build a nice light weight and strong Welded aluminum cage frame construction, fiberglass sheeted, body shell.
025s.jpg

029s.jpg


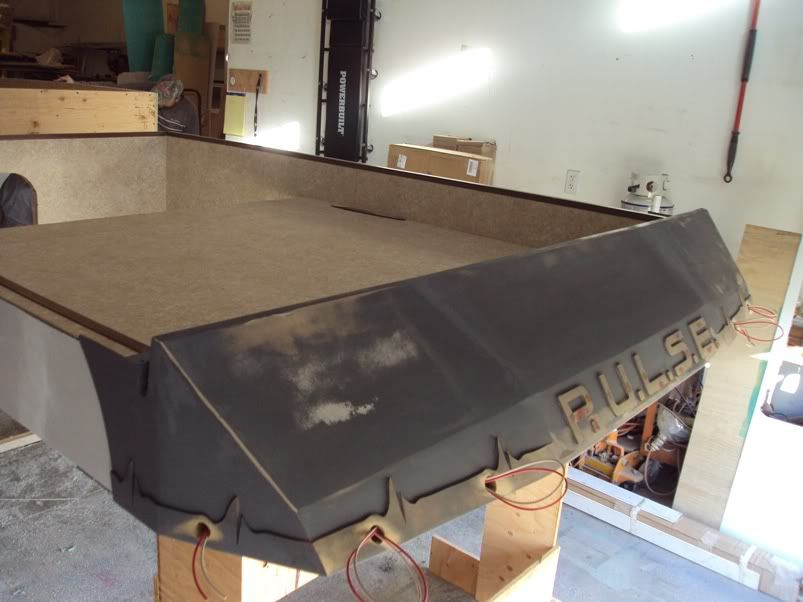
2. Now that the concept is refigned to be as low profile and light weight as possible, while keeping just enough interior comfort, the new PULSE needs a better face. So, here we are creating a brand new aerodynamic "Nemesis Inspired" cab over shape, complete with built in molded name plate, heart waves, and accent lighting.
015-2.jpg

031s.jpg


3. Once the cab over has been shaped, fiberglass molded, and installed over the finished welded aluminum framed laminated composite roof, and triple layer insulated flexible liner, the unit is seam sealed and ready for the color match paint. This is provided by "Pappy's Auto" an excellent custom car painter here in the Denver Metro area.
007s.jpg


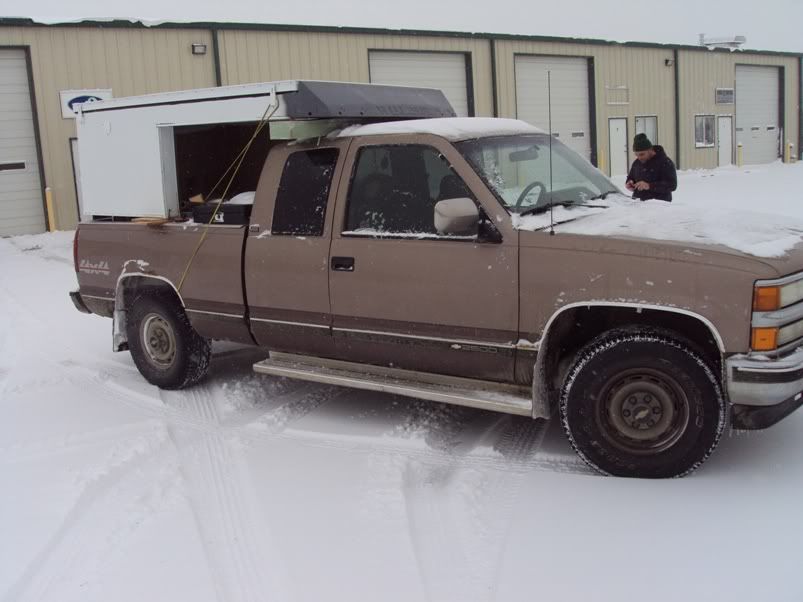
4. Now we load the unit onto the delivery truck and CAREFULLY drive it out to the farmhouse in Earie, where "Pappy's" does their magic.
This PULSE looks pretty tiny on this Chevy full size truck.
010s.jpg


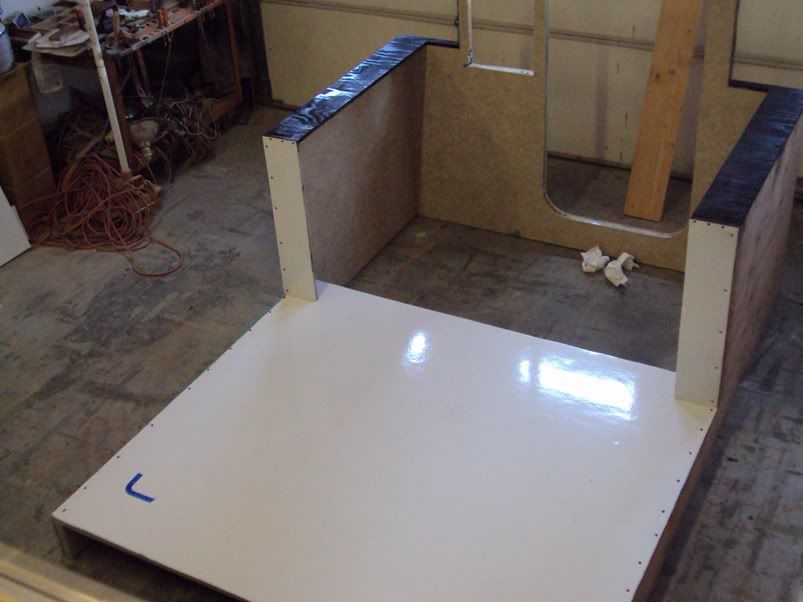
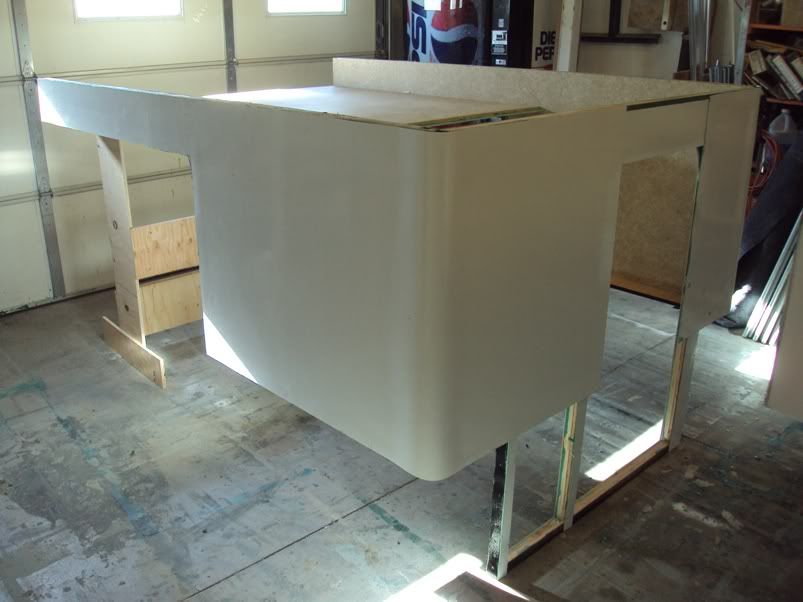
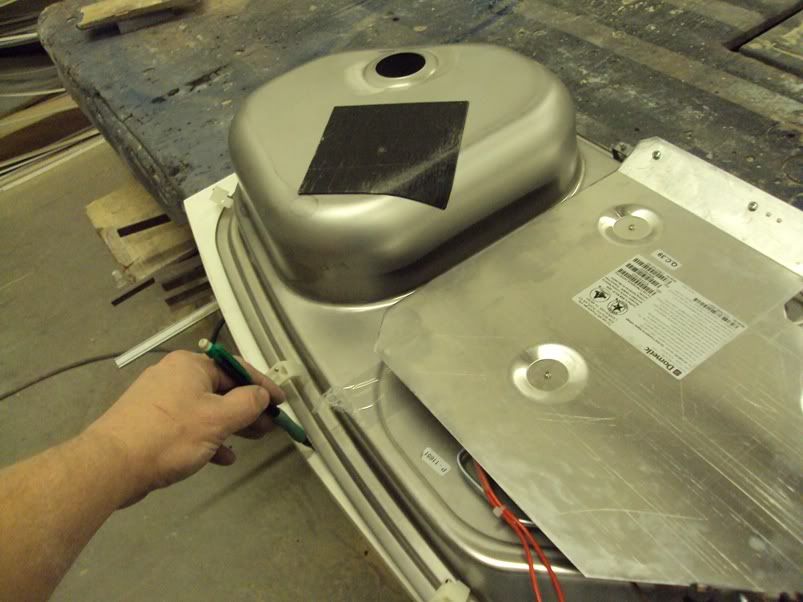
5. While Pappy's does his work, we design and build the interior cabinets and housings for the equipment and features. Here we are fitting a sliver of countertop around the Dometic/Cramer stainless steel sink/3 burner range with glass built in covers. So that this feature does not cut into our entranceway, we have to make this countertop hug the edges of the fixture, then blend into the slanted thin panel face... nothing square about this work, it's almost like art.
003s.jpg

001s.jpg

005s-1.jpg


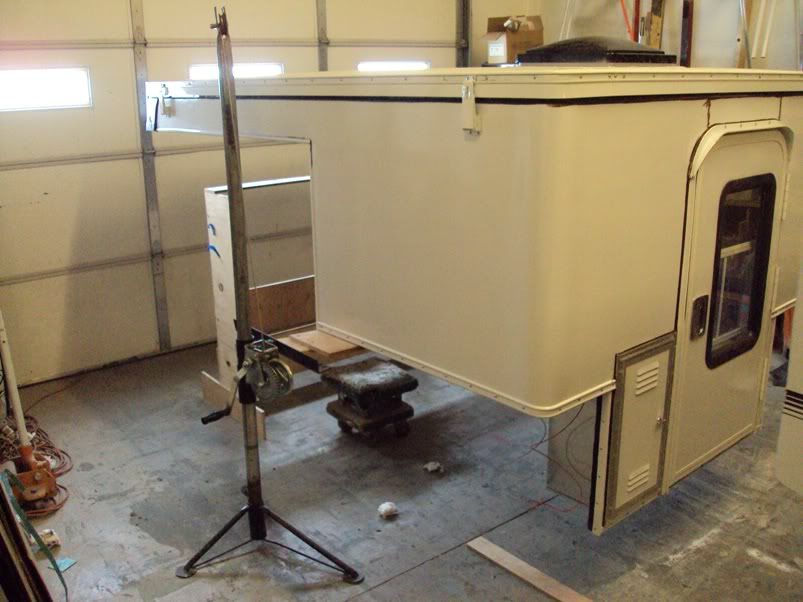
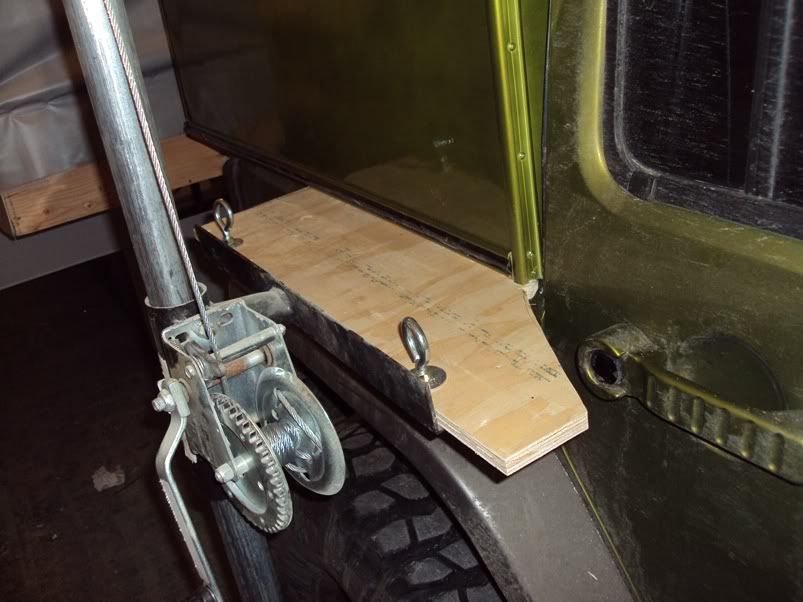
6. When the PULSE XJ returns, we are almost too excited to focus on the tons of work that we have left, the green is a little overwhelming. But, like good little soldiers, we push on. With the unit suspended over the Jeep, with customized cable jacks,
027s.jpg

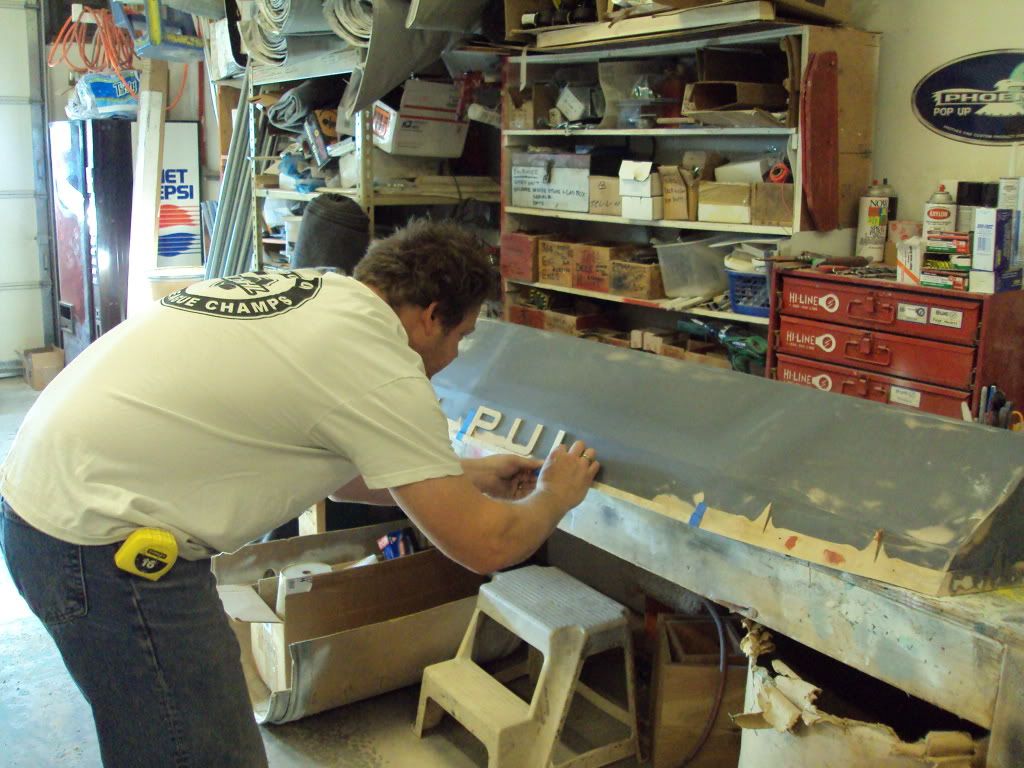
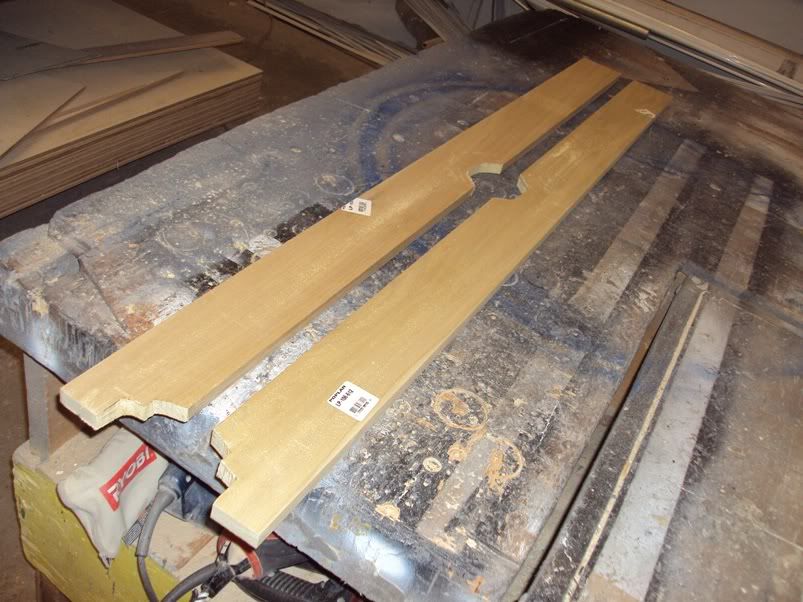
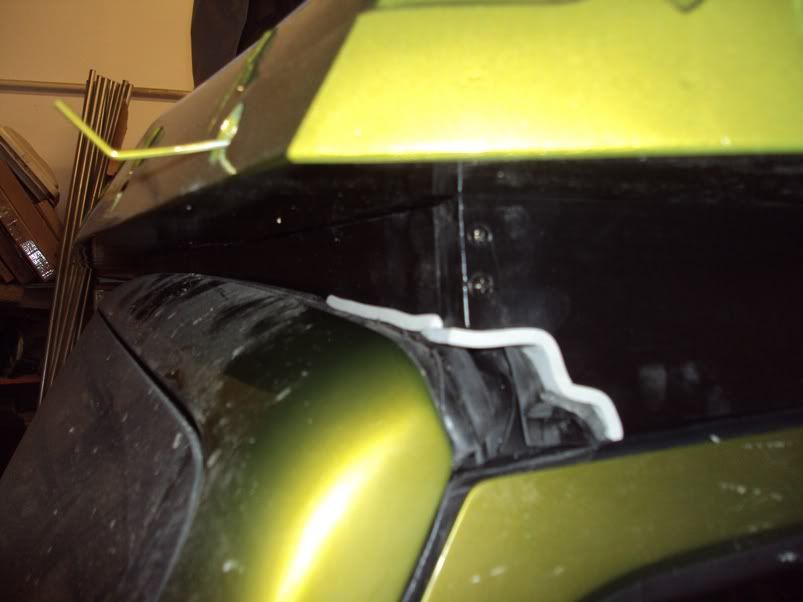
here we trace and trim, sand and carve out the trimming pieces that connect the PULSE to the Jeep. We use good strong and straight Poplar lumber, cut trimmed, sanded, and then painted with so many careful coats, you would swear these body pieces are made of molded plastic.
018s.jpg

019s.jpg

035s.jpg

038s.jpg


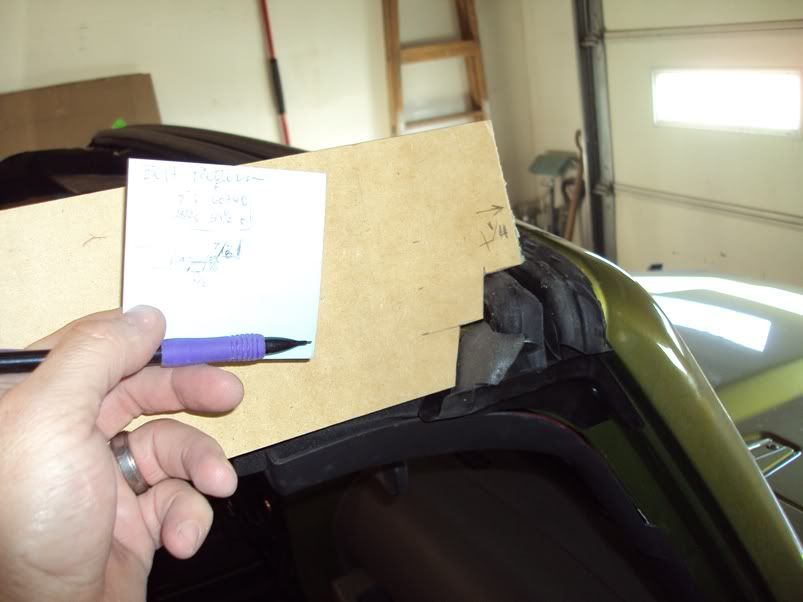
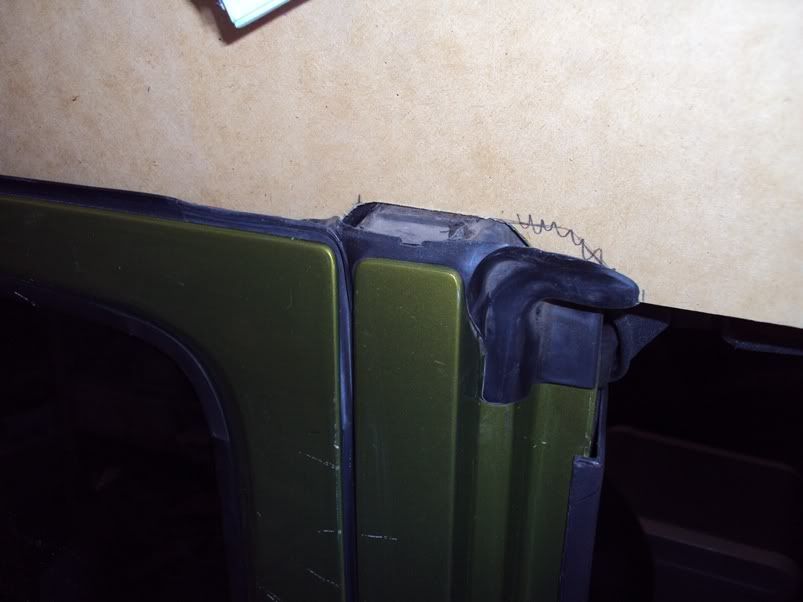
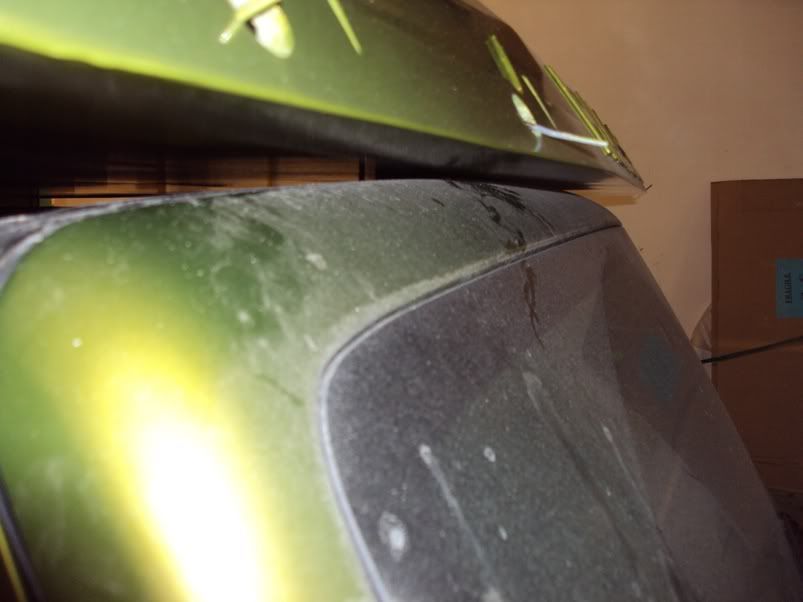
7. On final approach, we find that our measurements turned out pretty good, since the insides of our re-inforcement walls actually brush along the roll cage padding of the XJ. Happy, because I really didn't want to break out the sawzawl again, once the paint was almost dry!
025.jpg


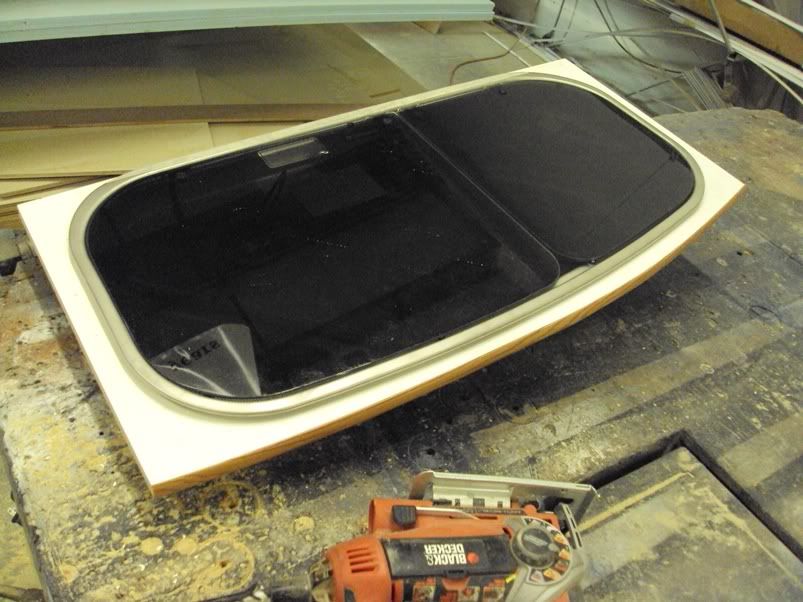
8. Once we set the unit down, we find that the windshield and door pieces are a good fit.
046s.jpg


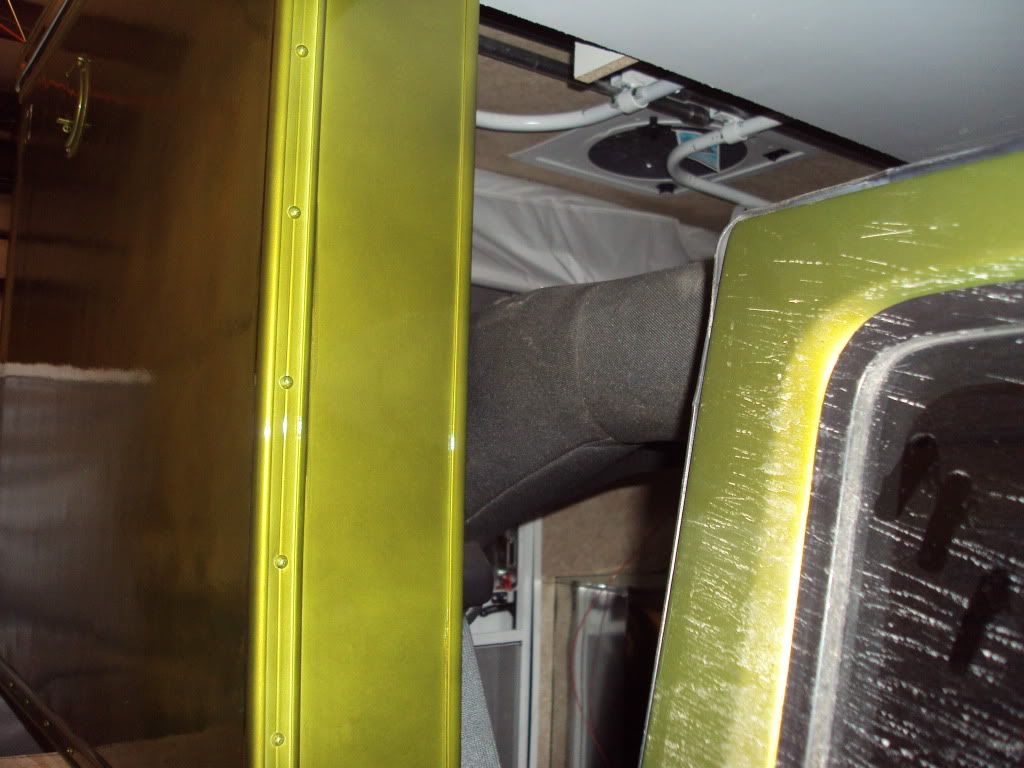
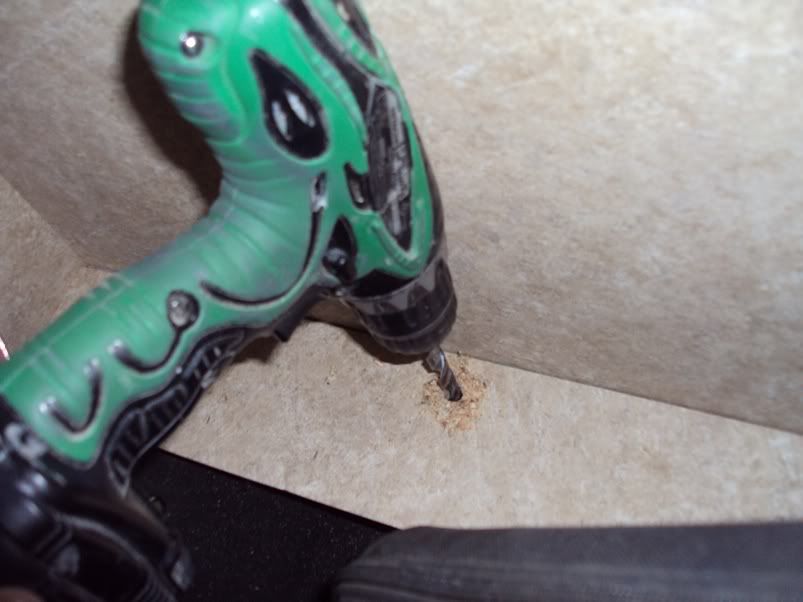
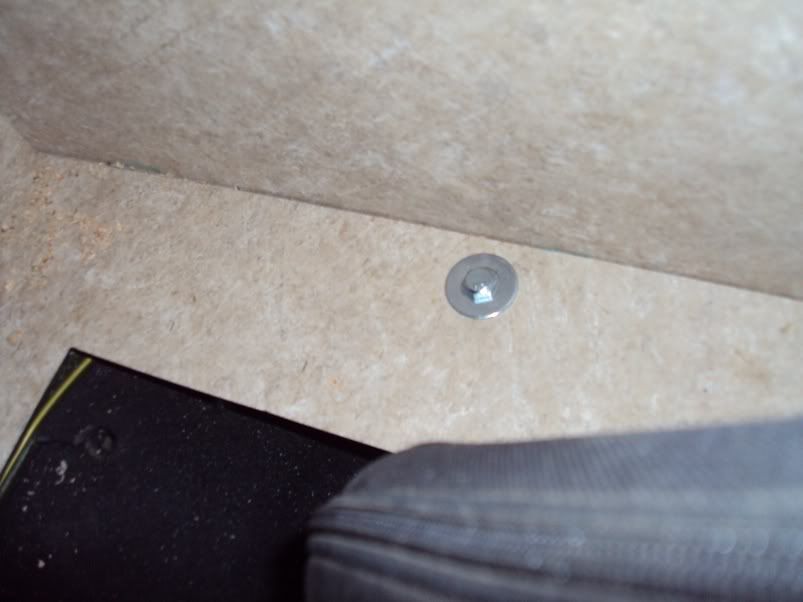
9. Now, we bring out the bolt hole pattern map that we remembered to draw up at the beginning of this whole process? By using this map, we can carefully drill from the top down and drop right through the built in slotted bolt holes provided by the Jeep factory. Then we add the heavy duty bolt/nut/washer sets and tighten them down.
049s.jpg

050s.jpg


10. Now we design, fabricate, and install the custom heavy duty windshield frame clamps.
057s.jpg


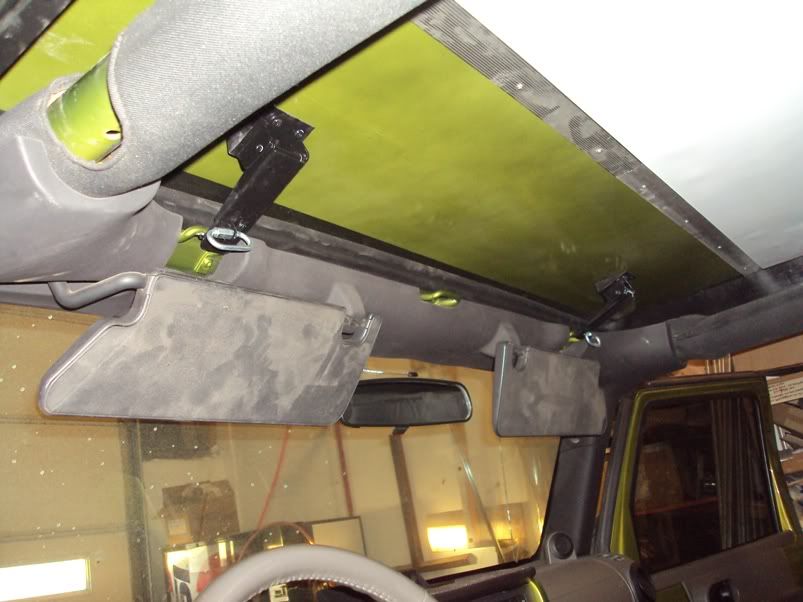
11. Finally, we get to install all of the goodies that transform this neat little top into a truly comfortable living space. Photos of the interior coming soon!
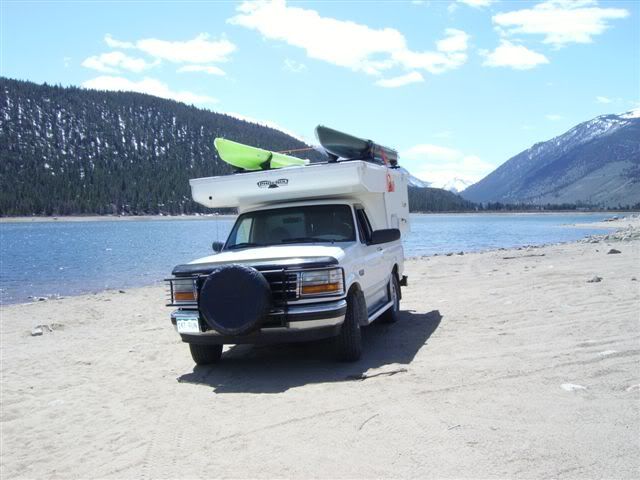
Here is the exterior.
030-1.png
 
Last edited:

Forum statistics

Threads
185,888
Messages
2,879,490
Members
225,497
Latest member
WonaWarrior
Top