84 Fleet Rescue-First $SOLD

rayct77

Observer
The windows were probably put in with Butyl rubber tape. This link is the first one I found for double side, I would look some more before ordering.

Bill

I would agree Bill. Butyl tape is what I used when I replaced the seals on my Alaskan. TacoFWC, butyl tape is a pain to work with when it's over about 70 degrees. Doesn't look like you will have that issue :). It's readily available at most RV dealerships in the parts dept. You can use a putty knife or a dull razor knife to trim it.
 

SLO_F-250

Explorer
Great work! Sorry I am late to the game here. Everything is looking great! Love to see people bringing new life to these ole' campers. For paint, just make sure to prep it well. I color matched my old hawk rattle can style and it worked great. I did (4) coats of color and (3) coats of clear. See my thread in my signature for more info, documentation, and pictures. Link to post where I started painting it. Used the Duplicolor Auto paint for color and Rustoleum Clear gloss enamel for the clear coat. Good luck and keep up the great work!! :victory:
 
TacoFWC, looking really good!

Like SloF-250 prep it well. I used 2 coats of Rustoleum Filler primer with a 400grit sand in between, 3 coast of base color (Rustoleum: Smoke Grey[base], Charcoal [stripe], gloss Black [stripe]) with light sanding w/ 800grit in-between coats. Then the same with the clear, Rustoleum Clear Gloss 3 coats. Check out the link in my signature for pics and more details.

What are you doing for lift panels and vinyl? Gonna take it to FWC? I just got an email back from them and they are going to replace both lift panels and the vinyl for me on my '85 Fleet at the end of Janurary. They need it for 3-4 weeks…

Nice work, your really doing a full 100% ground up resto on that thing, I didn't get around to striping mine down 100%, but about 90%. Your going to love the final product! FWC at a good price with a little elbow grease,time,sweat and a little money$$ and you'll have yourself a great camper built to your liking.
 

brian90744

American Trekker
I'm NO wiring expert,

If you wire it up like the Picture you should have no problems.LOL
brian
 

Attachments

  • wiring 2.jpg
    wiring 2.jpg
    148.6 KB · Views: 462

TacoFWC

Observer
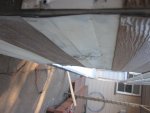
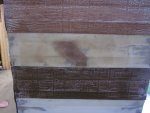
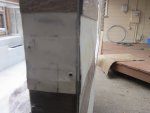
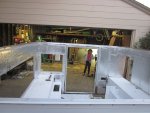
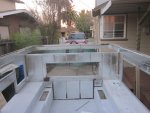
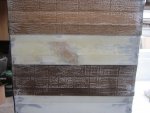
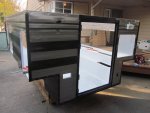
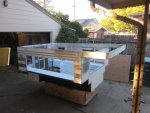
Was able to get some work in before going out to finish my holiday shopping. Took a wire brush to all the remaining sealant, tape, decals, and road grime. Sanded the exterior, banged out dents to an exceptable level, straightened trim and glassed one pretty good gash.

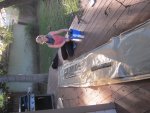
My lovely wife scrubbed down the vinyl
IMG_1785.jpg

Sanded and just about ready for paint
IMG_1786.jpg

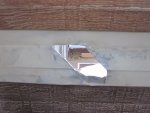
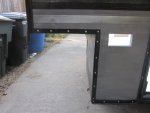
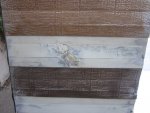
Heres a the worst skin damage, other than that there was a slew of pretty goo dents. The skin was far from perfect and always will be...unless I reskin it in a year or two

Heres a basic run down of an easy fiberglass fix if anyones interested:

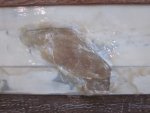
As for the gash, I banged out the surrounding skin flat as best as possible with a hammer and dolly. Then cut out the mangled skin. I then put some foil tape on the backside, and mixed up what I call angel hair. Its a mix of fiber glass resin and cut up fiberglass. I take some cloth and cut it into small fibers no more than a half inch, then mix it in with the resin. The trick is to not put so much resin in with it that it turns to snot and unworkable. Also don't want too little resin so that it won't break apart inb the cup or stick to the repair surface. Lastly, if you cut the fibers too long you cannot pull out managable amounts to goop on.

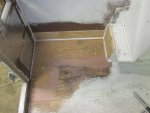
So now you have angel hair, the hole backed and an acid brush. You goop the ngel hair in the hole to as if it were bondo. At this point you can either lay a bunch of resin on the surounding skin, place precut cloth on it and dab it with the acid brush to get the air bubbles out, as well as, saturate the cloth in resin. (this is how I did it today) Or another way which is better in some cases, is to pre impregnate cloth and cut it to size, the put it on like stickers. You take some plastic sheet celophane equally hardy product, lay pieces of cut cloth on it, then dump some resin on the cloth. Then lay another piece of plastic sheet of that. At this point you have a fiberglass cloth and resin sandwiched in plastic. Now take a bondo spreaded or soft putty knife and work the resin into the cloth completely. Once the cloth is pretty translucent, squeegy the excess resin out. Now you have prepreg cloth that you can cut with scissors, peel off the plastic, and stick directly to whatever you are reparing, make sure you put down a thin layer or resin on the repair surface before the first sticker. I plan to fix a spot in the camper floor that got all dry rotted out, Maybe I'll do a video of the prepreg method and try post it.
IMG_1769.jpgIMG_1770.jpgIMG_1795.jpgIMG_1802.jpgIMG_1803.jpg

Thanks for all the wiring and paint tips, it will all be put to use at some point. To answer a couple questions,

Lift Panels: I plan to build my own. Hard to swallow a purchase like that at this point. I am already racking up some expenses with all the materials I have been needing. So I am going to take a stab at making new panels. One thing I think gives me an advantage is the original hinges are in good shape. They still have plenty of spring to them, and I don't have to worry about drilling new holes to the frame, which will make it really easy to locate them once the panels are riveted on.

Vinyl: I would LOVE to go to FWC and get new vinyl installed, but like the lift panels, not in the budget. My vinyl is in fairly rough but somehow okay shape...if that makes sense. Its has a few rips and a lot off pinholes but I am going to do whatever I can to fix it. My wife scrubbed it down with 303 today, and we will be shopping for vinyl repair kits soon. On that, has anyone tried glueing vinyl over the damaged areas like a patch? I'd like to gusset all the corners and maybe put an extra layer/patch where the lift panels ride. Wheres the best place to find matching vinyl material and what would I use for glue?

Thanks for reading, post again when I get something done.
 

MDM54

Observer
VLP Vinyl Liquid Patch or HH-66 Vinyl Cement both work well on new or not too old vinyl. Both products take the vinyl into solution and form a very durable waterproof flexible bond. In it's "natural state" poly vinyl chloride is stiff and brittle. Vinyl that is stiff has lost the placticizers that make the fabric flexible/plastic and glue will not adhere very well or at all. The HH-66 comes in a 8oz can with a very handy applicator brush built into the top. No clean up and it's always ready to go.
 

TacoFWC

Observer
VLP Vinyl Liquid Patch or HH-66 Vinyl Cement both work well on new or not too old vinyl. Both products take the vinyl into solution and form a very durable waterproof flexible bond. In it's "natural state" poly vinyl chloride is stiff and brittle. Vinyl that is stiff has lost the placticizers that make the fabric flexible/plastic and glue will not adhere very well or at all. The HH-66 comes in a 8oz can with a very handy applicator brush built into the top. No clean up and it's always ready to go.

Thank you, thats very helpful.
 

TacoFWC

Observer
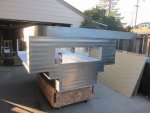
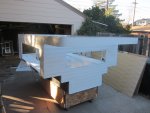
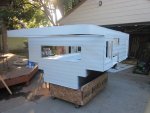
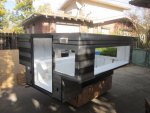
Had a fairly productive weekend, but the cool weather was pretty restricting. I was able to get it primed, sanded, and base coat sprayed on. I was really hoping to get it panted completely and cleared but the time between coats and sanding was pretty extreme. The temp was fair but the spot in my driveway I use to work the camper gets all of about zero direct sunlight. Other than that I put together my repair piece for the dry rot repair and got it installed. I planned to glass the seams on it but it ended up being really solid with the glue and screws, so I don't think glassing it will be needed. Plus there is a very small section of it that could even be stepped on, the rest of it will be under the furnace. I went ahead and bondo'd the seams inside and out to give it a lil extra. Also got all the walls insulated, interior seams caulked, and chipped away at painting the mouldings. The paint process is grossly slow and tedious but it feels good to at least be gaining progress now, everything before this weekend was putting me further away from a completed product. Once the paint is complete I will be able to start rebuilding the interior and start making it look like a camper again.Hpefully over the next few days I'll find time to paint on the stripes and clear coat.

For whatever reason, I am not able to upload pics like before, so heres attachements...not sure how they'll come up


IMG_1809.jpgIMG_1832.jpgIMG_1825.jpgIMG_1823.jpgIMG_1819.jpgIMG_1816.jpgIMG_1811.jpgIMG_1810.jpgIMG_1806.jpg

Starting to plan the interior build and have a couple questions.

I am going to put laminate flooring in, its the kind that looks like wood planks. Do I need to apply any special primer or anything at all for that matter?

I am also going to carpet the right hand side by the window and area below the bench. I'd like to put something under the carpet to pad it a bit but also insulate to some degree. Can I just use that foil bubble wrap stuff or is there something better? I am trying to keep the weight down as much as possible but also want to keep it cozy warm.

I'm also just about ready to start wiring the inside, I have most everything I need to get started but have not bought a battery yet. Is there a brand/model that seems to be a front runner for this setup? I only want to run a single battery, and it would be nice to have one that get get me by on minimal light usage, but medium furnace usage for a coupl nights camping.

I want to line a good portion of the aluminum frame inside with a one sided foam tape. Adhesive on one side and then a low density foam on the other. I think this will help put a small distance between my wall panels and the foil side of the insulation, which apparently is supposed to give it the reflective property. I found a few products on Amazon but most of it was sold for 7 or 8 bucks for 17 feet...and I need more like 150, and would like to keep it around 20 or 30 bucks. 1/2-1" wide by 3/16" thick would work. Anyone know of a reasonable product ?
 

subterran

Adventurer
Merry Christmas!
For the floor in my cargo to camper conversion, I used the type of heavy vinyl 'wood' flooring that snaps together, and gravity holds it down. Well, gravity and some quarter round trim. It works great, and with no glue you can replace it or remove it with no future hassle.

One thing you may not have thought of - Its a constant fight to keep the floor clean, what with the tiny space and all the traffic. Our pop-up has a carpet on the floor made from a runner. We can pull the whole thing out and dump it out. There's plain linoleum underneath. It sure makes it easier to deal with keeping the floor clean.

I vote for the biggest auto parts store deep cycle battery you can carry, FWIW. My 90 amp hour came from Autozone, and it would run the (LED bulb retrofit) lights and furnace for a couple of days, no problem. Now add on a compressor fridge to the mix, and you'll need to charge with solar or somehow about every 48 hours or so.

Your progress is looking good. Keep it coming!
 

bill harr

Adventurer
looking good.

+1 on carpet over floor for quick clean up and much warmer. look at amp hours to size your battery. take a picture of all your framing before you cover inside, then take measurements you will need if adding something later. set down and think of any electrical item you may want to add later, led bed light, charging center, extra 12v plug etc, run wires now note on framing picture and cover up.
 

TacoFWC

Observer
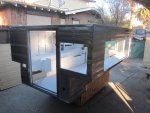
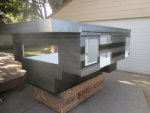
Got around to painting the stripes and clear coating the whole shabang. I decided to do all the stripes one color, for simplicity sake and to avoid getting burned out. Painting can be such a hassle, and with the skin in the condition its in I just can't bring myself to put 100% effort into the paint. It turned out fine, and will look great once everything is reassembled. I used Duplicolor Dark Steel Metalic for the base, Carbon Mist for the stripes and then a Duplicolor Clear. I am thinking of doing the door exterior with a Rosemary Hammered Finish. Once the paint and clear was all done it was apparent I needed to throw in a little color to get away from the Raider Nation silver and black...not a Raider fan and it never occured to me until the paint was on and done. Oh well.
I have all the trim, molding, and exterior parts that were pulled off ready for final coat of color and clear.

IMG_1843.jpg
IMG_1847.jpg

Installed a new bed board. I sprayed the outside with a rubberized coat, and stained the inside. Put it in with stainless screws inside and out and caulked all the interior seams. I ran out of time last night but plan to caulk the exterior, let it cure, and then spray all the edges with the rubberize coat again

IMG_1850.jpg

IMG_1848.jpg

Put on another coat of the gloss black on the exterior wood with cleaned up any over spray and also a fresh coat of primer inside. I am to the final stages of exterior work on the camper aside from the roof fiasco I have in my future, but that will be the last big push. This next weekend might be slow but hope to get the interior panels cut to fit and mocked up, windows and door installed, and the rest of the molding/trim installed. Once that is complete I will start putting the galley together, and get some wiring done! Really like to have this project wrapped up in the next couple months, I'm ready to put it to use...for the first time.
 

TacoFWC

Observer
Reno...

Well I forgot to mention I took a trip to Reno this last Saturday. Stopped off on the Truckee River to stretch and let the dog run off some energy. Few shots and a future project haha

Looked awesome out there, can't wait to have the camper rocking and spend some time on the river fly fishing
IMG_1781.jpg

Kona can't wait either
IMG_1779.jpg

and the reason I went to Reno: to pick up this savage ruler of the road! I am going to have to figue out a hitch mount that works with the camper so I can bring this on trips to the coast. Only weighs 225 lbs fully gassed, and cruises at 55 mph. Be awesome in spots like Monterey, Mendocino, etc.
IMG_1794.jpg
 

TacoFWC

Observer
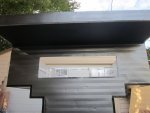
Was super strapped for time this weekend but managed to knock out a couple items, nothing too exciting, but progreess all the same. Got most of the molding back on. Put a fresh layer of butyl tape on, installed everything with stainless screws, and put in fresh screw covers on the rv moulding. All the windows are shined up and ready for install. I was able to get the front wall panel cut out as well. Can't wait till it starts looking like a camper again.

IMG_1856.jpg
IMG_1857.jpg
IMG_1858.jpg
IMG_1859.jpg
IMG_1860.jpg


So as I have been putting parts back on the exterior I have run a bead of silicon across the seam where water could be driven under the skin. Then put the moulding in with covered with butyl tape. I want to hit all the edges of the rv moulding with another bead of silicon, preferably clear. Anyone have luck with this or is there something I'd be better off using?
 

xxfullsailxx

Observer
hey there-

great progress! way to work with what you have...

i just wanted to throw out there that i am currently under taking a complete tear down of a mid-80's FWC (non-cabover)... it's the exact same materials/construction as yours and i currently have it torn down to the aluminum frame and lower wood "decking."

anyways, i am planning on ditching the FWC roof entirely on mine and was going to cash it in for scrap, but if you would like any of the trim pieces (the rain flashing around the top edge) and we could figure out a way to get them to you. i would be happy to offer them up for your project... same thing with the roof skin, though it may take me some time to unfasten it from the roof framing...

i realize it's probably not the same length (my roof is 97" X 81") but let me know... i am in the portland area, so getting the materials to you might be logistically difficult but not impossible.

also, i am ditching the lift panels as well, i removed them cleanly and they are in pretty good shape... (one has a crack that was repaired by a previous owner, otherwise no rot or damage). i was planning on selling them on here for $100 to be used as replacements or templates... let me know if you're interested in the dimensions.

-darin
 
Last edited:

Forum statistics

Threads
186,163
Messages
2,882,714
Members
225,984
Latest member
taunger
Top