Blender, My LX450/FZJ80 + FJ45esk + GM + Land Rover crazy concoction

Metcalf

Expedition Leader
I can't believe this worked....

I started making the rear spine for the transfer case crossmenber in metal. Once feature I really wanted was a long 90 degree tab on the back. I want to use that flange to hold some clip-but fasteners. Those fasteners will attach the belly plate to the crossmember. I wanted a fastener that was blind and easy replaceable.


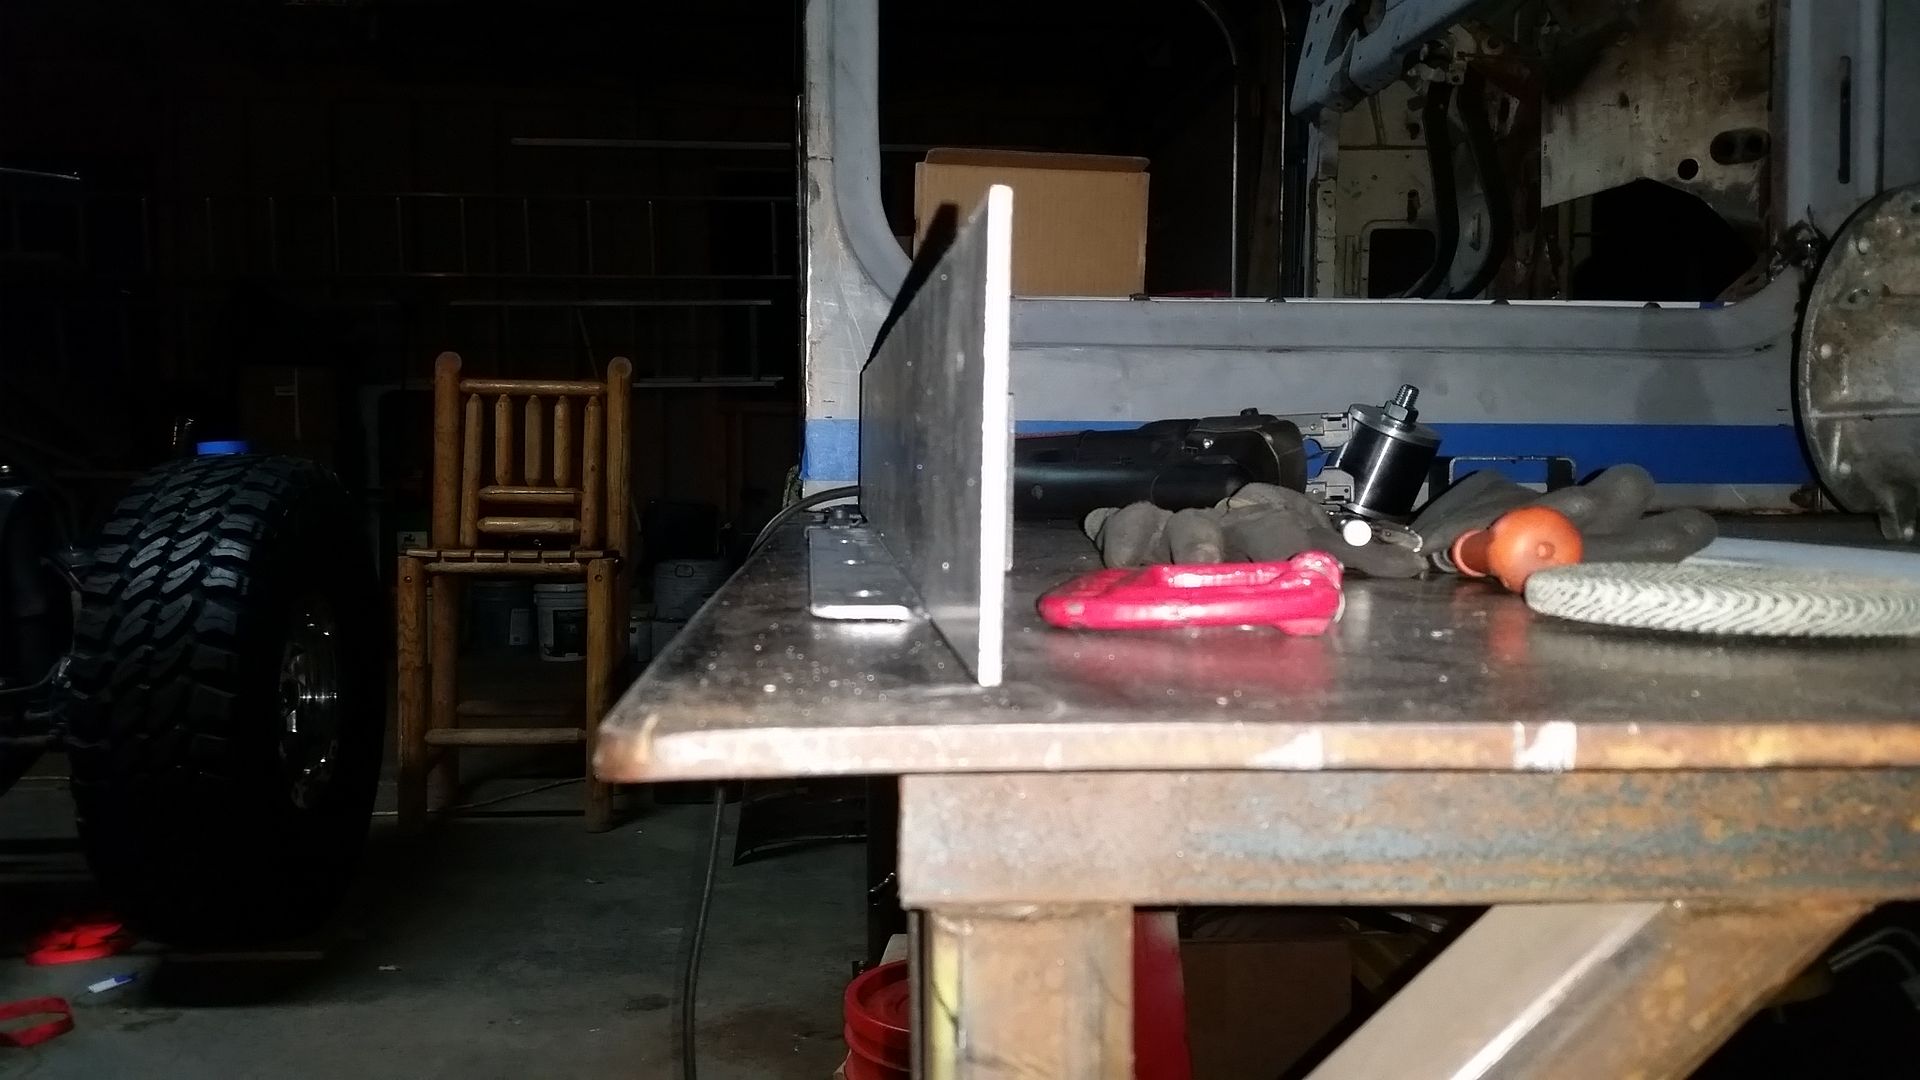
I laid out the shape I needed on a fresh sheet of material. I wanted a nice factory edge on the flange.

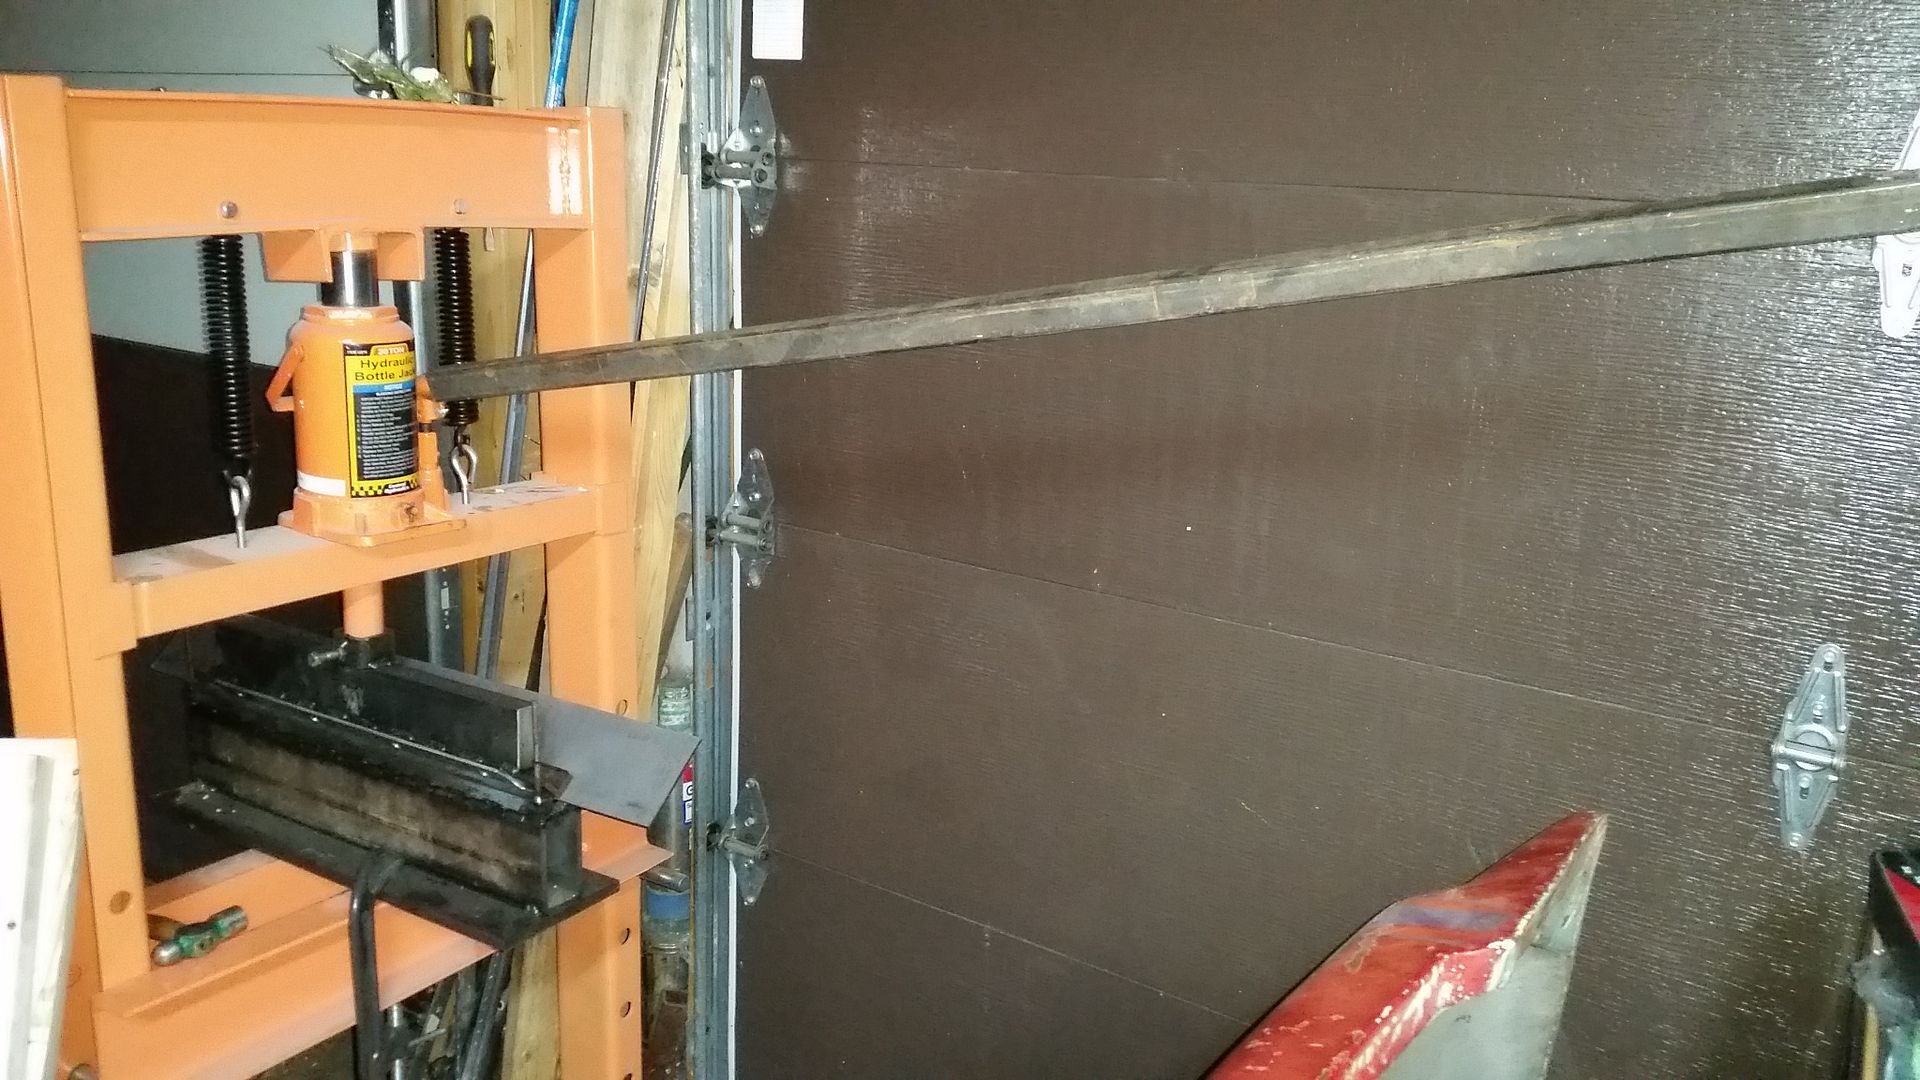
The main problem was that part is about 30.63" wide and my Harbor Fright 20 ton press is only about 22" wide. I made a quick press brake for it a year or two ago. It wasn't really designed to bend this kind of material. I normally use it for 12" or less of 10-11 gauge or full width with some 14-16 gauge. That seem to fit most of my needs.

Overall the biggest challenge was the overall width. I have about 20" available for bending, but the part is 30"+


This is what I came up with....

I ended up coming up with the idea to turn the brake sideways in the press. I wasn't thrilled about this. I reduced the width of the flange just over 18". This give me enough room for 4 fasteners spaced about 5" apart with a little tail on each end to keep the clip from rotating off the end of the flange.

The press was working pretty hard!

The die width is pretty narrow on this setup, less than 1". That makes it great for close bends and small flanges, but it does take more force to bend material.

Yes. I did have to use that cheater bar. I could most it with one hand, but it was stiff! I needed to keep an eye on everything. I went slow and kept an eye on everything the best I could.


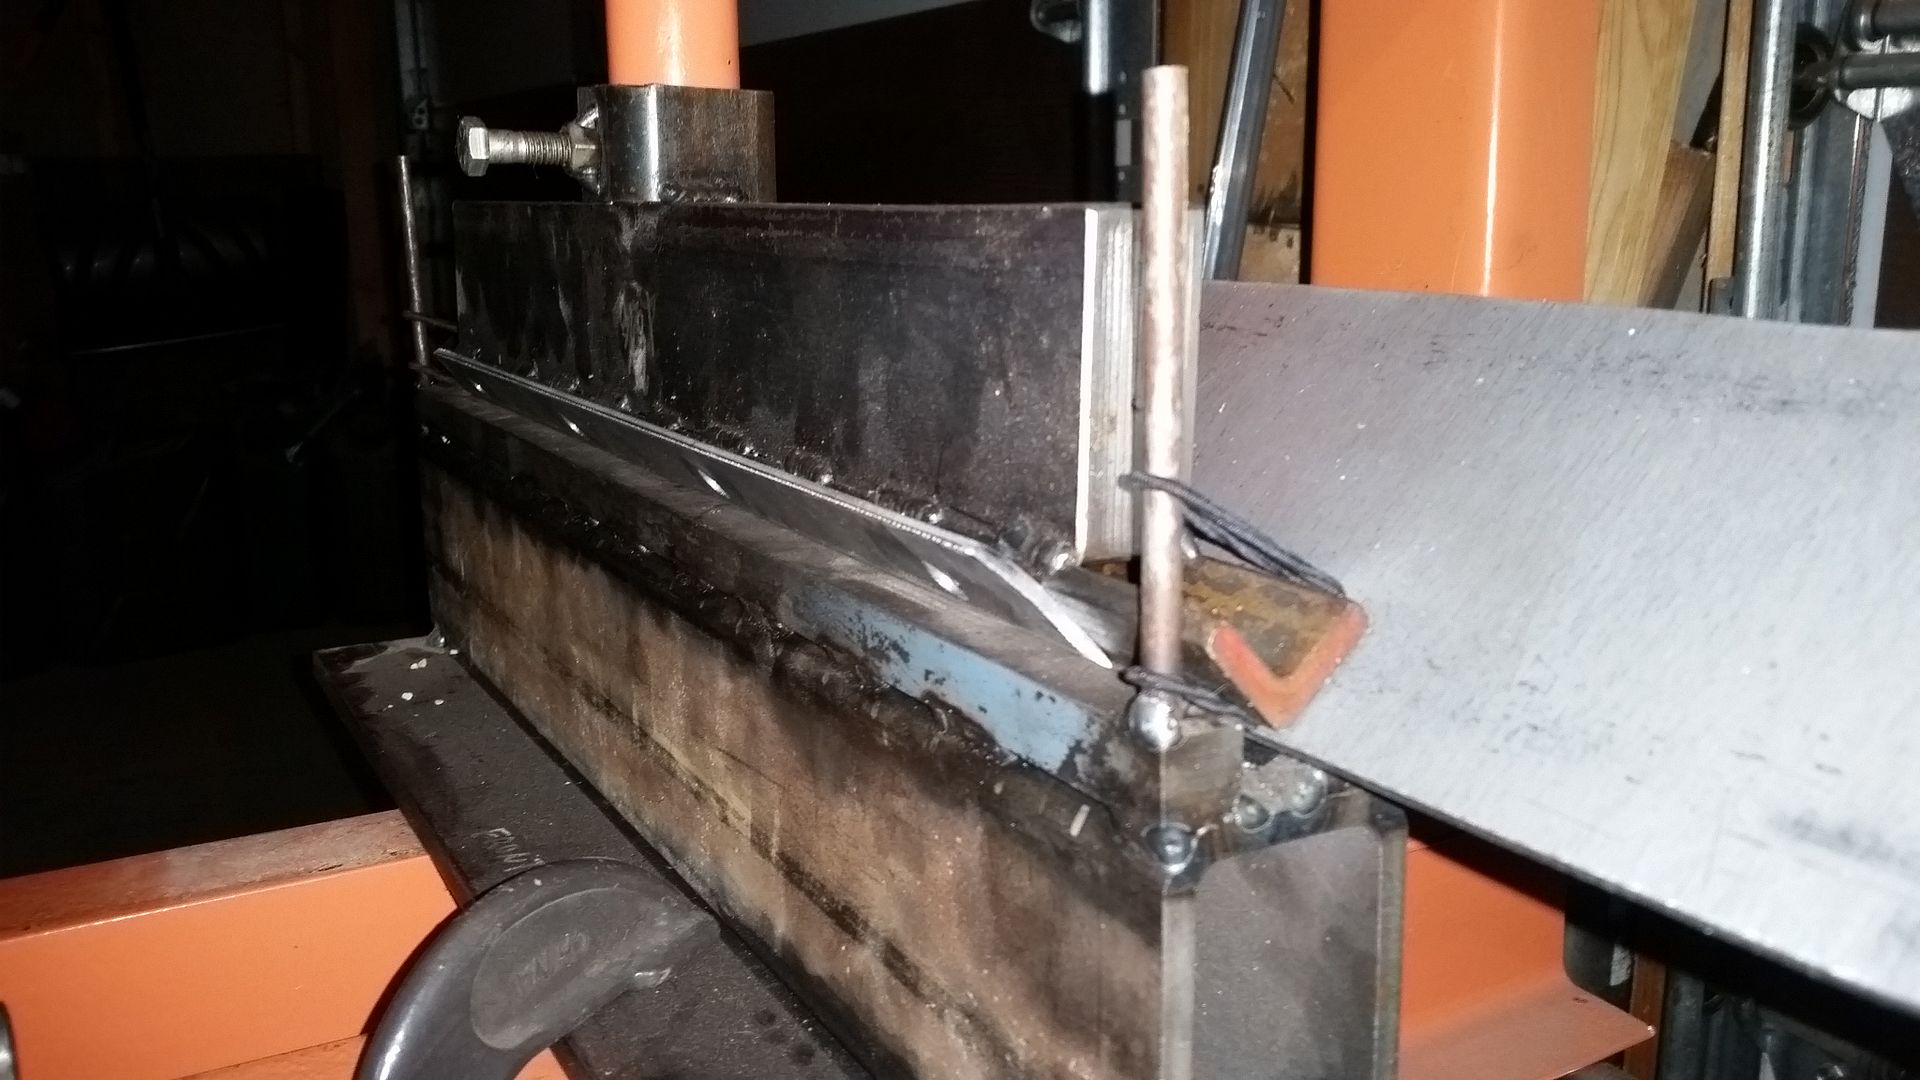
I had to modify my press brake slightly by removing two of the pins that help keep the upper die aligned. In order to keep the upper die aligned during the initial setup, I had to sacrifice a few of the misses hair ties. They kept the upper die tight to the pins. They where trapped under the die, but they basically got cut in half once the pressure was up. Opps.


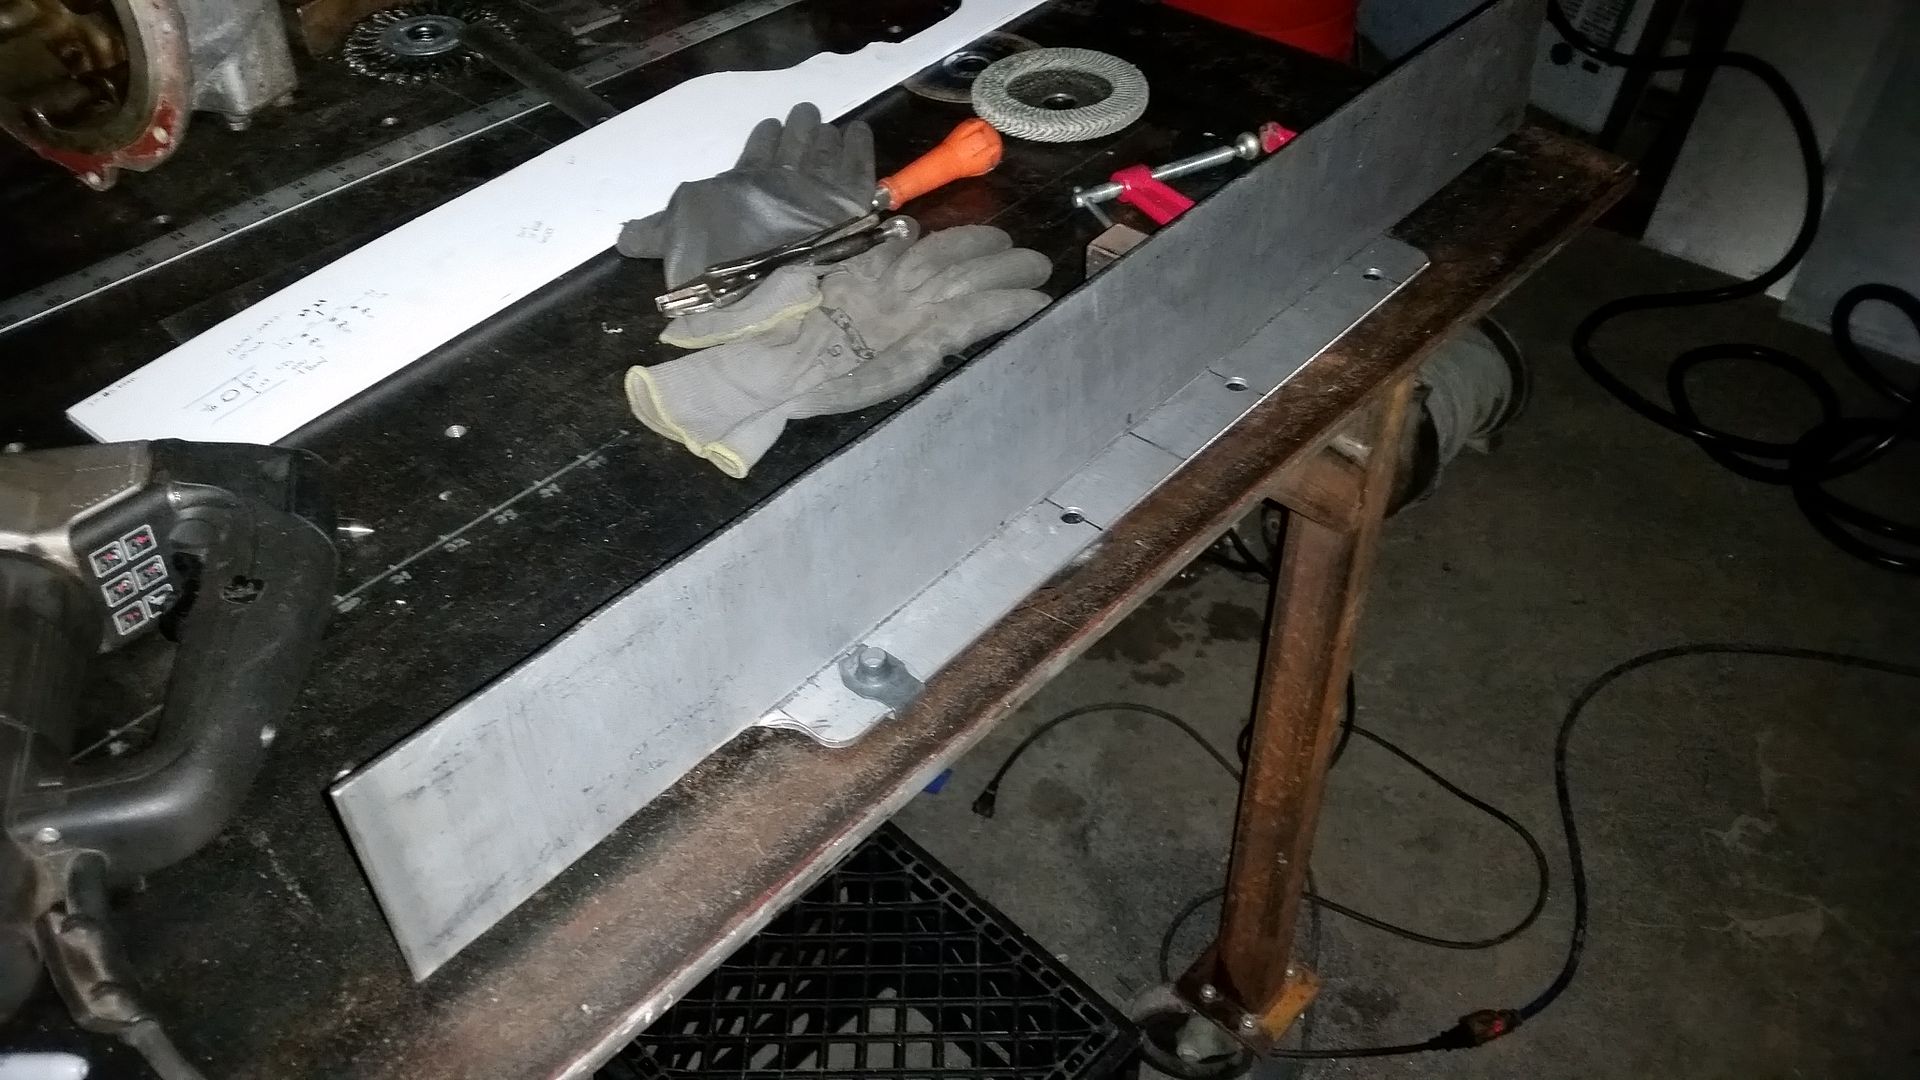
Here is how the part came out. Overall I couldn't be happier with how it that worked. Now I need to carefully trim the spine to match the pattern I made with the foam core board the other night.


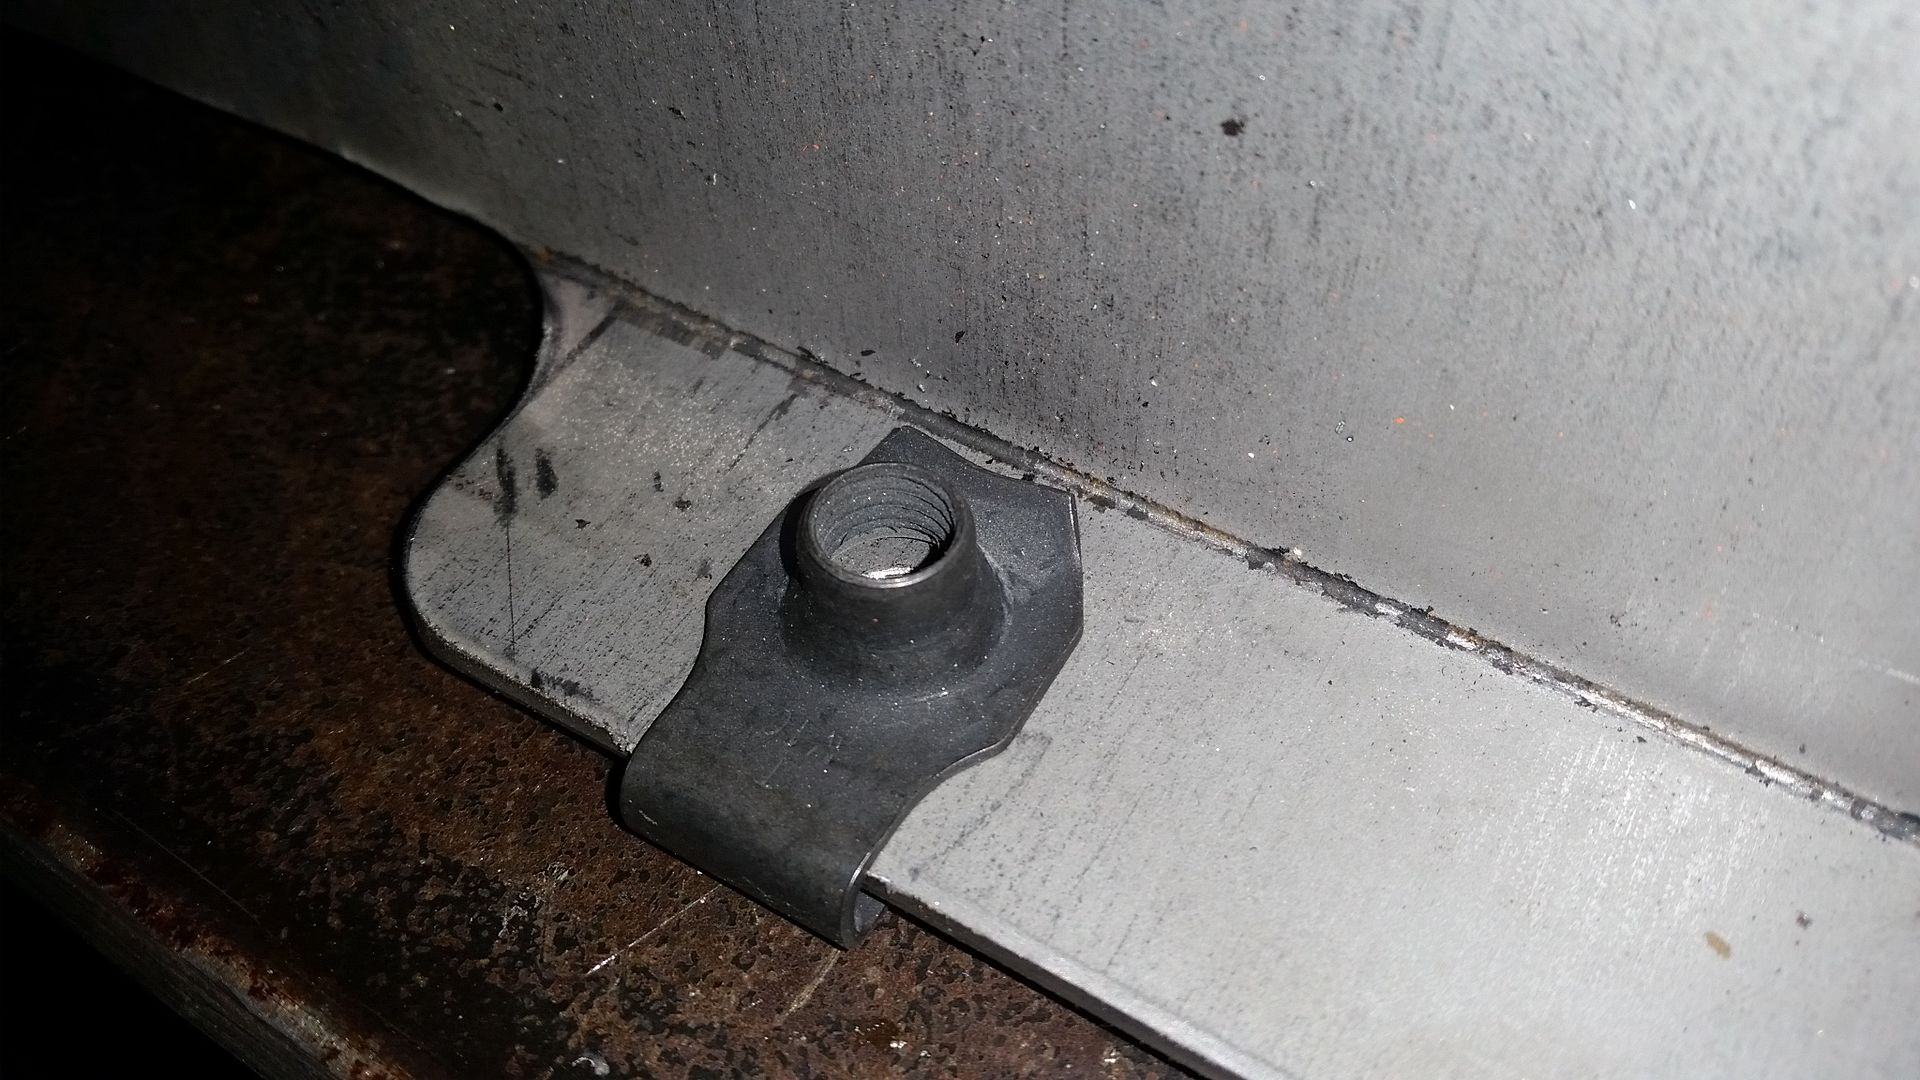
Here is what the clip nut looks like installed on the flange. The holes have about .045 clearance now on the fastener. I can increase that a little bit. The nut can move around a little bit to deal with hole mis-match on the belly pan.


90 bend turned out pretty well!

I am so happy that actually worked.
 

Metcalf

Expedition Leader
I had a weekend of keeping the couch from flying away while I tried not to lapse into a coma.....

Back at it again.


Connecting A to B with brackets. I almost forgot to take some pictures.

Nothing fancy really. Just the standard make a template, make another template, transfer to steel, cut out, swear the the jig saw while trying to cut too tight a radius, clean then up with a flap wheel, fit, fit, fit some more, then tack them in place before pulling them apart for welding again.....

Hopefully tomorrow I can get the other side done and maybe the cross member spines cut and fitted.


I am playing with something kind of interesting for some of the exhaust construction....
 

Metcalf

Expedition Leader
Nothing amazing, but progress is progress.


I started making the drivers side transfer case mount. This one ended up being pretty simple really. I did remake the base bracket to integrate the bottom tab into the bracket. I only had to make one more part to finish it off.

Some shop tips...


I have found it easier to cut out radii curves like this when they get a little tighter. Then I use one of these 'corner' flap wheels to clean it up.

Diablo 4-1/2 in. 40-Grit Steel Demon Corner-Edge Grinding and Polishing Flap Disc with Type 29 Conical Design-DCC045040N01F - The Home Depot

These things are expensive, but dang they are handy. I need to find a source for a less expensive version. I have had this one for a few years. It seems to be lasting well. I don't use it often, but it is good to have around.


The corner flap disc makes it very quick and easy to clean out a radius.


Last tip for now. Sometimes it is really handy to have a few square blocks or tubes sitting around. I like using them for setting 90 degree corners on parts and setting things in the right position.
 

Metcalf

Expedition Leader
Transmission mounts are done.....


The weight of the transmission and transfer case is now on the crossmember! I started trimming the spines for that crossmember, the one with the fancy flange in the back. I am going to need to fit those parts around the exhaust pipe also. The y-pipe merge is going to be right over the crossmember. I also have to figure out a mount for that part in the same location. I think I will be building something off the extra 'pad' I had for the drivers side transfer case mount.

I am going to be working on the exhaust system, at least to the merge, before I pull it off the table. This will give me a nice reference plane to work from. I am going to get a little fancy with designing the exhaust. I am going to have some custom parts 3D printed to help design things.

The Y-pipe is going to be 2.25" mandrel bent stainless. The merge is going to transition into 3" before going to the muffler. I am still very much up in the air on what to do for the rear part of the exhaust. Anyone have any good muffler recommendations?

My little garage shop also got a pretty big improvement.....


220 MIG welder! Actually it's a neat multi-process machine....it does mig, stick, has a spool gun for aluminum, and can even do lift start DC tig.

FREE SHIPPING — Klutch MIG/Stick 220Si 230V Multiprocess Welder with Spoolgun — 230V, 140 Amps | Multiprocess Welders| Northern Tool + Equipment
 

Metcalf

Expedition Leader
Making a crossmember......


Overall I am pretty happy with how it is turning out. I have decided to eliminate the front plate/spine. It just clogs things up too much. It prevents access to the main mounting bolts on the passenger side mount. It was just too busy and cluttered. I think the main box tube and the rear spine with the folded bottom edge should be more than strong enough. The belly pan is likely going to be 1/4" 6061T6 aluminum. That should help tie everything together well without being too heavy, and protect everything on the bottom of the car. I don't think this car is going to end up too low. I think the belly will have about 20" of clearance or so. With the longer wheelbase I suspect I will turtle the car out when things get more serious.

Tomorrow night I should be able to finish up welding the crossmember. I need to make some tabs to laminate the front mounting eyes also now that I am thinking about it....

Hopefully next week I can start on the front half of the exhaust system!
 

VanIsle_Greg

I think I need a bigger truck!
Looking good. Nice welder to add to the arsenal. For that price it comes with the spool gun and the regulators too? Sweet.
 

Metcalf

Expedition Leader
Looking good. Nice welder to add to the arsenal. For that price it comes with the spool gun and the regulators too? Sweet.

Yes, the welder comes complete with a spool gun, stick welding stinger, gas kit, etc.
Overall it seems to be a very nice unit so far.
 

Metcalf

Expedition Leader
Nothing amazing this weekend.....


I did get all the welding done on the transfer case crossmember. It is 'done' at this point other than a little trimming and and adding a few holes for stuff later in the build.....exhaust clearance on the drivers side....hole for the shift cable perhaps.

I added teardrop weld washers to the forward mounts and also welded the main tab on both sides. Sometimes I am still baffled on how one part can take up so much time. I am happy with how it turned out however. The flange on the back for the clip nuts that was integrated into the rear spine turned out just like I wanted.

My other free time was spent pulling my flat fender out of the corner and getting it ready for EJS next week! Good thing I didn't think the new truck was going to be done for EJS this year!
 

Metcalf

Expedition Leader
Just a few little things....


I turned up some spacers for the upper M8 mounting bolts on the passenger side transfer case mount. I will weld them onto the bracket the next time I have things apart.


I also installed the transfer case crossmember back in the chassis.

I will be in a holding pattern for a few weeks most likely. EJS is next week. I am going to try and build the front part of the exhaust before I pull it off the table since that gives me a nice reference plane. I also need to start working on the tub. I need to start roughing in the rear and top structure....
 

locrwln

Expedition Leader
Excellent work as usual and I know what you mean on the time it takes on some parts that you think are going to go quickly.
.
Have fun at EJS!
.
Jack
 

Forum statistics

Threads
185,888
Messages
2,879,474
Members
225,497
Latest member
WonaWarrior

Members online

Top