ITTOG's Truck Camper Build (was 6' x 12' Trailer Conversion)

Pacific Northwest yetti

Expedition Medic
I know, use Astroturf!! :p

The hard liner on mine, I don’t like. Its white, has a popcorn celling like texture. Is hard to clean, and stains. Now that I think about it, maybe I will put something like marine carpet over it…. Although doing so laying on my back an upside down does not sound great.

Old pics, but you can see the plastic stuff. There are some stains I have been unable to remove.

IMG_20180626_1227159.jpgIMG_20180619_1509355.jpg
 

cannedtaco

New member
With the upcoming trip less than a week away I decided to put the camper on the truck. The last time I put it on the truck it took 1.5 hours due to complications aligning the hole in the camper with the hole in the truck bed, and of course with the nuts under the truck bed. Thus, I built the alignment pins previously discussed. In the pic below you can see the pins sticking up from the bed. It was difficult to get the alignment pins to go into the camper holes due to the hole only being about 1/32" larger than the pins. However, as long as I lower the camper into the bed evenly, it went in without issue. Otherwise the pins were great because it only took me 25 minutes to get it in the truck. I significant improvement. If I had someone helping I could probably due it in about fifteen minutes.
View attachment 798229

Here the pin is through the hole in the camper.
View attachment 798230

First pic on the truck with the protective film off of it.
View attachment 798231

Of course I had to pop the top.
View attachment 798232

Final step in preparing the truck is getting the larger mud tires on it.
View attachment 798233

It is ready to go to camp.
View attachment 798234

Well, except for one thing… I still don't have the door on. The humidity the last few days has been around 60% or higher. So painting wasn't going to work. I am starting to get desperate so yesterday, with the humidity at 59%, I added the second coat and quickly took the door inside the house to dry. The humidity inside is usually about 35% to 40% so it will dry just fine in there. I will probably have to do the same thing today because it is supposed to rain.
If the alignment pins came to more of a point they would self align more easily and if the pins were smooth instead of threaded they would bind less as they fitted into the holes.
 

ITTOG

Well-known member
If the alignment pins came to more of a point they would self align more easily and if the pins were smooth instead of threaded they would bind less as they fitted into the holes.
That is a good observation. I didn't do that originally because I cut the top square to use sockets to drive it in. But I could easily cut a point and then make square about a 1/2" lower and a deep socket would work. Agree removing unnecessary threads will help. I think I will insert a pin to see where the threads are no longer required and implement your suggestions for Alignment Pins 2.0. Thanks for the suggestions.
 

gendlert

Active member
That is a good observation. I didn't do that originally because I cut the top square to use sockets to drive it in. But I could easily cut a point and then make square about a 1/2" lower and a deep socket would work. Agree removing unnecessary threads will help. I think I will insert a pin to see where the threads are no longer required and implement your suggestions for Alignment Pins 2.0. Thanks for the suggestions.
Something about "Alignment Pins 2.0" resonates with me. I'm happy this is working out for you. Impressive project
 

Mules

Well-known member
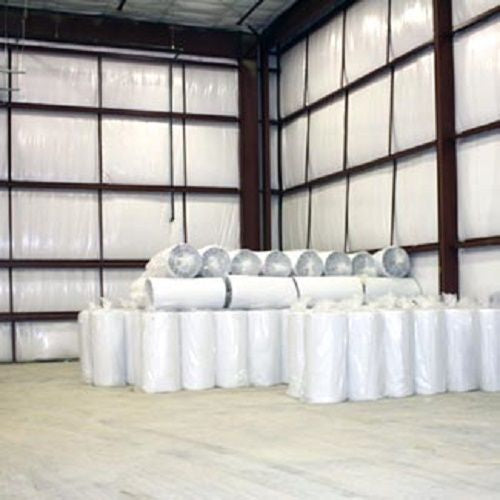
I used this stuff in the 5mm thickness. It works really well. Super light weight. Put it over the “joists” in my camper roof with VHB and some foil tape and it’s been good for 2.5 years now. I was more concerned with heat being in the Southwest, but it’s been very good for cold too. I didn’t fill in the airspace as the radiant barrier aspect needs an airspace to work according to stuff I’ve read. The company claims R8, but don’t know about that. It’s a popup, so the big issue is the tent walls. We didn’t cover it. The shiny ceiling is fine with us, but they make a version with a white vinyl side too.

Edit: Really nice job on your camper build!


View attachment 800557
View attachment 800558
My floor and walls have foam and carpet, but I never got around to insulating the ceiling. The automotive "stretch" carpet is nice, as it can stretch around curves.

Of course if I insulate the ceiling, I'm going to have to insulate the tent material also. It never ends!!

Nice idea using tape to hold the insulation to the ceiling ribs! I might have to try that.

IMG_6488.JPG
IMG_6486.JPG.

IMG_6249.JPGIMG_6932.JPG
 
Last edited:

ITTOG

Well-known member
My floor and walls have foam and carpet, but I never got around to insulating the ceiling. The automotive "stretch" carpet is nice, as it can stretch around curves.

Of course if I insulate the ceiling, I'm going to have to insulate the tent material also. It never ends!!

Nice idea using tape to hold the insulation to the ceiling ribs! I might have to try that.

View attachment 801857
View attachment 801856.

View attachment 801852View attachment 801858

I get what you are saying when it never ends but my primary reason to insulate the roof, at least at this point, is to reflect heat generated by the sun. I don't really care if my camper gets cold. I am fine without heat or insulation down into the teens. Below that I just use a Mr Buddy Heater to warm up a bit before getting into my sleeping bag and again in the morning before getting out of my sleeping bag. Once I can't handle the cold or I have water inside my camper, I will then want to insulate everything and get a diesel heater.
 

Mules

Well-known member
I get what you are saying when it never ends but my primary reason to insulate the roof, at least at this point, is to reflect heat generated by the sun. I don't really care if my camper gets cold. I am fine without heat or insulation down into the teens. Below that I just use a Mr Buddy Heater to warm up a bit before getting into my sleeping bag and again in the morning before getting out of my sleeping bag. Once I can't handle the cold or I have water inside my camper, I will then want to insulate everything and get a diesel heater.
I used to live in Austin and Kerrville TX. You can fry an egg on you're roof down south!
 

ITTOG

Well-known member
Anyone know the regs for exterior light requirements? Or have a link to them? I have been looking but have only found for RV's and trailers. When I look at other campers like mine that are not any wider than the truck it appears they do not use any clearance markers in the front or the sides. I do have to use brake lights in the back because it extends past my truck and flares out and kind of blocks the tail lights.

@IdaSHO, did you put clearance lights on your camper? The recent pictures I just looked at appear to not have anything but the brake, tail, and turn lights (two at the rear).
 
Last edited:

IdaSHO

IDACAMPER
Anyone know the regs for exterior light requirements? Or have a link to them? I have been looking but have only found for RV's and trailers. When I look at other campers like mine that are not any wider than the truck it appears they do not use any clearance markers in the front or the sides. I do have to use brake lights in the back because it extends past my truck and flares out and kind of blocks the tail lights.

@IdaSHO, did you put clearance lights on your camper? The recent pictures I just looked at appear to not have anything but the brake, tail, and turn lights (two at the rear).

No clearance lamps on mine.
Designed it that way with mitigating potential leaks.

I doubt there are any regs with regards to overhead clearance lamps that would effect us.
Never checked, and in near 80k worth of road miles on it in dozens of states, never been bothered about it (y)
 

highwest

Well-known member
I know, use Astroturf!! :p

The hard liner on mine, I don’t like. Its white, has a popcorn celling like texture. Is hard to clean, and stains. Now that I think about it, maybe I will put something like marine carpet over it…. Although doing so laying on my back an upside down does not sound great.

Old pics, but you can see the plastic stuff. There are some stains I have been unable to remove.

View attachment 800663View attachment 800664
There’s a special place in hell for people that glue carpet to the inside of boats. Think long and hard before you put that stuff on your walls or ceiling. 😁
 

Forum statistics

Threads
186,050
Messages
2,881,402
Members
225,825
Latest member
JCCB1998
Top