Can't it just be unbolted when at the trail?
You are using an out of date browser. It may not display this or other websites correctly.
You should upgrade or use an alternative browser.
You should upgrade or use an alternative browser.
I've left the Toyota Fold, AKA my Montero Build Thread
- Thread starter red87
- Start date
off-roader
Expedition Leader
Yes you can in your driveway/garage.
I found with my 11.5-12.5" wide tires (32, 33, & 35") the rig handles fine without them although I make it a point to drive it like a truck and not a car.
Hth.
I found with my 11.5-12.5" wide tires (32, 33, & 35") the rig handles fine without them although I make it a point to drive it like a truck and not a car.
Hth.
red87
Adventurer
Handling is fine on pavement with 10.5" tires. There is for sure more body roll but it isn't bad. What I notice more is the improved ride over diagonal bumps. You get less of that side-to-side head tossing motion. I personally have yet to wish I still had it installed. Just pull one of the endlinks and drive around for a while if you're curious. Same effect on the handling.
red87
Adventurer
Trimmed my extension bumpstops today after discussing it in another thread. I found it easiest to just unbolt the bumpstops and take them inside. I'm also not supposed to work on my truck at my apartment complex so I had to be somewhat stealthy ") . Cutting them down wasn't too hard, I just used my hacksaw. If anyone else is looking to do this, it'll help restore extension travel lost when the torsion bars are cranked. I used an existing seam on the bumpstops as a guide as it was pretty much where I had planned on cutting anyway and it provided a nice line to use. It also made me cut both sides evenly. Haven't driven anywhere yet so no feedback on ride quality but once I do, I'll post it up.
. Cutting them down wasn't too hard, I just used my hacksaw. If anyone else is looking to do this, it'll help restore extension travel lost when the torsion bars are cranked. I used an existing seam on the bumpstops as a guide as it was pretty much where I had planned on cutting anyway and it provided a nice line to use. It also made me cut both sides evenly. Haven't driven anywhere yet so no feedback on ride quality but once I do, I'll post it up.

. Cutting them down wasn't too hard, I just used my hacksaw. If anyone else is looking to do this, it'll help restore extension travel lost when the torsion bars are cranked. I used an existing seam on the bumpstops as a guide as it was pretty much where I had planned on cutting anyway and it provided a nice line to use. It also made me cut both sides evenly. Haven't driven anywhere yet so no feedback on ride quality but once I do, I'll post it up.
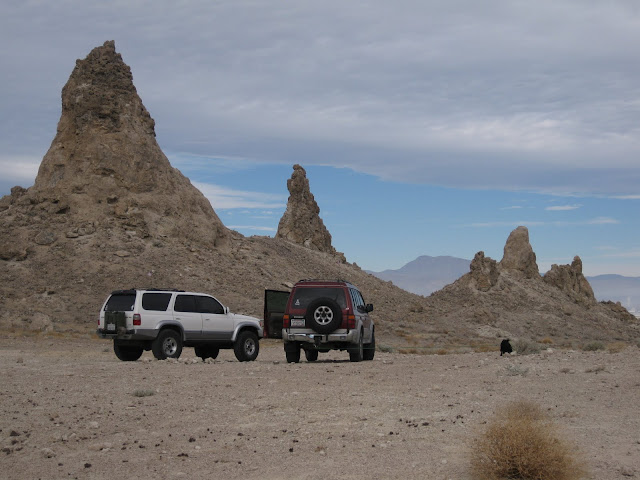
Who says these rigs don't flex??
Oh yeah, everyone. Flexes enough for what you and I use em for it looks like!
Oh yeah, everyone. Flexes enough for what you and I use em for it looks like!

scrubber3
Not really here
The first tires I got for my Monty were 31/10.5/15 BFG ATs. They were great on the highway, in the snow, and on several trails I went to. They wore great and had virtually no highway noise. A very good tire! Glad this go round I got my 33/10.5s. You couldn't be more right when you say they "go" with the truck perfectly.
red87
Adventurer
Small update, as usual. I got some new front speakers (Kicker KS65) from my good buddy last week and installed them today. I'm not allowed to work on my car in my apartment complex so I had to wait until Sunday for the office to be closed to install them Nice clean sound from the new speakers. On a related note, I've got a pair of stock front speakers for anyone who needs them. Cost of shipping and they're yours.

Nice clean sound from the new speakers. On a related note, I've got a pair of stock front speakers for anyone who needs them. Cost of shipping and they're yours. the little diagram that shows when I'm in 4wd, AWD, and/or diff locked never has my rear wheels lit up. Is that normal?
I replaced mine too. They seem to burn out quickly (last a year maybe). I guess it's because they're always on. Anyway, here's another resource for those dash lights.
http://autolumination.com/74.htm
The bulb for the wheel indicators (and a lot of other things in the dash) is the #74 wedge bulb. It lists for $0.99 and they come in a variety of colors. (The standard, non-LED bulb is about 1/4 of the way down the page. If you scroll down to the bottom of the page, you'll see that they even sell the little colored bulb caps that you sometimes find when you pull these bulbs out of the dash.
They have an amazing selection. I found some red-tinted bulbs there to replace the standard map lights too. Here's a link to that page:
http://autolumination.com/festoon.htm
Nik
red87
Adventurer
Who has two thumbs and just fixed his door locks? This guy! They've been bothering me since I bought my rig like a year ago so I'm pretty stoked to have them working correctly again. Both of the stops inside the actuator were destroyed so it would be very frustrating to try and unlock it.
These two zinc plated bolt are what holds the actuator in:

There's one plug and the door lock arm attached too. Pull those and the bracket off and you'll be left with this:

If you look at the backside, you'll notice a seam running all along the outside of it. You can carefully pry this apart to expose the inner workings. Mine needed a knife and a small flathead screwdriver to get it all the way apart. It messed up the edges a bit but its all cosmetic damage. And besides, I figured even if I broke it I wouldn't be any worse off. These are the inner workings. You can see the destroyed bumpers in the upper corners of the actuator:

It appeared they used to be about 1/8" thick so I cut some rubber off a bent motorcycle jack I use as a tiny coffee table to replace them. The neat square rubber is my new bumper and the little booger-looking things to the right are the old bumpers. They almost disintegrated when I pulled them gently out.

I used superglue to attach my new bumpers where the old ones lived. So now my fingers have some nice little glue spots. Try as I might, I can never avoid getting that stuff on me. The new bumpers are in the bottom corners of the actuator in this picture:

I don't have any pictures of me closing up as I just wrapped it in electrical tape. I'm not proud of it but I didn't want to use superglue to put the actuator back together i case my fix doesn't last very long. Turns out I didn't even need to do that as the bracket wraps all around the backside and will hold it together regardless of what I did. Now I can use my key fob again!
These two zinc plated bolt are what holds the actuator in:
There's one plug and the door lock arm attached too. Pull those and the bracket off and you'll be left with this:
If you look at the backside, you'll notice a seam running all along the outside of it. You can carefully pry this apart to expose the inner workings. Mine needed a knife and a small flathead screwdriver to get it all the way apart. It messed up the edges a bit but its all cosmetic damage. And besides, I figured even if I broke it I wouldn't be any worse off. These are the inner workings. You can see the destroyed bumpers in the upper corners of the actuator:
It appeared they used to be about 1/8" thick so I cut some rubber off a bent motorcycle jack I use as a tiny coffee table to replace them. The neat square rubber is my new bumper and the little booger-looking things to the right are the old bumpers. They almost disintegrated when I pulled them gently out.
I used superglue to attach my new bumpers where the old ones lived. So now my fingers have some nice little glue spots. Try as I might, I can never avoid getting that stuff on me. The new bumpers are in the bottom corners of the actuator in this picture:
I don't have any pictures of me closing up as I just wrapped it in electrical tape. I'm not proud of it but I didn't want to use superglue to put the actuator back together i case my fix doesn't last very long. Turns out I didn't even need to do that as the bracket wraps all around the backside and will hold it together regardless of what I did. Now I can use my key fob again!