PPCLI_JIM's Other Isuzu thread

PPCLI_Jim

Adventurer
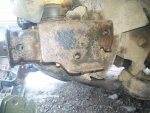
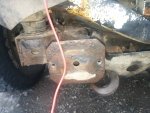
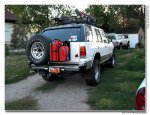
SOOOO anywway I decided i needed to re-aim my whooopie lights as i call em, so I went to pull my bumper off so I could put the lights on a plate so they could rotate more allowing a higher aim point. While doing this My trusty battery powered impact wrench decided to strip the welded nuts off the frame. Well crap. :oops: not to much too resolve a few grade 8 1/2 " nuts and bolts fortunately you can grab the nut with a pair of vise grips TM or whatever.Now ive had it on and off a few times I am seriously thinking of building a bumper front and rear for the Princess. this would allow me to add my winch from Christine and also change my approach angle on the back end along with putting a 2 " receiver tube for the back end getting rid of the wheenie little 1 1/2" one that hangs too low drags too often and would raise it. so it raises issues of the rear plate where to relocate it to? if i am gonna redo the back bumper im gonna make a swing gate on it that I an mount a MFC and a high lift jack. I was thinking of an old samurai axle that i have here from the weasel build as my base shaft then i have some 2 " schedule 80 tubing that i could use as the outer shaft. Ive got a few feet of 1.5" square tubing that i can use as my frame 10 feet or so. now to find a few axial load bearings.. aka tapered pin roller bearings and some 1/4 inch plate need a few square feet of that too. well any ideas before i start cutting metal for the front i was thinkng of this
13095739_1153668888029414_1473418136212651875_n.jpg

for the back end im not really firm yet its a soft plan kinda like the soft skull i have this is a good base but i want all the weight on the frame not the body
IMG_2784.jpg
 

PPCLI_Jim

Adventurer
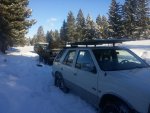
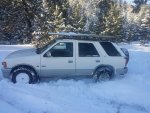
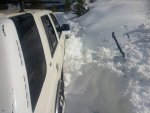
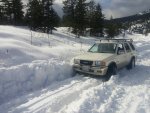
Well as its winter a few of my friends have decided that they need firewood . well yesterday I get a call ... Can you please come rescue me?... so I saddle up and drive out .. well its a 1 ton diesel ford that doesnt want to play fuel pump dead batteries etc etc . fack.. oh yea fresh snow about a foot of it
side rescue.jpg


da beast in snow.jpg
 
Last edited:

PPCLI_Jim

Adventurer
went out today and installed a electric fuel pump in the dreaded ford and now we are getting fuel but even after leaving the jumpers on the boat anchor for an hour when he hits his starter my rodeo fails to keep up looks like this summer im gonna try to install a cs130 one wire GM alternator in this thing
 

PPCLI_Jim

Adventurer
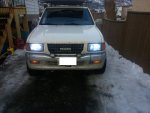
Well I am glad thats over. I got my new HIDs installed into my new headlight buckets. wasnt to bad except I zapped myself .... :yikes:::oops: Normally I dont feel that sort of zap I have done much damage to my nerves what with being in the LIGHT INFANTRY yea right the only thing thats light is my brains. But what the hey they are in and look a lot brighter then those stock style bulbs. while I was at it today in the much warmer weather i decided to lube up my driver side window rails and try to see what the issue is with my master control switch for windows .. Well nothing i can see but it started to sleet so i put the covers on and packed it in. I can control MY drivers window but non of the others any ideas guys and gals? :ugh:
 

PPCLI_Jim

Adventurer
At the connectors it was more then 12 v because it runs through the box that modifies the frequency i heard a BUZZZ then ZAP..!:Wow1: Could of been Zap then BUZZ .. It all happened pretty quick. I took the HIDs out for a drive last night and it was like driving with lightning bugs in jam jars . So this am, i took em out and put the other stock bulbs in Well SYLVYNA (SP) ones actually. ... LED I guess once I do some research and find out what works and what I want. :coffee:16143587_625686397632584_230564375601199639_o.jpg
these were the HIDs
 
Last edited:

PPCLI_Jim

Adventurer
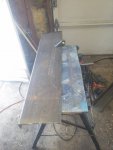
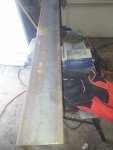
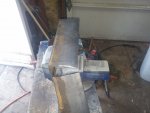
so after doing maths and pictures I have started in on my new bumper mounts prior to the winch bumper being constructed. making it out of 4" angle 1/4 " thick yes it is heavy and overkill but I will never break it when I'm done

j frame.jpgbumper mounts to duplicate in real thick metal

standard factory bumper mount.jpgfactory bumper mount location and appearance

frame rails.jpgthe frame rails come out like this and will allow another mounting point
 

Attachments

  • start point.jpg
    start point.jpg
    89.9 KB · Views: 9
Last edited:

PPCLI_Jim

Adventurer
well here goes...

winch plate 3 ft long.jpgI scored this 2x8 tube steel that was cut and four ft long for 15 $. it was basically the exact size as my winch plate on the trooper

start point.jpg 4" inch angle steel 1/4" thick

it begins.jpg first cut
 

PPCLI_Jim

Adventurer
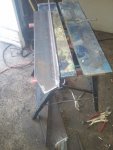
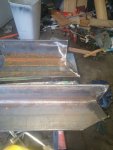
Much maths later I started in on the real cuts the riser has been notch cut so I get a full and complete weld path. At this point if i decided to go with 2 inch tube i know I would be just as good for torque load resistance IE if I hit something, or a full draw on the winch. :oops: If someones life is going to be on the line I want it not to fail, Just last year there was a fatality up at a local lake while winching where the steel cable broke. Thats why I dont mess around with stuff like this, Safety must always be maintained. Life moves pretty fast. If you don't stop and look around once in a while, you could miss it. to quote ferris buelller .


riser portion.jpg vertical riser

cut,notched.jpg cut notched for welding

coming together.jpg the frame extension and extension showing areas to be welded together
 

PPCLI_Jim

Adventurer
Well That didnt go as planned pt whatever....

Doesn't look like much until theres no one around to give you a hand. wet to to the Local range to do some plinking with my .22... well i should of not gone I should of put my chains on etc etc. ad to call a friend to pull me out after i made it almost all the way ..
16649045_636458293222061_3614773140998082533_n.jpg you can see the top of the hill where it all levels out about another 30 ft or so :Wow1:

16649228_636458263222064_5085804609680423441_n.jpg So it slid sideways and put itself in the ditch and stayed for a while :Wow1:
 
Last edited:

PPCLI_Jim

Adventurer
well the bumper is taking longer then expected so I got rid of the STOOPID 1 1/4" tow tube and I welded on a 2 inch receiver tube to it . I still have to attach to chain points but i can do that before i use it
file.php
 

PPCLI_Jim

Adventurer
Well POOP !!!! looks like either my head gasket or the water pump has pooped the bed. Just as I was about to start the conversion the trooper to CARB. So well thats on hold for a bit until i get the ROWDAYO fixed at least . I need transport and gaskets are a bit of a wait along with all the rest of the stuff..:smileeek:
 

PPCLI_Jim

Adventurer
18837012_691705217697368_1860848924157258662_o.jpg
18814664_691705111030712_8174679230546271294_o.jpg
18921164_691705291030694_514663223549831744_o.jpg


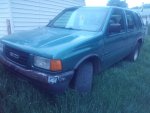
The toad . this is gonna be stripped and crushed , sad to say the body condition doesnt merit saving. I will be gutting it though drive line is what i was after . its a standard which is what i wanted , but ill take the spare motor that needs some work.front and rear diffs Ill be using these bits to do a diff drop with . then ill pull my driveline from my PAVEMENT PRINCESS and get a manual thats lifted !!!!!!!!! somebody from the trader has already asked for the window regulators!
 

PPCLI_Jim

Adventurer
tinfoil cap.jpg

Made a tinfoil hat for my dometic fridge and it dropped the temp 4 degrees.And in other news the heads are coming off so I can replace the head gaskets and misc hoses:chef:
 

Forum statistics

Threads
185,895
Messages
2,879,535
Members
225,497
Latest member
WonaWarrior
Top