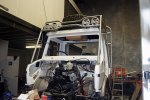
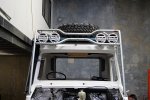
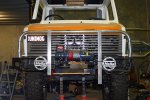
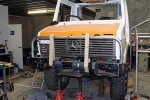
Unimogadventures - Our build and travel thread

sojourner

Observer
Ian, I just wanted to tell you I'm enoying this project immensely. Most of the builds I follow I look forward to seeing completion, yours I'll be disappointed when its finished because of enjoyment of construction process.
Rack looks good, keep up the great work.

Sent from my SPH-D700 using Tapatalk
 

matthewp

Combat Truck Monkey
Ian, I just wanted to tell you I'm enoying this project immensely. Most of the builds I follow I look forward to seeing completion, yours I'll be disappointed when its finished because of enjoyment of construction process.
Rack looks good, keep up the great work.

Sent from my SPH-D700 using Tapatalk

+ 1. Something like this project is on my dream list but way out of my budget for the forseeable future. I'm having a heckuva great time living vicariously through this thread though!:wings:
 

Iain_U1250

Explorer
Thanks for the encouragement. Initially this started out as a 9-12month project. That was more than two years ago and I've given up estimating when it will be finished. Right now, I'm just enjoying building it. I use my Land Rover to keep the travel bug at bay - but when "roughing it" with the Land Rover, all I can think about is how much better it will be when the Mog is finished.
 

Iain_U1250

Explorer
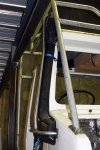
A quick update. First off the snorkel protector, I only used 26mm tubing as I don't plan on driving full speed into branches.

DSC03661.jpg

The protector unbolts so I can take the snorkel off.

DSC03662.jpg

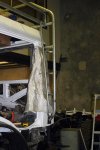
Next was the ladder so give me access to the roof. It was quite a tricky thing to fabricate, each step is made from bent tube so that the front of the ladder matches the profile of the cab, whilst the rear upright is vertical. The last rung was required to enable me to swap feet before climbing up on top. I will add a handle to the top of the rear crossbar to give me something to grab on when I'm climbing the last little bit.

DSC03664.jpg

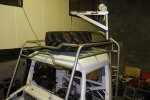
I decided to test the strength early - using an XM47 tyre - with just the tack welds holding things in place, it held the weight of the tyre and myself without any deflection.

DSC03674.jpg

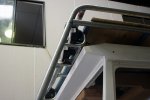
Next was to make the brackets to hold the spotlights. The first ones I made out of angle did not look right, so I cut the off and made them out of tube.

DSC03678.jpg

I decided to test out the crane again, this time using the MPT81. The crane just makes it down to the ground, all in all I'm quite impressed with the Spitzlift crane, it works great, and is very light. I can easily carry it up the ladder. In reality, the crane will be stored in a tool box on the roof, along with a few other things - but nothing too heavy.

DSC03683.jpg

DSC03682.jpg

The MPT81's looks more in keeping than the massive XM47.

DSC03680.jpg

The next stage is to fit the bracket to hold the tyre down to the roof rack. I will do that when the roof rack of off the truck. I will take it off tomorrow, and weld it all up, wire brush and grind welds where necessary, then paint it with an etch primer, then the grey hammer finish epoxy enamel. This is how I left it this evening - ready to lift off once I find 4 willing labourers

DSC03685.jpg
 

Chas Stricker

Adventurer
Looking awesome Iain! How did you bolt the snorkle protector on the top? I couldn't quite make it out. I hope to do something very close to your design and Couch's.
Thanks,
Chas
 

Iain_U1250

Explorer
Heavy metal part 2

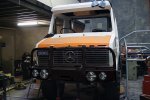
This week I've been concentrating on the front bumper /bullbar.

I started working on it, first bending up the top pipe. This is made from 60mm pipe with a 3mm wall thickness - it was very difficult to bend and by the time I had made it, I was stuffed. There are 6 bends in total, and I managed to get it symmetrical first time luckily, or would have had another hard workout. At this stage I decided that the Hella Rallye 4000 spotlight would make really good high beam lights. With that in mind, the front bumper would be about 25mm deeper than the originals, but that only needs
to be deep around the lights, after that I could taper it up.

DSC03708.jpg

The next part was to mount the 7.5 ton winch. The support plate for the winch sits on top of the chassis rails, that made the winch quite high. I made up the winch plate out of some 10mm plate. IT took quite a bit of cutting and fitting to get it right - my plasma cutter struggles a bit on 10mm steel, so I did most of the cutting with the 1mm cut off wheels on the angle grinder. I cut the support plates off the old bumper, and welded them onto the main plate - I was pretty happy with the weld - first time I have welded such thick plate together. I bevelled both sides of the plate, and was able to get good penetration right through.

DSC03716.jpg


Whilst it fitted , and would be strong enough, it didn't quite look right. I left it there until the next morning. In the morning I was still not happy with the winch taking up so much of the grill, and basically being exposed. So I took it all apart again.

After much deliberation I decided to cut off the front tow hitch ( that's the brown thing you can see sticking out from under the plate in the photo above). I could then lower the winch in between the chassis rails. That way I could hide the winch in the front bullbar, just like on the Defender and Discovery.

DSC03725.jpg

I had run out of steel, so have to wait until next weekend to get the winch mount made up. I decided to make up the front bumper out of cardboard. And this is what it looked like.


DSC03729.jpg

After much playing around I came up with a shape that looked good. The bumper continues past the front and provides extra protection to the front mudguards.

DSC03739.jpg


During the week, I will get the local sheet metal shop to fold up the bumpers out of 5mm plate. I took them over this morning and they said it should not be a problem, but they may have to make it in a few parts. All going well, I should be able to start fitting the bumpers and all the support plates and gussets next weekend.


This is how I left it on Sunday night - the photo shows an "artist's impression" of what it will look like thanks to a quick photoshop exercise.

DSC03729-mod.jpg
 

Iain_U1250

Explorer
Just a few photos of progress on the bullbar. I got the cardboard models folded up - however the winch support bracket was not delivered so I could not do as much as planned. I decided to get the 10mm plate folded to the right shape, as it would be a lot stronger, however the supplier decided they could not do it with their press, and outsourced it. I'll get it later this week.

I had to consult the "Australian Design Rules" a lot to ensure the bullbar and lighting etc was all legal. There are plenty of rules - ADR6 for indicators, ADR13 for lighting (which then refers to a whole load of other ADR's - nothing worse than finding out that all your efforts are illegal. :) The OEM indicators are partially obscured by the bullbar, so I need repeaters, however, I had to change where I was planning to put the repeater indicators on the bullbar as they would not have complied with ADR6.

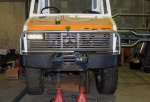
The photos below show the steel bumpers as folded


DSC03768.jpg


Determining the placement of the headlight recesses - using the support rings for the Hella 4000's and the standard H4 7" headlights.

DSC03769.jpg

The grill needs to fold forward to be removed - so the uprights have to be far enough forward to enable this to happen.

DSC03772.jpg

DSC03773.jpg

The Hella 4000's and H4 7" lights in place.


DSC03778.jpg

I cut the recesses using my cheap e-bay special plasma cutter - cuts 5mm plate very easily and a worthwhile investment for any truck building project.

DSC03779.jpg

I welded some temporary supports to hold both bumpers level and at the right angle. Once I get the winch support bracket back, I'll sort out the centre section of the bumper.


DSC03782.jpg
 

Iain_U1250

Explorer
I have not done as much work as I wanted the last few weeks - first off I have been away "Consulting the Community" at work - and I also got the flu - not pleasant at all. We also had a photo shoot for 4WD Action magazine of the Discovery, which meant I had to spend some time cleaning and polishing it - the photo shoot was great fun, it took the whole day and by the end the Discovery was muddy again.

The lining panels have started to arrive.

DSC03818.jpg


They are very light, made from two sheets of 1.8mm plywood and 6mm of foam, but the are very strong. They will be covered in 0.8mm of white Formica, so that will make them very tough and hard wearing. Once all the panels are here, I will mark all the areas for inspection opening and wiring openings - then send them back for finishing. Next time I see them it will be to fit them in their final position.
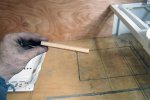
DSC03819.jpg

Back to the Bullbar fabrication:

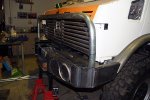
The infill panel arrived, and I can finally weld the thing up. Lots of clamps etc, but the temporary braces worked well, and the section fits in perfectly. I have to fabricate the supports as well - all from 6mm plate. The bolts are all M16, and after I tack the support in place I discovered that the rear bolts were too long to get out to the hole - so I have to cut a slot in the rear bolt hole to get them in and out.
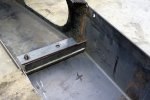
DSC03789.jpg

Next is to cut the various slots for the winch cable, the handle for the clutch and a slot to see how the cable winds up on the drum. I also mounted the roller fairlead. The main beam Hella 4000's fit in quite nicely.

DSC03795.jpg

I'm getting used to making cardboard templates - its a great way to see how things will look without too much effort. I tried a few different styles of support for the bar work, and this is what I think looks the best.
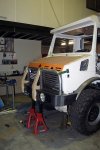
DSC03799.jpg

I have to make the front supports deep enough so that the fairlead does not protrude past - one of the ADR requirements. Not sure how getting hit with a fairlead or a solid steel bumper would made a difference, but apparently it does.


Now to turn cardboard into steel

DSC03804.jpg

I made the first support out of 6mm plate, but ran out and had to get some more the next day. That's the man problem working at night, if you run out of something, then it's either take time of work or wait until the weekend, luckily the steel supplier is just around the corner and opens at 7:00am, so I was able to get some the next day. I made them exactly the same by cutting the second one roughly, then tack welding the two plates together, and finishing off all the edges with a grinder. I welded these in place on late on Friday night.
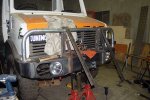
DSC03805.jpg

Next step was the flat bars to brace the supports. I welded them on starting with the bottom at the back - that way I was able to bend them a lot by hand.


I started again on Saturday morning, this time armed with a propane torch and a big hammer. After much heating hammering and tacking, I had the supports in place - I only had to cut one of the tacks off to realign the strips - must be getting better at this fabrication business.

Next was to weld it all up - there is lots of welding, and as the plate is all 6mm, that means turning up the welder to the max. It generates a lot of radiant heat - there were time when I could see the smoke starting to come off the welding gloves before I feel the heat starting to come through the gloves - then I had to stop or risk melting my fingers.

This is what it looked like after much welding:

DSC03810.jpg

The next stage was the lower bar - I didn't want the space between the bumper and the upper bar to be too big - else the pesky kangaroos might find a way to commit suicide by jumping into the radiator.


After even more bending, cutting and welding
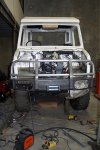
DSC03814.jpg

And this is how I left it this evening - as with all things I do, it's not perfect, the welding pulled the whole thing skew by about 3mm - but I doubt most people will notice. The bar is pretty heavy, I can lift it off, but it is just too heavy and a difficult shape for me to lift it back on by myself - that's where my trusty forklift comes into place. I think it weighs around 60kg - but I'll borrow the scale tomorrow and weigh it.
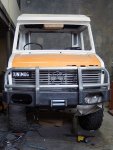
DSC03815.jpg
 

SChandler

Adventurer
The bumper/bullbar came out nice. I really like the way the whole thing looks.

The interior panels sound like an interesting product. Is the foam intended to provide additional insulation value or is it a structural foam intended to stiffen the panel? Do you have a link or trade name for the product?
 

Iain_U1250

Explorer
The foam provides both extra insulation and the stiffness. The panels are just vacuum bagged up by the guy who is doing the interior carpentry. He does a lot of veneer work, and has a big vacuum table for his veneering.
I was originally going to use a similar commercial product, but it uses polystyrene instead of foam, and I was able to get to to de-laminate very easily just by pushing it in.

A few more photos of the interior and bullbar.

DSC03820.jpg

DSC03816.jpg

DSC03788.jpg

DSC03817.jpg
 

Iain_U1250

Explorer
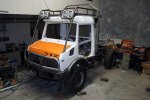
This weekend I finally managed to round up enough helpers to get the roof rack on the truck.

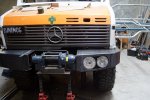
This is what it looks like with the Hella lights and the bullbar.

DSC03841.jpg

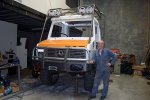
Before the last of the helpers left, I got him to take a photo - there are not many photos of truck and there owners, ( or should it be slaves) so I thought I would at least let everyone know who I am. :) It might start a new trend.

DSC03846.jpg

I also worked on the interior of the cab, adding extra supports, painting and sticking on the sound/heat insulation. In case anyone wants to know, so far I have used three boxes of the dynamat in insulating the cab. I hope it's worth the effort.

DSC03836.jpg

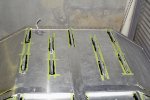
I also started on the roof of the camper section, getting it ready for the various things that will be on top of the roof. I have covered all the seams in the panels on the top with another layer of aluminium stuck on with Sikaflex . I think that should keep the water out. I also bought the paint for the roof - a special heat reflective paint made for RV and caravans, it also has good waterproofing properties, being a rubber latex type paint.

DSC03850.jpg

The next stage it to mount the solar panel brackets. Once I have all of them on place I will look at the steel rubbing rails - they protect the solar panels and proved somewhere to tie stuff on the roof. The will be made from 26mm steel pipe - the support plates will be glued onto the roof using Sikaflex, still deciding if I want to make them removable, they may be subject to damage due to branches etc so getting them off make be an advantage but how to ensure they stay on without making holes in the roof, and I also have to ensure the won't destroy the roof if they take a hit - that's what I'm figuring out now.

DSC03849.jpg
 

Forum statistics

Threads
185,898
Messages
2,879,549
Members
225,583
Latest member
vertical.dan
Top