Unimogadventures - Our build and travel thread

Mickldo

Adventurer
I hope not - I've been out bush for work so if my Mog is in Maryborough - then they have nicked it :Wow1:

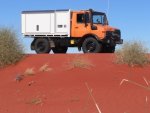
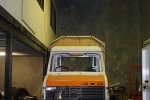
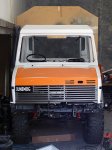
Yeah after looking back through this thread at your truck and then having another look at this one it has a bit shorter wheelbase than yours. It looks like it has some sort of frame on the chassis too. Something that allows a container or similar to be slid on and locked down maybe. If it is still here this next week I will go over and have a chat with them.
 

MOGHEVN

New member
I am sure that you will have fun with your project!

Iain:

Every owner has their own opinion of what is important to them. Some like amenities, some like compactness, others robustness. While each attribute is important in the global sense, you have to choose the mix that works for you. We focused on compactness and robustness.

See http://www.billcaid.com/2007/UnimogCamper200710/UnimogCamperConstruction200710.htm for our take on the world.

We ran this rig for a number of years and decided that we needed a bit more real estate, so we took another stab at the problem.

See http://www.billcaid.com/2010/1017ACamperConstruction20100921/TripMain.html for yet another approach.

Best,

bc
 

Iain_U1250

Explorer
Hi Bill. I've read every page on your website, love your travel blogs. I'm not quite sure have big your new camper is? Mine is 3.6x2.2x1.95H ( around 3.5x2.1x1.9H internal).
 

Iain_U1250

Explorer
Just got back from my 6000km trip to Cape York in my Land Rover - and it has given me great insight in to important things to consider for my Unimog.

Lessons learnt:

  1. One of the key things is dust seals - despite my best effort at trying to keep the Land Rover dust free - the entire interior is covered with fine red dust.
  2. Corrugations - they can change from a minor irritation to bone jarring. I'm not sure how badly the Unimog will be affected given it large diameter tyres and relatively low pressure.
  3. Insects - particulalry ants. Whist we had the mosquitoes and midges under control, the ant were a problem, gaining access to the interior through the smallest of holes. We ended up with a small colony under the wter tanks in the Land Rover which we only discovered when we got home - we were wondring where all the ant kept on coming from.
  4. Packing up - having to pack up the camp every time we want ot go and visit something, meant we ran the risk of losing our camping spot. We will look at some form of tent/stand alone awning to leave behind, and carry bicycles for short range travel.

  5. External lighting - ensuring they are suitable for max light when the awnings are up and have different ones for "stealth camping" having some more low down light, maybe just red ones for when we don't want to be seen.
  6. Camouflage netting - in area where we camp in gravel pits and other less secure areas, we need to ensure we are not to visible to casual passers by - we might look at some form of camoflage netting for the side closest to the road.


Here's a photo of our set at one site on the Old Telegraph Track.
Cape-York_0425.jpg
 

MultiSmog

New member
Suggestions

Hola Iain!

1. Dust. There are two options in my book: To use double lip trim with an additional round seal and/or use an inflatable seal. The second option will be way better but way way way more expensive. You will have to have a vent anyway or you could suffocate inside besides that every time you close the doors you will pound your ear drums if you really seal it properly. In some cases the door frame design is so poor that you will really have a hard time improving the seal.
2. Corrugations. Air down is the "easiest" way, CTIS will certainly make it effortless. With larger tires than the tires that actually made the corrugation will be enough most of the time to avoid shaking. You can also engage your lockers and it will not only help reduce shaking but you will reduce the amount that you corrugate the road at the same time.
3. Insects. Using good seals plus long residual time insecticide/repellent.

Saludos
 

njthommo

New member
Hi Iain

I've recently returned from a 7,500 trip out to the Plenty Lakes (north Simpson Desert) traversing country most likely never crossed by man, european or aboriginal. It was a great shakedown trip for the mog and showed up a few problems with the vehicle but very little with the camper.

As far as dust goes Thompson truck bodies who built my camper used a double lip seal which was up to the job of keeping out all dust and there was lots of bulldust from Oodnadatta up to Fink and Alice.

I have 42'' tyres and aired down to 30psi rolled over corrigations without much shakeing and used 4WD but not the difflocks as they effected steering way to much.

There were very few insects at this time of the year but there was the greatest mouce and rat plague of all time. Mice were way more intrusive in the designated camping areas but once we got away from these they were more timid though not in deminished numbers. They really annoyed my companions who were sleeping in swags.

Being able to pack up quickly is quite important for the way we travel as we move every day. We would only deploy an awning if it was raining.

I have found LED worklights attached to the mog are adequate for camp lighting and as far as stealth lighting goes after many years of camping in Oz I hardly think it is necessary. In the areas worth visiting (the remote areas) intruders are not a problem, they hang out in urbane areas.

Anyway how is the camper coming along? You were going great guns when I visited in March.

Regards Nick.P1020657 - Copy (2).JPG
 

Iain_U1250

Explorer
Hi Nick, I'm back into working on the Mog again - been a while since I did anything constructive on it. Work and getting the Land Rover ready for our trip up to Cape York.

I've just finished running all the wiring, and should be ready to go off to get the interior fit outdone.

I saw some of your exploits on the Unimog forum, looks like you had a great adventure.

Can you send me some details about the double lip seals - or a photo. I have used conventional car door rubber compression seals. I was also planning on using a positive pressure system with a fan to suck air in via an air filter

We often use gravel pits to bush camp - so not far from the road - hence the "stealth camping" We have some great led lights, but the produce a lot of light. We will look for some smaller lights, possible red ones to lower the intensity.

Anyway, now I'll be back to regular update as I get back to work on the Mog.


Hi Iain

I've recently returned from a 7,500 trip out to the Plenty Lakes (north Simpson Desert) traversing country most likely never crossed by man, european or aboriginal. It was a great shakedown trip for the mog and showed up a few problems with the vehicle but very little with the camper.

As far as dust goes Thompson truck bodies who built my camper used a double lip seal which was up to the job of keeping out all dust and there was lots of bulldust from Oodnadatta up to Fink and Alice.

I have 42'' tyres and aired down to 30psi rolled over corrigations without much shakeing and used 4WD but not the difflocks as they effected steering way to much.

There were very few insects at this time of the year but there was the greatest mouce and rat plague of all time. Mice were way more intrusive in the designated camping areas but once we got away from these they were more timid though not in deminished numbers. They really annoyed my companions who were sleeping in swags.

Being able to pack up quickly is quite important for the way we travel as we move every day. We would only deploy an awning if it was raining.

I have found LED worklights attached to the mog are adequate for camp lighting and as far as stealth lighting goes after many years of camping in Oz I hardly think it is necessary. In the areas worth visiting (the remote areas) intruders are not a problem, they hang out in urbane areas.

Anyway how is the camper coming along? You were going great guns when I visited in March.

Regards Nick.View attachment 67037
 

Iain_U1250

Explorer
Work continues on the truck at last - whilst the back is getting fitted out, I'm working on the roof rack.

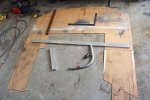
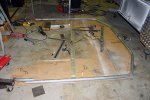
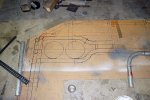
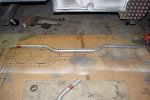
First was to make a template of the camper box - so I can get the roof rack in the right position etc.

DSC03586.jpg

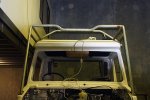
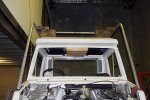
Using the template, I drew up a layout for the tubing - this took quite a while and lots of studying of various photos of Mog roof racks to come up with my design. THe key things are that must be big enough and strong enough to hold the spare wheel and associated crane. It can't be higher than the camper box, but should double as protection of the edges.

DSC03593.jpg

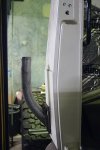
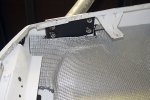
Then I made some attachment points - using M10 rivnuts and M10 bolts through the double skin part of the cab, I fashioned up the lower attachment points

DSC03594.jpg

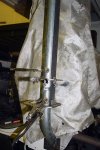
I then bent some 40NB Grade 350 pipe, and made the lower attachment points
DSC03600.jpg

DSC03598.jpg

Next was to bend up the pipe to match the template drawn up - in total, there is about 5.7m in this hoop.

DSC03597.jpg

Then I lined up the pipework using a heavy angle and lots of clamps, and welded them together.
DSC03607.jpg


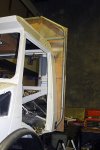
And this is the final configuration of the rear section of the roof rack.

DSC03611.jpg

DSC03610.jpg

There will be an upper attachment point just under the rain channel - that will have 3 x M10 rivnuts and 3 x M10 bolts through the double skin section - you can see the attachment point on the template

More photos to come as work progresses and I'll do another post with some of the little detail pieces I have been working on on the camper box side of things.
 
Last edited:

Iain_U1250

Explorer
Just a few detail photos of various elements.


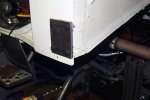
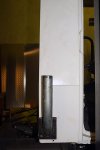
First off are the two batterey boxes. These will hold two Optima 75AH yellow top batteries each, giving me 300AH of "house power" There will be a fifth starting battery for the truck as well.

DSC03573.jpg

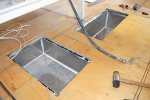
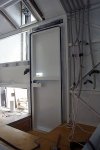
This photo show the shower recess / step. I will be lining this with a stainless steel insert. A shower curtain will limit the amount of water spread around the rest of the camper, the shower itself is a hand held with a push button nozzle, so that will limit the amount of water used. The shower has 4m of hose, so when the weather is good and we are alone, we will use it as an outside shower, the only time we will us it internally will be for cold weather use mainly, or for washing off the sand and dirt off our feet. The inside of the door will be lined, but will have pocket for various thing recessed into the lining.

DSC03578.jpg

The next few photos show the conduit layout in the truck - there is 50m of 40A cable and 50m of 25A cable - and that is just from the circuit board to the connection point.

DSC03576.jpg


DSC03574.jpg

DSC03575.jpg

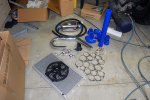
Finally, my Water-Air intercooler has arrived - more details on the fit out of that in a few months.

DSC03572.jpg
 

mogcamper

New member
More Dust

Hi

I can see that double seals work well on the doors and windows but how do people keep the dust and insects out of the ventilation openings such as bathroom extractor fan, fridge, battery and gas compartments?

BTW, great thread. Keep it coming.
 

Iain_U1250

Explorer
Hi

I can see that double seals work well on the doors and windows but how do people keep the dust and insects out of the ventilation openings such as bathroom extractor fan, fridge, battery and gas compartments?

BTW, great thread. Keep it coming.
On mine, the bathroom/toilet extractor is fan forced, so dust should not be blown in, and it also vents out to the roof, under the "tropical roof" so even less chance of dust getting in. The fridge will vent internally when travelling, but will have a hatch to vent externally when parked up - it is likewise fan force and has a mess screen for the insects as well. The batter compartment is sealed, and only has a hose coming of the vent to the outside - I'm running yellow top Optima's, they only vent on overcharging which I hope my solar regulator sorts out.

The only gas I have is on on an outside barbeque - the gas storage has to be vented, and that is outside the truck. I'll have a few baffles in the vent to slow down the dust., but I'm sure it will get in there.
 

Iain_U1250

Explorer
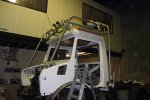
A few more photos of my roof rack under construction.

The one thing I realised this weekend, is that the first one is always the longest - the first of the front support took hours to figure out, the second was just a simple copy of the first. Similarly the side tubes etc.

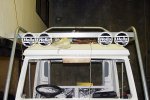
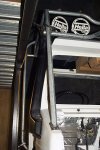
I have done numerous sketches of the roof rack, and I wanted something a bit better than just a series of straight bars. I'm going to fit four Hella Rallye 4000 light up high, and another four on the bullbar. The 4000's are "Mog Size" lights - smaller ones would just not look right. I also have 7 of them, so all I need is another one to make up the set I decided to go with the two on each side, rather than space them equally across, or have all four in the middle.


The photos below show the sequence of construction.

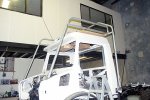
I welded the back vertical tube on and used it stabilise the whole support - that way I could hook it onto the back cross member, whilst I measured up the angles etc. Doing everything by yourself means you have to get a bit "inventive" when it comes to supports. The wood blocks hold the front supports vertical.

DSC03618.jpg

With the front supports attached to the cab, I welded support tubes to the rear hoop and then the two side tubes. This all took a long time, and many iterations of measuring, grinding and cutting, and remeasuring until I got everything just right. This is how the sandwich plate looks from underneath, it seem very rigid, but I may add an extra support going all the way down to the main chassis framing.


DSC03622.jpg

DSC03630.jpg

DSC03628.jpg

I used the light covers and a length of aluminium as a mock up, to get the ideas and dimensions right.

DSC03633.jpg

I drew up the cross beam on the template, and using the worked out all the bend points and shapes.


DSC03637.jpg

and after a whole lot of bending, this the result. The reverse bend were particularly difficult, especially so close together, I messed the first one up, but the second one worked out great.


DSC03639.jpg


DSC03640.jpg

another view of the weekend work

DSC03645.jpg

This is how I left it last night - snorkel fits quite nicely but will need a bit more protection.
DSC03648.jpg
 

Forum statistics

Threads
185,898
Messages
2,879,551
Members
225,583
Latest member
vertical.dan
Top