Unimogadventures - Our build and travel thread

dzzz

Webasto air heaters do it the right way by increasing combustion air fan speed at altitude (stock feature in newest design)

Espar hydronic decreases fuel pump pulses with the optional kit mentioned. Before that option was created it was the two pump system controlled by a switch. Significant loss of BTU.

Webasto hydronic doesn't have an option, AFAIK. Someone mentioned partially blocking the exhaust (?) pipe at altitude. Increased back pressure?

It seems to me, that what you just described is more or less the behavior of a unit that is setup for high altitude. ....

The result may be the same, but the reason is very different. I was just talking about water flow being inadequate to remove the heat of normal full combustion.

The problem at altitude is too rich a mixture. All the units can be set up for high altitude, but then they are too lean near sea level.

............

If you would like a copy of the manual (10 pages), PM or email me.
Thanks, I was able to read the manual online. I was disappointed at the complicated wiring.
 
Last edited:

mog

Kodiak Buckaroo
I was disappointed at the complicated wiring.

The vendor who I got my Espar D5 from has a customer in Colorado who just uses a manual potentiometer and sets the resistance according to barometric pressure/altitude that he has established by trial/error and experience. He (customer) now has a chart of what resistance to use for what pressure/altitude. I’m working on getting a copy of that chart.
 

dzzz

That's interesting.
Will the fuel pump pulse less often or the same frequency with less strength?

On the subject, I recalled that Stephen Stewart had mentioned somewhere on his site that he'd had some problems with his Hydronic. I can't find exactly what the problem was, but this page mentions replacing the ignitor plug every six months and carrying a spare:

http://www.xor.org.uk/unimog/mymog/heating.htm

He doesn't say, but the problem is inadequate coolant capacity and warm weather. The system needs to burn on full power long enough to burn off potential sulfur deposits. A smaller D4 and a bigger buffer/overflow tank would have been a better start for the design. He apparently isn't engine connected, so he has to fire up the espar to heat his little calorifier. A commercial calorifier would have an electric heating element as a third way to heat water.
 
Last edited:

Iain_U1250

Explorer
Thanks for all the info - unfortunately it went way over my head - I'll have to study the details and what it means for me with my Webasto 90ST.
 

dzzz

I've been paying attention to the heat issue more, and noticed with wet 35-40F weather my 13' camper needs about 2000 btu for a cool sleeping temps. Say 3000 btu for people who like to sleep warm.
I feel that's as more of a design issue as dealing with the theoretical coldest night.
Using the electric heating coil in the water heater is one solution for low heat. 750W or 1500W is about 2000 or 4000 BTU.
 

grizzlyj

Tea pot tester
Hi

I have a D5WS Eber 24v running a coolant loop through a calorifier, with a blown air heat exchanger tee'd off it, no valving to swing the flow one way or the other. At the tee both the calorifier and exchanger feeds drop a pipe size, and both get nicely toasty. From a cold calorifier it will run on high for about 40 mins until it cycles onto low power, unless the exchanger fan is on too.

If I don't turn the fan on the heat coming up through the floor isn't noticeable, so I don't have an issue with it still being in the circuit. One advantage with a fan is the heat is instant and quickly circulated which a static radiator will not produce.

A radiator perhaps in the bathroom to dry towels, washing etc without additional electric drain other than a small amount of extra coolant pipe flow resistance (!) is a good future plan for me. Drying clothes without heating the whole camper would be handy.

If you apply a thermostat to the heater feed, cutting it off entirely to control temp in the camper, wouldn't you use more Ah since the glowplug will need to fire up every time?

Stephen Stewart also added underfloor heating, presumably from a valve controlled spur?

Having just one valve to control flow is fine, but I'm still jitterry about having my engine coolant winding itself around so many extra metres of camper pipework! The engine header tank is also the pressurisation for my Eber at the moment, or the circuits would be seperate.

Indeed getting the air out of such convoluted pipework, especially when renewing coolant, will have me changing to a D5 for the camper near the calorifier etc to minimise pipe runs and make de-airing easy, and a seperate one for the engine.

Our camper has kept us warm up to 2600m, but I wasn't aware of a height limit for the Eber at the time. I only remember that it worked! I imagine it would gunge up quite quickly if you stayed at height for a while? I didn't know there was an alternative to two fuel pumps, I'll look into that in the future too!


I've also been told that the camper circuit will generate some sludge, so there should be a heat exchanger between the engine loop and the camper loop rather than fluids swapping? 2nd hand info that though.

:)
 

Iain_U1250

Explorer
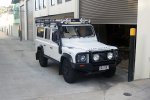
It has been quite a while since I updated the blog - I have been a bit distracted on the Unimog since getting this - my new Land Rover Defender 110. This is what it looked like the day before got my grubby paws on it....
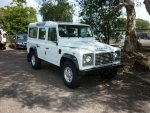
Defender.jpg

This it what it looks like now - just can't seem to leave things alone. We are going up to Cape York in July, and since the Mog was not going to be ready, I had to have something to drive - it's a long walk otherwise :)

DSC00568.jpg

Anyway, back to the camper build.

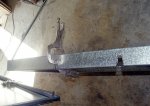
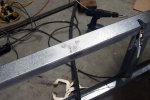
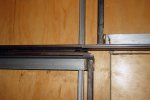
Next up was the fridge slides - Anyway, about a month ago I started work on the fridge slides, and after much fabrication and engineering - this is what I ended up with this.
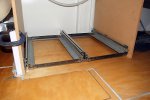
DSC00525.jpg

There is a lot of detail in this slide, first the two runners have to be off-set, as the bolts have to be countersunk to allow the runners to pass - so I could not just bolt them back to back. The frame has to allow for the slight sag on the runner due to the weight of the fridge, and not hit the floor or the framing.
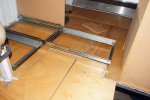
DSC00527.jpg

The sliding parts have to fit a "standard fridge" - otherwise if we have to replace the fridge on day, we may have to remake things. The slide is now the standard size for a 40/50litre fridge. In the end it was a neat fit - I have primed it and will paint it when I paint the rest of the things that will need painting - no point mixing up 1/2 a litre of two pack paint just for this little thing.
DSC00528.jpg

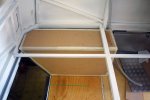
Next thing on the list was the water tanks - I made a mock up out of thin craft wood the exact size of the space available - only to discover that there was no way to actually get the tank in. That was the purpose of the mock up - I need to make sure I can get them in and out - I read on a few other truck builds where the builders installed the tank early on in the build, only to find out a few month later that once other things were installed, the tanks became permanent fixtures - on poor guy had to rip up half of his floor to replace a leaking tank a few years later. What should have been a 1/2 day job for him turned out into a month long re-build.

With a bit of cutting I managed to get a mock up that I was able to fit into the space without having to dismantle anything. That made the tank a bit smaller, but I made it slightly wide to compensate.
DSC00522.jpg

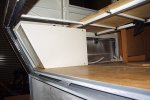
I has Atlas Tanks build the plastic water tanks from my drawings - in the end I decided that 100 litres each would be enough and keep the rest as "boot space". The initial idea was to have a chamfer in the corner as per the mock up - but when they told me how they make the chamfer - first make the tank with a flat plate on the angle part, then cut the chamfer into it, then weld in a new piece of plastic - and that would cost an extra $250 per side - and would only gain 8 litres. I decided to just go with the flat rear plate. So now instead of 2 x 100 litres, I have 92 litre per side ( probably around 88 usable unless we part the truck downhill). We have another 20 litres in the hot water calorifier, and for the $500 can easily get another 100lt flat water tank in the boot if we need more water.
DSC00533.jpg

I've made up all the brackets to hold the water tanks in place - there will be another on behind as well - I don't want 100kg of water tank moving around.
DSC00599.jpg


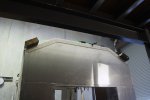
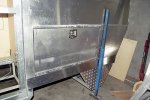
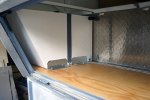
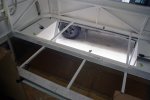
I also decided to completely separate the rear boot area from the rest of the truck. I made up some brackets and a sheet of 3mm chequer plate to form a bulkhead. There will also be a solid lid to the boot, with inspection hatches to allow me to remove the water tank hold down straps, the senders etc etc. I'm still deciding whether to make it from aluminium or plywood. I will also run part of the heating system through into the rear boot compartment - probably just a few runs of copper tubing - to ensure the water tanks don't freeze up.
DSC00595.jpg
 
Last edited:

Iain_U1250

Explorer
Finally, this weekend I got back onto the door. I needed to move the lock from where I had originally wanted it ( about 1/4 of the way up from the bottom) , to the middle of the door. The was just no way the door seals would seal properly at the top of the door, when the lock was so close to the bottom.

DSC00600.jpg


I cut the new position for the lock, and put the cut piece in the old hole. With a bit of magic and hot metal, the hole moved to the right position.

DSC00601.jpg

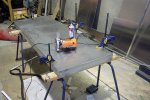
Next came the cladding of the door. After rough cutting the aluminium with the plasma cutter, I then clamped it to the door frame, and using a bottom bearing bit on my router ( and some spray oil for lubrication) cut the aluminium to the exact size.

DSC00602.jpg


I've started the "armour plating" - 3mm chequer plate is to strengthen the edges most likely to get hit by something - and to provide my double layer seal. Each horizontal seam/joint in the aluminium cladding on the truck will two layers aluminium - to create a double seal.

DSC00562.jpg

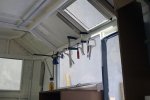
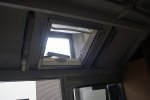
I also put in all the supports of the lining and finished off the window frames. Then I cut the roof skylights in and made the frames for them.
DSC00563.jpg

Next was to make and fit all the aluminium trim pieces around the hatches, down the bottom of the truck etc. Lots of little details to fill in the gap on the cladding and to make a nice fit.

DSC00554.jpg

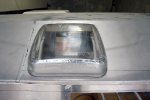
The skylights are the same brand as the windows - and are double glazed polycarbonate. For some strange reason, the skylight do not come with a sealing strip. Their website says this is because the Australian rules for gas appliances in caravans require them to be open - They are not supposed to leak, but I'm going to get some seals for them because I don't believe them.

DSC00581.jpg


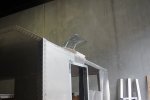
The roof hatch stands proud even when closed - about 100mm - so I had to have a re-think of the roof mounting system for the solar panels and roof racks as the solar panels are only 50mm thick- I will have to make something to allow branches to slide over the top of the hatch. It will be back to the drawing board as far as the roof layout is concerned.

DSC00584.jpg

DSC00588.jpg

We have two skylights, one directly above the stove, the other above the sink. That should be great for ventilation.

DSC00585.jpg
 

Iain_U1250

Explorer
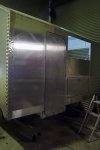
This photos shows the result late last night of the nicely clad door - I went to the beach today, but we have a day off on Monday so I'll fit the rest of the lock so I can actually get in to the truck

DSC00605.jpg

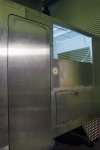
After two days of deliberation of where to put it, drawing circles all over the mog, just before I went home at around 10:00pm last night, I decided that the best place fit the water tank filler was next to the door. You can stand on the steps to reach it once the camper back is on the truck - it has to be a gravity feed to the tanks, so that means being higher up the than the top of the tanks - so that is always going to be above head height.

DSC00607.jpg

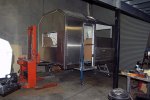
Anyway - that's what I have been doing the past month or so. Things progress slowly and within a few weeks, the back goes up to the Sunshine Coast to get the interior fitted out. I've built a "travelling frame" to hold it for the 100km trip on a flatbed up the coast. The photo shows the rear one in place whilst the forklift holds up the front. I've made another heavy frame to take the place of the legs and will weld it all up tomorrow.

DSC00593.jpg

Whilst it is gone, I will get back to working on the truck itself - and get it up and running for the first time in two years.
 

Mickldo

Adventurer
Hi Iain

Camper is looking good.

Is your Mog currently up in Maryborough? I spotted a White Mog like yours parked in the yard next to the fibreglass workshop that is over the back of my place. Is it yours? If it is you should come over for a chat/ coffee/ beer/ whatever when you pick it up.

Mick
 
While we wait for Iain's next progress report, check out another Australian Unimog conversion - rather a major job:

http://theage.drive.com.au/motor-news/perkins-swaps-racetrack-for-outback-20110526-1f4vs.html

Yes there is/was a Unimog under there...

motorhome_1_729-420x0.jpg
 

Forum statistics

Threads
186,083
Messages
2,881,794
Members
225,874
Latest member
Mitch Bears
Top