You are using an out of date browser. It may not display this or other websites correctly.
You should upgrade or use an alternative browser.
You should upgrade or use an alternative browser.
04 2500 suburban build
- Thread starter 60beforetruck
- Start date
60beforetruck
Active member
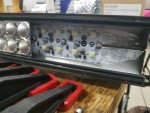
They have a aluminum wire soldered in across a the modules every two inches. Positive on to top ground on bottom. I just picked the length I needed and cut it. I could have done a cleaner job if I took it all apart and used the band saw.Heh. That the kind of silly nonsense I'd do. Is each 4-LED module wired independently?
Attachments
60beforetruck
Active member
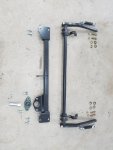
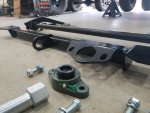
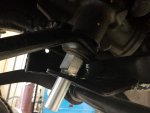
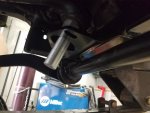
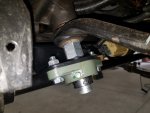
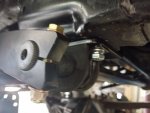
Got the sway bar back from powder coat last week. I also ordered a WFO concepts steering box brace. Most people think Dodge when they hear steering box brace, It is the same thing. Carrier bearing slides onto a sector shaft extension and has a retainer nut with set screw after that. The box brace attaches using the stock sway bar bolt holes. That is why I was waiting on the brace. Put it all on one time.
Everything fit nicely and it now has no body roll. I took it for a quick spin and I am very happy with the results.
WFO concepts box brace
Speedway Engineering sway bar and arms.
Everything fit nicely and it now has no body roll. I took it for a quick spin and I am very happy with the results.
WFO concepts box brace
Speedway Engineering sway bar and arms.
Attachments
-
 20200317_172403_resize_98.jpg374.4 KB · Views: 49
 -
 20200317_172421_resize_17.jpg1.7 MB · Views: 50
 -
 20200317_173817_resize_53.jpg1.6 MB · Views: 50
 -
 20200317_173822_resize_46.jpg1.6 MB · Views: 51
 -
 20200317_185217_resize_22.jpg1.5 MB · Views: 51
 -
 20200317_184104_resize_45.jpg1.7 MB · Views: 49
 -
 20200317_173830_resize_27.jpg1.6 MB · Views: 51
 -
 20200317_184056_resize_48.jpg367.7 KB · Views: 48
60beforetruck
Active member
The box brace is for the crossover steering and the load it puts on the box. It takes out the "wonder" from the box. The front crossmember gets cut out when you do a straght axle swap so this ties the frame horns back together.
Between the brace and the sway bar it is alot tighter feeling.
Between the brace and the sway bar it is alot tighter feeling.
60beforetruck
Active member
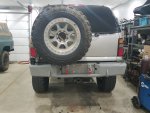
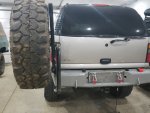
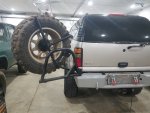
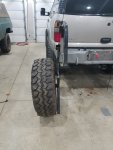
Started working on the rear bumper again. Had to cut a piece of metal to bring the center section out about 1 1/2" so that the latch would catch. Mocked up the bumper to measure for filler pieces for the top. Bumper was made for my truck and the suburban has larger side pieces on top.
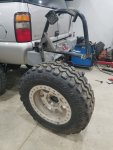
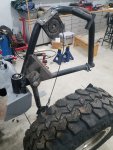
Set the spare tire swing out on again to check clearance. It can lock in three different positions. Closed, half way for a parking lot so I want hit the car next to me, and wide open.
The idea is to swing it open pull the safety pin and lower the tire to the ground. I used a spare tire winch to lower the tire to the ground. Welded a lug nut to the winch so you can use the same size socket to lower the tire that you would use to change the tire. The winch want lift the tire on it's own. I can use my impact with one hand and lift on the tire with the other. Not really that hard to do.
Dont know if I am going to change the design or just fix mount the spare to the swing out .
Attachments
-
 20200324_183713_resize_12.jpg1.8 MB · Views: 85
 -
 20200324_184229_resize_69.jpg1.8 MB · Views: 81
 -
 20200324_184318_resize_94.jpg1.7 MB · Views: 79
 -
 20200324_185027_resize_0.jpg402.6 KB · Views: 84
 -
 20200324_185007_resize_21.jpg409.9 KB · Views: 85
 -
 20200324_185120_resize_87.jpg407.9 KB · Views: 88
 -
 20200324_185126_resize_15.jpg543.9 KB · Views: 88
 -
 20200324_185114_resize_97.jpg373.7 KB · Views: 84
60beforetruck
Active member
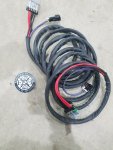
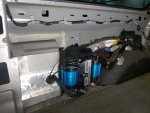
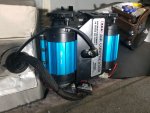
Got back to working on the truck this week. Finally wired in the compressor and got it mounted in. Still need to find the tank I want since my 15 gallon one will not fit due to the secound fuel tank being between the frame rails.
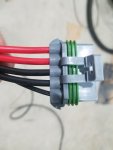
Expedition Essentials makes a ARB compressor wire harness extension that plugs in. ARB only comes with about a 5' harness.
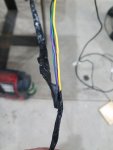
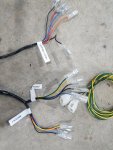
I also took the ARB switch harness apart to get the power plug out to connect it to my SPOD. The stock ARB harness is designed so you have to turn the compressor on to engage the locker. You can only then engage the front locker after the rear is engaged. I already had al my switches set up and also like being able to only engage one locker if I need to.
Attachments
-
 20200114_182458_compress23.jpg397.6 KB · Views: 38
 -
 20200114_182801_compress24.jpg202.3 KB · Views: 37
 -
 20200114_184600_compress17.jpg223.3 KB · Views: 38
 -
 20200430_192837_compress49.jpg573 KB · Views: 40
 -
 20200501_215947_compress63.jpg307.2 KB · Views: 39
 -
 20200501_215937_compress11.jpg417.9 KB · Views: 38
rayra
Expedition Leader
There's a good bit of room to the left RIGHT rear outboard of the frame but the rear AC lines intrude a bit. Something like a medium-sized scuba tank would fit there, with some sturdy mounting brackets. Maybe no more than 5-7gal tank at 'normal' air pressures. Was just poking about under there the last couple weeks, with pulling the full tank and changing the rear coils and lubing all the rear suspension bushings. I'm thinking to put a tank there myself, a compressor where my rear sub is (rearward of your ARB install) and hard-plumbing QD couplers at both front and rear bumpers. I'd like to put a tank in too. And that rear quarter spot looks like a likely candidate.
Last edited:
60beforetruck
Active member
I have been looking at the space between the rear bumper and the fuel tank. Looks like a 18" x 7" diameter tank would fit.There's a good bit of room to the left rear outboard of the frame but the rear AC lines intrude a bit. Something like a medium-sized scuba tank would fit there, with some sturdy mounting brackets. Maybe no more than 5-7gal tank at 'normal' air pressures. Was just poking about under there the last couple weeks, with pulling the full tank and changing the rear coils and lubing all the rear suspension bushings. I'm thinking to put a tank there myself, a compressor where my rear sub is (rearward of your ARB install) and hard-plumbing QD couplers at both front and rear bumpers. I'd like to put a tank in too. And that rear quarter spot looks like a likely candidate.
Haveing a tank is a must. My duramax had 15 gallons with a York 210 under the hood. It was like have a shop compressor with me.
Similar threads
- Replies
- 7
- Views
- 2K
- Replies
- 16
- Views
- 5K
- Replies
- 6
- Views
- 3K

