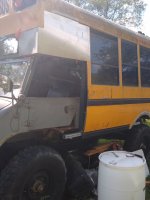
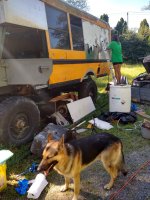
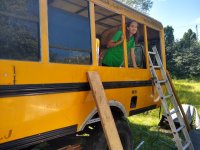
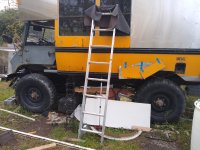
1958 Unimog 404 with cabover flex

joeblack5

Active member
Wazac, To many projects , to little time.. working on our other outfit at the same time, sure most people here have similar problems..
Dory the blue one was once a low floor city bus, now has floor heat, full solarand has gone thru the USA a couple of times..420000 miles. The other,our original camper 7.3 power stroke, full solar, diy 4x4 conversion is the toad for the bigger one.. so a good hitch is now made... Still have to do a test run before we leave end of December..IMG_20221031_154200499~2.jpg
 

joeblack5

Active member
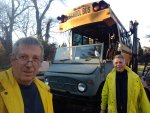
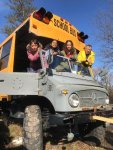
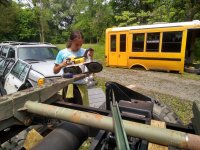
Today was a good day. My brother brought the hands and motivation to give it a try. So we got the old hyster started and we're able to get the bus body loose from the Econoline frame. Tomorrow we will try to place it on the 404.

In the last picture...My brother on the right and me on the left
Johan
 

Attachments

  • IMG_20221123_145939268_HDR.jpg
    IMG_20221123_145939268_HDR.jpg
    3.6 MB · Views: 37
  • IMG_20221123_140913521.jpg
    IMG_20221123_140913521.jpg
    3.1 MB · Views: 31
  • IMG_20221123_150728712.jpg
    IMG_20221123_150728712.jpg
    2.1 MB · Views: 29

joeblack5

Active member
Some more pics. The next step is removing the back wall of the unimog cabin and experiment with swiveling chairs how the cabin can be made part of the living space.
It looks like the rear shock towers are going to interfere with chassis flex but since the rear wheel we'll have to be enlarged anyhow that modification can be easily included.

Johan
 

Attachments

  • IMG-20221128-WA0031.jpg
    IMG-20221128-WA0031.jpg
    131.6 KB · Views: 38
  • IMG_20221124_132719042.jpg
    IMG_20221124_132719042.jpg
    3.7 MB · Views: 39
  • IMG_20221124_132643747.jpg
    IMG_20221124_132643747.jpg
    3.1 MB · Views: 33
  • IMG_20221124_132707826.jpg
    IMG_20221124_132707826.jpg
    3.3 MB · Views: 34

joeblack5

Active member
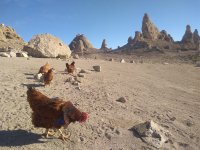
We are back from our 9300 miles American South West.. Arizona, Utah, Nevada, New Mexico.
Took our two dogs and four chickens along.. ( skoolie.net...dory for trip report)

Back to the 404.
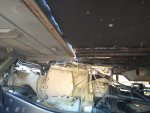
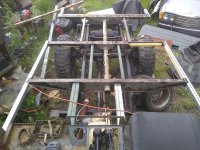
Got the welding on the subframe done. We reconstructed the 404 swivel frame with the solid crossmembers close the the cab and two pivoting ones to the rear of the mog.

Then we got rid of the rusty school bus members and able to lower the bus another 3/4" .

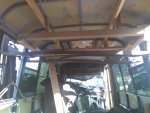
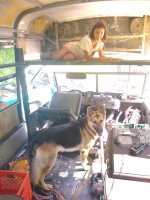
Then the rear can panel behind the seats from 404 got removed. So it is all fitted up and are now making the connection from the cab to the bus.

We raised the cab 1-1/4" to get some clearance for the tires.

The front of the open box bus body was not stiff. We used unistrut to make the initial reinforcements . Also the over the cab bed frame is made of unistrut.

I was curious how the swivel frame was holding up so I set the 404 on concrete block passenger side front and forklift at driver side rear.

Lots more to do but there is progress

Johan
 

Attachments

  • IMG_20230812_151630426.jpg
    IMG_20230812_151630426.jpg
    3.3 MB · Views: 38
  • IMG_20230728_114751865_HDR.jpg
    IMG_20230728_114751865_HDR.jpg
    3.7 MB · Views: 34
  • IMG_20230710_193008231.jpg
    IMG_20230710_193008231.jpg
    3 MB · Views: 32
  • IMG_20230728_115206330.jpg
    IMG_20230728_115206330.jpg
    3 MB · Views: 30
  • IMG_20230619_160204371.jpg
    IMG_20230619_160204371.jpg
    4.6 MB · Views: 30
  • IMG_20230619_143813669_HDR.jpg
    IMG_20230619_143813669_HDR.jpg
    2.9 MB · Views: 26
  • IMG_20230620_200435749.jpg
    IMG_20230620_200435749.jpg
    3.5 MB · Views: 32
  • IMG_20230302_154959511.jpg
    IMG_20230302_154959511.jpg
    3.9 MB · Views: 36
  • IMG_20230302_064221537.jpg
    IMG_20230302_064221537.jpg
    2.2 MB · Views: 39

joeblack5

Active member
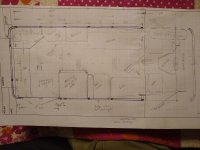
First attempt at a floor plan. The 404 cab section is not to exact scale. Only the driver front wheel is in the drawing.
The two part rear side door will be modified I to one smaller door of 700 to 800 mm wide. About 200mm will interfere with the wheel well.

Entrance and walk thru shower are combined. Toilet in rear driver side.

Bed above cab 60" wide , 24 " on additional hinge. The whole bed tilts up from hinge above front wind shield to facilitate more space when stationary and not in bed.

Distance between bed and ceiling 30"
Each square in drawing is 100x100 MM.
Johan
 

Attachments

  • IMG_20230814_205927583.jpg
    IMG_20230814_205927583.jpg
    2.9 MB · Views: 18

joeblack5

Active member
Unfortunately not much to show for.
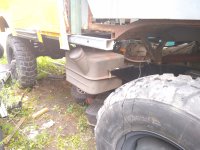
Cut the bottom fiberglass above the windshield straight.. welded up a bracket that connects the cab/ bed unistrut frame to the A frame post.. tested how much the fuel tank had to be lowered to get access to the fuel cap now that it is mounted under the busbody. Now I can make new brackets. The bottom of the tank is still an inch above
the bottom of the frame rail. I will mount a second tank (not interconnected) but with a filler cap next to it to have better control about fuel quality and leaking tanks and so on.
 

Attachments

  • IMG_20230823_130327545.jpg
    IMG_20230823_130327545.jpg
    3.1 MB · Views: 8
  • IMG_20230823_130310848.jpg
    IMG_20230823_130310848.jpg
    4.5 MB · Views: 8
Last edited:

joeblack5

Active member
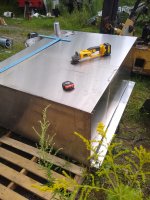
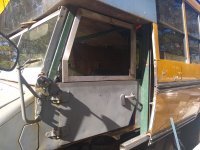
A couple of intense grinding days. This is the most complicated side. First removal of the old aluminum, rivets and glue was a pain. This construction glue is not kids white elmers glue. What a pain. I wanted it to be tucked under the roof so that it is inherently leak free. The ssteel is a corner section I cut out of a psu surplus draft hood that I bought for $25.. it probably would have been easier to weld it but I am not good enough welder for such an " in the eye weld"

Aluminum would have been lighter but this what I had and plenty for the other side as well. Always had a thing for deloreans ,haha, nice contrast with a 404.

It worked out, must have climbed that barrel 50 times to measure and fit.. the trick part is the angle change from the front to where it attached to bus body.. I think it worked out pretty good. The center section becomes a bedroom window. Lexan..
 

Attachments

  • IMG_20230827_151945300.jpg
    IMG_20230827_151945300.jpg
    2.6 MB · Views: 21
  • IMG_20230827_152040381.jpg
    IMG_20230827_152040381.jpg
    3 MB · Views: 20
  • IMG_20230827_143809843_HDR.jpg
    IMG_20230827_143809843_HDR.jpg
    4.6 MB · Views: 18
  • IMG_20230827_143241708.jpg
    IMG_20230827_143241708.jpg
    5.3 MB · Views: 16
  • IMG_20230827_123018633_HDR.jpg
    IMG_20230827_123018633_HDR.jpg
    3.5 MB · Views: 17
  • IMG_20230827_131509883_HDR.jpg
    IMG_20230827_131509883_HDR.jpg
    4.3 MB · Views: 19
  • IMG_20230827_152835023.jpg
    IMG_20230827_152835023.jpg
    4.1 MB · Views: 21

joeblack5

Active member
Thanks Wazak, just started the other side.. these are old hoods from the University. Bought them for the stainless material , lucky I did .. also cut a stainless sheet for covering the last three windows on the driver side. It is cover sheet from a commercial kitchen. ..pretty thin. Curious how much oil canning it will get. As you can tell this is all shade tree work and " low cost".. sofar I have 2.5k in the 404, 3k in the diesel conversion and 2k in the busbody.. hope to get this on the first camping trip below 10k.

Johan
 

Attachments

  • IMG_20230829_131308476.jpg
    IMG_20230829_131308476.jpg
    4 MB · Views: 7
Last edited:

joeblack5

Active member
A little more progress. Getting ready for covering up the last three windows on the driver side. Undoing some of the glue work of the roofing sheet so that the side covering can slide under it. Although sikaflex can be very strong I rather trust overlapping so that a water leak is impossible. The buscompany mounted the driver clearance light higher then the passenger side....purpose or sloppy?? Less visible is that the passenger side is also 1" further to the front. Maybe that had something to do with the entrance door construction?? I am not going to fix that. The glue used for bonding the fiberglass to the aluminum is stronger then the fiberglass. It would add a lot of work and result in more damage.
the rectangular hole will be used for 1/4" of lexan to let light into the bedroom and make it feel less claustrofobic. I will probably expand a little upwards into the fiberglass depending how easy the curvature of the fiberglass conforms to the flexibility of the lexan.

johan
 

Attachments

  • IMG_20230830_172528087.jpg
    IMG_20230830_172528087.jpg
    4.3 MB · Views: 12
  • IMG_20230830_172505545.jpg
    IMG_20230830_172505545.jpg
    4.8 MB · Views: 12

joeblack5

Active member
3 windows out and a ss steel sheet in, nicely tucked under the roof sheet.. a two person job. It was not that easy.. I will wait for a full sun day on that side before I add more screws. I like that sheet to have Max expanded so that it pulls thight with out oil can effects under normal temps. I have to find a glue that bonds stainless and 2 " thick styrofoam over the full surface together. The other side has only one window to do.

Johan
 

Attachments

  • IMG_20230904_153921518_HDR.jpg
    IMG_20230904_153921518_HDR.jpg
    3.8 MB · Views: 22
  • IMG_20230904_143803770_HDR.jpg
    IMG_20230904_143803770_HDR.jpg
    3.4 MB · Views: 22
  • IMG_20230904_142320378_HDR.jpg
    IMG_20230904_142320378_HDR.jpg
    3.8 MB · Views: 20

joeblack5

Active member
It was a busy week, another vehicle, 1995 landrover discovery 3.9 v8 with manual 5 speed.. rust of course...broken starter... It started on a hill and I did not turn it off before we were home..

More work on the 1987 Mercedes 300td...new floor pan..will be nice to get that running . In the past I made it into a two tank wvo burner with hih fuel pre heater and injection line heater.. with the current diesel price it will be fun to drive.
New inner tube for the Mercedes 240gd.

Then got a 1995 e320 wagon with a broken motor . I will try to put an om603 manual in there.

And then a bit on the 404.. another window removed and a pice of ss installed. Really nice the the emergency windows swing open. Our oldest trying to take the uv damaged plastic protection of. A work of patience.

Next step is the window up front and solar rack.

Johan
 

Attachments

  • IMG_20230916_132902566.jpg
    IMG_20230916_132902566.jpg
    3.1 MB · Views: 28
  • IMG_20230905_170755718.jpg
    IMG_20230905_170755718.jpg
    6.8 MB · Views: 23

joeblack5

Active member
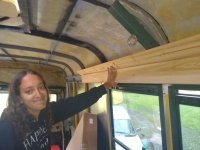
For unknown reasons the school decided on a holiday this Monday.. good for us, after all the rain we were able to get something done. Tanya and I mounted the first unistrut rail for the solar panels. We used a stainless 3/8 threaded rod going thru the roof rib and then extending into a roof brace, made out of unistrut also. That piece is also going to hold the interior 1/4" cedar tongue and groove planking. We liked the extra strength of this construction and also that we had plenty of space for insulation and a wiring channel..
Every location will get an eye nut to hang stuff off, 3/8 will be strong enough to attach an hammock to if so desired..

Johan
 

Attachments

  • IMG_20230925_112704428.jpg
    IMG_20230925_112704428.jpg
    2.7 MB · Views: 11
  • IMG_20230925_112939229.jpg
    IMG_20230925_112939229.jpg
    3.8 MB · Views: 11

joeblack5

Active member
Time flies.. more then two weeks ago .
Some more experiments with interior cedar planking....then first test of door window frame...solar rack...
The solar rack is a bit over dimensioned but it also reinforced the bus body and strong enough for recovery in case of a rollover. The cedar planking is so soft and splinters easy.. I found using the cut off grinder works nice..these planks have to be cutoff . Because there will be a bulkhead with two drawer cabinets .
The door windows will be made of lexan and have a hinge in the middle.. I used to have a Citroen 2cv4 .. always liked those windows.

The solar panels are 280 watts.. if I relocate the escape hatch then I can install 4 of them.. serious power for such a small vehicle.

The current hatch is in bad shape. If I relocate hatch more to the front then it will be partial above the bad.. in other buses I have built I retrofitted the escape hatch with a window for more light.

Having that close to the bed will be nice with letting the heat out and allowing to look at the sky..
Time will tell.

Johan
 

Attachments

  • IMG_20231011_113740371.jpg
    IMG_20231011_113740371.jpg
    3.7 MB · Views: 11
  • IMG_20231011_111352354.jpg
    IMG_20231011_111352354.jpg
    4.4 MB · Views: 10
  • IMG_20231011_110812464.jpg
    IMG_20231011_110812464.jpg
    3.1 MB · Views: 8
  • IMG_20231011_110824897.jpg
    IMG_20231011_110824897.jpg
    4 MB · Views: 9
  • IMG_20231006_131634172.jpg
    IMG_20231006_131634172.jpg
    3.5 MB · Views: 9
  • IMG_20231006_131710453.jpg
    IMG_20231006_131710453.jpg
    2.8 MB · Views: 9

joeblack5

Active member
They say that luck is with the dumb, of course you all know that I engineered and modeled this in 3d cad, haha. It clears with a 1/4".

Now the welding can be finished. As luck has it tomorrow rains here in state college.. hope I can make the passenger side window frame as well. It is getting colder and wetter so it would be nice to get it closed up.
My poor "old gray" 300td needs some love also.

Johan
 

Attachments

  • IMG_20231013_183133117.jpg
    IMG_20231013_183133117.jpg
    3.3 MB · Views: 12

joeblack5

Active member
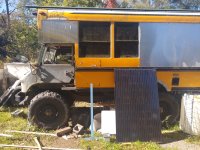
I want to make some bulkhead on the inside but now first I have to address the rear wheel well.. dreaded this a bit because there are a lot of variables that are hard to understand without experimenting. So first I cut some inside floor away and then the old bus wheel well had to come out. I don't think much can be re-used .

My previous experiments with the swivel frame were limited so I will have re-do that and see how much space the rear wheel really need in extreme condition.. then there is some guess work since the unimog is not loaded to the weight it is going to be, and that I do not know since it is not ready yet .
Here some first pics..
My other 404 has the bed on the same height as the wheel well of the front wheels.

But since I inverted the swivel subframe , front solid and two swivels in the rear, the distance between the rear wheel and wheel well likely has to be larger.

Automotive tire Motor vehicle Automotive exterior Gas Tints and shades so
The interior structural wall sheet and seat lip has to be reinforced now that the original wheel well is gone. For that I need to take the old fuel filler box out as well.
Wheel Tire Vehicle Automotive tire Motor vehicle

A quick mockup to get an impression
That cutout likely will get bigger after the old fuel intake gets removed..
I have to do some thinking about what is the worst case situation, wheel well perspective.
-Lift rear tire till front or opposite rear comes of the ground.. or..
-Lift front and rear diagonally at the same time.... Input appreciated...
Johan
 

Attachments

  • IMG_20231014_144838303.jpg
    IMG_20231014_144838303.jpg
    3.8 MB · Views: 12
  • IMG_20231019_172819720.jpg
    IMG_20231019_172819720.jpg
    3.9 MB · Views: 11

Forum statistics

Threads
188,201
Messages
2,903,720
Members
229,665
Latest member
SANelson
Top