1999 4Runner SR5-Baby Beast 2

AxleIke

Adventurer
I added a safety pin just in case the latch fails. This also helps with movement on washboard roads, as the carrier slides back a bit, making releasing the latch difficult.

IMG_0514.jpg


And, I finally got around to getting an extender for the bike rack and starting fitting all of that up to the carrier. Here are a couple shots of it closed and open.

IMG_0512-1.jpg


IMG_0515.jpg
 

AxleIke

Adventurer
Been a little while, but I've made some more progress on the truck.

I found with the factory cup holders, the shifter did not allow for a full water bottle to be in the forward cup holder position. Fortunately, Marlin Crawler has a solution for that:

IMG_0557.jpg


IMG_0573.jpg


I very highly recommend this product. Really shortened the throw (as they claim), and it makes a huge difference in the usability of the center console area.

Second, I installed an M8000, and a set of Rigid Dually lights.

IMG_0568.jpg


IMG_0579.jpg


I have these wired to my high beams, so when the switch is on, they will turn off when I go to low beam. This way, I can use them out on the highway with ease, which is my primary use for them. I find the stock high beams to be lacking when out on long stretches of highway, especially in Utah. These improve the range quite a bit, and the color really helps to highlight the eyes of animals far in advance, which gives me more time for braking.

This spring, after several years of saving Amazon gift cards, I was able to get a fridge for my truck, something I've wanted for a very long time. To accommodate the fridge, I put in a shelf/slide system. I got many good suggestions from this site, but sadly, I am not wild about my first attempt:

IMG_0740.jpg


IMG_0762.jpg


After reading lots on here, the idea was to make the truck able to both carry camping gear safely, and make it quick to pack/unpack.

While this does allow for everything to be safely strapped down, I find the hassle of getting this in and out of the truck to be a ROYAL pain. It takes 20 minutes just to get the whole thing in and assembled, and same for the reverse at the end of the trip.

I've had it out twice now, and while I like the overall idea, this just isn't cutting it. Besides, as it stands, I am still going to have to put things on the roof if I take more than one other person with me (my wife and I have to put our day packs in the backseat next to the dog).

I also used rather low grade plywood. This is not ideal, as it was warped, and very rough. I plan to make version two, once I have decided how best to correct the shortcomings of this design.

Lastly, I fabled some sliders up. They are at the powder coaters as of now. Very simple, and fairly low profile. I did not want them to stick out very far, as this truck is still a DD, and I also don't like the look of large sliders standing out. My old 4runner had every more tucked in sliders, and they work very well.

IMG_0765.jpg


IMG_0768.jpg


IMG_0770.jpg


More on those when I get them back.
 
Last edited:

AxleIke

Adventurer
A couple of other modifications that I've found are really very useful, and may help others:

The first was my quest to stop the "wobble" in my front end. After lifting the truck, the steering wheel would vibrate horribly, especially on braking.

The PO had installed some crappy "lifetime" brake pads, which, as we all know, are perfect for warping rotors. So, I replaced the rotors, and pads, with OEM stuff. This fixed the braking problem, but not the wobble on the highway when driving normally.

So, naturally, the next thing I thought of was the rack. I replaced it with a Toyota rack, though I'm pretty sure they have these remanufactured these days. I also replaced the outer tie rods at this time, as the new rack comes with new inners. In addition, I bought a polyurethane bushing kit from Toytec lifts for the rack, and installed all of those at the same time.

IMG_0788.jpg


Not a very good picture, but the bushings are all poly now.

Anyway, the wobble was still there. After lots of reading, and a trip back to the alignment place, I found that my caster was at about 0, which is out of spec, and that this was a common problem with lifted 3rd gens (and it seems, newer tacos, as much of my reading centered around the 05+ taco's).

So, I started to look at upper control arms. I initially purchased a set of light racing arms, as they seemed perfect with their adjustability, stock style ball joint, and the price is pretty good. However, once I got them, I decided I didn't like the adjustability after all. The problem was, everything is held in place with a large nut and bolt, which seemed to me would need constant supervision to ensure that it didn't move. I didn't want to hassle with it, so I returned them. Instead, I went with the Icons.

IMG_0773.jpg


I chose these over other uniball style arms because of the ability to add the top cap (seen in the picture). In my reading, I noticed that many folks were concerned about dirt building up in the uniball and causing premature failure. The top is the place where dirt collects the most easily, so these seemed perfect with the caps providing protection and keeping dirt from accumulating in the well of the uniball. Time will tell if this works or not.

At the same time I did the upper arms, I also replaced the lower ball joints with OEM. They were not loose, but I've seen enough horror stories that I thought it was worth doing.

The upper arms have 2 deg of castor, enabling all alignment specs to be set to factory, and this, thankfully, fixed the wobble! The steering wheel is smooth and solid like it was when the truck was stock. Finally.

The second modification I found helpful I found online. This was for powering my fridge. Later model third gen 4runners started coming with a power outlet in the cargo area. However, this is accessory switched, and the fridge needs full time power. Someone online had the quick, cheap, thought of simply removing the relay under the hood, and putting a jumper on the hot leads:

IMG_0785.jpg


IMG_0782.jpg


This works great. So far, I've only had the truck off for about 24 hours with the fridge on and keeping food cold, but there has been no issue with power drain. This ARB unit is very efficient.

The last mod is pretty basic, but we'll see. My M8000 came with steel cable. After seeing lots of info from Bill Burke, and talking to others, I decided to give synthetic line a go. I got the Warn Spydura rope, 100ft, so we'll see how well it does. I used the wire cable several times this past winter, and it was already kinked in several places. I have not used the synthetic line yet, but we'll see how it holds up over time compared to something like Viking or Masterpull.

IMG_0786.jpg


The rope does fill the drum completely, though I think when wound under load, it will compress more. I also weighed the difference between the wire rope with roller fairlead, and the synthetic line and hawse, and it was about 22 lbs. More if you get a lightweight thimble instead of the hook. Still, not a huge weight savings, but certainly nicer to handle!
 
Last edited:

AxleIke

Adventurer
The last "fix" I don't have any shots of.

Like many IFS drivers, once the truck was lifted, the front CV boots tore. I, like other third gen 4runner/first gen taco owners, replaced the axles and had a bad, leaking passenger side diff seal.

I replaced with OEM remans, and put in probably 5 different seals, all to no avail. After reading online, I tried the Two Seal approach, essentially putting in two of the passenger side diff seals in, as there is plenty of room for them. This worked, and I no longer leak gear oil from the passenger side tube.

I know others have been able to get brand new axles, instead of remans, but, 1. they are pricey, and 2., it seems to be very difficult to get a hold of a new axle any more. Most dealers will tell you they don't exist. This fix seems to work well, and saves the hassle and expense of having to track down a new axle.
 

AxleIke

Adventurer
Thanks man!

Its a 2007 Marin. I don't get out as much as I'd like these days. Going to try a bit more this summer.
 

sgiandubh

Observer
That is the 'Runner to have! Supercharger to boot. I have been very tempted by that exact setup. Cool build. Very functional. How do you like those AT/S Yokos? I'm eying getting a DD set of tires as an alternative to my KM2s.
 

AxleIke

Adventurer
Thanks!

The Yokohamas were a good tire. I just couldn't get past the 2 ply sidewall and sold them. Just a personal thing: they were great tires on road. Loved them.

I'm now running a set of BFG KO2's. The yokohamas were much quieter, and lighter. They were MUCH better in the snow than the Original KO's I was running, but the KO2's have been exceptional so far, even better than the yoko's, and, with the heavier sidewall, I'm happier with them over the Yokos.

I'd still recommend the Yokos for a highway only tire. They are lighter, and quieter than the BFG's and MT/R's I had prior to the Yokos. My wish for a 3 ply sidewall is simply personal preference, and probably all in my head.

Cheers!
 

AxleIke

Adventurer
Installed Dual Cases in the truck. I know most of the time this is done as a rock crawling addition, but before I started to heavily modify my old 4runner, I found the dual cases to be one of the best all around modifications I did. On the old rig I had 4.7 gears in the rear case, so the second case added the ability to run stock low range, which I liked. On this truck, I left both cases stock, which puts the final crawl ratio at 3.9x2.3x2.7x4.3 ~ 104:1. Not as low as before (over 200:1) but plenty slow for this truck.

What I like about this modification is the ability to really go slowly through rough sections especially when fully loaded with gear. I love to go to eastern Utah, and many backroads out there are miles of fairly mild terrain for which stock low is great, punctuated by sections with sandstone ledges, washouts, or other obstacles which with the stock low, you end up bouncing through or up or down, which isn't always fun for my passengers, and can dislodge gear, and I always feel is rough on the steering components. The double low allows for much more control on descents, ascents and in addition, when going through something sketchy, allows me more control, and at least gives me the illusion of lessening the impacts on the truck.

In addition, the movement of the rear case backward shortens the rear driveshaft, which tucks it up more, and keeps it out of the rocks.

The downside: I lost my front cupholder. I only used it as a wallet/cell phone catch, so I have just resorted to the center console for those when not in my pockets.

Well, on with the pictures.

Pull the trans and t-case:

IMG_1210.jpg


Adding the second tcase makes everything really long I had to pull the gas tank crossmember on the truck to get everything in:

IMG_1215.jpg


Had a good time learning to use my new finger press break from Swag:

IMG_1217.jpg


I decided to use dual mounts to prevent the crawl case from getting over torqued by the added weight.

Went geriatric and had a lot of trouble with puddle control (bad joke, sorry. I was struggling to get nice, consistent travel speed so the beads laid down symmetrically. Need more practice) :( But still managed to get everything together.

IMG_1221.jpg


Had the drivelines fully rebuilt, and retubed to the new lengths. Thicker with new joints and a new set of splines on the rear shaft (they were shot, which was a real bummer, as that doubled the cost of the mods).

Also, brand new OEM clutch, pilot, and throwout bearing were installed, and the whole clutch system was drained and bled.

IMG_1225.jpg


My motto: Grinders and Paint make Welders that Aint! Or at least in my case. I used the factory mounts for now. I was running short on time, and I also am not sure if I like the skid plate at all. I also did not want to pull fuel and brake lines off to get at the driver side frame to plate and weld at this time, so I kept it stock. Its all 3/16 and 1/4" plate, and it is tied in a the front and rear crossmembers, so the transfer cases and transmission are well shielded

IMG_1228.jpg


Got some new lower control arms for the rear (2" .250 wall DOM with 1.25" heims) for strength and to fix the pinion angle back to 1 or 2 degrees to get rid of any potential vibes: don't want that pinion bearing to crap out! Ran out of time, so bought, not built. :(

IMG_1226.jpg


Got them installed:

IMG_1234.jpg


And finally, I need to do a *little* more tweaking to get the shifter in the back just right, but its in, and functional:

IMG_1230.jpg


Mainly, when I put the truck on Cruise, I like to pull my leg back to change angles on long drives. The shifter hits my leg and is annoying. I plan to bend it a bit more and I will finish the console with a leather boot once everything is in place and to my satisfaction.

Now I can go nice and sloooowwww.
 

Adventurous

Explorer
************! I'd love to put another t-case in my Tacoma at some point in the future. Seems like a good way to gain more capability and cut down on skinny pedal bashing.
 

AxleIke

Adventurer
Been slacking on the updates. Geez.

Some of this is not particularly fascinating as its on every other build as well, but I'll try to provide some of my personal experiences.

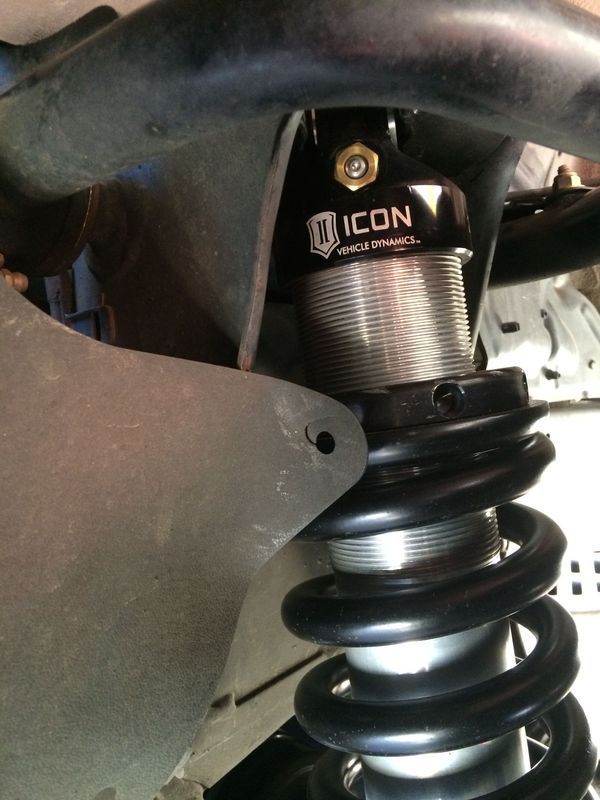
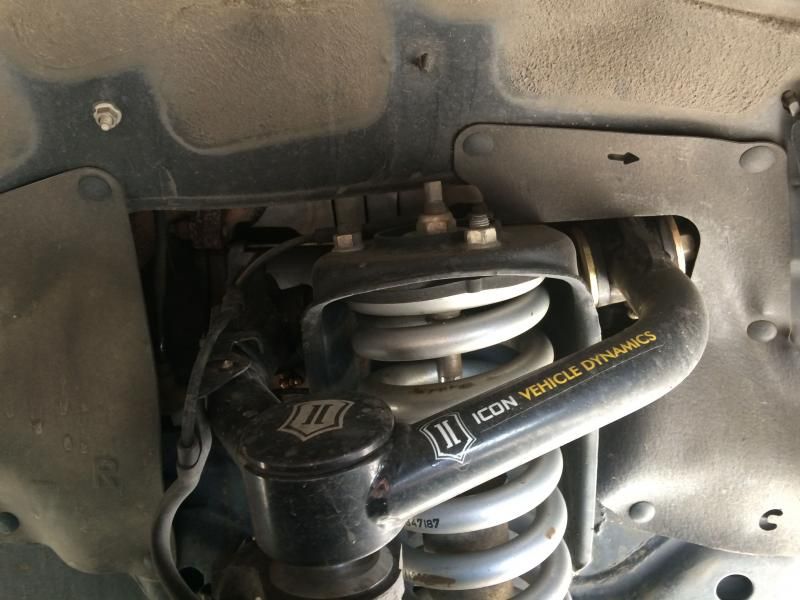
First up: Icon suspension.

IMG_2095.jpg


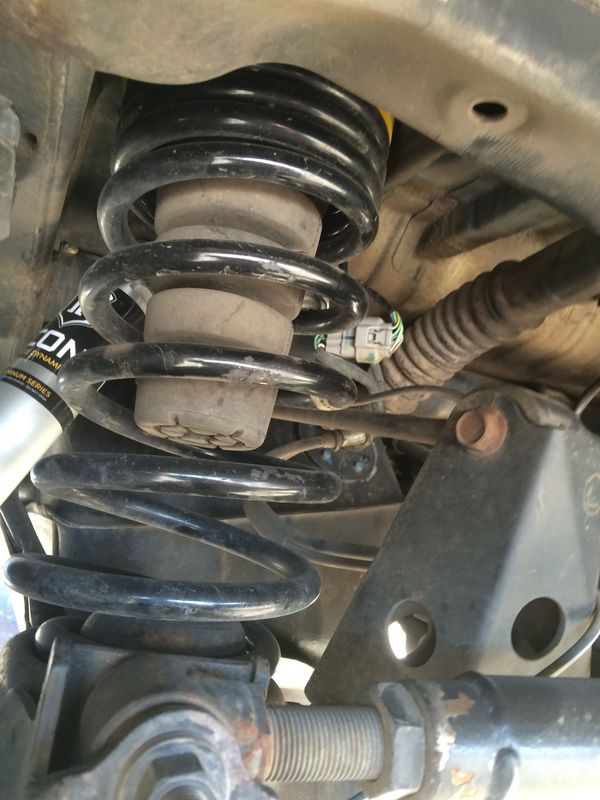
Nothing special there, except that I'm pretty displeased with it at the moment. The rest of this post is not a bash against ICON, they are a company trying to serve many needs of many customers, and make a fully road legal and safe product. In fact, my only complaint with them is that I wish that they had called me during my shock rebuild to verify what I wanted. At this point, I can't tell if they did a revalve or not.

Essentially, I got their stage 1 kit, so yes, not the CDC adjustables (wish I had), and got the rear springs they recommend (OME 890's). There was a warranty issue at the beginning: the passenger front shock was leaking oil. Not too big a deal, except that they make you pay for shipping one way. Not the worst thing in the world, but 50 bucks is 50 bucks. And 2 weeks of downtime on a DD isn't easy.

But thats not my actual source of displeasure. I got them knowing they were re-valveable, and so I could tune them as I wanted.

Reviews on many sites, and talking with people, suggested that they would be excellent right out of the box. They were a lot better than my old crap bilstiens, but not what I had hoped for. Good news though, ICON will revalve once for free, and since I had to send one shock back for warranty, I figured I'd just send all 4. So I did. I spoke on the phone with a tech before sending, and told them exactly what I wanted, and they said, no issue.

Get them back, and the leak is fixed, and has stayed fixed, but the ride is still not right. In fact, I was expecting a very noticeable difference, and didn't feel any change at all.

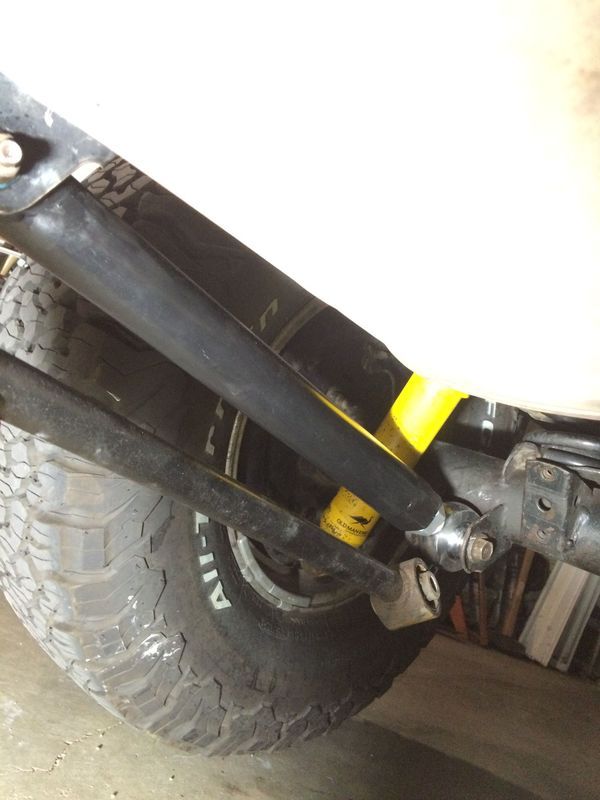
I found most of my problem was at the rear: As you can see, I have a tire carrier and 33's, so I figured perhaps my springs were off. However, I feel no change with stock springs and 1.5" spring spacers, or with FJ80 7 wrap fronts (what I had with the bilsteins).

The take home message for any reading with regard to suspensions is: Everyone's opinion of "good" is different. As you can tell, I want a "good ride". To me, a good ride is driving down a street or a washboard road at about 10-15 psig in your tires. You are aware of the bumps, but only peripherally. I want that same ride in my truck at 30-35 psig.

To others, such as my dad, a "good ride" is one where it rides like a "truck", read: STIFF. Corners on rails sort of thing. So, for the latter, a stiff spring and stiff shock valving will "ride really well", which means it handles well in corners, and doesn't sway around or lean. The price you pay in a conventional shock set up (no variable damping) is that you feel every bump so badly that it displaces fluid in your spinal column.

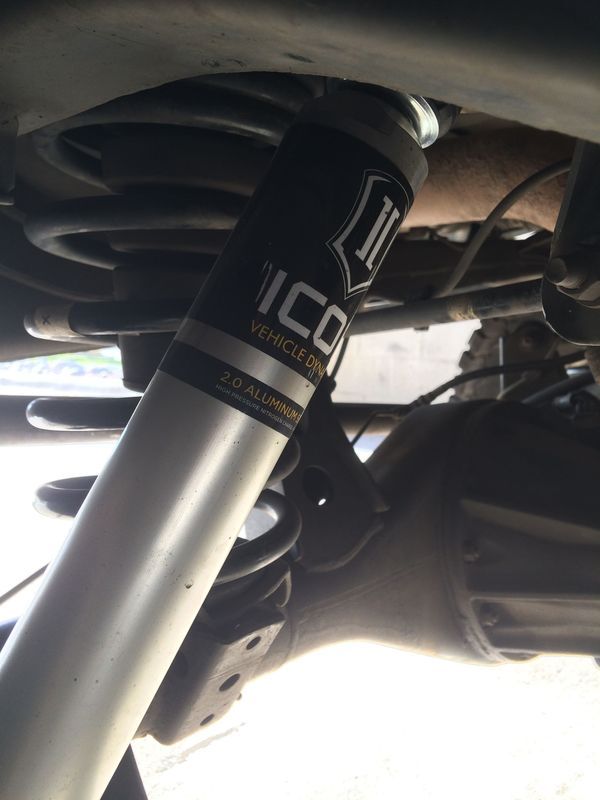
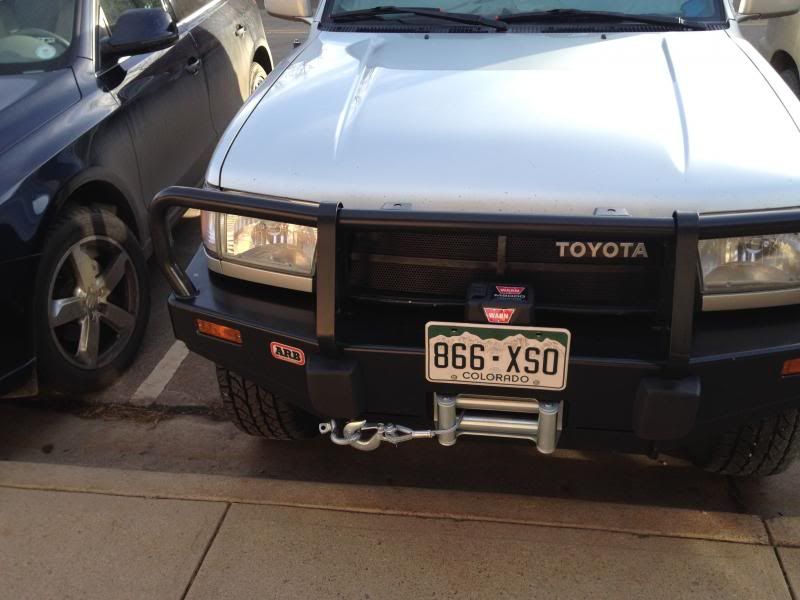
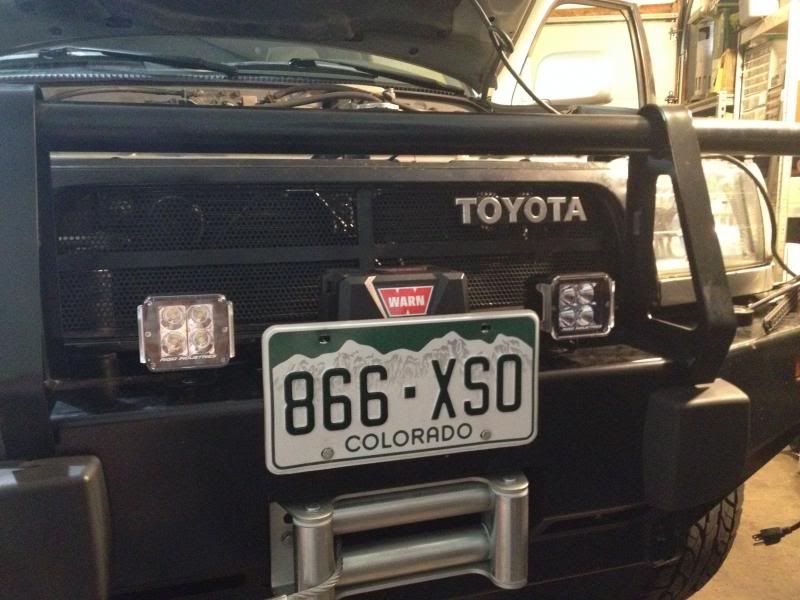
Now, this could all be an issue with my springs/shock tuning. I did use the springs they recommended, and despite asking for a softer front spring, ICON will only supply a 650 lb/in front spring. So, not ideal if you want a softer ride, but I do have a skid plate, ARB front bumper, and winch, so I do need a heavier than stock rate.

Scratch that, I do have one further complaint about ICON, which is that they recommend that you not turn the collars on the fronts down past 1" of thread showing. I have a little over 2, and that nets me just barely 2" of lift. One of my options is to back the collars off on the fronts, and run 1.5" spacers up front.

I'm working on buying shims from ICON. However, a full kit is 400 bucks and Id need two, one for the 2.5 fronts, and 1 for the 2.5 rears. The kit has many sizes and thicknesses, but is overkill for what I want to do. I likely only need to revalve compression, but since I don't know whats in there, or what will work, I'm torn between pulling them apart, waiting on shims to come, then trying new shims, refilling and re-charging, and then waiting for another size down the way. It would be nice to have the selection, but after getting it dialed in, I will have a very expensive box of shims sitting around collecting dust, which isn't ideal.

I'll post back up with my results once I've figured out how to do it.
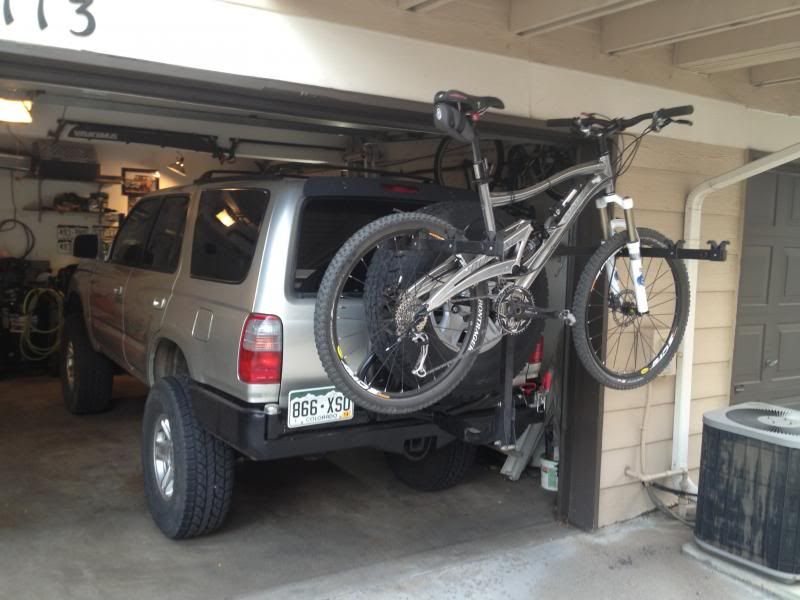
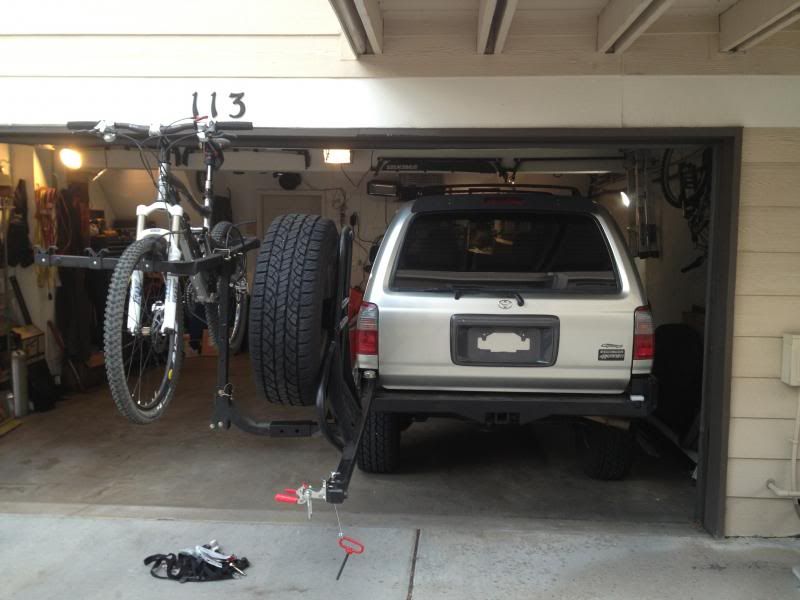
 

Forum statistics

Threads
188,447
Messages
2,905,082
Members
230,428
Latest member
jacob_lashell
Top