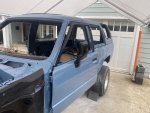
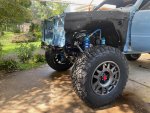
1st Gen 4runner Project: My COVID-19 Build

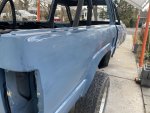
Not much progress has been made. I’ve been slowly wet sanding the clear coat and will finish cutting and polishing in the next few days.
IMG_3634.jpeg

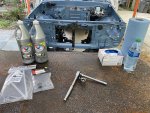
I decided to go backwards and remove the body mount hardware since they were starting to rust again. This time I would treat all hardware with a black oxide kit.

Black oxide: After using Evapo-Rust to remove rust on the hardware, I thought it would require no additional treatment. Wrong! The solution removes rust, but it leaves the metal bare and without protection from future corrosion. The hardware would quickly start rusting again. I decided the best thing to do to all hardware I restore is treat it with a black oxide kit from Caswell. I removed the rust from the hardware (again) and followed the directions.

IMG_3553.jpeg

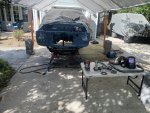
Tundra: I want to get the Tundra out of the driveway ASAP so that is now a priority . Today I removed the catalytic converters, engine igniter, throttle cable, clutch hydraulics (spares), ECU (spare), and O2 sensors. When I pulled the engine in the summer, I also removed the MAF sensor, the air intake & filter box. I called ORS today to make sure I had everything for the swap between what I ordered from them and removed from the Tundra.
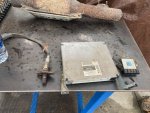
IMG_3614 (1).jpeg
Here is a link from ORS that lists what is needed to complete the swap: https://www.offroadsolutions.com/tech-info/3-4l-5vz-fe-conversion/#conversion_snr_parts

I think all I am missing now is the EVAP system. The Tundra has the EVAP (charcoal canister) under the truck rather than in the engine bay like my 4runner. I can reuse mine from the 4Runner or find one from an early 5VZ 4Runner/Tacoma. ORS said they prefer to swap in a 5VZ EVAP when possible so that’s my plan. I still might just grab the Tundra EVAP just in case.
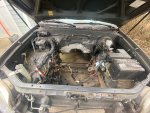
IMG_3622 (1).jpeg

I’d like to list it for sale locally by next weekend so if I need to grab anything I am forgetting, I have a few days.
 
Shine: I tried to make the paint shine by wet sanding the body by hand with 2000 and 3000 grit sandpaper. Then I cut it with Meguiars 105 compound on a wool pad and polished it with Meguiars 210 on a foam polishing pad. I’ve never cut or buffed a vehicle before. It came out ok, there is some orange peel scattered around but I will deal with another day. The body and paint work aren’t perfect but it’s nice enough to start scratching.
IMG_3730.jpg
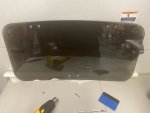
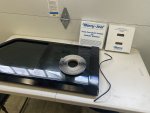
Windows: I removed all the windows prior to painting. Before reinstalling, I wanted to clean and tint them. For each window I gave it a good cleaning, removed old tint, polished any scratches with cerium oxide before applying tint.

I ordered the tint film off eBay. It is supposedly Suntek brand but there is no markings or packaging to verify. It’s advertised as scratch resistant, ceramic with UV and heat protection. It was my first time tinting myself and I did not enjoy it. I went with 50% film in the front and 35% film in the rear. The tint came out ok, not as good as if a professional installed it, but not noticeable unless looking for imperfections. It’ll at least protect the windows from getting scratched inside.
63548412665__308FCC96-1F71-4031-AE44-0F032FD8EDB3.jpg
After a few days of letting the tint adhesive fully cure, I installed the windows. I replaced the front window runs with new Toyota runs, the sliding rear window runs with some aftermarket runs and rear hardtop glass foam tape with new OEM Toyota.
IMG_3831.jpg
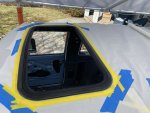
Sunroof: I reinstalled the sunroof frame. Before installing it, I added a generous bead of urethane to help keep water out of the body. Installing the frame went smooth but I had trouble installing the glass. The glass doesn’t seem to shut tight. There is play in the latch and I imagine it will rattle while driving or even worse, leak.
IMG_3772.jpg
 
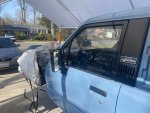
Doors and other details: I installed all the door hardware. New Toyota handles, weatherstripping window runs, FJ62 side mirrors and restored the rest of the hardware I could. Then I reinstalled the windows. Now the doors shut, seal and lock! Just missing the interior panels.
IMG_3825.jpgIMG_3820.jpg
I also took the time to refresh the dash bar, steering column, sheering shaft and replaced the steering box with a rebuilt “Toyoda” one.
IMG_3740.jpg
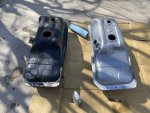
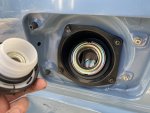
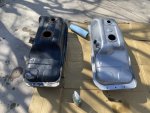
Gas tank: The original tank was dented in a few spots and badly rusted inside even after trying to recover it. I replaced it with a new Spectra tank off RockAuto. It is nearly the same, except it lacks a drain plug and the front pinch weld needed a slight trimming.
IMG_3922.jpgIMG_3931.jpgIMG_3985.jpg
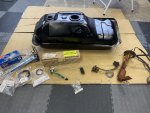
I painted the skid plate and new tank then installed new OEM fuel pump bracket, floater, gaskets/hardware and a 22RE Denso fuel pump. From what I have read a 22RE fuel pump is sufficient for a 5VZ swap. I made my first soft line that connects the tank and hardline out of 6AN fittings and hose. I also found a used, but better condition filler neck that I installed.
IMG_3989.jpg
I may put the aux tank project off until I break in the vehicle and work out any kinks. I would still like to add an auxiliary tank ASAP since the suspension I spec’d out for the vehicle is for designed for a 13.2-gallon S10 Blazer aux tank. Working on an empty fuel system should be much easier than one with gas and fumes in it. It would also be nice to route the new exhaust with the aux tank already installed to assure fitment.

My biggest hurdle with the aux tank is figuring out how to utilize a single filler neck to fill both tanks. I know it’s been done on other vehicles, but I have not found a vehicles specific or universal solution. I am not opposed to cutting the body for an aux tank filler but would really like to avoid it if possible.
 

Attachments

  • IMG_3922.jpg
    IMG_3922.jpg
    3.5 MB · Views: 14
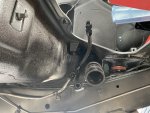
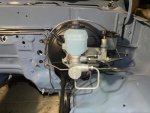
Brake and clutch lines: I bent new brake lines out of 3/16” stainless steel tubing for the engine bay. They came out nice, without any kinks and very close to OEM. The biggest change from the original is I know only have a single hardline running to the rear. I removed the rear load sensing portioning valve (LSPV) since it looked tired. I replaced it with a Wilwood adjacent portioning valve (P/N: 26012627) and mounted it next to the brake booster on a bracket I cut/made.
IMG_4572.jpgIMG_3960.jpg
I had to redo the line rear line since I changed my mind on where I would the new portion valve. I originally planned to mount it onto the frame in the rear but decided it would be more accessible in the engine bay.
IMG_4578 2.jpg
My vehicle came with an automatic transmission, as part of the manual conversion I made a clutch hardline. Before paint, I cut the mounting holes in the firewall for the master cylinder. I had hard time figuring out how the line was supposed to be mounted but @Summit Cruisers Jr sent me a reference photo and I made something close. I ordered a new Toyota OEM Softline to match my new hardline.
IMG_4590.jpg
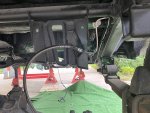
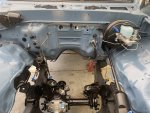
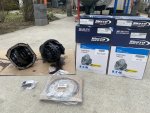
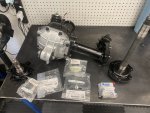
Differentials: My 4Runner differentials have a 4.30 ratio but the 4th gen 4Runner rear axle I am swapping has a 3.90 ratio I believe. Since they are not the same ratio, one of the differentials must be regeared for a matching ratio. Now is a great time to regear to a lower ratio and add lockers. I ordered new Sierra 4.88 gears and Eaton Harrop selectable lockers. After looking into what is involved with installation, I decided this was just beyond my current skill set. I removed the differentials from the axle housings and dropped them at Iron Pig Off-road to be built.
IMG_3903.jpgIMG_4406.jpgIMG_4544.jpgIMG_4648.jpg
I’ve never had a vehicle with lockers or regeared differentials. I knew 4.88s and a rear locker would be great, but I was unsure if a front locker would be worth investment. I landed on not wanting to open the differentials again and having a front locker would be fun to try.

Tundra: Tundra is gone! I was able to sell some parts from it and removed others as spares or just in case they are needed for the engine swap. I had it hauled away by calling one of those junk cars numbers. Happy to have more driveway space again.
IMG_4048.jpg

Next Steps: I’d like to get the vehicle back on its wheels and off jack stands. Reassembling the front end and installing the long travel is next. Once its back on wheels, I can get onto the engine swap and drivetrain.

I’m going to need to order tires soon. I think ~33” BFG KO2s will be a good choice in either 285/70r17 or 285/75/r17. According to tiresize.com, both have a width of 11.2” but differ slightly in diameter. The 70s have a 32.7” diameter and the 75s have a 33.8” diameter. A 1.1” diameter difference doesn’t seem significant, but I’m leaning towards the KO2s 285/75/r17 at the moment.
 
Last edited:

arlindsay1992

New member
Paint looks great! Nice to see all the shiny bits going on. Just a word of caution on that gas tank, I've read many reports of the tanks leaking where some internals are spot welded to the bottom. Takes months to appear. Definitely hold on to the OEM tank in case.
 
@bkg Thanks!

@arlindsay1992 Thanks, good to know. I'm really looking forward to getting rid of all my old/used parts to clear some space once the vehicle get back together and on the road. Maybe I should plan to seal the inside of the tank with the POR gas tank sealer?
 

arlindsay1992

New member
I've never had to use a tank sealer before so I can't give any real advice there. How bad is the inside of the tank? Tightly adherent rust may look ugly but cause no actual problems.
 
I've never had to use a tank sealer before so I can't give any real advice there. How bad is the inside of the tank? Tightly adherent rust may look ugly but cause no actual problems.

I've never sealed a tank either but it can't be difficult or harmful when done properly. Just like paint, prep is probably key.

The rust in the new tank is scaling and corrosion is visible everywhere inside. I've already tried to remove or neutralize what rust I could but that didn't appear to make a difference. Short of cutting the tank open, sanding and welding it back together then sealing it, I'm not sure what more can be done. The rust is not an immediate problem, it has not rotted through yet but I've already sunk more time than I believe it's worth. I've had a rusted out tank fail on me before and it's not fun. It's also worth noting my old tank is dented in a few spots and I'd like to maximize my fuel capacity as much as possible. I will definitely hold on to it as a spare until I am confident in my new tank.

The new tank is bare metal from what I can tell, so coating the inside with a sealer should deter rust from forming and keep it from leaking at the seams (if that ever becomes a problem). I may try and do this after some more research.
 
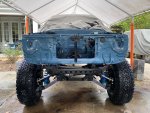
Been awhile, thought I figure an update was warranted after a year! Last summer I got the Runner back on its own weight. Luckily, I had nearly everything on hand and ready to finally be installed. The plan has been to retain the IFS and go long travel.

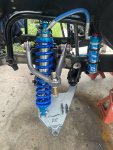
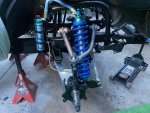
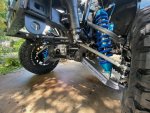
Long Travel: I landed on the Total Chaos boxed arm kit since it seemed to be the most “bolt-on” compared to other market offerings/availability. Plus making my own seemed out of my current skill set. I went with what I’d consider to be the “premium” setup, adding many upgrades offered by TC.

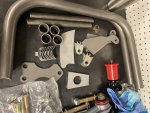
Shock hoops
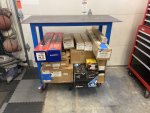
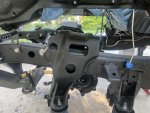
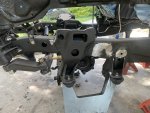
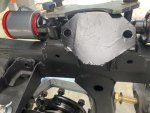
To begin, I pulled all the new parts off the shelf and took inventory of any old parts needed. Luckily, I saved everything as there were a few parts I didn’t realize I would need. First, I mounted the lower control arms. Then I cut the old upper control arm bump stops mounts, brake brackets, upper shock mounts off the frame and trimmed the inner fenders.

64736938119__5CDAEE37-F93B-4F4E-97D7-70DF300D6C7D.jpeg

Before and after:

IMG_5029.jpeg
IMG_5032.jpeg

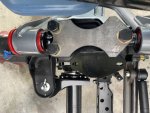
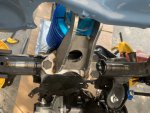
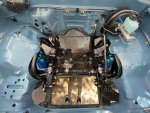
To begin, I installed the bushings and cross braces into the upper control arms. Next on the list was welding in the shock hoops. The base plate for the shock tower mounts had to be trimmed to accommodate the 5VZ (V6) engine mounts. I first tacked together the shock tower, unboxed a shock and test fitted it to the tower. Next I tacked in the shock hoop. With the shock hoop in, and test fitting the shock complete. I welded it all together, installed the upper control arm, and repeated for both sides.

64790238383__577C9EEA-4DE7-4D87-B0F6-20D7252885BC.jpegIMG_5041.jpegIMG_5038.jpegIMG_5039.jpeg64806031578__4F3B6018-75E9-4DC8-8210-2B6EF231FA98.jpegIMG_5054.jpegIMG_5508.jpeg
 
Steering
I reinstalled the steering shaft along with a rebuilt steering box, along with the total chaos cady idler arm, “King Kong steering system,” heim joint steering upgrade, OEM steering stabilizer, then welded in a frame cross brace between the rear lower control arm mounts.

IMG_5034.jpegIMG_5655.jpegIMG_5538.jpeg

Remaining front end work
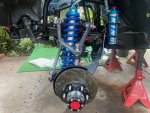
To finish up the install, I bolted the rebuild T100 axles to the differential. Next, I moved onto the spindles. I had to have the top of the spindles drilled out slightly for the upper control arms uniball bolt as the bolt diameter was slightly greater. I took bolt spindles to a machine shop to ensure it was done precise. I installed the lower unibal joint to the lower control arm, then then the spindle and reassembled the front hubs, with new bearings, Aisin part-time hubs, drilled and slotted rotors, rebuilt ’94 brake calibers, brake pads and all new hardware.

IMG_5622.jpegIMG_5625.jpegIMG_5659.jpegIMG_5649.jpegIMG_5668.jpeg

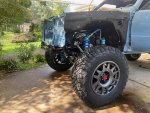
Wheels and tires: For rims I went with 17” Evo Corse DakarZero rims in anthracite paired with 33-inch BF Goodrich KO2 285/70R17.

IMG_5668.jpeg

Sealed gas tank: Based off some input here, I dropped the new gas tank and sealed it with POR-15 gas tank sealer as an extra precaution while it is still dry. Supposedly these tanks are prone to linking at the seams so hopefully applying the sealer inside will prevent that.

Next Steps: Getting the engine, transmission and transfer cases built, mounted, and installed next. I’d like to build the drivetrain and have it fully functional before touching the interior.
 
Last edited:

TheCascadeKid

Observer
Drool worthy. Looks like your coils up front are 600#? Is that the standard recommended, or did you upsize for the added 5vz weight?
 

Forum statistics

Threads
188,290
Messages
2,904,964
Members
229,961
Latest member
bdpkauai
Top