vintageracer
To Infinity and Beyond!
Any issues running the heater in the box on da roof?
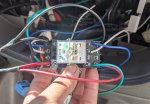
How about a pic of the in-cab control?
How about a pic of the in-cab control?
Great build! That heater solution cracked me up, it's pretty ingenious. I didn't realize you were so close to me until I recognized the RB Vons parking lot from a couple posts back. Maybe I will see you driving around one of these days.
Any issues running the heater in the box on da roof?
How about a pic of the in-cab control?



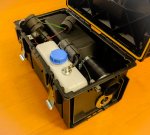
MODIFICATION: Diesel Heater 2.0
GOAL:
Apply some lessons learned and "fix" some annoyances about heater 1.0.
PURPOSE:
Moving the heater to the roof really worked out nicely. However, it presented some painful and inconvenient aspects to it. So, I decided to repackage it.
DURATION: 2 hours
MATERIALS:
Dewalt Toughbox toolbox
COST: $30
HOW-TO:
Steps are largely the same, so I'm sticking to the highlights.
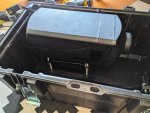
Instead of staying with the Rigid toolbox, I moved onto the Dewalt Toughbox toolbox. One of the biggest annoyances I had with the Rigid box was steps to keep it secure on the roof rack. It took two locks (one for each latch) and a zip lock for me to feel confident that it wouldn't get stolen. Not to mention they rattled like crazy. With the Dewalt box, all it takes is one zip lock. Another benefit is that the Dewalt box had more usable interior volume and a slightly smaller foot print.
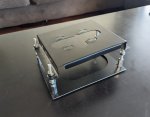
Instead of a tray system like the one used in 1.0, I opted to use a stand using threaded stand-offs. This made positioning the heater a breeze and didn't get in the way compared to a full-length tray when gaining access to the intake pipe or the exhaust pipe.
View attachment 636804
View attachment 636805
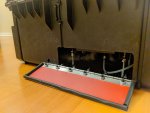
For convenience, I added an access panel to make troubleshooting, service, and disassembly easier.
View attachment 636806
Lastly, I staggered the placement of the tank versus heater. This arrangement distributed the weight more evenly and doesn't result in an awkward balancing act when moving the heater to/from the roof. It's easy when you're in your driveway with a ladder, but not so much when at a gas station with the ground covered in wet, hard-packed ice. The new placement is also conducive to refueling without having to pull the heater from the roof. Open the lid and refuel. Accessible even when my snowboard is in the way.
Lastly, I kept the filter and fuel pump where they are easily accessible for inspection, service, and/or replacement.
View attachment 636807
Nice work. Should have just built a second fresh system and sell that first one. I know people would by finished products like that.
Sent from my iPhone using Tapatalk
Impressive build, do continue.

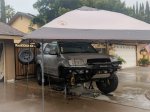
What bearings did you go with? When I was prepping for the my manual hub swap I read nothing but bead reviews about the aftermarket ones. The OE bearings cost almost as much as the drive hubs but I figured if they are what keeps the wheel in place, its worth the cost for peace of mind.
Sean
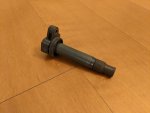
Other than measuring the primary and secondary winding resistance there isn't much you can do. The problem is that you can have heat driven dielectric breakdown which is pretty much impossible to find using a meter since it is an intermittent fault.
Sean
Other than measuring the primary and secondary winding resistance there isn't much you can do. The problem is that you can have heat driven dielectric breakdown which is pretty much impossible to find using a meter since it is an intermittent fault.
Sean


