2003 F550 No Limit

Krangmang

Member
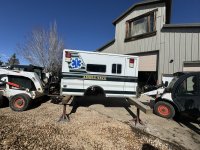
I really enjoy the planning, building, and fabrication process. I also really like the outdoors. I saw this as a good way to incorporate those two things into one project. My background in off road travel was previously limited to truck camping, which was great for me, but wouldn't get the wife out into the wilderness with me. My background in fabrication is completely as a hobbyist, but I've built some race cars, many shop projects: my garagejournal if anyone cares to look(https://www.garagejournal.com/forum/threads/the-jungle.404733/), and having my Dad, and youtube, as a resource. I knew what I wanted for the truck platform and it was a crew cab 1999-2003 ford with the 7.3 diesel. My Dad owns many of them and its a familiar truck. I wanted the strongest chassis I could start with, and figured making it weaker would be easier than stronger, so I started looking for a F550. As for what to put on it, I've always liked function over form vehicles like service trucks, ambulances, fire trucks... I knew that ambulances were basically just aluminum boxes, and that sounded really easy to work with, so I found a cheap one and kept looking for the truck.

This was January 2024.

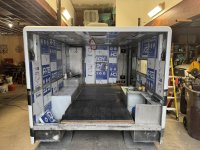
$2000 later and we have an aluminum box.
IMG_4103.JPEG

The Truck:
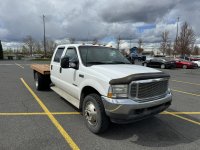
I found very few crew cab f550's initially. The ones I found were either too long, didn't have 4wd, or were just totally clapped out beaten work trucks. After a while I found a truck in Spokane that seemed clean, and the seller was responsive. After some conversations we set up a time and I picked it up. Its exactly what I was looking for, clean, and even had a factory 2nd fuel tank installed. I made the almost 11 hour drive from Spokane back to Utah in almost one fuel stop, very cool.
IMG_4586.JPEG

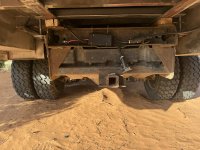
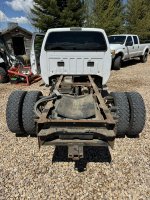
Truck needed new tires and a solid inspection once I got home. I wasn't going to be needing the bed, so that came off. Everything looked as well as could be expected. Shocks probably need to be replaced soon, but you cant even tell there are leaf springs with no weight on it, rides like i'm on rubber bushings still, so suspension will have to wait for now until the weight shows me how it really feels.
IMG_4679.JPEG

Everything looked solid, I did an oil change and topped fluids. Decided to drive it a bit before doing anything more.
IMG_4676.JPEG

The Box:
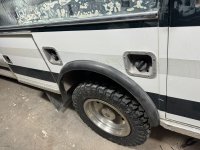
The box is a late 1980's Horton Type-1 truck box. From what I can tell its a tank. They were engineered to handle a rollover, so I'm going to study the structure and try to stay as close to that design as possible if I make changes. To foreshadow, changes will be made.

I really needed to get a feel for the space inside and how it would be to spend some time in it. For 2024 I decided to get it more or less fitted to the truck, do a small, "good enough" interior build and figure out exactly what I needed and wanted. My priorities were:

Needs:
Shower + Toilet
Seating for 2
Queen Size Bed
50 gallons fresh water
Dry heat of some sort

Wants:
Seating for 4
Sleeping for 4
100+ Gallons Fresh Water
100+ Gallons reserve diesel
Radiant floor heat
Maintain ambulance aesthetic

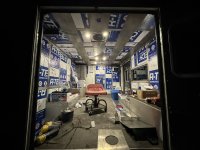
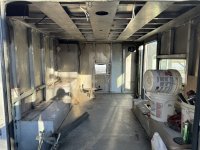
I gutted the box, and installed some cheap 2" insulation panels which helped a lot keeping the heat out.
IMG_4112.JPEG
IMG_4324.JPEG

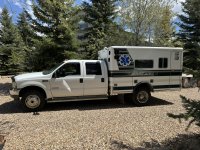
I flipped the box around and figured out a mounting system. Just used some conveyor belt on a 2x4 as a spacer for the frame rails and some modified u-bolts from a flatbed kit, after a few thousand miles and some 200 or so on dirt roads one of the 2x4 eventually split, the final build will include a complete subframe to support the box and overhang in the rear. I removed any mention of Ambulance or Emergency vehicle, and all the red side and forward facing lamp covers. I'll keep the clear scene lights and retrofit LED's for exterior lighting. I'll use the same retrofit on the brake lamps, turn signals, and reverse lights so I can keep the old style Whelen fixtures. I also re-wired the 7-pin plug to a split so I could easily plug in lights from the box and continue having an option to tow. I also needed to re-route and cut out new filler mounts on the box for the front and rear tanks.
IMG_4744 (1).JPEG
IMG_4295.JPEG
IMG_4299.JPEG
IMG_4796.JPEG
 

Krangmang

Member
Continued...
IMG_4747.JPEG

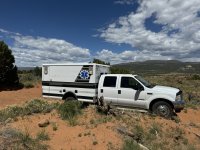
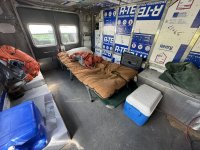
At this point it was attached, and waterproof. I had an upcoming trip with the guys to Red Fleet and decided that would be the maiden voyage. Truck did amazing, the insulation kept the habitat cool during the day and warmer at night. I rigged up a simple 12v light string and used an old cot for a sleeping platform. Soft sand is not great with a heavy truck and dualies, I didn't get stuck but I definitely used 4wd. As long as I had momentum it felt good, and the truck took some minor washboards and offroading very well, so that built some confidence.
IMG_4767.JPEG
IMG_4769.JPEG

I think the takeaways from this trip was that it would work. For some reason the lack of headroom didn't really sink in yet, but that would change on the next few trips. Convinced I could deal with a 59" ceiling height I moved ahead with planning the interior.
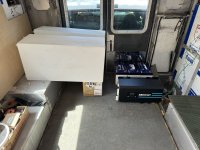
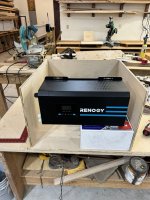
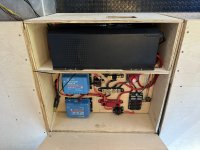
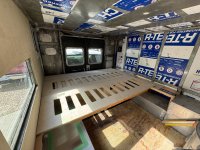
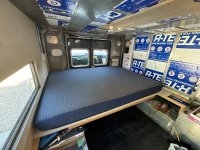
I wanted weight as low as I could position it, and that meant tanks and batteries on the floor. Knowing I would have a bed in this area I tried to make it all as compact as possible, which turned out not bad. I never hooked up the water on this layout, but the electrical system layout I'll continue to use.
IMG_4817.JPEG
IMG_4981.JPEG
IMG_4985.JPEG
IMG_4995.JPEG
IMG_5158.JPEG
The bed platform for now would just be fixed on top of these boxes, I had planned for it to slide back into a couch but that did not come to fruition.
IMG_5014.JPEG
IMG_5165.JPEG
 
Last edited:

Krangmang

Member
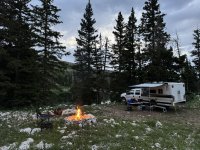
Happy with that progress and that great mattress, I loaded up for the next trip out to the La salle range. I also quickly installed a roof rack and awning, which was a game changer. Two hours on switchbacks and minor dirt roads got us to a great alpine lake. Most of the guys were car camping, but one friend rented a hybrid jeep which, at first, I thought was kind of lame. However, creeping through nature in a vehicle silently is one of the coolest things I've experienced. When I returned from this trip I looked into some hybridization options for the truck, seriously considering an Edison Motors retrofit when they're available. Guess we will see.
IMG_5233.JPEG
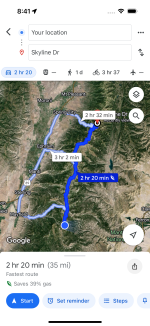
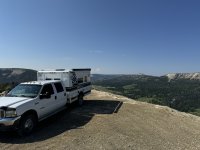
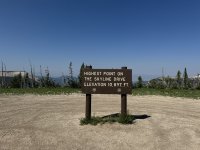
It stormed hard the first night, everyone huddled under the awning and eventually piled in the rig to stay dry. The morning was beautiful and instead of taking the short way home I set off North on Skyline Drive for a few hours, I think I pulled out around Mt. Pleasant even though the map shows Spring city. The truck did great even on the tight hairpin turns... something I would have been much harder to do had I gone with a longer wheelbase I think.
IMG_5290.PNG
IMG_5299.JPEG
IMG_5304.JPEG
After returning from this trip I had a few, very clear thoughts. First, the no headroom wasn't going to work. I would actively avoid using the rig if I couldn't stand up in it. Second, I needed more space for seating because having at least 4 people inside is just the minimum. I travel with family and friends and being together is the point of it all, isn't it? Third, I needed to reinforce the structure somehow, and decided to build a subframe for the box.

- At this point we are semi-current, I'll be adding to each section as work is completed.

The Subframe:

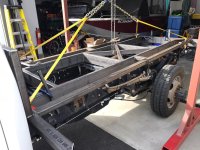
I don't have much chassis to flex, so I'm not super worried about that, but I will be using some springs on the rear chassis mounts to accommodate any flex. The below pic is NOT my truck, but the design will be very similar. 2x6 square tube for the main rails, outrigger supports for the rest of the habitat, and an integrated (non-tow point) bumper to load some extra junk on the rear. I have an idea for the bumper design that should be cool, but that will be a later project. I also want the subframe to lift the box a few inches for clearance and other reasons, hence the 2x6 instead of a 2x4.
IMG_5480.JPEG
More to come here when I get to it...
 
Last edited:

Krangmang

Member
Habitat Modification:
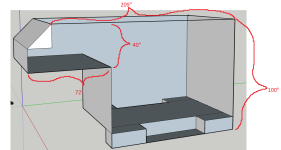
I needed headroom, and space. I watched everything I could on how folks had done this in the past and it looked fairly straight forward. The plan is to raise the roof 20" and add a cabover section. To raise the roof and extend the cabover I'll use 1/8" thick, 20" tall c-channel with 2" lips. This should give me a great surface to bond to, and eventually stitch weld. A note is that prior to modification the truck with full tanks and the habitat as it was built out together weigh 11,200lbs, the truck is rated for 17,100lbs so I've set a goal of 15000lbs wet, no gear.

The end product should look something like this.
Dimensions.PNG

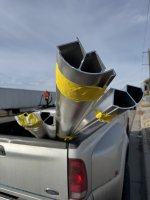
I was able to find some new-old stock of the corner extrusions used to make these Horton boxes and bought what I could. I still need to see how much of the cabover structure I can actually build with them, but I should at least be able to do the top corner edges and the bottom front lip.
IMG_5700.JPEG

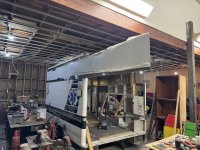
Since I was removing the "rear" doors anyway I removed the whole structure and cleaned all the mating surfaces. I'll eventually need to go back and weld this up, but at least its clean. I'll say here that, by far, the worst part of this process was cleaning the 30 year old crud that had accumulated in these corners and surfaces. At this point I'm convinced if I were to do it over again I would start with a scratch build. Were committed now though, so onwards.
IMG_5665.JPEG

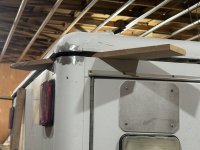
Keep in mind the shape of those extrusions, it will help with understanding how I'm making the roof cuts. Using a skillsaw I just set the depth to only go through 1/8" of skin and leave the underlying 2x2 structure. Then, simply followed the drip edge.
IMG_5694.JPEG

Some clamps and a floor jack later, shes up and out of the way. This is more like it for ceiling height!
IMG_5705.JPEG

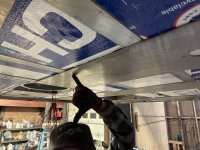
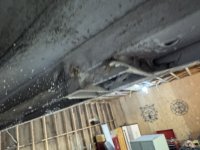
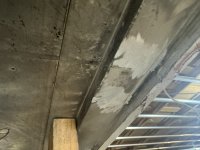
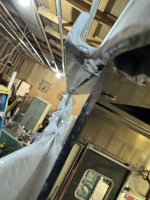
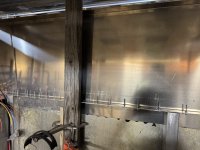
It felt great to get to this point. Little did I know the worst was yet to come. These structural boogers left behind needed to be cleaned up which turned out to be a giant pain in the rear. Pretty much just had aluminum dust, 30 year old body adhesive, and grinding wheels disintegrate into my face for a good 14 hours. Thankfully, that was the end of the overhead cleanup and were left with some great, clean surfaces to adhere to and eventually weld.
IMG_5707.JPEG
IMG_5712.JPEG

The bottom edge needed a bit more work. It did not have a suitable lip that I could seal my bent c-channel pieces to. I fitted some angle into the spaces between uprights, I'll eventually go back and weld the interior edges. The main area is held on with Sickaflex 221 and that product will be used throughout the build. IMG_5715.JPEG

Eventually I had all the angle glued into the spacer areas and could place my c-channel in.
IMG_5728.JPEG

After that adhesive had tacked up, which takes a few hours, I attached the cantilevered piece with sheet metal clamps at the break and clamped it up carefully, eventually lowering the roof down.
IMG_5730.JPEG

Continued on the next post...
 
Last edited:

Krangmang

Member
Fits together great! A bead of Sika 221 on all the surfaces should provide good waterproofing and vibration reduction.
IMG_5733.JPEG
I don't currently have pictures of this when finished, but I went back through all the mating surfaces and put staggered 1/4" rivets every 3" or so. this was probably overkill but I figure it can't hurt. It took around 200 of them, I'm very happy I splurged on the air powered rivet gun, highly recommend.
IMG_5729.JPEG

Currently this is where I've stopped. I'll be back there on December 9th and hopefully finish the cabover structure within that week.

Back at it December 9th:
With the majority of the existing structure in place where it needs to be, time to start working on the cabover. Thankfully, this is all new metal, the fun stuff. I started with taking some measurements of width, height, and diagonal squareness from the body the way it sits. The dolly that the box is resting on is not perfect, so the box doesn't sit perfectly flat. I would have taken more time to ensure that I think if I were to do it over again. Not a huge deal, once its all back together it will hold itself square.

Not a huge number of pictures during all of this, its hard to remember to stop and take them. I think I'll be better at it during the interior work.

Since I'm cutting most of this with a standard chop saw, I built most of the structure in the wood shop. Up until starting this part of the build I had never used a spool gun before, and oh boy these things are awesome. Plenty experience mig welding steel, and tig aluminum, but mig aluminum is easier than mig steel I think, once you understand how to correctly spray with it.

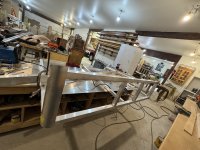
The lower portion of the cabover starts to take shape. I'm using 2x2 sharp edge aluminum tube for all structural components. The ambulance box used rounded edge 2x2, so everything should mate very well.
IMG_5788.jpg

Next, I cut the remaining extruded pieces that will comprise the front 45 degree nose and eventual roof corners. Shortly after cutting these, which used the entirety of my available material, I discovered a problem... I had calculated the 45 degree face of the exterior edge, not the interior edge, of the curve. The curves depth is 3.25", so not only were my lengths off for the 45 degree pieces, but the front facia I had bent had the wrong dimensions. Well, aluminum is expensive, so, instead of burning the $400 sheet of 5x8 1/8" I raised the vertical corners you see in the above photo by around 2" to make the 45 degree face fit perfectly with all my material. I burned an afternoon absorbing this mistake and figuring out how best to tackle it. Thankfully, it all worked out in the end.

Day 2 started with fully welding out the tacked up structure. Did I mention aluminum MIG was fun? After finish welding and assuring it was still square, I laid the under panel down, marked the structures overlap, and hit it all with a bead of Sikaflex 221, dropped the frame on top of it, and stitch welded in select places. At this point I could still move it around myself, so I'm happy with how light it should be, and very strong.

That night I had it together enough for a test fit. It did NOT just slide right in perfectly, but its definitely manageable. After some taps with a sledge, some floor jack maneuvers, and lots of clamps, I had some massaging of the body to do, and the front, vertical skin to put on. Once installed I was very happy with how it was looking, and especially the space I'm gaining.
View attachment IMG_5808.jpg

I had to make some sacrifices due to shortage of the very expensive extruded corners I had found. I didn't have enough to do all the bottom edges like I had wanted to, so it will all be 90 degree. This actually turned out working very much in my favor, as I can overlap the bottom edge of my c-channel over the bottom skin creating a groove for it all to seal on itself. The c-channel in this case is not structural, but will still be stitch welded on the inside providing shear strengths. Skika 221, rivets, and stitch welds to hold the top and bottom c-channel, and frame together. Many clamps assisted.

View attachment IMG_5810.jpg

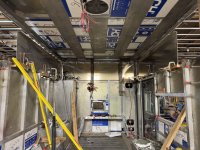
At this point it was a lot of hand fitting of the previously miscut corner pieces, figuring out where roof supports would go, and how to do final assembly with some way to get sealant under the front facia. That will have to be for a later date though, as getting this part put together and installed burned the whole few days I had. I've gone from 14.5 cubic yards of interior space to 24 cubic yards, quite the increase, and you really feel it inside. The aesthetic is great, and I'm really happy I went through the extra trouble making these extrusions work. Its going to look terrific when on the truck, and eventually all one color. It will likely not be painted anytime soon as I want to have a few trips in it before I commit to making things clean. I completely forgot to take interior pics, but will do so when I'm back in January and finish up the box itself and hopefully start on the subframe.

View attachment IMG_5811.jpg
 
Last edited:

Krangmang

Member
Subframe

A few goals with this:
1) strong and stiff - I want it to provide rigidity, not the ambo box
2) Built in jack points for easy removal or service
3) Torsion reduction
4) Room for additional external tanks within the structure

To recap, truck was 11,200lbs will full fuel tanks, the unmodified ambo box and all electronics / batteries.

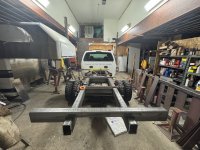
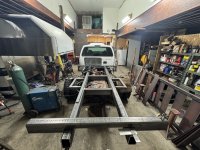
The cab-on-body frame rails are about 4" wide, so whatever I used needed to be at least that. The mounting straps (which won't be used to secure the box, but will still be supportive). Lastly, due to how I've modified the cabover, I need at least 4" of subframe to bring the box up enough that the cabover clears nicely. I decided to go with 4x6" 3/8" wall square tube, chonky.
IMG_5889.jpg
- The rear bumper will go on and those ends will be trimmed in after I dry-fit the subframe.

After a good deal of back and forth I decided to go with a hard-mounted cab side with spring mounts in the rear. It's only about an 8' span, I don't expect a lot of flex but I want the truck frame to flex as it should if needed.

Fitting and drilling for the front hard-mounted brackets. Also made from the 4x6" material, turned out great I think. Mag drills are freakin' sweet.
View attachment IMG_5890.jpg

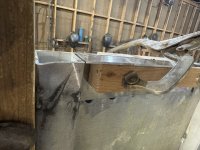
Next, the actual mounting for the box will be through the saddlebag side structures. Looking at how the box is constructed this seemed to be the most direct and accessible place I could secure to. It will also allow me to spread the stress over a large surface area, and all the stress will be in shear instead of tension like with a c-clamp or j-bolt. These outriggers have holes drilled through them and I'll be able to directly bolt through the 1/8" aluminum in all 4 of the side boxes. I may add a band of aluminum bar to further strengthen those areas, we will see.
IMG_5898.jpg
I'll be putting some gussets under these outriggers before final welding and paint.

Last thing I could get done is the rear spring mounts, these were really fun to make. Also made from this 4x6 material, and some 2x1/2" bar.
View attachment IMG_5907.jpg


I'm quite happy with how this has turned out. The next time I get to work on the truck I will have the box and subframe back on it. So standby for that, I'm hoping it all goes on the way I think it will!
 
Last edited:

Krangmang

Member
Hydronic Heating and Fresh Water System:

Here is what I have so far, and I'm trying to keep it as dead simple as possible. I might just replace the two electronic ball valves with manual valves and only worry about pumps, we will see.
If I do make them manual I would control the system temperature by modulating flow rather than by using a thermostatic mixing valve.

I'll have control of both the truck side coolant pump and the camper side coolant pump in the cab and in the habitat, I would like them to be wired like a 3-way switch but I also want to be variable speed, I'll figure that out later I guess.

I might also simplify the floor/radiator loop by making one, 3-way ball valve instead of the two valves.

image.png
 
Last edited:

ExpoMike

Well-known member
Looking like a great project. I agree, too many people don't really understand not having standing height is not such a great thing, long term. I raised the roof on my M1010 to give me 6' height inside and it was a game changer. Looking forward to the build.
 

chop480

Observer
Wow, kudos to you for taking on such a huge project. Look great so far. Happy to see the 7.3L F550 as your build platform. Looking forward to your plans for the chassis/running gear mods, if any.
 

Krangmang

Member
Looking like a great project. I agree, too many people don't really understand not having standing height is not such a great thing, long term. I raised the roof on my M1010 to give me 6' height inside and it was a game changer. Looking forward to the build.
Its so huge. I really had no context until I stood up inside after raising the roof. Really makes the space comfortable.
 

Forum statistics

Threads
188,337
Messages
2,905,693
Members
229,959
Latest member
bdpkauai
Top