2005 118" Sprinter Conversion for Alexander

PaulJensen

Custom Builder
Q& A # 2

Yeah, it was something like that...Those were drawer Accuride brackets, "repurposed"...Simpson brackets would work just as well...

The important thing is to mount the bracket to the 1/2" plywood case wall first, and leave at least 3/8" gap behind the bracket so when you put the back wall screws through to steel body, the cabinet case pulls tight to the wall...The bracket will bend if you do it right...
 
Last edited:

PaulJensen

Custom Builder
# 15

P1030328.JPG
(above) After a weekend of torrential rain, fiberglass and epoxy on the new SUP, and refinishing a hundred year old rocking chair, it was back to the drawer slide bolts...

P1030329.JPG
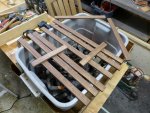
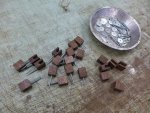
(above) The walnut slide bolts are sealed in a bath of gloss polyurethane varnish, thinned out 50%, air dried and wiped...

P1030330.JPG
(above) Before sealing, there was a lot of fine tablesaw work, filing of edges, and progressive sanding...

P1030331.JPG
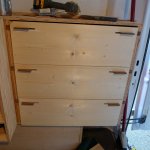
(above) With all the drawer face components ready, they get installed over the plywood boxes...Pre-drill screw holes in the boxes, squeeze on polyurethane adhesive, place drawer face on plywood holders at the bottom, 22 gauge pin nail the faces to the box, pull out drawer and fill the screw holes with wood screws and make 'em tight...

P1030332.JPG
(above) Next, on top of the lowest drawer face, add an 1/8" plywood spacer, repeat the drawer face installation...Etc...

P1030333.JPG
(above) Then it's on to the driver side...The difference here is pin nailing a temporary vertical placement guide in the center of the cabinet and holding all the drawer faces square and tight to that during installation...

P1030334.JPG
(above) As it should be...
 

PaulJensen

Custom Builder
# 17

P1030342.JPG
(above) With the drawer faces on, it was time to make pulls for the drawers and doors...Some walnut was rough cut, then planed to 5/16" thick and ripped to 1" wide...A quick fine sanding was followed with a thinned poly-u varnish bath and air drying...

P1030343.JPG
(above) The base of the pulls were cut from a single srtip of 7/8" x 1.5" walnut...A groove was cut on the tablesaw, then individual blocks were cut to length, 1"...

P1030344.JPG
(above) A screw mounting hole was drilled with a drill press...Sanding & oiling had them ready to install, but only after they dry for a day...

P1030346.JPG
(above) This is how they'll look when they are installed...

P1030347.JPG
(above) The slide bolts were partially exposed, so a thin strip of pine was glued and pin nailed over the slot to fully capture the bolt...

P1030348.JPG
(above) Holes for the walnut mounting posts were drilled through the drawer faces, then bolted tight...Next, the pulls were epoxied into the slot then clamped in place...

P1030349.JPG
(above) With the clamps removed it looks like this...

P1030350.JPG
(above) Next, 1/4" roll cork was cut to size for the van ceiling...

P1030353.JPG
(above) Aerosol contact cement is sprayed to the cork, then a coat gets sprayed on the ceiling...

P1030351.JPG
(above) Then carefully placed on the foam backing/insulation...After placement, the cork gets rolled with a hard rubber roller for maximum contact...I got the whole ceiling done, but forgot to get a picture...
 
Last edited:

jiveass

New member
Crap. I'd really hoped when Maxxair marketed that fan as 'smoke,' they meant transparent instead of completely frigging black. That's lame, but I think it will still be a cool vanfan. Dude, you are going over the top with the mahogany and cork. Really, I think the photos I've shown around already will be enough to get me laid before I even get the van back.
 
Not to hijack Paul's build thread, but . . .

This "a good job requires soldering" advice is all over this forum, but it's worth noting that some codes, for example, the ABYC (American Boat and Yacht Council) Standards, do not allow soldering as the sole means of connecting wires. When subjected to serious vibrations, solder joints can go bad when crimped connections don't. The fact that cheap crimp connectors and crimp tools produce crappy connections doesn't mean you should solder everything; it means you shouldn't use cheap stuff when making crimp connections.

In point of fact, mechanically sound, heat-shrink-covered wire connections, where the solder is for electrical conductivity rather than strength, are undoubtedly fine for our non-critical operations. But don't bad-mouth properly done crimp connections, as at least some knowledgeable groups require crimping. (And from a practical standpoint, crimps make diagnosing and correcting problems easier.)

There's a informative article on the issue here:

http://www.cruisingworld.com/how-to/systems/to-crimp-or-solder

Crimping is the standard in aviation. Propperly calibrated tools and quality butt splices. Airplanes are high vibration!!!
 
I love to read your build threads! My kid goes to school in Oly some time when I come down I would like to come by and see your handy work!
 

kjp1969

Explorer
The cork is brilliant for a headliner. Much better than the standard mouse fur foam.

Paul,
I remember that you use a lot of PSA- can you elaborate on it? Where do you get it, and what is it good for?
 

PaulJensen

Custom Builder
Crap. I'd really hoped when Maxxair marketed that fan as 'smoke,' they meant transparent instead of completely frigging black. That's lame, but I think it will still be a cool vanfan. Dude, you are going over the top with the mahogany and cork. Really, I think the photos I've shown around already will be enough to get me laid before I even get the van back.

The fan blades obscure most of the light anyway...It doesn't do much to increase the light back there...I think once the conversion is done the ambient light will be fine...I'm adjusting the wall plan to accomplish that...

BTW: If you daydream less about getting laid, you might notice it's walnut, not mahogany...I understand, but try to keep up...
 

PaulJensen

Custom Builder
I remember that you use a lot of PSA- can you elaborate on it? Where do you get it, and what is it good for?

The Pressure Sensitive Adhesive (PSA) is a double sided tape that i got on a 18" wide x 750' roll for about $450 a few years ago...I don't remember where i got it...It is "destructive strength" which means that the bond will hold and the materials will fail before the adhesive bond breaks...I find that to be true...The key to a good bond is for both surfaces to be dust free...

The PSA is used similar to contact cement...Sometimes one is simply more convenient to use and both offer similar bonds...It's nice to have options...

BYW: No pictures or work from yesterday, I went to Portland to exhibit my surf stuff in an art gallery...I'll be back in the van this weekend...
 

Forum statistics

Threads
189,763
Messages
2,920,518
Members
232,886
Latest member
AZXPLOR
Top