2005 118" Sprinter Conversion for Alexander

westyss

Explorer
Hey you guys, quit poking the bear!

I have to agree with paul on the concepts, it is one rig built for an individual who wants it done for himself, not for someone else, if you want a bed then build a camper for yourself, that way it will be perfect. Just dont piss Paul off to the extent that he stops posting on here :D
 

mhiscox

Exp. Leader Emeritus
You can joke around about it being just big enough for pre-teens, but the reality is that Pam and I, with a combined age of over 120 years, do just fine on the floor . . .
I do great on the floor, too; just spent 9 days on the MegaMat down by the back doors and it was good as home. But are you telling me you and Lady Pamela BOTH sleep between the wheel wells? :Wow1:

I mean, there's a reason you're Big Paul, and superfit surfer or not, there's a size issue here . . . ;)
 

PaulJensen

Custom Builder
#19

P1030455.JPG
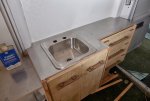
(above) Time to get the stainless steel sink countertop on...

P1030456.JPG
(above) Instead of carefully measuring the plywood case, I make an 1/8" plywood strip pattern...Hot glue gun and utility knife are all that's needed...

P1030457.JPG
(above) The pattern gets traced onto the sheet stainless steel...

P1030459.JPG
(above) To cut the stainless steel. I use a metal cutting blade in a 4" high speed grinder...Light pressure and a steady hand get it done...Gloves and a fireproof shirt are nice to have too...

P1030460.JPG
(above) The sheet metal is on top of scrap plywood for the cuts...

P1030461.JPG
(above) After the initial cuts, the top is loosely placed and the sink hole gets traced from the underside...

P1030462.JPG
(above) Sink hole cut out...The rough edges all get smoothed out with a belt sander...

P1030463.JPG
(above) Contact cement on the underside, and one on the plywood...

P1030464.JPG
(above) Thin wood spacers are nice to use when an accurate placement is vital...Next, the stainless is put on top, slid into place accurately, then the strips are sequentially pulled out...

P1030474.JPG
(above) Perfect fit...
 

PaulJensen

Custom Builder
# 19

P1030465.JPG
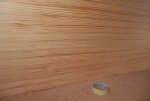
(above) I've been going back and forth with how to finish the rear driver side wall...Cork was my first thought, but too much cork looks like sausage to me...And it's kind of boring to look at...White FRP makes sense, but it's a bit too institutional...So I went to the wood pile and pulled out some 2x4's I got at Lowes...I found 21, clear, straight and dry sticks there a while back while going through the unit...Like hitting a vein of gold...

P1030466.JPG
(above) On the tablesaw, the wood was rough cut to 1/4" thick x 1.5" wide strips...Next it was run through the planer to remove saw marks...

P1030467.JPG
(above) What three 2x4's amount to after cutting and planing...

P1030469.JPG
(above) A fairly simple install...Aerosol contact cement on the wall and wood strip backs...Start at the bottom and put one strip on top the previous...

P1030471.JPG
(above) A fast light sanding to get the edges even then a thin coat of varnish is rolled on, then the excess is all wiped off...Thin, rubbed in, sealed...It might get another coat or two...Not sure yet...

P1030472.JPG
(above) I like it...

P1030475.JPG
(above) The wood tones will mellow out over time...It's going to age beautifully...
 

matthewp

Combat Truck Monkey
View attachment 190146
(above) I've been going back and forth with how to finish the rear driver side wall...Cork was my first thought, but too much cork looks like sausage to me...And it's kind of boring to look at...White FRP makes sense, but it's a bit too institutional...So I went to the wood pile and pulled out some 2x4's I got at Lowes...I found 21, clear, straight and dry sticks there a while back while going through the unit...Like hitting a vein of gold...
...

Wow! You have just told me how I'm going to finish the panelling of my kitchen area in my trailer! beautiful yet simple idea!
 

VanIsle_Greg

I think I need a bigger truck!
I like that this is a more simple straightforward design. I also must say I really like the contrast from panel van on the exterior and warm and inviting utility camping unit on the inside. The wood and the cork look nice together.

"Atta Boy."

:)
 

jiveass

New member
Paul, I was only half joking about carrying the <Jensen> logo. In fact I'd be totally honored should you put something inside.
 

PaulJensen

Custom Builder
# 20

Hey JA: Something like that...

P1030476.JPG
(above) A still dark run to Lowe's and Home Depot had me set for the day...First up, figure out the water tank...

P1030484.JPG
(above) It'll go there...

P1030488.JPG
(above) To not get confused early, locations are noted...

P1030491.JPG
(above) The vertical fittings waste space, so they get cut down significantly...Probably voided some warranty...

P1030492.JPG
(above) Fittings get taped together for rough placement...

P1030493.JPG
(above) On the van wall, the hose strap was through bolt plated, with epoxy as the lock thread...

P1030494.JPG
(above) So how would you bolt that...???...

P1030495.JPG
(above) Not found in any catalog...Precision long reach bolt AND washer holders...

P1030497.JPG
(above) Masking tape on some days is the greatest invention...

P1030498.JPG
(above, All there is to do is sweep the screw through epoxy and line it all up...
 

PaulJensen

Custom Builder
# 20

P1030499.JPG
(above) Loosely strapped...Far from considered installed, but good enough to precisely mark all the angles for an accurate glue up...More on that later...

P1030478.JPG
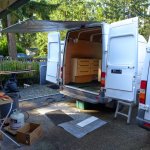
(above) It felt like the right time to put the rear tarp together...A cheapo 5 x 7 from Harbor freight with 1/2" elect. conduit on the ends...Zip ties are good enough...

P1030480.JPG
(above) Decent coverage for the back...

P1030486.JPG
(above) A nice option to have if you set up somewhere for a while...

P1030487.JPG
(above) The roof connection is on the hold down disks on the roof...There are heaps of options...
 

Forum statistics

Threads
189,744
Messages
2,920,336
Members
232,830
Latest member
kernsrock65
Top