You are using an out of date browser. It may not display this or other websites correctly.
You should upgrade or use an alternative browser.
You should upgrade or use an alternative browser.
2007 LR3 - my 10 yr build thread...
- Thread starter Jwestpro
- Start date
Jwestpro
Explorer
Thank you for the support guys!
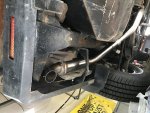
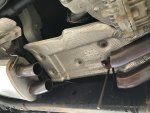
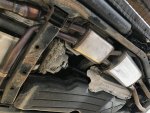
Notice that exhaust routing and silencer at the rear outlet. Magnaflow designed it stupidly to run straight out BELOW the stock fender edge with ridiculous dual tips so you can see them! Had those cut off and put a turn-down at the end tucked up above the virtual drag line if the bumper bottoms out on a departure.
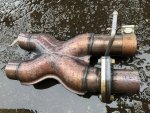
More photos to come on this but I had this exhaust kit modified not only to actually fit with proper routing above the Kaymar rear corner supports, but also for quieter output.
It comes with a basic 'X' pipe but we cut it out and added in its place a cool combo X pipe muffler in front of the first/primary muffler. This was to help reduce the loudness.


Jwestpro
Explorer
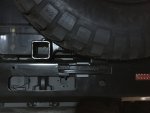
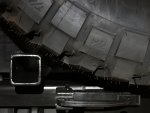
Many years ago I thought I needed this Rover Hardware spare wheel mounting height booster. It's a nicely machined and finished block of aluminum. Never needed it until now LOL...

It regained about 2" vertical which is not what I needed but what I did need was lateral relief from being too near my custom bike mount receiver that slides into the tire carrier swing arm. 32" tire just barely fit but the additional 1" radius was too much.
If I want to retain the security aspect provided by the Kaymar system, I'd just have to drill new holes and/or tap new mount points inside the swing arm.


Jwestpro
Explorer
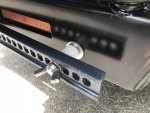
Nice rig! Did you mount the main part of the inverter behind the panel and just locate the power outlet faceplate in the trim? Was thinking of doing the same thing.
Whole unit it right there. It's not a very big one so it just fit in there. I think I've only used it to charge the lap tops over the years. In hindsight it's not the most convenient location but it's not so bad and used space otherwise unlikely for anything else.
In my disco 2 it's mounted inside the rearmost cavity in cargo area right by the back door. If you're familiar with Disco2, the cargo area side walls have either jump seats or storage bins but there's a space between them and the actual body where door hinges. We used this cavity on both sides for the following:
-Arb Compressor switch, gauge and outlet
-inverter panel
-12v sockets each side (of course powered by the 2nd battery)
MLu
Adventurer
In my disco 2 it's mounted inside the rearmost cavity in cargo area right by the back door. If you're familiar with Disco2, the cargo area side walls have either jump seats or storage bins but there's a space between them and the actual body where door hinges. We used this cavity on both sides for the following:
-Arb Compressor switch, gauge and outlet
-inverter panel
-12v sockets each side (of course powered by the 2nd battery)
Not to hijack the thread, but the Disco 2 has a whole bunch of unused space once you start poking and prodding the plastic trim. I think if you removed all the plastic pieces from the rear doors and backwards you'd end up with a surprising amount of space. The storage bins are nice and big, but the area in front of them, around the rear seat belts, and behind them below the light cluster is almost half of that space wasted.
Anyway, really nice D3. Any more pics of the whole shebang all set up?
Jwestpro
Explorer
Unacceptable, must be a solution...
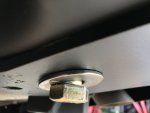
Yup, there is...a "malleable iron bevel washer - galvanized 5/8" very cool little item which made me so happy because I imagined it and then it was real and easy to get
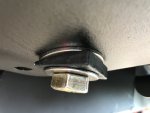
I'm very fortunate to have the corporate headquarters Tacoma Screw and Machine parts just a few minutes away!
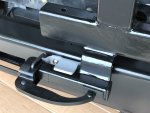
Someone snapped the Kaymar provided keeper rod so I made my own
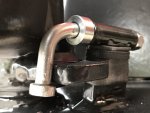

Yup, there is...a "malleable iron bevel washer - galvanized 5/8" very cool little item which made me so happy because I imagined it and then it was real and easy to get

I'm very fortunate to have the corporate headquarters Tacoma Screw and Machine parts just a few minutes away!
Someone snapped the Kaymar provided keeper rod so I made my own

Last edited:
tdhunter13
Observer
Tank is the Australian Longer Ranger. Using as supplied, dual neck works fine. Dash photo at factory lights switch shows the tank pump switch on left with approximate gauge.
Jwestpro, were you able to order straight from Long Range or did you have to work through ARB USA? What does your range look like now with both tanks?
Awesome build by the way!
Jwestpro
Explorer
I got mine from an LR3 owner who was selling his so he parted out all the aftermarket stuff. I have talked with long ranger though about getting one for my D2 and they will ship here. I think I talked with the one who has the camel mascot. There are two companies with practically same name .
52 gallons total
52 gallons total
Jwestpro
Explorer
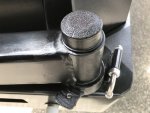
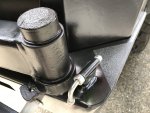
High-Lift mount to rear bumper. I have both the 48" standard and the 60" 'extreme'. The grey extreme is what's shown below.
Guess what I found out today: oddly their step lift holes are not the same size or spacing. Strange but probably something to do with standard vs extreme in the casting. The head is the extreme so i need to also make sure it ratchets properly with the 48" if I want to have the option to chose either bar.
I have considered the standard bull bar mount which I don't like either blocking the best view of tight terrain or being up there potentially grinding into trees or whatever, or collecting bugs on the highway.
Nor do I like the roof mounted ideas for such high weight. I have tried to keep anything heavy low and/or central as I enjoy high angle routes but with the confidence of lowest center of gravity I can achieve.
Obviously there is also the popular vertical mount to rear swing arms and I've taken some measurements to see about a horizontal approach to using the tire carrier swing arm.
However, this 'plug-n-play' idea just occurred to me yesterday so I thought I'd just give it a try to see how it works. Seeing as it required zero anything except having the right stainless hardware bits in hand, which I already did. These sweet tidy little mounts I've had for all 10 years...just waiting for today apparently. LOL
This option clears the departure angle set by the fuel tank and spare tire but it's not quite ideal if getting crazy with ledge drops or steep uphill transitions, but it is cool as it simply uses the pre cut holes for parking sensors with centering done via a washer with 30mm O.D. That happens to just snug inside hole.
Kinda cool anyway.
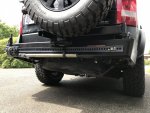
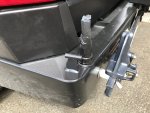
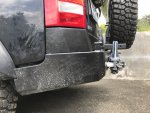
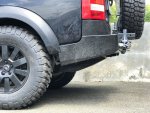
It should be noted that I normally carry the high lift inside located behind and below the 2nd row seats. Separated from the bar, the lever and head sits in the floor tucked against the 2nd row seats when folded flat or even upright. The 48" bar will lodge tight between the wheel arches but also still below the virtual cargo floor level.
It has stayed there for years, completely out of the weather and with its dense heavy mass about as low and vehicle centered as possible. My idea is that most of the time, it would remain there for obvious reasons. However, when needed in nasty conditions, or if anticipated repeatedly, then an exterior mount is desireable until such event is finished. Of course this asproach to temporary accessibility lends itself to the above mentioned location options seeing as they would not be permanent.
Still, my preferred location if I can fabricate it, would be rear bumper area horizontally attached to the spare tire swing arm. That would eliminate any aspect of how these photos show potential for departure angle problems.
For the interior, I am devising two similar large gauge wing nut mounts to hold the 48" bar snug so I don't have to use a tie down strap which is secure, but annoying to manage.
I forgot to mention the obvious but important fact that being hit from behind by another vehicle would not be cool if the jack were there. The idea would be to only use those alternate exterior locations when off highway though. I'll probably consider the front bumper if I can't pull together a horizontal tire carrier mount. - on second thought, I'd rather have this table on the tire carrier so I'm going to abandon that idea.
https://www.seriesdefender.com/exterior/folding-table.html
Guess what I found out today: oddly their step lift holes are not the same size or spacing. Strange but probably something to do with standard vs extreme in the casting. The head is the extreme so i need to also make sure it ratchets properly with the 48" if I want to have the option to chose either bar.
I have considered the standard bull bar mount which I don't like either blocking the best view of tight terrain or being up there potentially grinding into trees or whatever, or collecting bugs on the highway.
Nor do I like the roof mounted ideas for such high weight. I have tried to keep anything heavy low and/or central as I enjoy high angle routes but with the confidence of lowest center of gravity I can achieve.
Obviously there is also the popular vertical mount to rear swing arms and I've taken some measurements to see about a horizontal approach to using the tire carrier swing arm.
However, this 'plug-n-play' idea just occurred to me yesterday so I thought I'd just give it a try to see how it works. Seeing as it required zero anything except having the right stainless hardware bits in hand, which I already did. These sweet tidy little mounts I've had for all 10 years...just waiting for today apparently. LOL
This option clears the departure angle set by the fuel tank and spare tire but it's not quite ideal if getting crazy with ledge drops or steep uphill transitions, but it is cool as it simply uses the pre cut holes for parking sensors with centering done via a washer with 30mm O.D. That happens to just snug inside hole.
Kinda cool anyway.


It should be noted that I normally carry the high lift inside located behind and below the 2nd row seats. Separated from the bar, the lever and head sits in the floor tucked against the 2nd row seats when folded flat or even upright. The 48" bar will lodge tight between the wheel arches but also still below the virtual cargo floor level.
It has stayed there for years, completely out of the weather and with its dense heavy mass about as low and vehicle centered as possible. My idea is that most of the time, it would remain there for obvious reasons. However, when needed in nasty conditions, or if anticipated repeatedly, then an exterior mount is desireable until such event is finished. Of course this asproach to temporary accessibility lends itself to the above mentioned location options seeing as they would not be permanent.
Still, my preferred location if I can fabricate it, would be rear bumper area horizontally attached to the spare tire swing arm. That would eliminate any aspect of how these photos show potential for departure angle problems.
For the interior, I am devising two similar large gauge wing nut mounts to hold the 48" bar snug so I don't have to use a tie down strap which is secure, but annoying to manage.
I forgot to mention the obvious but important fact that being hit from behind by another vehicle would not be cool if the jack were there. The idea would be to only use those alternate exterior locations when off highway though. I'll probably consider the front bumper if I can't pull together a horizontal tire carrier mount. - on second thought, I'd rather have this table on the tire carrier so I'm going to abandon that idea.
https://www.seriesdefender.com/exterior/folding-table.html
Last edited:
Victory_Overland
Explorer
The build looks great. I like the idea of leaving as much as possible down low and easily accessible.
I'm assuming you have your parking assist turned off via GAP Tool and that fuse (#36 glove box) controls TPMS as well. I was able to reconfigure my Config on the GAP tool and pull the fuse to get my sensor and back up horn to stop, but no matter what I do on the TPMS, I can't get the configuration to hold as "TPMS not installed" with or without the fuse in. Says my configuration failed.
Any suggestions? I want to start work on my swing out and might pirate your idea of hanging the jack off the back. Obviously hearing the back up assist will drive me nuts.
Jwestpro
Explorer
The backup does try to beep but I instinctively hit the button every time now apparently.
I don't need to halt my TPMS seeing as 20 of the 25 wheel/tire sets have sensors inside . With great annoyance none of the settings via IIDtool have yet to stop the parking sensor beeping though. :/
I don't need to halt my TPMS seeing as 20 of the 25 wheel/tire sets have sensors inside
Similar threads
- Replies
- 0
- Views
- 837
- Replies
- 9
- Views
- 2K
- Replies
- 1
- Views
- 742
- Replies
- 5
- Views
- 2K
Forum statistics
Members online
- SVTRIT
- Umbrarian
- JWag21
- RealTruck
- dstefan
- NOPEC
- SDDiver5
- Jtvs
- Jack Mac
- warrpath4x4
- Shek
- Gabe357
- twowheels19
- 1Goat
- Voayageue
- mssyrjan
- PDXSting
- Smksignals
- bwdmax
- luthj
- granny_gear
- Sid Post
- NikonRon
- Leighsjor
- wackyhacky76CO
- White Dog
- jgdisco2
- mark5280
- OVRLND
- jkexp
- H3LV
- shopowner93
- jaywo
- KirkL
- 67390FE
- gluceth
- Scott Lee
- deeppurpleman
- bjorn240
- Dmora874
Total: 1,909 (members: 46, guests: 1,863)

