2012 JKL Rubicon build

Longtallsally

Adventurer
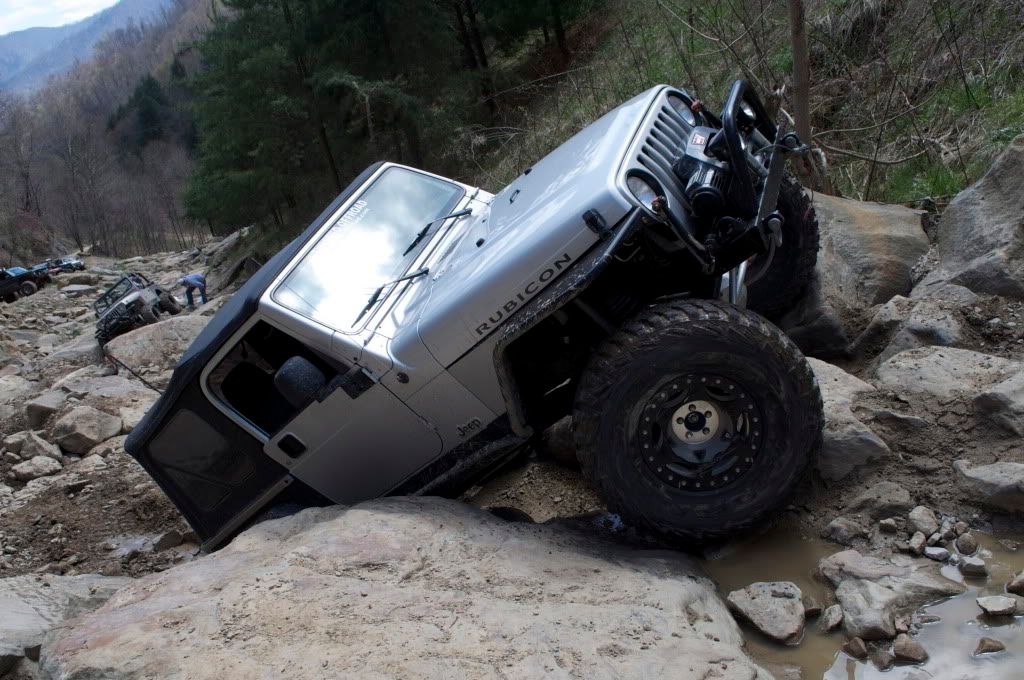
Not to badger you as this is your machine, but have you tried them out? I was very nervous as well, but after pivoting on the stock ones a couple times as well as slipping off a couple rocks and landing hard, they certainly seemed more than sufficient. Also, I dunno where in KY there is that will be as nasty as the Rubicon itself. Again, not making fun or giving you a hard time, but prior to giving the OEM ones a bum rap, I'd suggest testing them out. Just my $.02. Carry on with a nice build up...
 

marshal

Burrito Enthusiast
They are mounted on a single sheer to thin tin, and they don't protrude from the body. In a situation like this, which is common place where we wheel, my tin would be destroyed. This is my old Jeep

DSC_0075.jpg
 

marshal

Burrito Enthusiast
I had planned on doing a bunch of work on the jeep this weekend, but as usual my plans fell through and I got about an hour and a half to work on it today. So today I finished up trimming the pinch seams in the back. (No pics)

Got the rokmen aluminum bling handle for my hilift on

B7DECF7F-138A-4E38-877A-684B3890D02B-4573-000001AF01646DDF.jpg


Isolated and ready to work

8F7717DF-327D-4E72-87F6-6218E3D746BF-4573-000001AF055575CA.jpg


Roof rack assembled


427EECC5-03FB-47C6-A8F3-5F86025099EF-4573-000001AF1635C7E8.jpg


Lined up the runner even with the end of the final reinforcement rib

F38E71FF-B428-4BB7-8524-5DE6F21E0F85-4573-000001AF1390A473.jpg


Pretty tight tolerance

6504E525-17F1-4854-9B6D-69F1D0157D1A-4573-000001AF0E627D1F.jpg


Like a glove

E4CF3A07-78F6-4CAF-B9C9-B31060BDA57E-4573-000001AF09B7F402.jpg


Everything lined up and centered

9DBC1AC3-24B6-4916-AAAB-257445D25941-4573-000001AF07D71B8F.jpg


Unfortunately that's as far as I got. I marked the holes with a punch and all that's left is to finish up and drill
 

Power Wagon Family

I Hate Off Camber
I see you took the sound bar off to do the stuffing, is that required? I would rather leave mine in place if I can get away with it.
PS love your build and your Jeep!
 

marshal

Burrito Enthusiast
Not required but it makes it a hell of a lot easier!

Taking it out is really easy, there are six 10mm bolts and the hand cams for the freedom tops. Then there is a molex connector that everything runs through. I had it out filled and back in in 20 minutes.

I'm hoping that ill be able to do the subwoofer enclosure tomorrow - if I'm lucky.
 

marshal

Burrito Enthusiast
I think if you reinforced the attachment points of the cross bars you could load 200lbs up there no problem. I don't intend to have more than 75 up there. It was a project for me to satisfy putting duffels, maxtrax or a kayak up there.
 

Rubicon

Observer
Hey there Marshall,

what is your purpose for stuffing the sound bar w/padding? Heat/cold insulation? Better sound from speakers? Just curious...

BTW - great build!
 

marshal

Burrito Enthusiast
Putting poly fill behind the speaker simulates cone resistance as if it where in a high density air tight speaker box. It assists in producing more full and colorful sound it's applicable to all speakers in a less than ideal enclosure

Thanks!
 

Forum statistics

Threads
186,902
Messages
2,889,103
Members
227,437
Latest member
Top Jimmy
Top