2017 F-550 Camper Build - Ground Up

PacificNorthWestJeeper

Blissfully Lost
So I have been battling with trying to figure out the cheapest/easiest way to get this flatbed off and sell it so I can start the build...
$60.00 for a pair of 'working' rusty camper jacks and I fab'd up some brackets with scrap steel I had laying around... Boom, off and ready for a new owner to back underneath it. Camper jacks NOT included...
Once it's gone I can clean up the frame and start on the suspension...,
,
IMG_3025.jpg
 

PacificNorthWestJeeper

Blissfully Lost
The REAR brake light wiring is pictured below.
I think I have each wire figured out but if someone has a wiring diagram of the rear of the cab chassis 2017 F550 for verification that would be cool.
Best I could figure out on the internet is:
Orange: Its a constant hot line for a camper battery charging?
Blue: Electronic Trailer Brake Controller?
Yellow: Left Turn Signal?
Brown: Running/Marker Lights?
Blue Grey: No Idea, probably something to do with the trailer brake controller?
Green: Right Turn Signal?
White: Ground?

F550 Brake Wiring.png

.
 

PacificNorthWestJeeper

Blissfully Lost
The parts build up continues.. Powerstop cross drilled and slotted rotors and their X-treme brake pads front and back arrived today.
When I dig into the brakes, I think since I am there, I will change the axle seals and front axle Ujoints since I will be more than half way there any way. Just precautionary since again I have no idea what it has been through the previous 100k before I bought it.
So what is left to get for the truck before it is torn down and rebuilt?
- Glow Plugs, with just over 100k and being the new owner I think it is good insurance to do.
- Carli Radius Arms
- Carli Swaybarlinks & Drop Brackets (front only) - the rear is in my Kelderman kit.
- Stryker track arm bar.
- 20 gallon gray tank
- 60 gallon diesel tank. Not sure if I am going to have a custom one made or go with the Titan tank. I think if I have one made I will be able to utilize the space between the frame rails much better... We will see....
- Lastly, after the suspension install, I will need to measure for 2.0 remote reservoir adjustable King shocks so they can be made.
Next step after this is the 4 point subframe. I am debating if I am going to extend the frame 3-4 feet first before the 4 point subframe build starts. Still batting that around in my head. I would like more floor space in the camper build so still thinking..
.
IMG_3409.jpg
 

PacificNorthWestJeeper

Blissfully Lost
The slow down on this build is now selling the flatbed...
I have literally ran out of room and can't make any moves until the flatbed is gone.
Once gone I am full steam ahead with parts ready to install.... Hopefully soon...
 

PacificNorthWestJeeper

Blissfully Lost
Good question, totally forgot to throw the latest purchases in.
I am building it.
I bought 3 inch round steel bar (6 foot) that I will cut to length & lathe. I bought the below bronze oil impregnated bushing that has a silly high compression rating, they'll never wear/crush.
I will press the bushings (4) into ½ wall tube which will act as the base for welding on the supporting bracketry of the 4 point. I have left over ½ plate from an old project I will use to make the bracketry.
The rest of the 4 point build is pretty straight forward, Ill lay it all out when I get there.
 

Attachments

  • Subframe3.jpg
    Subframe3.jpg
    1.8 MB · Views: 17
  • Subframe1.jpg
    Subframe1.jpg
    1 MB · Views: 17
  • Subframe 2.Jpg
    Subframe 2.Jpg
    1.5 MB · Views: 17
Last edited:

PacificNorthWestJeeper

Blissfully Lost
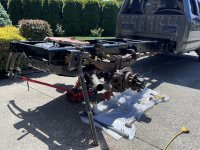
Big morning, SOLD IT!
Got to admit, that flatbed sitting on 4 camper jacks was rrreeall sketchy, moving back and forth and side to side. I was waiting for a jacks to fold but they held and did the job...
Loaded onto of the buyers own flatbed and off he went, BAM, done...
Not much rust on the frame and it appears to be surface rust.
I need to figure out which wires go to the flatbed and label those for the future.
Next step is to sand off the rust and give it a nice new coat of black paint...
After that it is time to start the suspension and brake overhaul....
More to come, just excited to finally be able to start making some headway...
.FLatbedsold8.jpgFlatbedsold2.jpgFlatbedsold3.jpgFlatbedsold5.jpg
 
Last edited:

PacificNorthWestJeeper

Blissfully Lost
Sanded the rust off today, the nooks and crannies ended up encapsulated with some Eastwood paint. Then a coat of Rustoleum on top of that...
Im not painting the springs or hanger bracketry since it will soon be coming off...
Rolled a tire out today to get an idea of what's to come....
.
.
Frame Paint1.jpgFrame Paint4.jpg
 

Attachments

  • Frame Paint2.jpg
    Frame Paint2.jpg
    1,014.2 KB · Views: 25
  • Frame Paint3.jpg
    Frame Paint3.jpg
    1.2 MB · Views: 23
  • Frame Paint5.jpg
    Frame Paint5.jpg
    1.3 MB · Views: 23

PacificNorthWestJeeper

Blissfully Lost
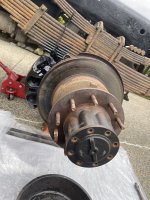
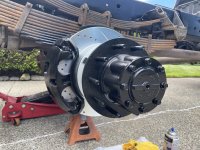
With the back part of the frame sanded, protected/painted it was time to move onto the rear brakes.
Most everything about the brakes was a slug fest!
First taking the tires off, the outers were not too bad, the inners required a sledge hammer with dozens of hits, finally those came off.
Pulling the calipers off and taking out the axles shaft, pretty straight forward....
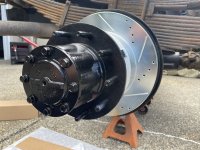
Then came the hubs and rotors, the bolts were not too bad but I went back to the sledge hammer to get the rotors & hubs off.
This was the toughest part, it took hit after hit after hit and rotating the rotor and blah blah blah, but finally they came off.
I took the rotors off the hubs, cleaned up the hubs and pulled out the seal with a slide hammer.
I replaced the inner and outer bearings for good measure as well as the hub seals and axle shaft seals.
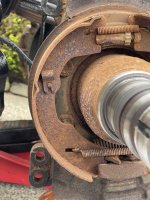
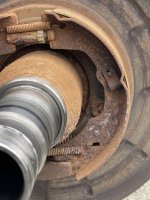
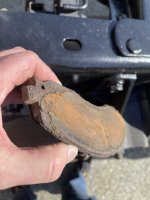
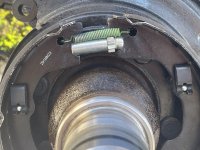
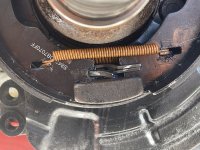
The parking brake pads were almost to metal as well as the caliper pads which were all replaced.
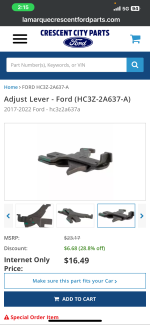
The parking brake lever (see pick below) was frozen and would not move so I replaced that as well. Heck I replaced a lot.. The calipers looked pretty good, almost like they had been replaced at some point.
I used the semigloss caliper high heat paint, all turned out pretty clean.... I'd say I sanded by hand for about 2-3 hours total.
It took a while to find the torque settings on the net and calling the Ford dealer, then it was time to put the PowerStop kit on.
The install was pretty straight forward.
Installing the hub seal did take a bit of finagling. I did not want to buy a 80 dollar seal installer (plus shipping) so I went to Lowe's. I bought a 5 inch hole saw ($35.00) and ground down the teeth. It fit perfect, I then hammered in the seal.
After the cleaning and install was done I was pretty happy with the results.
Now onto taking off the rear springs and bracketry and installing the Kelderman kit in the rear.....
.
.
A Little Before And After Below:
:
:
RustedBrake1.jpgRustedBrakes4.jpgRustedBrakes2.jpgRusted Brakes3.jpgRustedBrakes5.jpgNew Brakes1.pngNewBrakes2.jpgNewBrakes3.jpgNewBrakes4.jpgNewBrakes5.jpg
 
Last edited:

PacificNorthWestJeeper

Blissfully Lost
In preparation for the rear suspension I knew I would have to get longer rear sway bar links.
I will be adding 2 ½ inches of lift via spacers I will make for the air bags front and rear.
I found that Moog made replica's of Ford's that are 2.5 inches longer, perfect!. ITEM # K700905 - I sprayed them with a clear coat for good measure.
SwayBarMoog1.jpgSwayBarMoog2.jpg
.
.
 
Last edited:

PacificNorthWestJeeper

Blissfully Lost
- Pulled springs off this weekend = 25-ish minutes...
- Drilled out, chiseled off, and air hammered out the 16 rivets holding on the 4 spring 'Helper Brackets' = 2 hours....
- I wire brushed the axle and put a couple coats of semi gloss rust-oleum on...

All ready to start installing the Kelderman rear kit now, just need 2.5 inch or 3 inch spacers for the air bags..
.
.
 

Attachments

  • Axle1.jpg
    Axle1.jpg
    3.4 MB · Views: 22
  • Axle2.jpg
    Axle2.jpg
    4.1 MB · Views: 20
  • Axle3.jpg
    Axle3.jpg
    4.7 MB · Views: 19
  • Axle4.jpg
    Axle4.jpg
    4.8 MB · Views: 19
  • Axle5.jpg
    Axle5.jpg
    5.1 MB · Views: 20
  • Like
Reactions: mog

PacificNorthWestJeeper

Blissfully Lost
Need some help, I am looking for SIX 2.5 inch or 3 inch spacers to go under my air bags.
The Firestone Part # for the airbags is W01-358-5323
The bottom of the airbag mount/cup is 7 3/16 inches wide in diameter (see pic below). 7 ¼ would probably work out better for a spacer diameter for the bag to sit on.
The bolt hole is the center is ½ inch.
I checked Firestone, Continental and did not see any spacers for these.
If there are none out there my thought are:
1) Steel plate(s) cut circular and welded together to get 2.5 inches of height.
2) Steel tube 7 ½ inside diameter and then weld a round base into it to give me the 2.5 inches of height.
3) Forged aluminum round block 2.5 inches high 7 ½ diameter.
* Let me know is you find some or have a better idea on how to get 2.5 inches of lift under these.
.
.
AirBag3.jpg
AirBag1.jpg
AirBag2.jpg
 

PacificNorthWestJeeper

Blissfully Lost
The latest update:
- Inner & Outer bearings on rear axles replaced for good measure.
- New parking brakes installed.
- Rotors and Pads are now in.
- All rear leaf spring brackets unbolted and rivets for brackets all cut off (air hammered).
- Rear frame sanding and painting done. It didn't smooth out perfectly, it left some pitting behind but I did not want to grind the frame down any further. The rust is gone so moving on...
.
.
Brakes 1.jpgBrakes2.jpgBrakes3.jpgFrame1.jpgFrame2.jpg
 

PacificNorthWestJeeper

Blissfully Lost
Spacer update:
I purchased 7 ¼ diameter 2.5" tall round 6061 (T6511) aluminum blocks.
I found center, drilled them out and put a coat of etching primer and semigloss paint on them.
I did have to buy longer bolts to be able to reach far enough through these up into the threaded base of the airbags.
They came out pretty good and should do the trick.
.
.
Spacer4.jpgSpacer1.jpgSpacer2.jpgSpacer5.jpg
 
Last edited:

Forum statistics

Threads
188,399
Messages
2,906,844
Members
230,176
Latest member
Arcadia1415
Top
­