2017 F-550 Camper Build - Ground Up

Darwin

Explorer
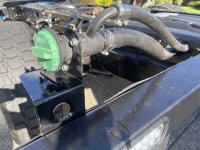
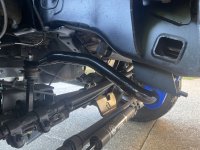
I was able to square away the wheel wells today. You can see (below) where the factory wheel well liner stops and the BuckStop wheel well liner starts. Essentially you reinstall the factory liner and then install the BuckStop liner which the factory liner just rests on top of. Eh, it works....
My mind went to making aluminum wheel well liners and bolting them in but.....'good enough for government work'.... I'm moving on....
.
.
View attachment 858740View attachment 858741View attachment 858742
What was the thickness of the material you used? I am thinking about doing something similar but on a Ram
 

PacificNorthWestJeeper

Blissfully Lost
What was the thickness of the material you used? I am thinking about doing something similar but on a Ram

1/8th Aluminum

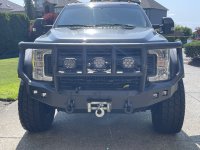
As a quick update, nothing exciting, I am wiring the lights, winch, and 60 gallon tank.. Also need to align all lights, they're just kinda sitting there right now not tightened up... Haven't had a lot of time on the weekends lately. Hoping to make some good headway with it next weekend...
.
BumperOn.jpg
 

PacificNorthWestJeeper

Blissfully Lost
Been a while, didn't want to muddy this up with wiring and air line running that would put everyone to sleep... Took me a while....

Update:
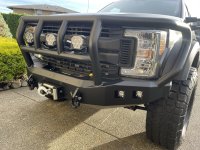
- Had to cut the ends of the bumper protruding into the wheel wells, tires rubbed at these points. I cut, welded in new backing plates on the ends of the bumper and painted it. Done..
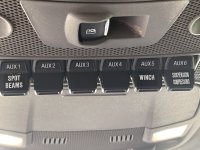
- Wired Morimoto spot lights to #1 Upfitter switch... Done
- Wired H3 compressors & air direr to #6 Upfitter Switch....Done
- Wired Rigid flood lights to factory driving lights button.... Done
- Wired winch/solenoid to #5 Upfitter Switch.... Done
- Found labels and installed them on Upfitter Switches... Done with a few blank switches left for future fun.
- Finished wiring the H3 air system (dual compressors & air drier).... Done
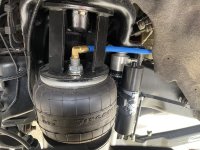
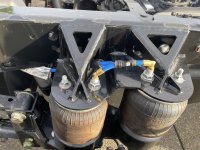
- Plumbed the air lines back to the H3 system. I didn't use the plastic push connectors provided, I upgraded to all brass connectors where I could... Done
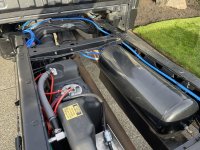
- Color coded, with split loom, all accessories I added. Figured it will help me troubleshoot if needed..... YELLOW: winch BLUE: air lines GREEN: H3 electrical wires RED: 60 gallon fuel tank pump electrical..... Done
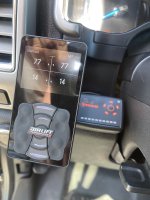
- Programmed the H3 suspension controller on the dash and downloaded the H3 controller app on my phone so I can now controll the suspension from my phone or in the cab with the H3 controller.... Done
- Raised the temporary fuel neck up as suggested earlier in the thread. Had to cut/bend/dimple die/paint a bracket. Thank you MFV56, you were right, I could only get .43 cents of fuel in at the gas station.... Done
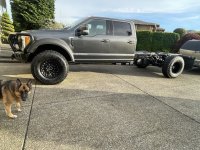
- Truck is sitting at ride height in pic below.

What's next:
- Recheck the rear hubs and ensure the hub nut is not rubbing on the inside of the hub. Retighten as necessary.
- Need to get an alignment. I found a place that has an alignment rack that the truck will fit on. Keeping in mind I bought the adjustable FRONT panhard to help center the axle. The new REAR panhard bar Kelderman supplies is not adjustable and meant for factory ride height. If needed the same guy doing the alignment said he can fab up a rear panhard bar if needed. So the alignment should be a one-stop-shop... They are only open m-f 9 to 5 though sssooo I will have to figure out how to get in there with my schedule. Shooting to get this done in 2-4 weeks...
- Once aligned then the frame extension will begin so I can move on to the torsion free subframe build.
Going ALOT slower than expected. Wish I had more time on my hands...
.
.
IMG_0311.jpegIMG_0312.jpegIMG_0313.jpegIMG_0314.jpegIMG_0315.jpegIMG_0344.jpegIMG_0346.jpegIMG_0356.jpegIMG_0355.jpegIMG_0358.jpg
 
Last edited:

unreng

Active member
Keeping in mind I bought the adjustable FRONT panhard to help center the axle. The new REAR panhard bar Kelderman supplies is not adjustable and meant for factory ride height. If needed the same guy doing the alignment said he can fab up a rear panhard bar if needed.

Would this adjustable rear bar fit the Kelderman bracket? If so, we would be seriously interested in one if the shop is interested in building more than one (the Kelderman bar is not an efficient design 🙃). 😁

Nice job on the color coding... just not a fan of split loom after several years on a vehicle as it becomes non pliable.

What is the titan gauge? 🤔
 

PacificNorthWestJeeper

Blissfully Lost
UNRENG:
- Track Bar: no idea on that, will cross that path if it's determined if I need one in the rear. I would opt for cutting the rear track bar and sleeving it with DOM tube for the right length if it comes down to it.
- With the split loom, by the time it gets crudy I'll probably be moving on to my next build.... : ) Split loom allows me easy access, so went for it...
- Not sure of the gauge. When I spoke to Titan I told them I was going to make a skid plate for it. He laughed and said no need, they only had 2 get punctured in weird accidents one of which being pierced by a pipe traveling at over 60+ mph.... Titan has a lifetime warranty for punctures and will send me a new tank. If this was my primary tank I would be thinking a little more about skid platting it...
 
Last edited:

unreng

Active member
UNRENG:
- Track Bar: no idea on that, will cross that path if it's determined if I need one in the rear. I would opt for cutting the rear track bar and sleeving it with DOM tube for the right length if it comes down to it.
- With the split loom, by the time it gets crudy I'll probably be moving on to my next build.... : ) Split loom allows me easy access, so went for it...
- Not sure of the gauge. When I spoke to Titan I told them I was going to make a skid plate for it. He laughed and said no need, they only had 2 get punctured in weird accidents one of which being pierced by a pipe traveling at over 60+ mph.... Titan has a lifetime warranty for punctures and will send me a new tank. If this was my primary tank I would be thinking a little more about skid platting it...
I was talking about the digital titan gauge on your dash. 😁
 

PacificNorthWestJeeper

Blissfully Lost
Ahh, the Titian Tank Fuel Gauge. The bottom white dots light up to show you the level of the fuel, currently empty so they are not lit.
The upper right circle surrounded by 5 red lights is used to feed the factory tank. You push the center button and 5 gallons pump from the Titan tank into your factory tank. The surrounding red lights act as a countdown to tell you when it is full. Every time you hit the button 5 more gallons will pump into the factory tank at a a time...
 

Forum statistics

Threads
190,053
Messages
2,923,559
Members
233,330
Latest member
flipstick
Top