Note: Similar to all OEV campers for 2023, the "CAMP-X" has been renamed and will now be known as the "Back Country". There is also now a shell version known as the "Cross Country".
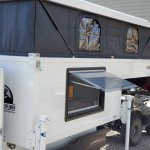
2020 Overland Explorer Vehicles (OEV) CAMP-X pop-up slide-in pickup camper

Overview:
Overland Explorer is a division of LITE Industries, Inc. and is based in Red Deer, AB, Canada. As of this writing, Big Sky RV in Bozeman, MT, USA is the sole U.S. Distributor. I'd been following Overland Explorer's conversions and builds for years. In 2018, I saw an online video of their CAMP-X prototype. In 2019, they began producing the CAMP X. I was interested due to the build materials and high end components. I pass by Big Sky RV on my daily work commute and in the fall of 2019, I was surprised to see a CAMP-X on their lot as I drove by. I stopped in for my first in-person look. 3 more trips back to look at them with my wife, sit in them and talk through day-to-day use, take measurements, etc. Since it was fall, we took pause over the winter to think about it. Spring of 2020, I started communicating directly with Arnold at Overland Explorer and again with BigSkyRV. My wife ad I evaluated and compared the 2019 versions on the lot to the first run of the 2020 version that had not yet left Red Deer. We ended up ordering, and taking possession of, a 2020 CAMP-X.
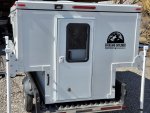
The pickup brackets I've not yet seen, but they are custom to each pickup brand and get bolted to the bed floor using the pickup bed bolts. Since the pickup brackets have not yet arrived, I transported the CAMP-X home using the previously installed eyebolts used for our FWC. They are not in the ideal place for the CAMP-X, but I made due as the drive home is only 2 miles and on 40mph backroad (and I drove 25 - 30mph). I'll add additional info/insight once the brackets are installed, truck wiring is done, camper is loaded onto truck and we get some experience with it. In the meantime, I have the camper sitting in the shop on the 5x8 trailer that I use for a dolly. I lower the legs to take some of the weight off the trailer and to stabilize, but can easily crank up the legs and back outside such as for the photos in the next few posts.
Available options (note they are considering making some options standard):
- King bed pullout
- Extra roof Vent/Fan
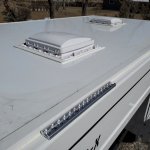
- Roof rack (connects to L-track that is standard on all campers)
- Offroad lights mounted on cabover rack
- Fridge cabinet and fridge delete
- Thermobreak foam kit applied to cabin extrusion (the extrusions are the only place thermal bridging can occur and the foam kit's intent is to reduce/eliminate condensation on the extrusions)
We have:
- King bed pullout
- Extra roof vent/fan in cabover (requested to be offset to the drivers-side)
- Thermobreak foam kit
Things different on the 2020 from the 2019 (There may be more)
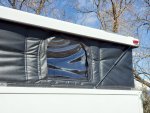
- Zippered window insulation flaps rather than Velcro and fully removable cover
- Improved dinette table mechanism
- Four 12” L-Track sections on roof
- Stand-alone LED dome light added next to vent/fan; Vent/fan no longer includes a built-in light
- More scratch resistant counter top surface
- Rounded counter top corners over fridge
- Outside shower connector moved to side of camper rather than at rear of camper (to facilitate a camper-mounted shower curtain and position water runoff away from rear door)
- Various wiring/breaker/disconnect improvements
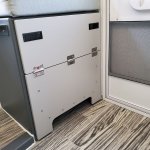
- Relocation of REDARC battery management system into same compartment as water tank, battery box and water pump. The expansion of that compartment made the under-fridge compartment smaller
- Dedicated battery box with outside venting, to accommodate lead acid batteries, rather than a non-vented, lithium-only battery tray sitting in the open within the water tank/pump cabinet.
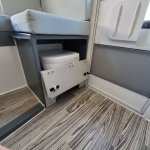
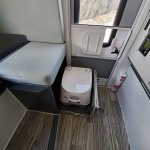
- Pull-out potty drawer faced with Starboard material (same material as the other cabinets) rather than aluminum
- Addition of 120v outlet on countertop and under sink (live only when on shore-power)
- Additional touches like etched switch labeling on the interior control panel and branded propane tank-door vent
Features that drew us to the CAMP-X:
- Composite panel/extrusion construction: Walls are R-8 rated and no thermal bridging and condensation like on aluminum-framed construction. Nice benefit is the interior ceiling is solid rather than white-styrofoam between aluminum framing. When raising the roof, one can push up anywhere on the solid roof panel rather than on specific board/panels.
- Insulated pop-up walls. Hoping this will eliminate condensation on the popup canvas. It may increase sound deadening slightly. The added R-factor (R-4) may also reduce furnace run-time, but elimination of condensation was our main interest.
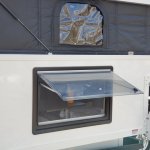
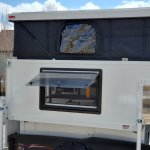
- Dometic window sits high on the wall so much better exterior view when seated at the dinette
- REDARC Manager 30 battery management system (I'll shorten this to “REDARC” for the remainder of this writing even though REDARC makes many products). I love these units and is what I would put in a camper if building from scratch.
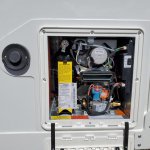
- Truma heater and water heater units. Again, the units I'd use if building a camper from scratch. The heater is multi-stage and the water heater is tankless/instant.
- There is enough sidewall height that one can sit at the dinette comfortably with the top still down.
- There is enough room on the cabover bed that pillows and bedding can stay on the bed, with the top down, rather than unmaking and packing into and out of storage every time we put the top down.
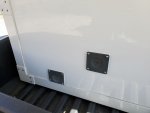
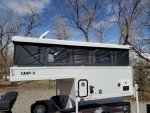
The pictures of the camper temporary sitting on the truck are with the camper still sitting a bit higher than it's long term ride height. I had both a 3/4" rubber mat and 2x4s under the floorpack to get it to clear the bedrails. My bedrails are about 22.5" tall and the camper overhang is 21.75" above the floorpack. The 3/4" rubber mat compressed just enough so the camper overhang started to touch down on the top of the bedrails at about the same time as it touched down on the mat. I will temporarily double up the 3/4" mat but will see if the 3/4" paired with 1/4" or 1/2" of another mat gives me the clearance I need. Of interest, Arnold, at Overland Explorer, shared that the floorpack support must be under the perimeter of the floorpack under the extrusions but that no mat/floorpack support is needed under the majority of the floor (the center of the floorpack). For the time being, I've cut down the 90 lb rubber mat to 4" wide strips that I'll double up. One floor mat weight 90lbs. By cutting the needed strips and doubling those up, weight is down to 60lbs as I only used 2/3 of the mat. To double up the entire mat would have been a waste and would weigh 180lbs. So taking the time to cut down to the needed strips, weighing 60lbs, saves 120lbs over doubling up to full bed mats. Well worth the time with a utility knife. (Edit: As Overland Explorer has gained data for different pickup bedrail heights, they are now installing slats under the camper floor so the ride height will be appropriate for the model pickup. Overland Explorer sent me a set of these slats and hardware at no charge. Thanks guys!)
I'll add pictures of mats when the truck brackets arrive and everything gets mounted. Then I'll determine if I can use the 3/4" tall mat strips with an additional 1/4" or 1/2" tall mat rather than doubling up the 3/4". I want the camper to sit as close to the top of the bed rails as possible which will also make the pickup roof to cabover gap as small as possible. I'll be able to make that call once I see the design of the brackets.

We still have the clear protective plastic on the white cabinet doors. We'll remove it once truck brackets are installed and no more trips back to the dealership are needed.


On the control panel from left to right:
Top row: REDARC controller, dual USB charger (under flap), 12v charger (under flap), Interior light switch, exterior light switch, water pump switch.
Second row: Truma Controller. Truma heater outlet.
The 120v outlet on the counter (and under the sink) are only hot when on shorepower. Dometic stove (left) and sink (right) are flat top.

REDARC controller, USB charger, 12v charger, Interior light switch, exterior light switch, water pump switch. Second row: Truma Controller for Truma heater and Truma water heater. Truma heater outlet.

Inside drop down panel. Labeled, tidy and easy access to everything.

Top notch plumbing work. Truma instant water heater has bypass so you can easily shut off water supply, pull out the filter from the outside panel to drain the water if there is a cold snap. Water heater is exposed to outside air via the exterior vent and you do NOT want water to freeze in your water heater. Takes about 30 seconds to flip the bypass and then go outside and pull the filter and let the minimal amount of water drain out of it. Important: When you pull the filter out of Truma instant water heaters to drain them, do not re-insert the filter. Leave it out.

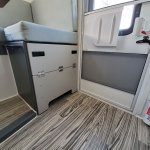
Storage under stove and sink. 120v breaker box and outlet is new for 2020. The cord that is plugged into the outlet is the AC plug for the REDARC. When on shorepower, the outlet is energized and the REDARC starts charging the battery off of AC.

Storage under the sink (behind the breakerbox panel).

2020 Overland Explorer Vehicles (OEV) CAMP-X pop-up slide-in pickup camper

Overview:
Overland Explorer is a division of LITE Industries, Inc. and is based in Red Deer, AB, Canada. As of this writing, Big Sky RV in Bozeman, MT, USA is the sole U.S. Distributor. I'd been following Overland Explorer's conversions and builds for years. In 2018, I saw an online video of their CAMP-X prototype. In 2019, they began producing the CAMP X. I was interested due to the build materials and high end components. I pass by Big Sky RV on my daily work commute and in the fall of 2019, I was surprised to see a CAMP-X on their lot as I drove by. I stopped in for my first in-person look. 3 more trips back to look at them with my wife, sit in them and talk through day-to-day use, take measurements, etc. Since it was fall, we took pause over the winter to think about it. Spring of 2020, I started communicating directly with Arnold at Overland Explorer and again with BigSkyRV. My wife ad I evaluated and compared the 2019 versions on the lot to the first run of the 2020 version that had not yet left Red Deer. We ended up ordering, and taking possession of, a 2020 CAMP-X.
The pickup brackets I've not yet seen, but they are custom to each pickup brand and get bolted to the bed floor using the pickup bed bolts. Since the pickup brackets have not yet arrived, I transported the CAMP-X home using the previously installed eyebolts used for our FWC. They are not in the ideal place for the CAMP-X, but I made due as the drive home is only 2 miles and on 40mph backroad (and I drove 25 - 30mph). I'll add additional info/insight once the brackets are installed, truck wiring is done, camper is loaded onto truck and we get some experience with it. In the meantime, I have the camper sitting in the shop on the 5x8 trailer that I use for a dolly. I lower the legs to take some of the weight off the trailer and to stabilize, but can easily crank up the legs and back outside such as for the photos in the next few posts.
Available options (note they are considering making some options standard):
- King bed pullout
- Extra roof Vent/Fan
- Roof rack (connects to L-track that is standard on all campers)
- Offroad lights mounted on cabover rack
- Fridge cabinet and fridge delete
- Thermobreak foam kit applied to cabin extrusion (the extrusions are the only place thermal bridging can occur and the foam kit's intent is to reduce/eliminate condensation on the extrusions)
We have:
- King bed pullout
- Extra roof vent/fan in cabover (requested to be offset to the drivers-side)
- Thermobreak foam kit
Things different on the 2020 from the 2019 (There may be more)
- Zippered window insulation flaps rather than Velcro and fully removable cover
- Improved dinette table mechanism
- Four 12” L-Track sections on roof
- Stand-alone LED dome light added next to vent/fan; Vent/fan no longer includes a built-in light
- More scratch resistant counter top surface
- Rounded counter top corners over fridge
- Outside shower connector moved to side of camper rather than at rear of camper (to facilitate a camper-mounted shower curtain and position water runoff away from rear door)
- Various wiring/breaker/disconnect improvements
- Relocation of REDARC battery management system into same compartment as water tank, battery box and water pump. The expansion of that compartment made the under-fridge compartment smaller
- Dedicated battery box with outside venting, to accommodate lead acid batteries, rather than a non-vented, lithium-only battery tray sitting in the open within the water tank/pump cabinet.
- Pull-out potty drawer faced with Starboard material (same material as the other cabinets) rather than aluminum
- Addition of 120v outlet on countertop and under sink (live only when on shore-power)
- Additional touches like etched switch labeling on the interior control panel and branded propane tank-door vent
Features that drew us to the CAMP-X:
- Composite panel/extrusion construction: Walls are R-8 rated and no thermal bridging and condensation like on aluminum-framed construction. Nice benefit is the interior ceiling is solid rather than white-styrofoam between aluminum framing. When raising the roof, one can push up anywhere on the solid roof panel rather than on specific board/panels.
- Insulated pop-up walls. Hoping this will eliminate condensation on the popup canvas. It may increase sound deadening slightly. The added R-factor (R-4) may also reduce furnace run-time, but elimination of condensation was our main interest.
- Dometic window sits high on the wall so much better exterior view when seated at the dinette
- REDARC Manager 30 battery management system (I'll shorten this to “REDARC” for the remainder of this writing even though REDARC makes many products). I love these units and is what I would put in a camper if building from scratch.
- Truma heater and water heater units. Again, the units I'd use if building a camper from scratch. The heater is multi-stage and the water heater is tankless/instant.
- There is enough sidewall height that one can sit at the dinette comfortably with the top still down.
- There is enough room on the cabover bed that pillows and bedding can stay on the bed, with the top down, rather than unmaking and packing into and out of storage every time we put the top down.
The pictures of the camper temporary sitting on the truck are with the camper still sitting a bit higher than it's long term ride height. I had both a 3/4" rubber mat and 2x4s under the floorpack to get it to clear the bedrails. My bedrails are about 22.5" tall and the camper overhang is 21.75" above the floorpack. The 3/4" rubber mat compressed just enough so the camper overhang started to touch down on the top of the bedrails at about the same time as it touched down on the mat. I will temporarily double up the 3/4" mat but will see if the 3/4" paired with 1/4" or 1/2" of another mat gives me the clearance I need. Of interest, Arnold, at Overland Explorer, shared that the floorpack support must be under the perimeter of the floorpack under the extrusions but that no mat/floorpack support is needed under the majority of the floor (the center of the floorpack). For the time being, I've cut down the 90 lb rubber mat to 4" wide strips that I'll double up. One floor mat weight 90lbs. By cutting the needed strips and doubling those up, weight is down to 60lbs as I only used 2/3 of the mat. To double up the entire mat would have been a waste and would weigh 180lbs. So taking the time to cut down to the needed strips, weighing 60lbs, saves 120lbs over doubling up to full bed mats. Well worth the time with a utility knife. (Edit: As Overland Explorer has gained data for different pickup bedrail heights, they are now installing slats under the camper floor so the ride height will be appropriate for the model pickup. Overland Explorer sent me a set of these slats and hardware at no charge. Thanks guys!)
I'll add pictures of mats when the truck brackets arrive and everything gets mounted. Then I'll determine if I can use the 3/4" tall mat strips with an additional 1/4" or 1/2" tall mat rather than doubling up the 3/4". I want the camper to sit as close to the top of the bed rails as possible which will also make the pickup roof to cabover gap as small as possible. I'll be able to make that call once I see the design of the brackets.

We still have the clear protective plastic on the white cabinet doors. We'll remove it once truck brackets are installed and no more trips back to the dealership are needed.


On the control panel from left to right:
Top row: REDARC controller, dual USB charger (under flap), 12v charger (under flap), Interior light switch, exterior light switch, water pump switch.
Second row: Truma Controller. Truma heater outlet.
The 120v outlet on the counter (and under the sink) are only hot when on shorepower. Dometic stove (left) and sink (right) are flat top.

REDARC controller, USB charger, 12v charger, Interior light switch, exterior light switch, water pump switch. Second row: Truma Controller for Truma heater and Truma water heater. Truma heater outlet.

Inside drop down panel. Labeled, tidy and easy access to everything.

Top notch plumbing work. Truma instant water heater has bypass so you can easily shut off water supply, pull out the filter from the outside panel to drain the water if there is a cold snap. Water heater is exposed to outside air via the exterior vent and you do NOT want water to freeze in your water heater. Takes about 30 seconds to flip the bypass and then go outside and pull the filter and let the minimal amount of water drain out of it. Important: When you pull the filter out of Truma instant water heaters to drain them, do not re-insert the filter. Leave it out.

Storage under stove and sink. 120v breaker box and outlet is new for 2020. The cord that is plugged into the outlet is the AC plug for the REDARC. When on shorepower, the outlet is energized and the REDARC starts charging the battery off of AC.

Storage under the sink (behind the breakerbox panel).

Last edited:


