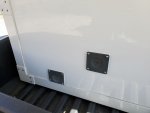
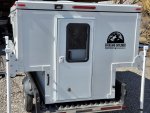
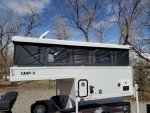
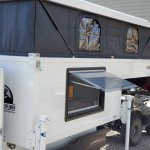
2020 Overland Explorer Vehicles (OEV) CAMP-X pop-up slide-in pickup camper (renamed "Back Country" as of 2023)

Chadx

♫ Off road, again. Just can't wait to get...
Note: Similar to all OEV campers for 2023, the "CAMP-X" has been renamed and will now be known as the "Back Country". There is also now a shell version known as the "Cross Country".

2020 Overland Explorer Vehicles (OEV) CAMP-X pop-up slide-in pickup camper

thumbnail_20200325_120727.jpg


Overview:
Overland Explorer is a division of LITE Industries, Inc. and is based in Red Deer, AB, Canada. As of this writing, Big Sky RV in Bozeman, MT, USA is the sole U.S. Distributor. I'd been following Overland Explorer's conversions and builds for years. In 2018, I saw an online video of their CAMP-X prototype. In 2019, they began producing the CAMP X. I was interested due to the build materials and high end components. I pass by Big Sky RV on my daily work commute and in the fall of 2019, I was surprised to see a CAMP-X on their lot as I drove by. I stopped in for my first in-person look. 3 more trips back to look at them with my wife, sit in them and talk through day-to-day use, take measurements, etc. Since it was fall, we took pause over the winter to think about it. Spring of 2020, I started communicating directly with Arnold at Overland Explorer and again with BigSkyRV. My wife ad I evaluated and compared the 2019 versions on the lot to the first run of the 2020 version that had not yet left Red Deer. We ended up ordering, and taking possession of, a 2020 CAMP-X.

The pickup brackets I've not yet seen, but they are custom to each pickup brand and get bolted to the bed floor using the pickup bed bolts. Since the pickup brackets have not yet arrived, I transported the CAMP-X home using the previously installed eyebolts used for our FWC. They are not in the ideal place for the CAMP-X, but I made due as the drive home is only 2 miles and on 40mph backroad (and I drove 25 - 30mph). I'll add additional info/insight once the brackets are installed, truck wiring is done, camper is loaded onto truck and we get some experience with it. In the meantime, I have the camper sitting in the shop on the 5x8 trailer that I use for a dolly. I lower the legs to take some of the weight off the trailer and to stabilize, but can easily crank up the legs and back outside such as for the photos in the next few posts.

Available options (note they are considering making some options standard):
- King bed pullout
- Extra roof Vent/Fan
- Roof rack (connects to L-track that is standard on all campers)
- Offroad lights mounted on cabover rack
- Fridge cabinet and fridge delete
- Thermobreak foam kit applied to cabin extrusion (the extrusions are the only place thermal bridging can occur and the foam kit's intent is to reduce/eliminate condensation on the extrusions)

We have:
- King bed pullout
- Extra roof vent/fan in cabover (requested to be offset to the drivers-side)
- Thermobreak foam kit

Things different on the 2020 from the 2019 (There may be more)
- Zippered window insulation flaps rather than Velcro and fully removable cover
- Improved dinette table mechanism
- Four 12” L-Track sections on roof
- Stand-alone LED dome light added next to vent/fan; Vent/fan no longer includes a built-in light
- More scratch resistant counter top surface
- Rounded counter top corners over fridge
- Outside shower connector moved to side of camper rather than at rear of camper (to facilitate a camper-mounted shower curtain and position water runoff away from rear door)
- Various wiring/breaker/disconnect improvements
- Relocation of REDARC battery management system into same compartment as water tank, battery box and water pump. The expansion of that compartment made the under-fridge compartment smaller
- Dedicated battery box with outside venting, to accommodate lead acid batteries, rather than a non-vented, lithium-only battery tray sitting in the open within the water tank/pump cabinet.
- Pull-out potty drawer faced with Starboard material (same material as the other cabinets) rather than aluminum
- Addition of 120v outlet on countertop and under sink (live only when on shore-power)
- Additional touches like etched switch labeling on the interior control panel and branded propane tank-door vent

Features that drew us to the CAMP-X:
- Composite panel/extrusion construction: Walls are R-8 rated and no thermal bridging and condensation like on aluminum-framed construction. Nice benefit is the interior ceiling is solid rather than white-styrofoam between aluminum framing. When raising the roof, one can push up anywhere on the solid roof panel rather than on specific board/panels.
- Insulated pop-up walls. Hoping this will eliminate condensation on the popup canvas. It may increase sound deadening slightly. The added R-factor (R-4) may also reduce furnace run-time, but elimination of condensation was our main interest.
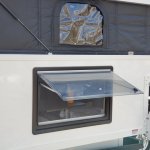
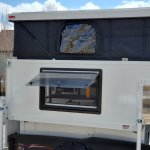
- Dometic window sits high on the wall so much better exterior view when seated at the dinette
- REDARC Manager 30 battery management system (I'll shorten this to “REDARC” for the remainder of this writing even though REDARC makes many products). I love these units and is what I would put in a camper if building from scratch.
- Truma heater and water heater units. Again, the units I'd use if building a camper from scratch. The heater is multi-stage and the water heater is tankless/instant.
- There is enough sidewall height that one can sit at the dinette comfortably with the top still down.
- There is enough room on the cabover bed that pillows and bedding can stay on the bed, with the top down, rather than unmaking and packing into and out of storage every time we put the top down.

The pictures of the camper temporary sitting on the truck are with the camper still sitting a bit higher than it's long term ride height. I had both a 3/4" rubber mat and 2x4s under the floorpack to get it to clear the bedrails. My bedrails are about 22.5" tall and the camper overhang is 21.75" above the floorpack. The 3/4" rubber mat compressed just enough so the camper overhang started to touch down on the top of the bedrails at about the same time as it touched down on the mat. I will temporarily double up the 3/4" mat but will see if the 3/4" paired with 1/4" or 1/2" of another mat gives me the clearance I need. Of interest, Arnold, at Overland Explorer, shared that the floorpack support must be under the perimeter of the floorpack under the extrusions but that no mat/floorpack support is needed under the majority of the floor (the center of the floorpack). For the time being, I've cut down the 90 lb rubber mat to 4" wide strips that I'll double up. One floor mat weight 90lbs. By cutting the needed strips and doubling those up, weight is down to 60lbs as I only used 2/3 of the mat. To double up the entire mat would have been a waste and would weigh 180lbs. So taking the time to cut down to the needed strips, weighing 60lbs, saves 120lbs over doubling up to full bed mats. Well worth the time with a utility knife. (Edit: As Overland Explorer has gained data for different pickup bedrail heights, they are now installing slats under the camper floor so the ride height will be appropriate for the model pickup. Overland Explorer sent me a set of these slats and hardware at no charge. Thanks guys!)

I'll add pictures of mats when the truck brackets arrive and everything gets mounted. Then I'll determine if I can use the 3/4" tall mat strips with an additional 1/4" or 1/2" tall mat rather than doubling up the 3/4". I want the camper to sit as close to the top of the bed rails as possible which will also make the pickup roof to cabover gap as small as possible. I'll be able to make that call once I see the design of the brackets.

thumbnail_20200325_120753.jpg


We still have the clear protective plastic on the white cabinet doors. We'll remove it once truck brackets are installed and no more trips back to the dealership are needed.
20200405_120457.jpg

20200405_120509.jpg


On the control panel from left to right:
Top row: REDARC controller, dual USB charger (under flap), 12v charger (under flap), Interior light switch, exterior light switch, water pump switch.
Second row: Truma Controller. Truma heater outlet.
The 120v outlet on the counter (and under the sink) are only hot when on shorepower. Dometic stove (left) and sink (right) are flat top.
20200405_120519.jpg


REDARC controller, USB charger, 12v charger, Interior light switch, exterior light switch, water pump switch. Second row: Truma Controller for Truma heater and Truma water heater. Truma heater outlet.
20200405_120527.jpg


Inside drop down panel. Labeled, tidy and easy access to everything.
20200405_120537.jpg


Top notch plumbing work. Truma instant water heater has bypass so you can easily shut off water supply, pull out the filter from the outside panel to drain the water if there is a cold snap. Water heater is exposed to outside air via the exterior vent and you do NOT want water to freeze in your water heater. Takes about 30 seconds to flip the bypass and then go outside and pull the filter and let the minimal amount of water drain out of it. Important: When you pull the filter out of Truma instant water heaters to drain them, do not re-insert the filter. Leave it out.
20200405_120552.jpg


Storage under stove and sink. 120v breaker box and outlet is new for 2020. The cord that is plugged into the outlet is the AC plug for the REDARC. When on shorepower, the outlet is energized and the REDARC starts charging the battery off of AC.
20200405_120615.jpg


Storage under the sink (behind the breakerbox panel).
20200405_120658.jpg
 
Last edited:

Chadx

♫ Off road, again. Just can't wait to get...
Storage:
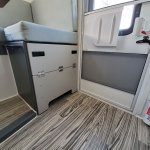
The CAMP-X has a cabinet by the rear door with a sliding drawer for a portable toilet or other storage. That is situated under the rear dinette seat. The side dinette area is more spread out (longer table and more leg room) than our previous FWC side dinette. No need to interlock legs with the person sitting across from you; we each have our own legroom in the CAMP-X. There is one storage cabinet under the sink/stove and also a floor-level cabinet under the fridge. That under-fridge cabinet got a bit smaller for 2020 because they created a vented battery box to allow owners to run lead acid rather than lithium. In 2019, the battery sat open on a trey in the underseat cabinet that also housed the 20 gallon water tank and water pump. The water tank and battery sat front to back in the 2019. For 2020, the battery is within the same compartment, but is within a sealed and vented-to-outside battery box. The REDARC unit is now mounted vertically in this larger underseat battery/water pump/water tank compartment (in 2019, the REDARC was in the under-fridge compartment mounted horizontally on a bracket handing from the top of that compartment).

Living space:
Around 6' 10” of standing room with the pop-top up. Interior layout is good and feels bigger and more open than our similarly arranged FWC. Our favorite layout, in any brand slide-in pickup camper, are the flatbed versions (whether FWC or Overland Explorer HBE “Hudson Bay Edition” or other brands). Side entry on flatbed campers just allow one to enter into a “room” rather than entering into a “hallway/galley”. But, the CAMPX feels less like a “hallway” for some reason. Likely the longer, more open dinette area. The trade-off to the larger dinette is a bit less storage.

The Dometic side window sits higher on the wall (top of window is about at least 4” higher than our previous camper). While not quite looking out at the horizon, the field if view seems to extend 40+ feet from the camper compared to about 10 feet.

One of our favorite things is how much room is available over the bed and dinette when the pop-top is down. One can sit at the dinette with the top down with no ducking (depending on your height). I'm 6', but have a long torso (more like a 6' 2" person) and if I sit is my typical relaxed sitting position, I have about 1" head clearance. If I sit at attention, I hit my head and would need 1" - 2" more headroom. By comparison, we could not sit in the FWC with the top down. This extra side wall height does contribute to the CAMPX cabover being thicker than, and overall top-down height being taller than, a FWC but having room for bedding to stay on the bed and to be able to sit in the camper with the top down makes it well worth it for us. We no longer will have to store all our covers and will no longer have to make and unmake our bed twice a day.


King pull out bed:
The CAMP-X cabover bed is roughly queen sized (76” tall by 60” wide). The king pullout is a nice option and we had it on our previous camper. In the CAMP-X, the pullout rests on two rails near/on each wall and pulls out about 15”. This extends the front to back length from 60” to 75” which allows for North-South sleeping rather than East-West and no crawling over one another to get up in the night. Due to the plywood pull-out shelf, there is a small ridge for the transition from the main part of the bed up to the pullout. In our FWC, we slept with our feet forward and head towards the back. We've not moved our mattress or pillows into this camper to try them, but with only the stock mattress, the ridge hits me right across the shoulder blades with my head towards the rear. Will have to see if I can feel it with our mattress setup. Alternate solutions may be sleeping with head towards the front or using something to make the transition more gradual. With the extra insulation factor of the pop-up, we may even try sleeping East-West since we hope condensation won't be an issue in this unit like it was in our previous.

The 5'x8' trailer that I use as a dolly.
20200405_114931.jpg


Note that the lower section is the same width for the entire length. The lower section of a FWC is wider at the back, which fills up the pickup bed behind the wheel wells. The CAMP-X being narrower will allow for easy access to the rear two turnbuckles and will also allow for storage of outdoor items in the bed of the truck (will have to figure out that storage to ensure it's secure and not bouncing around). The pros are easy access to the two rear turnbuckles. The con is...easy access to the rear turnbuckles. We don't frequent "rough" neighborhoods but if theft is a concern, the flip down turnbuckles have a safety pin and that could be replaced with a padlock.
20200405_114949.jpg


Thicker cabover allows for room on the bed so pillows and bedding can remain in place.
20200405_115015.jpg


Branding on the propane door vent is a nice touch. 30 amp plug and solar plug are side by side. Locking gravity waterfill and then the sink drainage. For 2020, outside shower connection is moved to the side, rather than rear, of the camper. This will keep water off the ground near the rear door and also would allow room for one to attach a curtained shower stall to the camper without interference from the back door.
20200405_115244.jpg


New for 2020 is an enclosed battery box vented to the exterior to allow use of various non-sealed lead acid batteries and not only lithium. For lithium use, since they require no venting, one will likely want to plug/insulate these vents so the lithium is not exposed to cold outside air. [Update: newer OEV campers no longer have vented battery boxes and the associated warning stickers noting that vented lead acid may not be used; only sealed lead acid (like typical AGM) or Lithium batteries are allowed].
20200405_115459.jpg


The CAMP-X back door is about 2" narrower and almost 6" taller than a FWC back door. Door swings left to right rather than right to left like on previous camper. Door stop also secures the door open. LET running lights and a interior-switched LED exterior light. No factory deadbolt. On our FWC, I only used the deadbolt as that key worked the quickest and smoothest. So far, the keyed RV latch and RV deadbolt seem easy enough to use. If not, I will look into getting a deadbolt installed as the house-style key and deadbolts seem to be less finicky to dust, etc.
20200405_115623.jpg


Interior popped up with four bungees in place that pull in the soft top sidewall when closing. Note that our optional extra roof vent/fan is offset, rather than centered, by our request. I like it over our heads.
20200405_120009.jpg


20200405_120027.jpg


Nice smooth ceiling. No aluminum frame to gather condensation and no white styrofoam areas where you can't touch/push up. Bonus: Will clean up nice after squishing a bug. Ha.
20200405_120423.jpg


20200405_120430.jpg
 
Last edited:

Chadx

♫ Off road, again. Just can't wait to get...
Power:
Shore-power 30amp plug is on the drivers-side exterior sidewall. I have a 30amp-female to 15-amp male adapter that plugs into the camper's 30amp male plug, so a regular 15amp-style extension cord can be used. Plugging into shorepower energizes two AC outlets inside the camper; one on the countertop at the rear drivers-side of the camper and the other by the AC breakerbox under the sink. The REDARC AC plug is plugged into the undersink outlet and allows the REDARC to charge off AC when connected to shorepower. An interesting feature of the REDARC is it favors/prioritizes green power so if you have solar input, it will utilize all solar power before drawing/supplementing from the other two potentially-available sources (AC-shorepower or DC-truck).

Regarding solar, there is a single exterior solar plug and it is on the exterior of the drivers side wall next to the 30amp plug. It feeds directly into the REDARC which serves as your solar controller. There is no need for a controller on the solar panel. If one wanted to mount a solar panel permanently on the roof, I've not explored that option yet. Overland Explored mounts solar panels on the Hudson Bay Edition (HBE) flatbed popup camper, so they must have the wire routing figured out which I assume is like all other pop-top campers and runs down through the soft side. One could run a cord down the exterior, but I'm sure there is a better way. I loved designing, piecing together, installing and using the Solar system for our FWC, but have not yet determined if we'll do solar on the CAMP-X.

My Tundra was wired when we purchased the FWC, but, after a few tests to ensure the auto-disconnects worked, I always had the wiring disconnected under the hood because the 180watt solar panel always kept us topped up. I left the wiring there as a backup. FWC installs small 10 gauge wire so there is a fair bit of voltage drop considering the length of the run from the truck battery to the camper connector plug and then to the camper battery (which, in our shell, was at the rear of the camper). With the solar typically working so well, I only connected the truck wiring on one trip, and probably could have done without it, but wanted to experiment. We were on a trip to the pacific northwest in fall. Heavy clouds, rain and heavy campsite canopy allowed for very little solar charging (but did allow for some). We were driving each day. Around the fifth day, our 150amp battery pack was down to about 60% SOC (the lowest it had ever been) so I decided to hook up the under-hood wiring for that days 4 hour drive. Even with the 10 gauge wire and the rather low voltage the Toyota's are known for (13.9 – 14.1 volts), the trimetric gauge indicated we were still pushing amps into the battery at the rate of 5 to 8 amps (per hour). Amperage flow depends on receiving battery's voltage, of course, so the lower the receiving battery voltage, the more amps that will flow with the 10 gauge wire being the constraint in this example.

That being said, the CAMP-X and REDARC use 6 gauge wire from the campers Anderson plug to the REDARC and they also require the truck be wired with at least 6 gauge. It will be interesting to see the maximum amp flow with the larger gauge wiring. The REDARC is programmable to limit the max amperage flow and when I looked up the specs on the provided 100 amp AGM, max recommended charge flow is .25C which means 25 amps for a 100 amp battery. So, I've programmed the REDARC to allow only 25 amps to be pushed into the battery at any given time. I may even lower that to 20 amps. If I replace with a lithium, those typically allow for .5C so on a 100 amp lithium, they can safely accept a 50 amps charge rate. In that case, I'll be able to set the REDARC back to it's maximum of 30 amps.

I'm undecided on what to do with our system; add solar and keep 100 amp AGM (50 amp usable), switch to 100 amp or 170 amp lithium and see if that capacity and the truck charging is enough. If not, can always add solar. Previous camper had 150 amps of AGM (75 amps usable) and with 180 watt solar panel, we were always full so never even though about “conserving”. Just ran what we wanted at any given time.
The stock 100amp AGM weights 61 lbs.
BattleBorn 100amp lithium is 31 lbs.
Renogy 170 amp lithium is 48.5 lbs.
160 watt rigid solar panel is 22.1lbs.
160 flexible solar panel is 6.2 lbs.
100 watt portable suitcase (w/no controller) is 19.4 lbs.
Somewhere in there is the combination of weight and convenience we are looking for.


The Thermobreak insulation tape covers the white aluminum extrusion. One of the few places in the entire camper prone to condensation is covered with this option.
20200405_120850.jpg


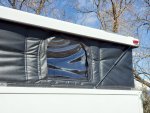
2020 insulated window coverings are now zippered rather than velcro and rounded rather than square.
20200405_120920.jpg


Order of layers is a bit different than our last camper. From the inside: Insulated layer, screen layer, clear plastic layer. All three are zipped so you can open it completely to pass items out or use as emergency escape. One pro is the clear window is the outermost layer so the screen won't get rain or snow on it. Con is that you have to completely open everything and then zip back up the bug screen (or go out side to unzip the clear window) to have only the screen in place. This may allow bugs in during the unzip/zip process. Another pro, though, is you can unzip the insulation and screen and have a very clear view out the window since there is no permanent bug screen obstructing your view. Note the screen is very course. While no mosquitoes will get through, the common little light attracted bugs will. For this reason, we tend to stick with using the dometic window's screen, rear screen door and vents which have a more typical screen.
20200405_121002.jpg


Accommodations are there to roll and snap the window coverings if you prefer. I foresee doing this only on the window shown because allowing the flaps to hang down would cover the dometic window. The other three windows I foresee just allowing the flaps to hang down rather than rolling and snapping them.
20200405_121232.jpg


New for 2020 are rounded fridge counterop corners rather than 90 degree. Besides looking a bit better, this will be most noticeable when moving in and out of the dinette and eliminating the risk of a 90 degree counter top corner to the hip or side.
20200405_121256.jpg


Dometic CRX65 fridge is 57liters. Larger than out Engel topload 45liter in the previous camper, but front loads use more energy than than a topload fridge so will be interesting to get some statistics. I unbolted the fridge while investigating another item and while in there, looked at moving the door swing direction. Not too bad, but didn't want to mess with it then. We'll use it as is and decide if we want to change swing direction which would allow both people can access fridge from a seated position and not have the door swing open and block in one of the dinette seats.
20200405_121317.jpg


Looking down at the new for 2020 battery box (dark gray box with lid), the water pump, shunt/breakers, and now side-to-side rather than front-to-back water tank. The marine port to the right is to access turnbuckle.
20200405_121404.jpg


REDARC controller is now mounted vertically and in this compartment rather than in the compartment under the fridge.
20200405_121415.jpg


20200405_121449.jpg


I like that the hinges/shocks are hidden inside the top when closed. I've not yet removed the protective film from the LED lights.
20200405_130601.jpg
 
Last edited:

Chadx

♫ Off road, again. Just can't wait to get...
Dimensions:

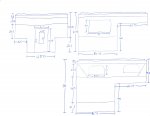
Note that the roof edge curves in and then there is another 1" tall rise for the majority of the roof. My height dimension include the 1" rise because that is part of the overall structural roof height.
My height measurements do NOT include height for the roof fan housing.

Those of most interest are likely the following:
- Floorpack footprint is a rectangle rather than an "irregular octogan" like a FWC: 48.75" wide by 80.75" long.
- Overall height when closed: 63.75"
- Overall height when open: 86"
- Overall length: 141.5".
- Cabover height closed: 17.75"
- From floorpack to bottom of cabover (to calculate your pickup roof to bottom-of-cabover gap): 46"
- From floorpack to bottom if side overhang (to calculate clearance of pickup bedrails): 21.5".
- Interior height: 82" (6' 10") headroom
- Interior width: 77.5"
- Interior length: 137"
- Interior bed platform: 77 x 60 (approx. queen equivalent)
- Interior bed with king pullout: 77 x 75 (approx. king equivalent)
- Door opening: 51.75" tall x 24" wide. Interestingly, the door opening, of 51.75" tall and 24" wide, is 3.75" taller than our 2017 FWC door and 2.25" narrower (provided my FWC notes were of the door opening and not the outer edge of the door surround. Perhaps someone can confirm and provide the door opening of the current FWC).

-----------------------------------------------------------------------------------------------------------------------------------------

All measurements are in inches.
Drawing is not to scale
The left drawing shows both the front and back of the camper at the same time (Read; it shows front of cabover and also the rear door). Hey, it's my drawing so I can do what I want. Ha.

2020 CAMPX Dimensions Details.jpg
 
Last edited:

Chadx

♫ Off road, again. Just can't wait to get...
Quirks:
The sink placement is a bit quirky as the countertop over the fridge somewhat hampers access, but sink use is limited and having it tucked back like that is a good use of space.

Fabric and foam on dinette. The fabric cushion cases don't seem sewn small enough for the foam size used and so are baggy. This causes the fabric to be rippled/wrinkled after touching the seat cushions rather than bounce back taut. The fabric cases perhaps should have been sewn tighter and smaller. Also, a heavier weight fabric might be a good idea. We also noticed the medium-density foam is borderline too soft, but we'll evaluate further as we use the camper. We weigh 135lb and 175lb and when we sit, the foam compresses quite a bit. A denser foam would be more supportive for sitting.
The bed foam and case are handsome and seem comfortable enough when tested, but it's unlikely we'll be able to report on sleeping comfort as we'll be installing our foam/memory foam mattress setup from our previous camper. It consists of soft, open cell foam that is 2” thick. That is covered by a 3” memory foam matress topper. The topper on stock density camper bedfoam makes the memory foam sleep too firm (even though I like a firm mattress). We found that , by using a very soft foam under the memory foam mimics the comfort of our Tempur-pedic mattress at home and we are very pleased with this setup over the last 3 years so no need to experiment further.

A really low priority item here, but I was surprised that the hex head bolts holding in the fridge and elsewhere, are not metric; they are SAE. Probably not a concern for most people. Most Canadian products I've purchased are metric, which I really favor over SAE. I have a few backup tools that are SAE, but all my good stuff, and travel stuff that I keep in the truck, is metric. I'll have to go over all the other fasteners and see if there are other SAE, rather than metric, and make some adjustments to my travel toolbox. I dislike having to bring what feels like duplicate tools by carrying both metric and SAE, but it looks like this will be very few. So far, I've only found two and they are two SAE hexhead bolts. If the target audience is USA, though, I imagine most buyers will actually prefer SAE. So this one is a scratch.

That's it. Very short list! Nothing else to report at this point. Will keep in touch with manufacturer and Big Sky RV regarding other suggestions as we use the camper more.

Really love this unit and anxious to get the pickup brackets installed and get out for the first time!

-------------------------------------------------------------------------------------------------------------------------------------------------


Images of Queen bed with King pull out


Passenger side bracket is mounted to the exterior wall.
20200405_121720.jpg


Drivers side bracket is mounted to the countertop.
20200405_121724.jpg


King pullout pulled forward. It extends the 60" queen to 75" king.
20200405_121812.jpg


20200405_121817.jpg


Pulled out without the provided additional cushion in place.
20200405_121824.jpg


Cushion in place.
20200405_121938.jpg


View from below.
20200405_122010.jpg


20200405_122024.jpg


King extension removes completely and leaves and nice clean edge if you prefer.
20200405_122214.jpg


King extension completely removed from camper.
20200405_122218.jpg
 
Last edited:

Chadx

♫ Off road, again. Just can't wait to get...
Windows


Dometic Sietz window (I believe these are the S4 model) with shade and bugcreen connected and in the up position. The exterior of the shade is reflective.
20200405_122447.jpg


Connecting the screen and shade allow one to tailor privacy, ventilation and light.
20200405_122501.jpg


Change for 2020; exterior canvas is now black rather than tanish brown. I slightly preferred the tan color, but not by much.
20200405_130512.jpg


20200405_130523.jpg


20200405_130542.jpg


Branding on back of camper.
20200405_115716.jpg


Window is highest position. Protective film is still in place and will remain until camper brackets are installed at final trip to dealership.
20200405_130412.jpg


20200405_130426.jpg


20200405_130438.jpg
 
Last edited:

Chadx

♫ Off road, again. Just can't wait to get...
Propane, water heater, breaker box, storage.


A single 10lb tank is provided. I'll be changing the routing of this strap and/or the strap to accommodate since I plan to typically run only one tank for weight savings. I have an additional 10lb but only plan to bring it on long trips or when tank one seems low. In our previous camper, one 10lb tank lasted an entire season. We do most of our camping in the mountains where it's cooler and many spring and fall trips where outside overnight temps are below freezing, but we also sleep with the thermostat set to about 48 - 52 degrees and during waking hours, typically don't heat up the interior to over 65. With the Truma heater and higher insulation, but with a water heater, I expect our propane use will be about the same over the 20 - 30 nights we spend in the camper per season.
20200405_115212.jpg


Inside of propane compartment door.
20200405_115216.jpg


Branding on the propane door vent is a nice touch. Label shows dry weight of 1210 lbs (meaning without battery, propane, water and does not include the jacks, king bed pullout and second roof vent).
20200405_115227.jpg


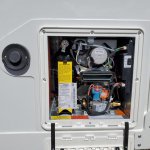
Behind exterior access panel of the Truma water heater. Truma cabin heater intake/exhaust is to the left.
20200405_115324.jpg


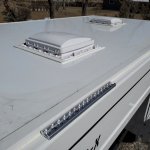
We opted for a second vent/fan to the front and in an offset position. Four 1-foot sections of L-Track are now standard. The optional roof racks mount to these. I plan to use L-track tie downs to mount various things such as tarps for shade, etc. One could use tiedowns with a rope and/or hook to hang things on, stretch a line to a tree or create a loop for drying towels, or hanging trash bag while at camp, etc. L track will be useful for quick connect/disconnects.
I also noticed the lip of the roof extrusion prevents water from running off so a very small amount of water will remain, evaporate and leaves a water mark, but that won't be an issue with this construction type. Just a cosmetic thing if you care about a watermark on your roof. I imagine in real world, the water will blow off while driving and this will only occur if the camper sits long enough to get rained on and then evaporate before driving.
20200405_115414.jpg


Jack bracket configuration. Note the production models, of all years, have bolted on brackets. The prototype has very slick quick disconnect slotted brackets. I imagine that was changed due to liability rather than engineering issues. They needed to prevent owners from driving down the road and a jack coming off. For my purposed, the quick disconnect would be ideal as we never take the jacks with us on the road. If one leaves the camper on the truck all summer, you only need to bolt those on twice, but if you put the camper on and off every time you use it, having to bolt and unbolt the brackets will become old. I may look into options to make it quick disconnect; maybe the use of pins rather than bolts.
20200405_115539.jpg


The AC breakerbox is located behind the under-sink cupboard as is one of the two AC outlets in the camper. The plug is the from the REDARC and when on shorepower, the REDARC will charge/maintain the house battery.
20200405_120624.jpg


Compartment under the stove.
20200405_120637.jpg


Floor compartment under fridge. Gravity water feed can be seen. They lead from the drivers side exterior wall to the water tank under the nearby dinette seat.
20200405_121340.jpg


Update for 2020 is the table mechanism. We much prefer this mechanism as the 2019 ran down, over then up and we found it in the way of our feet. Not a huge deal, but this design is improved in our opinion.
20200405_121426.jpg
 
Last edited:

Chadx

♫ Off road, again. Just can't wait to get...
Another view of the table support as well as the cutouts that allow one to monitor water level in watertank.
20200405_121439.jpg


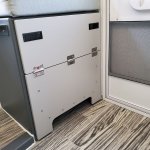
New for 2020, the rear cabinet face is starboard material rather than aluminum.
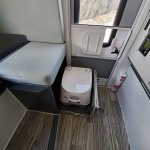
20200405_122800.jpg


20200405_122806.jpg


20200405_122823.jpg


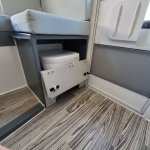
Tray slides out to allow access to portable toilet or other storage. Drawer is rated to support 300lbs I believe. It is narrow enough that I submit anyone approaching that weight won't comfortably fit there anyway. For users that want more room to use the toilet (or want that space for non-toilet storage), it may be preferred to remove the drawer, store the toilet or other items in the space and pull it out as needed.
20200405_122844.jpg


Shows how narrow the seating space is when used on the drawer. It will work well for both my wife and myself. We typically avoid using it, but nice to have it there is we need it.
20200405_122901.jpg
 
Last edited:

gnel

Active member
Wow thats very nice! Alot of well thought out features. I sort of skimmed the text to go right to the photos and didn´t see the weight specs?
 

MtnRider2

New member
I was on the phone with Arnold of OverlandX for over an hour on Monday discussing the flatbed version. I can't say thank you enough for the detailed description and pictures.

I'm interested to hear your thoughts (pros/cons) after a few trips. If I read correctly, you had an FWC previously. Have you had more than one?

Sam
 

okiedavid

New member
Great write-up, better than what the dealer or manufacturer has on their websites. In the future, when the day comes to replace my FWC, this will get a close look. Even though I'm happy with my FWC, there are no perfect campers.
 

Chadx

♫ Off road, again. Just can't wait to get...
Wow thats very nice! Alot of well thought out features. I sort of skimmed the text to go right to the photos and didn´t see the weight specs?

One of the photos shows the placard with the weight: 1210 lbs. Like FWC, that is dry and before accessories, but there are not too many accessories available on the CAMP-X. So on ours, that is not including the king pullout and the extra fan vent. And not including battery, propane and filled water tank. One thing I do like is the weight distribution compared to my Hawk Shell with furnace/stove and side dinette. In our particular FWC, the propane and batteries were in the cabinet at the very back of the camper. All the weight was as far back as physically possible in that rig and well behind the rear axle. In this particular CAMP-X layout, the propane and battery (and water tank) are at the very front of the camper. That will help our weight distribution. Though, on the shell, our water cooler and drinking water jugs were kept in the back seat, so our water will sit further back in this rig. Weight distribution is another reason why I like the layout of the various flatbed campers as they tend to have watertank, battery box and propane at the very front of the camper and the lightest equipment (the dinette) at the very rear.


I was on the phone with Arnold of OverlandX for over an hour on Monday discussing the flatbed version. I can't say thank you enough for the detailed description and pictures.
I'm interested to hear your thoughts (pros/cons) after a few trips. If I read correctly, you had an FWC previously. Have you had more than one?
Sam

Thanks Sam. Flatbed layout is my favorite layout, but not in the cards right now as I'll replace my truck in 2 or 3 years and so didn't want to put a flatbed on this Tundra only to sell it a few years later. I tend to plan well out into the future. Ha. So the standard layout will switch between trucks better. Maybe after a few years of this truck and a few of the next we'll move to a flatbed camper. That's a decision for down the road. Plus, then the flatbeds will have been out for a while. Right now, there are no pictures anywhere of them. I know they have or are building two currently. Not sure if we'll ever get to see detailed images of those. The pics on Overlands website didn't show up until Big Sky RV took the photos and sent them up there. Would be great to see detailed pics of the flatbed.

We'll be sure to add updates as we get more experience using our CAMP-X. We have experience with one FWC. We ordered in 2016 and received in 2017. It was a 2017 FWC Hawk Shell with heater/stove, side dinette, king bed pullout, thermalpack, etc. It was mounted on the Tundra full time over each summer (for about 6 months). Moving forward, we plan to only load the camper when we want to use it. We'll see how long that lasts. Ha. In the wintertime, I store my campers in our shop, but now we have a lean-to on that shop and I feel comfortable leaving a camper sit underneath that in the summer months so I plan to position it there and load/unload for each use. Besides the benefit of not hauling the weight around when not needed, another small part of that is I'll no longer be able to fit the truck with camper into the underground parking garage at work. My FWC cleared by 2". The CAMP-X will not clear. There is a large outside parking lot as well, but when it's 80 degrees or more outside and vehicles are baking in the sun, the underground parking stays below 70 degrees. I make the 15 minute commute home without even turning on the Air Conditioning. And I keep the UV, bird droppings, etc. off and no risk of hail damage and in the wintertime, the truck is 60 degrees rather than zero degrees and no snow/ice to scrape. It's nice parking inside at both work and home.

Backing under a camper never bothered me. It's the turnbuckles that are the pain, but CAMP-X comes with the flip down turnbuckles, plus the rear two are accessed from standing outside rather than crawling around on the floor like an animal. Ha. The front two are accessed through ports, but the flipdown turnbuckles should make it much easier than the twist-twist-twist variety. Granted, one could always buy and use the the flip variety on a FWC as well and we'd likely have changed to those if we'd been putting that camper on and off all summer.

Great write-up, better than what the dealer or manufacturer has on their websites. In the future, when the day comes to replace my FWC, this will get a close look. Even though I'm happy with my FWC, there are no perfect campers.

Once we get to this level of camper (CAMP-X, FWC, Alaskan, take your pick), they are all great and pretty lucky we have so many great choices. Then it's just little things here or there that differ between them. Nice to have choices and options. The more manufacturers the better. It will drive competition and innovation and so the consumer will keep getting a better product. Win.


Thanks for great writeup. What's the dimensions of the lower section that goes in truck bed, how wide?

Floorpack is a rectangle and is 80.25" (6' 8.25") long by 48.75" (4' 1/4") wide. Today, I plan to update my place-holder dimension section further up this thread. Stay tuned.
 
Last edited:

sg1

Adventurer
Great write up. I own one of the prototypes. It appears that all the little issues the prototype had have been taken care of. From experience I can confirm that the softwall insulation actually works. No comparison to the Hawk I owned before. Have fun with your new camper.
 

taliv

Observer
great review!

question for those who use truck campers like this: if you're going to spend a few months wandering about, where do you keep all your stuff? the bed of my pickup is usually full of it, but with a camper like this, that wouldn't be possible, and i dont see enough cabinet space under sink etc. where would you keep clothes, for instance, or food, or recovery gear?
 

Forum statistics

Threads
188,399
Messages
2,906,844
Members
230,176
Latest member
Arcadia1415
Top