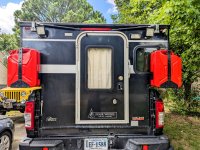
2021 RAM 3500 Tradesman | AEV Prospector | FWC Grandby

UglyViking

Well-known member
Again, taking time and having the proper tools is the correct way to do things every single time. I am not going to become philosophical here but now is the time for American men to "get up, dust off, reload, re-calibrate, re-engage, and go out on the attack." The future of humanity depends on you doing the best you possibly can.
Jocko is a bit much most of the time, but I've gotta say his book Extreme Ownership is amazing. I've listen to it twice, and have read it every other year since it came out. Really changed my perspective on things.
 

ramblinChet

Well-known member
Much of my exploring takes place at night so I have been meaning to install ditch lights for some time. They will be most valuable to me when maneuvering around a switch-back while crawling up a mountain side on a rough dirt and gravel road. It's not a comfortable feeling when you alone in the middle of a forest and are turning hard into blackness on a narrow trail with no guardrails in a vehicle so large you are unable to see what is on either side of you. These SDHQ A-pillar light mounts seem to be some of the best available that will not conflict with the installation of my AEV Snorkel.
SDHQ.jpg

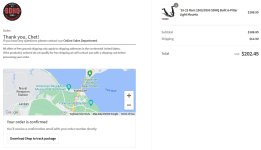
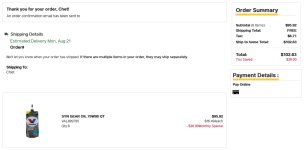
Since I will be installing my AEV front and rear differential covers next week, this is the perfect time to also change the differential fluid - I am also just over 50k miles. I really struggled with deviating from the factory recommended fluid but after receiving conflicting information from different dealers, I spent time researching and speaking with Valvoline regarding their 75W-90 full synthetic gear oil. The front AAM 9.25 requires 4.8 pints (2.4 quarts) whereas the rear AAM 11.50 requires 8.8 pints (4.4 quarts) for a total of 6.8 quarts. I ordered one extra quart just in case.
valvoline.jpg


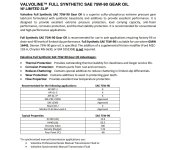
The Valvoline is 75W-90 while the Mopar requirement is 75W-85. During my research I discovered that Valvoline produces a 75W-85 gear oil although it is for the European market. Since this meets both API GL5 and SAE J2360, I am confident it will be just fine. Another one of the key reasons I selected this fluid is because if I required an immediately replacement in an unknown location, I believe the Valvoline would be easier to locate compared to the Mopar.

valvoline tech.jpg
 
Last edited:

ramblinChet

Well-known member
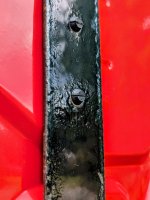
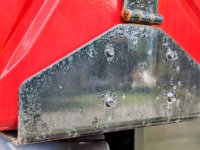
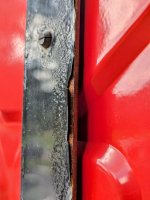
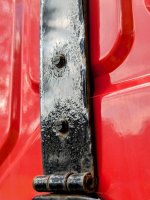
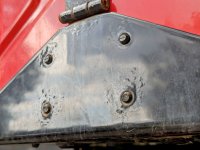
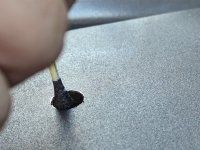
Unfortunately, the finish on the Wavian Heavy-Duty 5.3 Gallon Jerry Can Holders installed last September is not holding up well. I noticed months ago surface irregularities and they have continued to progress. I spoke with Wavian and they asked for pictures so here are the ones I emailed to them. When talking on the phone they seemed like nice folks so I am expecting we should be able to work something out.

The actual cans still look like new inside and out.

image000000(408).jpg

image000000(406).jpg

image000000(405).jpg

image000000(410).jpg

image000000(409).jpg

image000000(407).jpg
 

ramblinChet

Well-known member
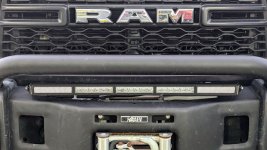
This evening we took advantage of a few hours to install the Diode Dynamics Stage Series 30-inch white combo light bar. The process began with an 1/8" pilot hole followed by three larger drill sizes and then the final finish hole. It takes slightly longer although this provides you with the opportunity to verify alignment of the progressively larger holes and if necessary, you are able to influence and hole prior to the finish hole being drilled. Of course, the majority of the time invested in this exercise was directly related to layout and agreement on final positioning.
image000000(411).jpg

For every hole drilled into any piece of metal it is always a good idea to de-burr the hole, clean, and coat with at a minimum, two coasts of protective paint. Since this is usually close to the end I take time between coats to begin cleaning up and organizing the work area.
image000000(412).jpg

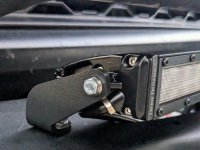
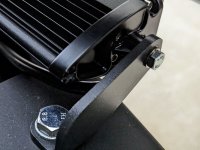
The AEV Colorado ZR2 Bison light bar mounting kit worked perfectly for installing lights on the AEV HD Ram premium front bumper. I shifted the brackets back an inch so the low tube provides some protection for the light bar. Keep in mind you can only move the brackets back so far before the rear of your light bar begins to interfere with where the remote control plugs into the top of the winch control pack.
image000000(413).jpg

The AEV light bar brackets are beautiful and solid. The fasteners that came with the light bar were on the weak side and since it was necessary to stop by the local hardware store to pick up the main mounting bolts, washers, and nuts; I spent the extra $2 to pick up stainless steel bolts and washers to clamp the brackets to the light bar. A few additional dollars well spent.
image000000(414).jpg

It was necessary to remove the low tube above the bumper to drill the holes so here is everything back together. The last piece of the puzzle will be wiring the light bar into the OEM auxiliary switches sometime next week. Since the front light bar is the farthest forward it will occupy switch position number one. Maybe ditch lights number two and rear bumper lights number three - that sounds logical.
image000000(415).jpg
 

ramblinChet

Well-known member
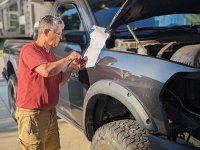
Much of this weekend was spent installing my AEV Snorkel, OEM projector LED headlights, and custom harness built by Jimmy07. Here is my good buddy Ed using a Starrett automatic center punch to reference where we will be drilling pilot holes on the template supplied by AEV.
image000000(416).jpg

As expected, we progressively worked up from 1/8" pilot holes to two 1/2" and nine 1" holes. We spent nearly an hour moving the paper slightly, checking, etc. All the holes were placed perfectly.
image000000(417).jpg

The blue strips of tape were used to cover the 1/2" holes to we did not mistakenly drill one out to 1" - that would have been catastrophic. When you are deep into a job and so close to the work a seemingly small mistake can create an unrecoverable error. Taking a few minutes to reference the template and placing tape over the holes you do not want to drill is a simple and effective solution. Probably the most challenging part of working on the fender was balancing pressure and rotational speed while the fender wanted to flex.
image000000(418).jpg

Here is Ed cutting lines between the finish holes.

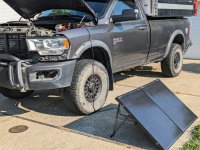
Has anyone had their battery go bad after only three years and 50k miles? On Saturday when we finished work I attempted to start my truck and the battery was dead. We jumped it and I was able to move it and let it idle for a bit pushing 14.0-14.1 Vdc. Sunday morning we tried to start her again and it was no joy. Since we were going to grab breakfast I figured I would let my Renogy Solar Suitcase try to charge the main battery and see if I was able to get her started. Surprisingly, it worked!
image000000(420).jpg

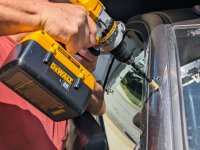
Drilling holes in the a-pillar where two 1/2" rubber expansion well nuts will be used to hold the upper section of the snorkel body in place. The instructions called for 1/2" holes and although we progressively worked up, our finish hole was 31/64", or approximately 0.016" under. We placed some black RTV on the rubber expansion plugs and they fit very snugly into the holes.
image000000(422).jpg

The AEV snorkel installation is not for the faint-of-heart. My recommendation is that if you are having an AEV Prospector built, pay the additional $420 and have the snorkel installed by AEV. Unfortunately, when my truck was manufactured in mid-2021, the snorkel was still many months away from being produced. Some of the most challenging parts of the installation centered around the removal of the trim piece under the front grill without disconnecting the front bumper and the installation of the new AEV airbox which is a combination of metal and plastic. Overall, it is a pretty impressive kit for the money although there is always room for improvement. Was it perfect, no. But for the money I consider it a great value.
image000000(421).jpg
 

Pacific Northwest yetti

Expedition Medic
I installed the AEV Snorkel in my ZR2 a few weekends back those first few cuts are killer. I also found it to be well made and designed. Although I had some hardware missing/ but not a huge deal. I decided to go with a Jig Saw, that actually worked really well. I had my grinder ready just in case.
 

ramblinChet

Well-known member
I installed the AEV Snorkel in my ZR2 a few weekends back those first few cuts are killer. I also found it to be well made and designed. Although I had some hardware missing/ but not a huge deal. I decided to go with a Jig Saw, that actually worked really well. I had my grinder ready just in case.

I agree - overall it is a nice package although my primary complains are directed at these two areas:

AEV bumper - this piece interferes with the OEM front lower trim piece and should not. Being required to spend an hour wrestling with a 1/4-ton bumper and winch combo should not be required when removing a two pound plastic trim piece that normally takes five minutes to remove.

AEV snorkel - the airbox is a combination of metal and plastic which itself is not good. TO make matters worse, they expect the installer to place the disassembled airbox into where it will reside and perform final assembly which includes maybe a dozen rivets. The rivet hat should penetrate first through the plastic while the stem goes through the metal - this is the strongest method of assembly since it is easy for the plastic to deform while the stem is pulled through. Around half of the joints are correct whereas the other half are not so this leads to failed joints. It would have been better to develop a single piece box or maybe one with an angled horn that passes through one of the walls with metal rings on the outside of each. In summary, the piece is unnecessarily complex and much time is wasted on an inherently weak component.

As previously mentioned above, some have complained about how the snorkel attaches to the a-pillar. If installed properly I do not expect to have problems with this although if I do I will be happy to share. I came upon this video titled "How to fix the weakest part on the AEV snorkel - upgrade the mounting hardware." Here are sections that raised questions in my mind:

0:26-0:36 - Installer only has one 1/2" rubber expansion well nut installed while the instructions specify two. The single 1/2" rubber expansion well nut is installed backwards (the shoulder should be up top with the brass threaded insert on the bottom) so when you tighten the screw the brass insert compressed the rubber above and it expands. In his defense, the AEV instructions do not specify how to properly install a rubber expansion well nut.

2:30-2:40 - Installer confirms that he ignored AEV instructions and only installed one rubber expansion well nut.

4:30-5:40 - Installer set in place two Nutserts into curved surface of unknown thickness. At first I was concerned of using a Nutsert on a curved surface since I have only used on flat ones - I was wrong and they can be used on curved surfaces. What I am not sure about is how thick the surface is since Nutsert specifies a minimum surface thickness of 0.030" which is awfully close to the thickness of the a-pillar. I would have measured it first and talked with the manufacturer if I had any additional questions.

I do like how he was innovative and did not remove the entire fender just to deal with this issue - he simply loosened most every thing up and pulled the snorkel out of the way to perform that work. I also like how he applied a waterproof sealer to the Nutserts, bolts, and washers. The AEV instructions do not specify this although I did the same since I would not want water to leak into the a-pillar.

Others have suggested using 3M VHB Tape which sounds like it too might be a successful application although I would contact a 3M technical representative to discuss which tape would work best and how to properly prepare the surfaces.
 

ramblinChet

Well-known member
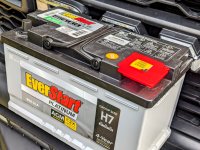
My new AGM battery has been installed and my truck is operational once again. I selected a battery from Walmart for several reasons. First, I recall reading an article in Consumer Reports several years ago where many batteries were tested and the EverStart was ranked the highest regarding value. Secondly, since I travel all around these United States, there are Walmarts everywhere and if I have a problem they generally have fair customer service. My cost with tax was $192.43 and it took me all of five minutes to install. I also took time to clean up dirt and debris in the battery compartment area.

EverStart Platinum AGM Battery, Group Size H7 (12 Volt 850 CCA)

image000000(423).jpg
 

ramblinChet

Well-known member
This week has been spent performing modification and maintenance on my AEV Prospector in preparation for departing Virginia and heading south, then west, for the next six to nine months. There have been some major projects such as the auxillary diesel fuel tank and AEV snorkel along with smaller projects such as the front light bar, LED headlights, etc.

Here I am plugging in part of my custom LED headlight and fog lamp wiring harness into the Power Distribution Center plug C6 spot 28 in the engine bay. This was actually much easier than I had anticipated. Here is a good post detailing the addition of fog lights on a 2019+ HD Ram.
image000000(424).jpg

After examining my options I decided to route the remaining four wires through the clutch block off plate. It was very easy to access this area after removing the battery which only takes a few moments. With the battery already removed, it was easy to disconnect a few additional accessories mounted on the inside fender and route the new wires along side existing ones for a very clean installation. These small details only take a bit of extra time but are well worth it in my opinion.
image000000(425).jpg

Here are the four wires waiting to be connected. The wires for the projector LEDs (red & black) along with the LED fog lights (yellow x2) have been pulled though the clutch block off plate and are waiting to be connected. The red (pin 1) and black (pin 2) are inserted into a small white two-pin connector and then plugged into the CANBUS junction block which is located just behind the headlight switch under the dash (green with black base). The fog light connectors (yellow x2) will plug into the C1:1 and C4:13 on the BCM under the dash which was the most challenging phase of this evolution.
image000000(426).jpg

I am very impressed with the factory LED projector headlights now that I have them installed. The Adaptive Forward Lighting System is really useful since the headlight beam is able to turn up to 15-degrees while the vehicle navigates around a corner. It will be interesting to see how it functions off-road at night.
image000000(427).jpg

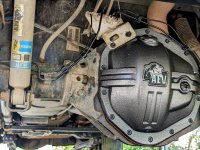
AEV front differential cover manufactured out of high-strength nodular iron now protecting my AAM 9.25" axle
image000000(428).jpg

AEV rear differential cover on my rear AAM 11.50" axle.
image000000(429).jpg

Currently I am preparing to wire lights and other accessories to my OEM auxiliary switches. Here is a great video for reference:

 
Last edited:

ramblinChet

Well-known member
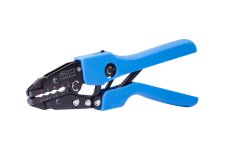
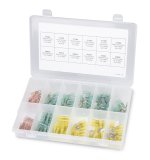
Now that my 30" light bar and A-pillar (ditch) lights are in place it is time to make the electrical connections. In a previous post I already ordered the Ancor 10 AWG wire so today I took time to research and order an Ancor Single Crimp Ratchet Tool and Ancor Heat Shrink Terminals & Connectors Kit. Initially I was going to only purchase a small number of ring terminals and butt connectors that I required right now although the difference in overall price was so small I and I received so much more in the kit it was an easy decision.

If I took time to research and select the proper wire it only makes sense to invest additional time in researching the connectors and tools required. I considered other offerings by other companies but concluded offerings by the same company (Ancor Products) that manufactured the wire would balance nicely.

Ancor Single Crimp Ratchet Tool
ancor 03.jpg

Ancor Heat Shrink Terminals & Connector Kit
ancor 04.jpg

Here is a reference copy of my invoice for the record:
ancor 05.jpg
 

Attachments

  • ANC_NPA_001.pdf
    2 MB · Views: 0
Last edited:

ramblinChet

Well-known member
Today I ordered parts that will be used to install my ExtremeAire Magnum air compressor. There are many places to install this unit and I believe I have selected one of the best for my particular application. If my calculations are correct it should take me approximately three minutes and thirty second to inflate one of my 37" tires from 15 to 45 psi. This compressor flows 6.0 CFM at 0 psi and 3.9 at 50 using a 100% continuous duty motor. For a long time I have wanted an Oasis 12 Vdc air compressor which flows 15 CFM at 0 psi and 10 CFM at 50 psi but it is just too large and I am not sure saving five minutes on airing up my tires can really justify losing that much room.

The plastic submersible cord grips will be used to pass the Ancor 2 AWG tinned copper battery cable which has a nominal OD of 0.47" while the vibration-damping sandwich mounts with studs will be used to mount the compressor to the body. Since we are passing the heat dissipation hose through the same surface this is where we will be utilizing the silicone rubber high-temperature grommet. After performing some research I was able to confirm the hose is manufactured using Gates LOC Lock-On Hose which has an OD of 0.64".

mcmaster carr 001.jpg
 

Attachments

  • ANC_BRO_007.pdf
    6.8 MB · Views: 3
Last edited:

ramblinChet

Well-known member
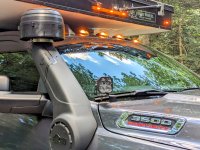
Much work has been completed recently on my adventure vehicle. Working from the top down first you will notice the AEV snorkel, then if you look closely you will see A-pillar (ditch) lights from Diode Dynamics (SS3 Max with combo optic) installed on SDHQ A-pillar mounts. Down a bit more you will see the factory LED projector headlights with the Adaptive Forward Lighting System which are beyond amazing and worth every penny. Below the tube on the front bumper you will see a Diode Dynamics Stage Series 30" lightbar with combo optic. Down in the bumper itself you will also see fog lights which are Diode Dynamics (SS3 Sport with SAE fog optic).
image000000(5).jpg

Here is a close up for some additional detail. Note there are no wires on the A-pillar lights as I am still waiting for Ancor supplies to arrive this weekend. I will share details regarding the harnesses I build and what specific materials I use.
image000000(3).jpg

My OEM projection LEDs are up and running fine. I am so glad I selected the Tradesman package when specifying this truck and then was able to add high-end parts such as these LEDs. Thanks again to Jimmy07 for the custom wiring harness which permitted me to install both these and fog lights all using factory switches.
image000000(4).jpg

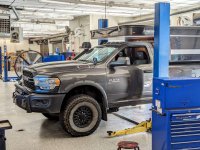
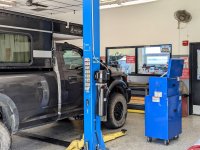
Here I am taking advantage of an "auto hobby shop" nearby military installation. The cost is $10 per hour to use a lift bay and that includes a full set of Snap-On tools. They have specialty tools such as air tools, torque wrenches, etc. available to use that are stored in a central location.
image000000.jpg

Note the sign on the window that specifies this lift is rated for 9,000 pound capacity. My rig with a full bag of gas, all supplies, and myself, weighs in at 8,660 as recorded on a certified scale. I have access to another lift nearby that is rated for 12,000 although I prefer this garage.
image000000(1).jpg

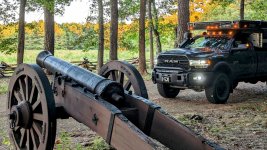
I finished up the day with a tour of the American Encampment at the Yorktown Battlefield here at the Colonial National Historic Park. After this stop I continued on to General George Washington's Headquarters, the French Encampment, and then down into Yorktown proper. Here is some additional information regarding the Siege at Yorktown which is considered by many to be a turning point in our Revolutionary War which lasted from 1775 through 1783. Keep your powder dry...
image000000(6).jpg
 

ramblinChet

Well-known member
This weekend has been beautiful so I wanted to take a break from performing upgrades on my vehicle and just relax for a day in my hometown of Yorktown, Virginia. This small area of south-east Virginia is commonly referred to as the Historic Triangle and is composed of Jamestown, Williamsburg, and Yorktown. Jamestown is where the first permanent English settlement was established. Colonial Williamsburg is where the American Revolution first started. And Yorktown is where the British surrendered. This is my home and I wanted to share a beautiful little trip with you that I have driven maybe a hundred times.

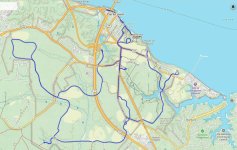
In short, this route is the complete Yorktown Battlefield tour which includes both the Battlefield (red arrow signs) and American Encampment (yellow arrow signs). As an added bonus I included a short trip down to the York River to visit the Yorktown Beach Picnic Area and the Yorktown Waterfront. This is a twenty mile drive and will take approximately 1.5 hours without any stops. There are dozens of historical markers along the way so this could easily be a half day excursion.

The route can be viewed and downloaded here - I will also include the GPX file as an attachment to this post.
CNHP.jpg

This is what the majority of your relaxing drive will look like: a one-way paved road through the forest and alongside the battlefield and encampments. It is really a relaxing drive since there is little traffic, virtually no signs, and only occasional two-way traffic for short stretches near some of the loops.
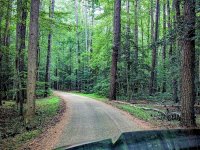
image000000(15).jpg

This is a typical view from the road while driving adjacent to one of the many fields. This picture was taken in the American Artillery Park area.
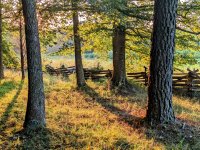
image000000(12).jpg

For those who enjoy water crossings - this route actually includes one a few inches deep and maybe a dozen feet in width. This stream is created from a natural spring just a few hundred feet away and the loop near the spring was General George Washington's Headquarters during the battle.
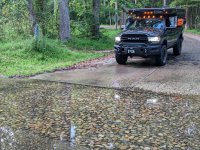
image000000(13).jpg

This is the French Cemetery deep in the forest where approximately fifty French soldiers were buried in an previously unmarked common grave. It's actually rather sad to imagine young men dying so far away from home and never to return. Yes, they felt pain for a period of time but their loved ones and friends felt their own pain for so much longer. War is a racket.
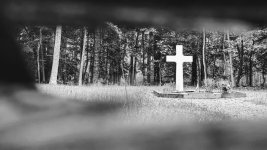
image000000(14).jpg

This is the Nelson House in Yorktown. Thomas Nelson, Jr. (1738-89), was one of the signers of the Declaration of Independence and as a brigadier general, he also commanded the Virginia militia at the Siege of Yorktown.
image000000(16).jpg

Wormley Pond is one of my favorite places along the route. It's just a beautiful area to watch turtles, great blue heron, deer, turkey, etc. It's also the place where a smokin' hot skinny blonde I worked with at NASA LaRC lost control and kissed me for the first time. Lord, I was born a ramblin' man...
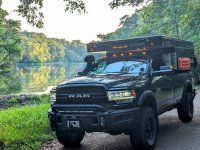
image000000(11).jpg
 

Forum statistics

Threads
188,039
Messages
2,901,490
Members
229,352
Latest member
Baartmanusa
Top