2022 Ford F550 - DIY - Adventure Expedition Vehicle Build Thread

Vance Vanz

Well-known member
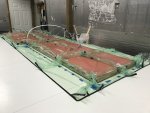
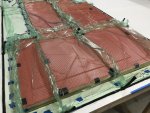
Resin Infusion – Subfloor – Layup

A Milestone on the project, my LAST resin infusion layup ?! It better be, or I quit ?.

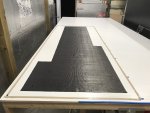
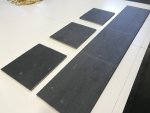
Cutting Carbon:
IMG_9016.jpegIMG_9017.jpeg

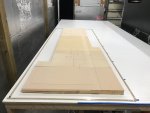
Stacking Materials:
IMG_9018.jpegIMG_9019.jpeg

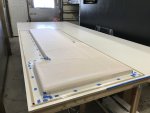
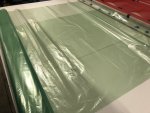
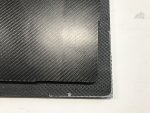
Wrapping Presents:
IMG_9020.jpegIMG_9021.jpeg

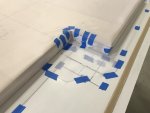
Looking for any possible nick (marking and sticky taping) so I don't have to chase leaks for hours:
IMG_9022.jpeg

Standing Vacuum Test (All good on the first pull down ?(y)?. This is usually not the case for me)
IMG_9024.jpeg

Infusion:
IMG_9025.jpeg
 

Vance Vanz

Well-known member
Resin Infusion – Subfloor – Layup - Continued....

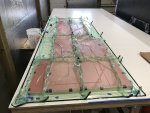
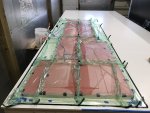
Infusion (Complete and ready for bed time):
IMG_9026.jpegIMG_9027.jpegIMG_9030.jpeg

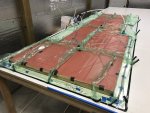
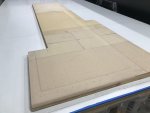
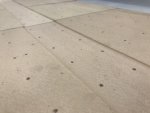
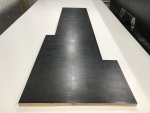
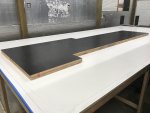
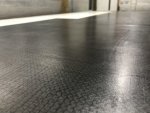
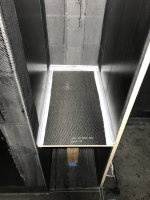
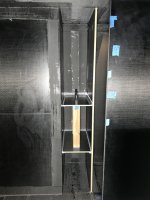
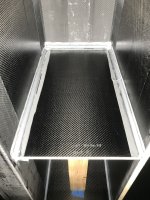
Final Product:
IMG_9054.jpegIMG_9055.jpegIMG_9056.jpegIMG_9060.jpegIMG_9059.jpeg

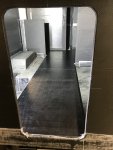
Dry Fit (Snug as a Bug)
IMG_9075.jpegIMG_9074.jpeg

Note: After I finalize the electrical and plumbing, I will epoxy/bond chases into the subfloor and then epoxy/bond the whole thing to the main floor.

Technical info from the layup for those that are interested:
  • 3 gallons of epoxy was used for the layup
  • About 1 hour 20 minutes for the layup (I let this infuse super slow because of the height and all of the butt joints in the core material as a result of using larger scrap pieces)
  • Carbon Fiber Skin is a 24oz plain weave
 

Vance Vanz

Well-known member
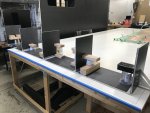
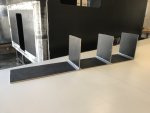
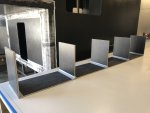
Carbon Fiber Overhead Cabinets - Layout & Bonding

Cutting and notching panels:
IMG_9044.jpegIMG_9042.jpeg

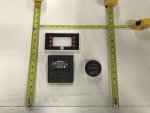
Laying out the size needed for the mechanical/electrical control cabinet (Some of the items to be installed, not all)
IMG_9039.jpeg

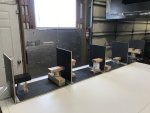
Bonding vertical cabinet pieces (Like my fancy jigs? ?)
IMG_9036.jpegIMG_9034.jpeg

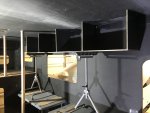
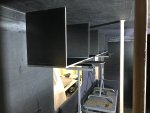
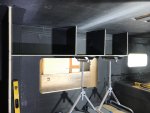
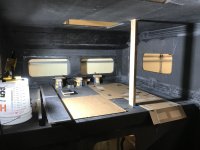
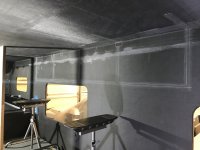
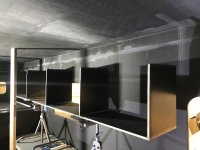
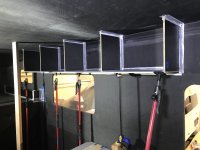
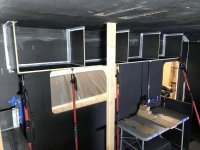
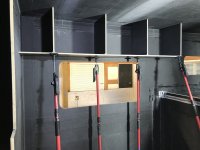
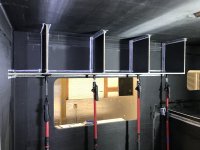
Driver and passenger side overhead cabinet frames ready to be dry fit:
IMG_9052.jpegIMG_9051.jpeg

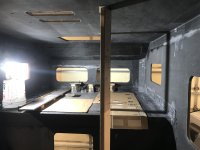
Dry Fitting Passenger Side:
IMG_9079.jpegIMG_9077.jpeg

Dry Fitting Driver Side:
IMG_9081.jpeg
 
Last edited:

trackhead

Adventurer
Amazing. Not many folks build composite cupboards. I did it when I rebuilt an old truck camper interior, and did my entire current camper in glass/xps. Save so much overhead, high center of gravity weight, plus it adds a lot of structural rigidity where typical cupboards just add weight.

Bravo.
 

Vance Vanz

Well-known member
Amazing. Not many folks build composite cupboards. I did it when I rebuilt an old truck camper interior, and did my entire current camper in glass/xps. Save so much overhead, high center of gravity weight, plus it adds a lot of structural rigidity where typical cupboards just add weight.

Bravo.
Nice trackhead (y). I'm sure it was just a little ;) work to do your entire camper in glass/xps. Good on you! Please forgive my ignorance, or if I have already asked, but do you have a build thread on your current baby?

I definitely agree! The two main reasons for composite overhead cabinet frames, for me, was 1. additional structural support (I have a lot of crap on the roof) and for 2. aesthetics (I wanted to have more composite/white in the camper as opposed to too much wood grain/bamboo. I'm shooting for a visually balanced interior).

The small headboard cabinet in the cab over bed area is also getting the same set up, composite frame and bamboo cabinet lids. This one isn't really for structural support, more to match the aesthetics of the camper, but it never hurts to keep it light while also adding additional structural support in the cab over area.

Pics to come soon on this one as I'm currently working on it right now. My cabinet jacks are on order, so I can't bond the overhead cabinet frames until Saturday/Sunday ☹.
 

Vance Vanz

Well-known member
Final Interior Layouts for Mechanical Systems:

Time flies; it has been almost three weeks since my last post :oops::poop:!

Let's get the build thread caught up :geek:.

I had to pause the interior composite cabinetry/shelving work in order to basically finalize the remainder of the A/C, heating, hydronic, plumbing, electrical and lighting for the entire build. I had a majority of this (generally) decided, but final locations and dimensions for mechanical compartments, chases, vents, needed blanks off, etc. needed to be made. The good news is, pretty much 95% of all of this is finalized. The bad news is, all of this took about 4-5 days of serious head scratching, number crunching, figuring, re-figuring and even re-re-figuring ?.

Basically, all of the interior walls and cabinetry frames/shelves will be composite. These things are not easily moved/removed after they are bonded and tabbed, so I definitely do not want to miss anything-royally screw something up. I also have to get all of this dialed in and finalized before the camper heads off to paint. The entire camper, inside and out, will be painted at once, and only once. I have to ensure that I have all of the composite work exactly where it needs to be for all final finish work, before I actually start the final finish work. This is the JOY of doing mixed material cabinetry, composite and wood.

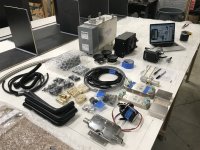
So........., I started yanking everything I had not already accounted for, out of the boxes, to take final measurements and dry fit everything.
IMG_9093.jpegIMG_9106.jpegIMG_9107.jpegIMG_9108.jpeg

I'll spare most of the details, but the refrigerator stack was by far the biggest PITA. This is the vertical stack that will have a mechanical compartment at the bottom, then the fridge, followed by a pantry cabinet, then the microwave and finally a small overhead cubby cabinet at the top.

The mechanical compartment at the bottom of this stack is the main hub that all of the electrical, hydronic and plumbing passes through, as well as where the drain line for the sink and fuel fill lines from the side of the camper (behind the fridge) pass through the floor. It is also where the heating fan coil, a plate exchanger and a mixing valve sit. The return for the heating is ducted up the back side of this compartment, behind the fridge, so it draws from the ceiling of the camper as opposed to the floor where the supplies registers are located. The venting needed for the refrigerator and adjacent electrical compartment also run up the back side of this stack to the common return ceiling of the camper. All of the plumbing/fixtures for the shower are also routed along the back wall of this compartment, behind the fridge. Getting all of this dialed in and laid out so I could finalize the locations of the composite shelves and make sure everything will come together during the final install took a bit of time.

I also had to finalize how all of the finished bamboo cabinetry will need to be laid out in order to finalize the associated heights of the composite shelves. The finished bamboo frame around the microwave, which makes it look like a built-in unit, needing to be removable to service/replace the microwave if needed, also through a wrench in the whole process and required adjusting shelf heights. You get the picture.

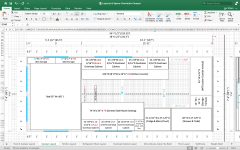
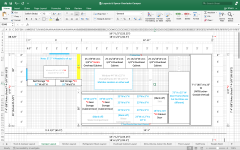
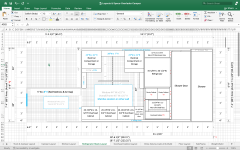
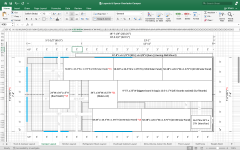
I decided to include my general interior and roof layout for those that are interested and to also have them as a reference, if/when I talk about specific interior elements of the build. The only areas that may change slightly are the dinette booth and kitchen cabinets; everything else should be all set.
Interior Top View.pngInterior PS Side View.pngInterior DS Side View.pngRoof Top View.png
 

Vance Vanz

Well-known member
Composting Toilet Layout - Feedback Welcomed!

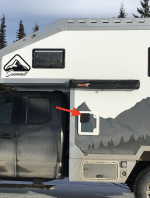
During the previously noted final mechanical systems layout, I had to pull the trigger and decide where and how I was going to vent the composting toilet. Since aesthetics are a priority on this build, the big old vent line needs to be handled in a discreet way.

I had three options for running/terminating the vent line: #1 the roof above/adjacent to the shower #2 the back wall of the shower/back side of camper-left side #3 the side wall of the shower/driver's side, rear side wall of camper.

#1 would have required running the vent line vertically and visibly up the entire height of the inside of the shower (not a visually pleasing option for me) or running it through the adjacent wall, into the vertical closet, and up the entire height of the closet (not an option considering I would have had to blank off the entire back side of the vertical cabinet/or a corner portion of it and lose a ton of valuable storage space).

#2 very short vent line run and hidden behind the toilet, but this would put the vent termination at the bottom of the access ladder to the roof and very close to the gear storage locker door on the back side of the camper, at chest height. I did not want to smell any poo when gearing up for fun adventures.

#3 seemed like the best bet. A short vent line, only somewhat visible on the side of the toilet, and I will rarely be around the driver's side rear area of the camper.

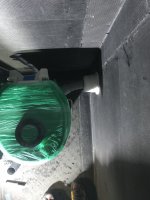
So here is how I have decided to condense the very long and oversized fittings they give you with the toilet. I'm actually surprised, maybe even shocked, that they do not have a simpler and more condensed venting system given the number of RV's and boats these things go in, therefor confined spaces.

I have about 7-1/2" from the side of the toilet to the side walls when the toilet is centered. This will probably shrink to max 7-1/4" once the finished shower walls/shower pan go in.
IMG_9104.jpeg

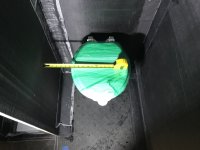
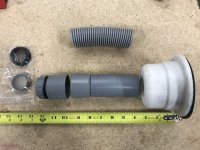
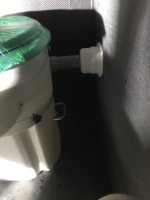
With all of the fittings the factory wants you to put in, the shortest distance you can manage, in a straight shot, (from the adapter that mounts to toilet to the outside/gasket edge of vent fan) is about 11-1/2"
IMG_9102.jpeg

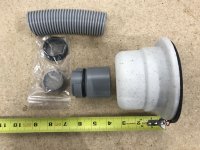
As opposed to hard piping this thing and using a union, I decided to use the factory items to try and keep things simple and still, literally, flexible. I/you can get everything piped in, in a straight line, at the shortest distance of about 5-1/2"
IMG_9103.jpeg

I removed the vent line coupling that also houses the bug screen. The bug screen can be installed in the end of the fitting that mounts directly to the toilet. It fits in the end very nicely/snuggly and can even be siliconed in a few places to make sure it stays put. The screen would also be accessible for cleaning it if/when needed.
IMG_9097.jpeg

Here is what it will look like installed
IMG_9095.jpegIMG_9096.jpeg
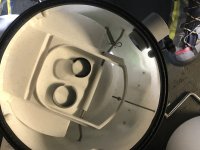
The fitting that connects to the toilet spins freely within the toilet, and is threaded to receive the threaded vent hose, so this will act as the union/mechanism to remove the vent line from the top portion of the toilet when it is time to clean the toilet. I can just spin the fitting to unthread the short piece of vent line.

Electrical for the fan. Since I'm running some kind of FRP shower panel and it will be held off the wall ever so slightly for caulking/the bonding material, I will run the wires in between the FRP panel and side wall. My wall is 1-1/8" thick, the FRP and space for bonding will probably be 1/8-3/16" and the vent fan is set back about a 1/4" in the termination housing, so this gives about 1-1/2" inside the wall for wire connectors. I will also install an additional screen on the inlet side of the fan to prevent the electrical wires/wire connectors from sliding back into the fan/fan blades.

Anyone that has a composting toilet and has tried something similar, and it did not work, or can see a flaw in my plan, please chime in. This should work and be fairly straight forward, but I want to make sure that I'm not missing something very obvious, or missing something that would cause an issue and only be discovered by those that have actually tried something similar

Also, if you have done something similar and it works great, give me the reassuring thumbs up.

Any recommendations on preferred side wall termination caps would be great as well ?. I haven't had the time to research any yet.
 

Vance Vanz

Well-known member
Bed Area - Composite Carbon Fiber Cabinet Bonding
Time to get back to the real work and visual progress ;)!

The cabinet and bed catch rail had to be bonded in three stages/layups to make it easier to keep everything in place.

Sanded, cleaned and prepped for bonding and filleting
IMG_9085.jpegIMG_9086.jpeg

Bonding the first two pieces of the cabinet
IMG_9091.jpeg

Layup #2, side pieces for cabinet
Those angled front corners on the camper, to match the lines/angles on the truck, were such a great idea, until you have to compensate/account for them on all of the associated finished interior work ;)?​
IMG_9124.jpegIMG_9125.jpeg

Layup #3, bed catch rail
IMG_9134.jpegIMG_9135.jpeg

Random, but may be helpful. If you are doing as much composite work as I have been this past year, and the corrugations on the straps of your full face respirator are eating the back of your neck ALIVE, get some soft cpap straps. $9.99 for two sets on Amazon. Me necky, likey
IMG_9123.jpeg
 

Vance Vanz

Well-known member
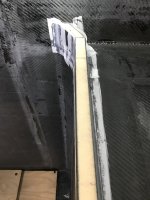
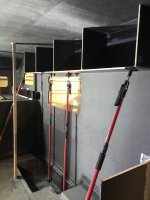
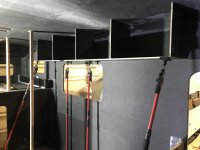
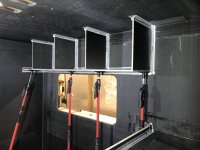
Composite Carbon Fiber Overhead Cabinet Bonding - Passenger Side

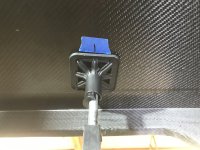
A new toy arrived.
IMG_9114.jpeg

I was going to save a few buck by figuring out a way to support the overhead cabinets with my existing clamps/stands, but nothing I had would work for applying pressure up and in on the corner of the cabinets. Rather than risk screwing up my overhead cabinets for a few hundred bucks, I decided to "get the right tool for the job" as they say.

Getting it all dry fit, dialed in and marked using the new toys
IMG_9115.jpegIMG_9116.jpegIMG_9122.jpeg

Final sand, clean and staging for the bond/fillet
IMG_9126.jpegIMG_9128.jpeg

I swear, all of my time is spent on figuring out how I'm going to do something as opposed to actually doing it. I had to use the tables and stands to support the cabinet for applying epoxy and getting it as close to the wall without touching it as possible. Once pressed in place, I had to set a few cabinets jacks and then remove the stands and table to place the remaining jack stands. Not a simple process when you are flying solo and also racing the epoxy gel/set up clock ??.

Perfectly placed, bonded and filleted.
IMG_9130.jpegIMG_9133.jpeg
 

Vance Vanz

Well-known member
Composite Carbon Fiber Overhead Cabinet Bonding - Driver's Side

Dry fitting and marking
IMG_9139.jpeg

Bonding and Filleting
IMG_9149.jpegIMG_9144.jpeg

Money well spent on the jacks.
 

Vance Vanz

Well-known member
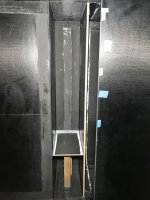
Composite Carbon Fiber Cabinet Shelf Bonding - Vertical Closet

Nothing fancy about these stands, good old 2x4's, or four be twos as they say down under in Aussie Land ?.

The only thing that stinks about using slow hardener, is it takes a biiiiiiiiiiiiiiiiiiiiiiiiit mooooooooooooooore tiiiiiiiiiiiiiiiiiiiiiiiiiiiiiiiiiiiiiiiiiiiiiiiiiiiiiiiiiiiiiiiime in between the layups.
IMG_9136.jpegIMG_9137.jpegIMG_9151.jpegIMG_9152.jpeg

I'll get the last/remaining top piece for the upper cabinet bonded this week. Then it will be on to the fun task of tabbing this narrow and deep cabinet. I can't wait to get some epoxy where it doesn't belong ?.
 

Trail Talk

Well-known member
Composting Toilet Layout - Feedback Welcomed!

We vent our AirHead similarly with the shortest run out the side wall, through the pre-existing cassette toilet access hatch. Needed a diffusor plate over the exterior cover to keep moving air from overwhelming the computer fan and preventing it from doing the venting part ;-) Once that was sorted, its been great. BTW, if you have the coir mix right, you should never smell anything more than a damp organic smell, even with your nose right up to the vent. You might need to experiment a bit with liners, too. Coffee filters, as recommended by AirHead, don't break up very well. We've settled on a narrow sheet of paper towel per "dump".

Screen Shot 2023-05-22 at 7.15.55 AM.png
 

Vance Vanz

Well-known member
We vent our AirHead similarly with the shortest run out the side wall, through the pre-existing cassette toilet access hatch. Needed a diffusor plate over the exterior cover to keep moving air from overwhelming the computer fan and preventing it from doing the venting part ;-) Once that was sorted, its been great. BTW, if you have the coir mix right, you should never smell anything more than a damp organic smell, even with your nose right up to the vent. You might need to experiment a bit with liners, too. Coffee filters, as recommended by AirHead, don't break up very well. We've settled on a narrow sheet of paper towel per "dump".

View attachment 779397
Perfect! Thanks for the response/info on the venting, as well as the liners.
 

ITTOG

Well-known member
Bed Area - Composite Carbon Fiber Cabinet Bonding
Time to get back to the real work and visual progress ;)!

The cabinet and bed catch rail had to be bonded in three stages/layups to make it easier to keep everything in place.

Sanded, cleaned and prepped for bonding and filleting
View attachment 779373View attachment 779374

Bonding the first two pieces of the cabinet
View attachment 779375

Layup #2, side pieces for cabinet
Those angled front corners on the camper, to match the lines/angles on the truck, were such a great idea, until you have to compensate/account for them on all of the associated finished interior work ;)?​
View attachment 779377View attachment 779378

Layup #3, bed catch rail
View attachment 779379View attachment 779380

Random, but may be helpful. If you are doing as much composite work as I have been this past year, and the corrugations on the straps of your full face respirator are eating the back of your neck ALIVE, get some soft cpap straps. $9.99 for two sets on Amazon. Me necky, likey
View attachment 779376
The cabinet and bed catch rail is much shinier than the walls. Did you use a different material for them or is it just picture magic.
 

StenchRV

Well-known member
Composting Toilet Layout - Feedback Welcomed!

During the previously noted final mechanical systems layout, I had to pull the trigger and decide where and how I was going to vent the composting toilet. Since aesthetics are a priority on this build, the big old vent line needs to be handled in a discreet way.

I had three options for running/terminating the vent line: #1 the roof above/adjacent to the shower #2 the back wall of the shower/back side of camper-left side #3 the side wall of the shower/driver's side, rear side wall of camper.

#1 would have required running the vent line vertically and visibly up the entire height of the inside of the shower (not a visually pleasing option for me) or running it through the adjacent wall, into the vertical closet, and up the entire height of the closet (not an option considering I would have had to blank off the entire back side of the vertical cabinet/or a corner portion of it and lose a ton of valuable storage space).

#2 very short vent line run and hidden behind the toilet, but this would put the vent termination at the bottom of the access ladder to the roof and very close to the gear storage locker door on the back side of the camper, at chest height. I did not want to smell any poo when gearing up for fun adventures.

#3 seemed like the best bet. A short vent line, only somewhat visible on the side of the toilet, and I will rarely be around the driver's side rear area of the camper.

So here is how I have decided to condense the very long and oversized fittings they give you with the toilet. I'm actually surprised, maybe even shocked, that they do not have a simpler and more condensed venting system given the number of RV's and boats these things go in, therefor confined spaces.

I have about 7-1/2" from the side of the toilet to the side walls when the toilet is centered. This will probably shrink to max 7-1/4" once the finished shower walls/shower pan go in.
View attachment 779370

With all of the fittings the factory wants you to put in, the shortest distance you can manage, in a straight shot, (from the adapter that mounts to toilet to the outside/gasket edge of vent fan) is about 11-1/2"
View attachment 779371

As opposed to hard piping this thing and using a union, I decided to use the factory items to try and keep things simple and still, literally, flexible. I/you can get everything piped in, in a straight line, at the shortest distance of about 5-1/2"
View attachment 779372

I removed the vent line coupling that also houses the bug screen. The bug screen can be installed in the end of the fitting that mounts directly to the toilet. It fits in the end very nicely/snuggly and can even be siliconed in a few places to make sure it stays put. The screen would also be accessible for cleaning it if/when needed.
View attachment 779367

Here is what it will look like installed
View attachment 779365View attachment 779366
The fitting that connects to the toilet spins freely within the toilet, and is threaded to receive the threaded vent hose, so this will act as the union/mechanism to remove the vent line from the top portion of the toilet when it is time to clean the toilet. I can just spin the fitting to unthread the short piece of vent line.

Electrical for the fan. Since I'm running some kind of FRP shower panel and it will be held off the wall ever so slightly for caulking/the bonding material, I will run the wires in between the FRP panel and side wall. My wall is 1-1/8" thick, the FRP and space for bonding will probably be 1/8-3/16" and the vent fan is set back about a 1/4" in the termination housing, so this gives about 1-1/2" inside the wall for wire connectors. I will also install an additional screen on the inlet side of the fan to prevent the electrical wires/wire connectors from sliding back into the fan/fan blades.

Anyone that has a composting toilet and has tried something similar, and it did not work, or can see a flaw in my plan, please chime in. This should work and be fairly straight forward, but I want to make sure that I'm not missing something very obvious, or missing something that would cause an issue and only be discovered by those that have actually tried something similar

Also, if you have done something similar and it works great, give me the reassuring thumbs up.

Any recommendations on preferred side wall termination caps would be great as well ?. I haven't had the time to research any yet.
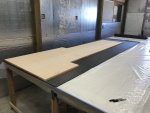
Vance,

I agree with routing the Air Head vent out the wall, rear wall in my case. I did not like the idea of running it up to the ceiling. A version of what you did.
OH and by the way there is really no odor from the fan exit.
I used a marine vent cover and installed a fine stainless steel bug bug screen inside the marine vent. They sell the vent it a few different sizes.

1684974332031.jpeg


1684974424314.jpeg


NICE WORK on your rig! ONWARD!!

CHEERS!!

Craig
 
Last edited:

Forum statistics

Threads
188,356
Messages
2,905,852
Members
230,117
Latest member
greatwhite24
Top