2022 Ford F550 - DIY - Adventure Expedition Vehicle Build Thread

Vance Vanz

Well-known member
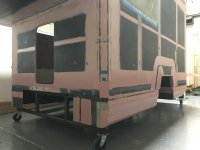
Bonding Fairings & Rear Fenders to the Camper

So, my sweet heart was in town visiting me for a few days and she called me one evening while I was at the shop working away. She asked if I needed any help. I said sure (as I had been prepping all day in order to bond the fairings) and I asked her if she was ready to work her butt off. She thought I was kidding and she also forgot to mention that she was referring to helping out "tomorrow" meaning the next day. Just a little relational miss communication :LOL:! I promise, we actually do pretty good in this department.

Regardless, she came out pretty late in the evening and I was stoked to have an extra set of hands to bond all four of the fairings. I kicked into go mode and the next thing you know it was 2am in the morning and she was basically turning into a puddle (we had both already worked a full day before starting all of this madness at 9pm). As soon as the last fairing was secured at about 2:30am, she tapped out and headed home. I stayed to get all of the filler smoothed out and peel plied. Another all nighter on this yahoo of a project 🤠😵‍💫🥴!

Erin, you are an Angel 😇 and a trooper 💪. I owe you BIG time sweetness :love:😘.

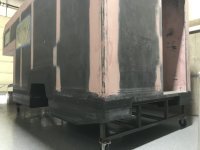
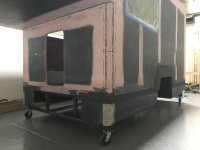
IMG_1192.jpegIMG_1193.jpegIMG_1196.jpeg

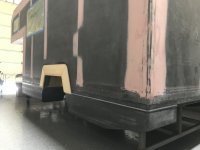
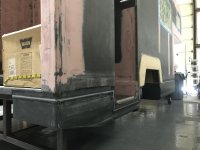
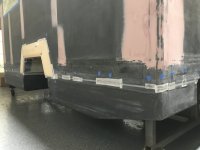
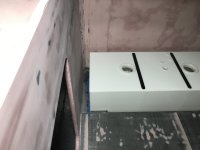
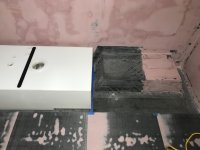
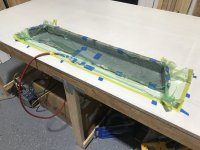
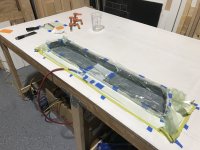
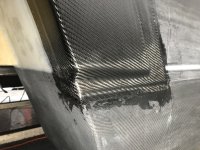
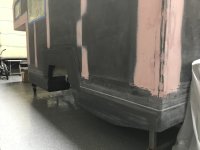
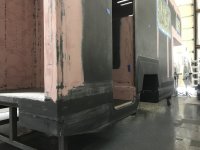
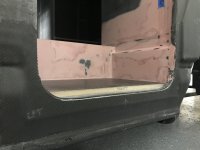
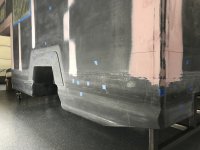
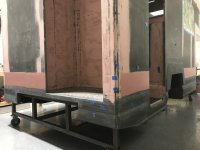
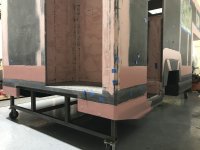
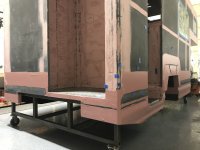
After sanding all of the joints on the fairings, it was filler coat number two for the fairing joints and time to bond the core material for the rear fenders.
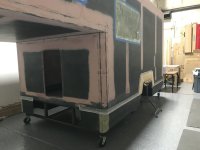
IMG_1199.jpegIMG_1200.jpeg
IMG_1205.jpeg
IMG_1207.jpeg

One more sand on everything and some last little spot fills. Oh man, there is nothing fast about composite work.
IMG_1223.jpegIMG_1225.jpeg
 
Last edited:

DzlToy

Explorer
Dangit, I was just in Boise on business and did not even think about sending you a PM.

It would have been nice to see all of this hard work in person.
 

Vance Vanz

Well-known member
Dangit, I was just in Boise on business and did not even think about sending you a PM.

It would have been nice to see all of this hard work in person.
Hey DzlToy,

Bummer; it would have been nice to show you the build. If/when you are out again, and I'm still putzing around here in Boise, definitely get in touch. I would be happy to shoot the build :poop: with you. 😁

On another note. If you would have remember, and timed it right, you could have also been able to see Wild's Build (y)(y). Wild's and his wife were on their annual summer trip out West and were able to swing by. It was great to finally meet them in person and see that SWEET Rig in person.

Pictures just don't do these machines justice. Seeing StenchRV's/Craigs (2 summers ago) and Wild's (this summer) builds in person, was awesome and refreshing. It not only normalizes the mountain I'm trying to move, it gives me a little shot of energy seeing well-built finished products.

Next time!
 

Vance Vanz

Well-known member
Shower Base/Pan

Alright, let's start with a few items that are not composite or body work related. Finally and Thank You!

After looking at my last round of posts, and the time in between them and the previous sets of posts, it seemed like I was missing a week of work. I remembered that I had sized the shower pan and water tanks, as well as tracked down fab shops and got them ordered. Somehow they magically arrived at my shop a day apart. Thank you Build Universe 😁 😘; it finally feels like some things are falling into place.

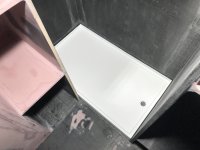
Sizing the shower pan took a bit of time, as I had to finalize: how I was going to frame the door-including door seals (since I won't be using a shower curtain), the door hardware, securing the composting toilet to the pan, the drain location in conjunction with plumbing and the grey water tank......... etc. A bit more head scratching and triple checking everything to ensure I wasn't forgetting something. I'll also be building a custom threshold for the door entry area, as opposed to having one built/fabricated into the pan.

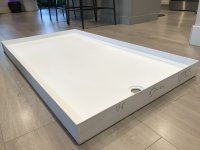
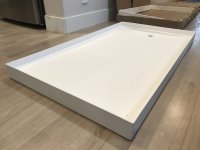
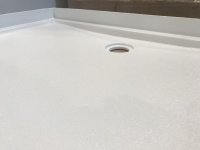
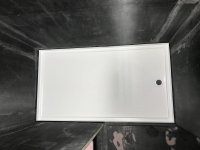
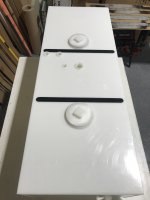
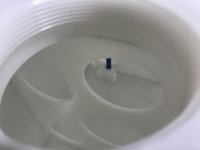
I was able to find a custom shower base shop that puts out production quality pans for half the price of the quotes I was getting to have one fabricated out of SS. This also eliminated several other headaches I was going to have to address, do myself, related to a SS pan. It was a no brainer. You can basically customize anything on the pan you want. I even have a slightly different slope on the pan under the composting toilet, vs. the slope of the pan in front of the composting toilet. The little details matter 🤓.

IMG_1345.jpegIMG_1346.jpegIMG_1347.jpeg

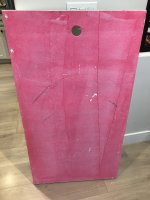
The shower base also has a solid core, so no flimsy/flexy RV pan.
IMG_1348.jpeg

My tape measure still works (y)
IMG_1353.jpeg
IMG_1351.jpeg

For those interested in knowing who made the shower base/pan:

Custom Shower Bases (They are out of Canada)

They will make a base out of "Diamond Core" (this is the material I chose) and "Corian". Corian allows for more color options and you can also select a hidden drain (square or rectangle) if you would like, but the price bumps up pretty quick when you start selecting custom colors. My Diamond Core base was $1,218, which included free shipping in the US. My base made out of Corian (white color and same circle drain) would have been about $1,750. Selecting a hidden square drain bumped the price up to $1,989. They have a pretty good online calculator for the various options.

Even if I chose the Corian option and the square hidden drain (Now we are getting all fancy ;)), I still would have saved $500 to 1,000 compared to a stainless steel (SS) pan (which I still would have had to fabricate and bond supports to the bottom of). I was getting price quotes of $2,500-3,000 for my pan in SS.

I hope this info helps somebody save a ton of time and $. If it does, you owe me a cocktail and I like the stiff-fancy-expensive ones 😜😆.
 
Last edited:
Vance Vanz

Well-known member
Water Tanks

These babies definitely involved a lot of head scratching to get dialed in. The grey water tank wasn't so bad, but the fresh water tank required me to finalize a lot of items that were undecided.

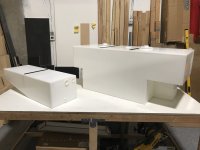
I needed to find a place to store my removable composite pass through door (34.5"H x 18.5"W) and the only place that made sense was the left side of the water tank/under the kitchen counter. I had to decrease the length of the water tank and add some to the height. This posed a problem because of my water filter compartment that sits right over a portion of the tank. Since I'm cramming a whole house/point of entry multi stage filtration and UV purification system into the camper that is sized for a small cottage, space is super tight and limited. I basically didn't have any room, but somehow hopefully found a way. I guess we'll see when it comes time to actually install everything 🤞🫣.

IMG_1305.jpegIMG_1320.jpegIMG_1322.jpegIMG_1325.jpeg

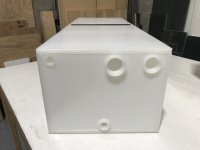
General tank info: 3/8" wall, internal baffles, heavy duty spin weld fittings, everything is rated food grade (including the cleanouts). PEX pick up tube (with a built in bracket to keep the end of it from moving)....... I can also reach my arm into each cleanout, and through the internal baffles, to access/clean the center portion of the fresh water tank if needed.

Internal baffles and PEX pick up tube support bracket in the fresh water tank.
IMG_1314.jpeg

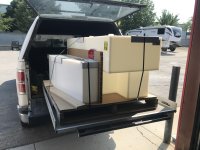
The fab shop I found did an awesome job. I was originally going to have them just fabricate blank tanks and I was going to install spin welds where I needed them (during the plumbing/mechanical install). Their price for the tanks, shipping and welding all of the heavy duty fittings and cleanouts, including installing the PEX pick up tube and support bracket was the same as what other shops were charging just for blank tanks and shipping. I basically got all of the fitting, cleanouts and pick up tube installed for free and it also saved me the time of not having to do them myself (y)(y). They also got the tanks to me 2 weeks before expected/scheduled :oops:, WHAAAAAAAAAAT ????? I wish every contractor was like this :ROFLMAO:!

IMG_1337.jpeg
IMG_1334.jpeg

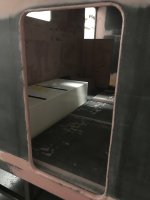
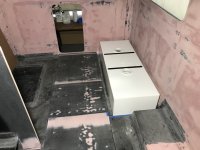
Left side of the tank, where my pass through door will be stored (super small pocket).
IMG_1329.jpeg

Right side of the tank, just enough room for a 3/4" cabinet wall.IMG_1330.jpeg

For those interested in knowing who fabricated the tanks:

Visual Options (Out of Tacoma Washington)

When you look at VO's website, you wouldn't think they do/specialize in water tanks. I was actually referred to them by several other plastic shops/fabricators in the Seattle/Tacoma Washington area. After researching and calling roughly 20-25 fabrication shops (throughout the US/Canada), VO's was the most knowledgable and one of the few shops that was actually willing to spend the time answering my technical questions. I was able to speak with the fabricator, not just the office admin or a salesman/women who rarely knows much about what they are trying to sell. It was refreshing. If you need custom tanks and can't find a decent shop local to you, consider using VO. The were great from start to finish.
 
Last edited:
Vance Vanz

Well-known member
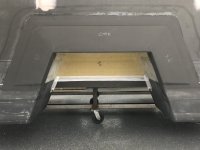
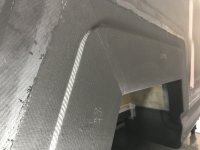
Carbon Fiber Wheel Well Skirts/Fairings

Back to our regularly scheduled program!

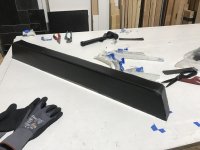
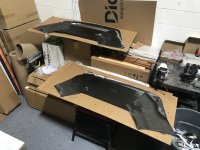
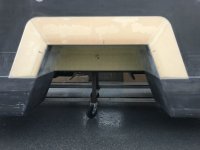
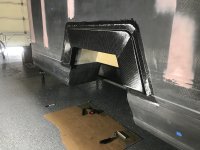
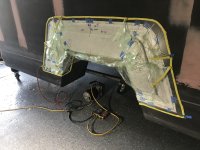
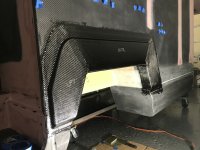
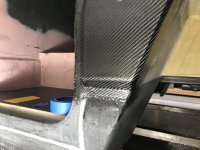
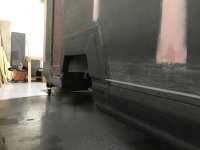
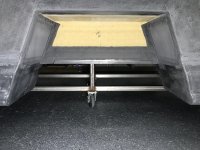
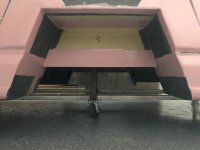
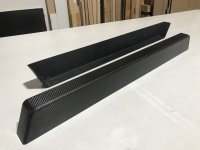
These are the skirts/fairings for the inside/back side of the wheel wells. I think it looks aesthetically cleaner when you can't see the gap between the camper and chassis, through and across from one wheel well to the other. They will also hide any lines/wires that penetrate the camper floor that otherwise would/could have been visible looking into and across the gap/wheel wells.

Those damn details again 🙃.

Building the mold
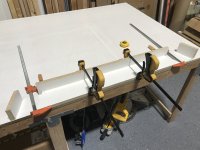
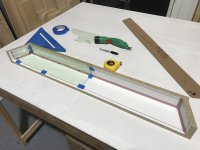
IMG_1219.jpeg

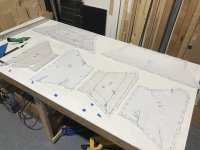
Templating for the various layers of CF
IMG_1226.jpeg

Ready for the layup
IMG_1228.jpeg

On a pump
IMG_1231.jpeg

Demolding
IMG_1244.jpeg

Rinse and repeat for #2
IMG_1250.jpeg

Trimmed and ready for bonding
IMG_1281.jpeg

Bonded, filleted and peel plyed
IMG_1285.jpeg

Sanded, cleaned, structural fill/fillet #2, sanded/cleaned again and ready for tabbing
IMG_1363.jpeg
 

Vance Vanz

Well-known member
Drivers Side Rear Fender - Templating & Layup

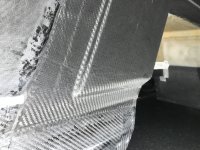
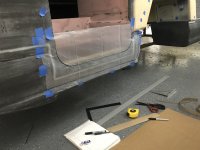
Although I didn't need to, because the rear fenders are not structural, I decided to match the CF cloth layup schedule on the exterior skin of the walls. I figure plenty of bushes and tree branches are going to jamb right into/on the ridges of the rear fenders. Hopefully not, but these things may take a hit from a tree, bank or even a boulder. The last thing I want is for them to peel open like a coke can If I only put one layer of cloth on them.

Of course templating and applying three layers of CF, instead of just one, is a huge time suck and PITA! But........., I'm building an adventure rig to travel the world and it needs to be rugged; it needs to be able to take a bit of a beating! 👊 and one more 👊. Ope, not done yet 👊👊 :ROFLMAO:.

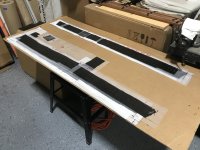
Templating, so all of the joints in the cloth are offset and the inside/outside corners are wrapped/oriented so there is no gap in the cloth/the same seam is not present throughout each layer. This is the nuanced stuff that just burns up time 😣.
IMG_1236.jpegIMG_1241.jpegIMG_1239.jpeg

Ready for the layup
IMG_1257.jpeg

Here we go
IMG_1258.jpeg

Second layer down, 8.85 biaxial
IMG_1259.jpeg

After some organized chaos, finally on a pump. You need to hustle when working solo 😧.
IMG_1261.jpeg
 

Vance Vanz

Well-known member
Passenger Side Rear Fender - Layup

Running a marathon over here. Final layer down on the passenger side
IMG_1262.jpeg

Making sure it is all wrapped and applied nice and tight-No Stinking air pockets please.
IMG_1264.jpegIMG_1266.jpeg

Pumping her down. Layups like these are always pressed for time, especially when you hammer out both fenders in the same day. It was a long day, but I'm running out of patience and Go Juice for composite/body work on this project, so I often keep pushing to just get it done. I can't wait until the composite and body work are in my rear view mirror on this project 🤪.
IMG_1267.jpegIMG_1270.jpeg

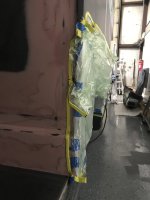
I am definitely not looking forward to cleaning the sticky tape off of the camper when this thing comes off!

Both fenders complete and on a pump. Night, night 😴
IMG_1274.jpeg
 

Vance Vanz

Well-known member
Carbon Fiber Fairings - Tabbing

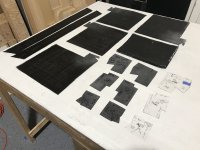
More templating and stacks of CF cloth/consumables
IMG_1256.jpegIMG_1359.jpegIMG_1362.jpeg

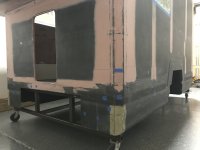
Layups complete. It's finally starting to look like somewhat of a cohesive habitat box/camper.
IMG_1367.jpegIMG_1368.jpeg
IMG_1370.jpeg

It was nice to see how smooth these transitions came out prior to any fairing material/body workIMG_1372.jpeg

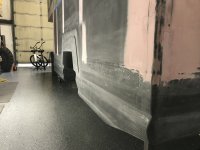
Ready for sanding and body work
IMG_1404.jpeg

Playing with the lighting a bit to show how the contours on the camper are finally starting to come together
IMG_1389.jpeg
 

andy_b

Active member
Shower Base/Pan

Alright, let's start with a few items that are not composite or body work related. Finally and Thank You!

After looking at my last round of posts, and the time in between them and the previous sets of posts, it seemed like I was missing a week of work. I remembered that I had sized the shower pan and water tanks, as well as tracked down fab shops and got them ordered. Somehow they magically arrived at my shop a day apart. Thank you Build Universe 😁 😘; it finally feels like some things are falling into place.

Sizing the shower pan took a bit of time, as I had to finalize: how I was going to frame the door-including door seals (since I won't be using a shower curtain), the door hardware, securing the composting toilet to the pan, the drain location in conjunction with plumbing and the grey water tank......... etc. A bit more head scratching and triple checking everything to ensure I wasn't forgetting something. I'll also be building a custom threshold for the door entry area, as opposed to having one built/fabricated into the pan.

I was able to find a custom shower base shop that puts out production quality pans for half the price of the quotes I was getting to have one fabricated out of SS. This also eliminated several other headaches I was going to have to address, do myself, related to a SS pan. It was a no brainer. You can basically customize anything on the pan you want. I even have a slightly different slope on the pan under the composting toilet, vs. the slope of the pan in front of the composting toilet. The little details matter 🤓.

View attachment 845882View attachment 845883View attachment 845884

The shower base also has a solid core, so no flimsy/flexy RV pan.
View attachment 845885

My tape measure still works (y)
View attachment 845887
View attachment 845886
The quality and attention to detail of your build continues to be amazing!

Could you share where you had your shower pan made? I had a quote for a stainless one for ~$2500. I’d love to hear about an alternative like yours.

Thanks!
 

kurad

New member
Have you considered an aluminum shower pan? Rust-proof, superior longevity compared to ABS or fiberglass... and it's not like you have to drink from it 😝 Easy to clean and you can add some teak slats or engineered wood and it will also look nice.
 

Vance Vanz

Well-known member
The quality and attention to detail of your build continues to be amazing!

Could you share where you had your shower pan made? I had a quote for a stainless one for ~$2500. I’d love to hear about an alternative like yours.

Thanks!
Thanks andy_b(y)(y)!

I'm afraid I set the bar high early on and there is no turning back now. It's costing me though 😄.

I input the info at the end of the shower base post for all to see. Probably more than you need to know, but having too much info on projects like these never hurts.

Happy shopping.
 

Vance Vanz

Well-known member
Favor, Por Favor!

Hi all. I probably should have asked this months ago, but it has kept slipping my mind.

Can you send me (PM me, or just post them to the build thread) any active/current and comprehensive build threads on the Portal? Comprehensive meaning (Camperthing, Stench RV, mine) and more current than these threads.

I'm also open to any comprehensive Overland/Expedition builds that you are aware of on Youtube, or any other online medium.

I need some 5-10 minute shots of entertainment on my snack and lunch breaks at the shop. Some of the info (build threads) may also show a design/product that I am not aware of. Most everything on the build has already been decided, but I do have a few things that are still a blank slate.

I peek in on most of the high end professional campervan builders at times, so that is covered. I just need some more Overland/Expi info and eye candy.

Thanks in advance for taking the time and I look forward to hearing from those that have some input(y):).
 
Last edited:
Vance Vanz

Well-known member
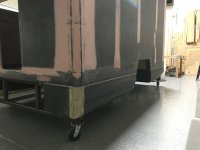
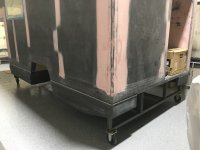
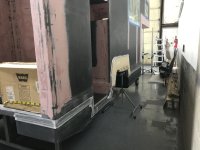
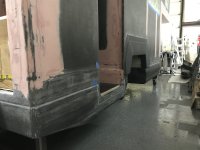
Camper Fairing/Bodywork - Bottom Exterior

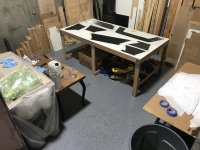
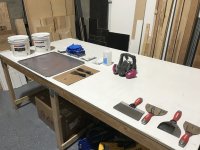
After getting everything bonded and tabbed on the lower portion of the camper, I set up my fairing/bodywork station in preparation for laying down some pooky.
IMG_1397.jpeg

As soon as I looked at my work station and really took in what was about to happen, I froze. I was lost in the moment, taken back to the experience of doing the bodywork on the interior of the camper. Let's just say that was not a pleasant experience/memory. I had to steel myself away from the journey back in time: stuff it all back in the closet, shake myself back to the present moment and repeat my old trusty-dusty mantra of "Just keep moving forward, one step at a time". Deep exhale and begrudgingly off I went.

Laying down reference lines and marking high point tabbing lines
IMG_1409.jpeg
IMG_1402.jpeg

First coats going down
IMG_1412.jpegIMG_1416.jpegIMG_1426.jpeg
IMG_1420.jpegIMG_1422.jpeg
 
Last edited:
Forum statistics

Threads
187,297
Messages
2,893,096
Members
228,100
Latest member
havanother
Top