2022 Ford F550 - DIY - Adventure Expedition Vehicle Build Thread

Vance Vanz

Well-known member
Hey rruff,

Thanks for the reply.

Yes, it has been decided. A flat roof for me. I will have several penetrations though, A/C unit, vent fan and a skylight, plus a couple of electrical penetrations.

Since my composite panels will only be about 1-1/16" total thickness when finished, and most A/C units, vent fans and skylights need at least a minimum wall/roof thickness of 1-1/4", I am going to have to build up the outside or inside of my composite panel/roof. I may just build up the outside of the composite panel/roof with additional layers of CF or foam. This would create a nice 3/16-1/4" high epoxied mounting ring/surface and would also act as a great water dam on a flat roof.

This is one of those ideas that will work out great and solve multiple problems at once, but will also be a PITA and HUGE time suck to make and finish out.
 

ITTOG

Well-known member
Yeah it is crazy how long glassing can take. Any close up pics of the boxes?

Did you use a release agent or some other trick to get the CF of the forms.

Sent from my Pixel 6 Pro using Tapatalk
 

Alloy

Well-known member
Hey rruff,

Thanks for the reply.

Yes, it has been decided. A flat roof for me. I will have several penetrations though, A/C unit, vent fan and a skylight, plus a couple of electrical penetrations.

Since my composite panels will only be about 1-1/16" total thickness when finished, and most A/C units, vent fans and skylights need at least a minimum wall/roof thickness of 1-1/4", I am going to have to build up the outside or inside of my composite panel/roof. I may just build up the outside of the composite panel/roof with additional layers of CF or foam. This would create a nice 3/16-1/4" high epoxied mounting ring/surface and would also act as a great water dam on a flat roof.

This is one of those ideas that will work out great and solve multiple problems at once, but will also be a PITA and HUGE time suck to make and finish out.

Just wondering why not make the whole roof panel thicker?
 

Vance Vanz

Well-known member
Yeah it is crazy how long glassing can take. Any close up pics of the boxes?

Did you use a release agent or some other trick to get the CF of the forms.

Sent from my Pixel 6 Pro using Tapatalk
Hey ITTOG,

You are telling me. I can't believe how long it takes to layout/prep all the CF and consumables for these layups. It's a freaking chore sometimes. I'm right in the middle of measuring and cutting everything for the final layup on the boxes/wheel wells and it's a bit of a grind when you are working solo.

I'll get some close ups of the boxes if I don't already have some closer pics in the line up to come.

I was going to wait until after the final layup of the the boxes and wheel wells before writing up a detailed material/layup process, but I guess I can do part of it now and finish out the rest later. See my next post to answer your question related to the use of a release agent on the forms.
 
Last edited:

Vance Vanz

Well-known member
Materials and Layup Process – Floor Boxes & Wheel Well Layups:

I thought I would Include the specific materials I used and some info related to the layup process I chose and why I chose it, in case it is helpful to others. I will also include what I would have done differently if I was to do things again, if/when it applies. I also threw in a few tips related to vacuum bagging for those that may be new to it/considering it. NOTE: This is only for the outside layup of CF for the boxes/wheel wells.

Materials: I’m using the same Foam and CF that I used on the floor (1" Divinycell and 9.5oz plain weave and 23.89oz biaxial weave) on all of the boxes/wheel wells. For the bottom of the step box and tops of the wheel wells, I also added an additional 8.85oz biaxial cap layer. For the larger water and battery boxes, I added additional 8 and 10” wide strips of 8.85oz biaxial and 9.5oz plain weaves to the layup. There are two sets of these wide strips per each box that wrap the outside width of the box. They help support the additional weight these boxes will see, while also stiffening them up. I didn't want any sag or deformation in the middle of these boxes, especially the water box when the tank is full.

I chose to bond/epoxy the foam core together first, rather than trying to bond the foam and the outside layers of CF in one shot/at the same time using a form and vacuum bagging. I was worried that the various joints/seams of the foam might shift or separate a bit during the layup process since there were multiple pieces/seams of core material. I wanted to ensure that all of the joints of the foam, and therefore insulation, stayed tight-no gaps.

Two of the forms, the wheel wells and step box, were made out of ¾” thick laminated MDF. The same material my layup table is made out of. I had some extra scrap left over from the table, so I used what I had. The wheel wells and step box only have three side walls (or another way of saying it is they have an open side), so I wanted to make sure the outside of these forms were laminated MDF. I taped any non-laminated edges/cut edges with masking tape and then used three coats of release wax on the entire outside of the form and on the bottom edge of the form.

For the other two forms, larger water box and battery box, that have sides all the way around them, I chose to make the form out of plywood. I had plenty of ½” plywood in the shop, so I chose to make them out of ½” instead of ¾”. I would not do this again-see below. For these forms, I just taped the bottom edge of the form and 1-1/2” up the sides of the form and applied three coats of release wax only to the masking tape. Since my layups are pretty clean and I’m vacuum bagging, I don’t really have resin pooling up or moving around during my layups. I wasn’t worried that resin would travel 1” across the edge of the foam/core and then vertically up 1-1/2” on the masking tape. I had no issues with the layups coming off the forms.

Forms: For forms of this size, I would recommend using ¾” material for your sheeting and 2x4’s inside if/when needed for bracing. Also, don’t forget to consider, when vacuum bagging, that pressure will be applied to the outside of the vacuum bag and form in all directions. I know this sounds obvious, but you need to consider this when designing your form. All sides/planes will need to be constructed to withstand the atmospheric pressure. I thought I had considered this, but after testing one of my forms, there was a plane/direction that I had missed and the form started to bow in-It even snapped two wood screws that were holding a 1-1/2” x ¾” wood brace. Luckily I caught this beforehand and was able to reinforce my forms to prevent any further issues during the actual layups.

Some people cut their material and consumables during the layup process-during the open time of the resin. This can be common for smaller parts and pieces, but I don’t do this for larger layups. I do all of the prep work I can beforehand related to: materials, dry fitting, layup sequence, etc. This allows for less stress and surprises when I’m already usually pressed for time during the actual layup. Plus, there are times when a surprise does come up and I will need all the time I can get to address it, before the epoxy starts to gel/harden.

I’m a bit of a tree hugger, so I reuse my vacuum bags as much as I can. I used the same bag/vacuum tape for the battery and water boxes. I also used the same bag for all three layups on the two wheel wells and step box. I find that the tacky tape works a little better on the second and third use, as opposed to the first, so I also get things pulled down quicker on a 2nd or 3rd time used bag.

Vacuum Bagging Tips: If you have never done it, it is easier than you might think, so don’t let it intimidate you. A few things to know. Some people use duct tape rather than vacuum bagging sealant tape/tacky tape. It can work, but I would stick with the tacky tape if you can, and definitely DO NOT use the waffle print duct tape. Leaks: If you have a leak while vacuum bagging, it is most likely coming from the tacky tape. The most common spots I find leaks are at the bottom of a pleat where it meets the layup table and at the bridges in the tacky tape. MFG’s of tacky tape will have thin spots in the roll of tape/in the actual material of the tape. These thin spots create a bridge in the tape and air passes right under these. The best way to spot them is to get your eye level with the tacky tape and layup table. When you find one, before your press the tacky tape (center of the bridge) down into the table, use the top edge of your finger nail and press/move some material/tacky tape from each side of the bridge into the center of the bridge. Once more material from each side has been moved into the center of the bridge, then press it down into the table. I wish I would have known this information the first few times I tried to vacuum bag something.

I’ll list any variations in the materials and layup process, for the inside layup of the boxes, once they are bonded to the floor and the inside CF layup is complete.
 
Last edited:

Vance Vanz

Well-known member
Just wondering why not make the whole roof panel thicker?
Hey Alloy,

Thanks for the question.

I could and it has crossed my mind. I just haven't had the time to sit down and figure out how much it would cost for the additional Dinvinycell (material and shipping) and the difference in labor/time of each method.

Once I get the boxes for the floor complete, and my head screwed on straight again, I'll figure it out.

My gut already tells me making the roof thicker will save some time, and it gets me a bit more R-value in the roof, where it is often needed the most. But, if I want those water dams, around penetrations, I would have to build things up a bit anyway. Sooooooo many choices o_O.
 
Last edited:

Vance Vanz

Well-known member
CF Floor Boxes/Wheel Wells & Floor - Prep for Layups

This past week has been a lot of the behind the scenes not so exciting and sexy work of CF.

There was a day/day and a half of sanding and prepping the boxes/wheel wells and floor-for bonding the boxes/wheel wells to the floor. On the third and final layup of the floor, when we thought there was a leak in the tape/seam of the vacuum table and lifted the entire layup to check, some resin pulled onto the bottom side edges of the floor. Once cured, it left many dime sized flat and thin globs of resin on the outside edges of the bottom of the floor. This all had to be sanded off with a belt sander. Not a huge deal, just more of a time suck and reason to get all Tyvek-ed and full-face respirator-ed up on a hot summer day ? ?.
IMG_7614.jpegIMG_7617.jpeg

I also spent a day/day and a half marking all the boxes and underside of the floor, in some places, and cutting all the material for the tabbing of the boxes/wheel wells. All of my tabs are not the same dimensions, so some accounting for smaller sized tabs and how they will meet and overlap at the corners of the boxes took some time.
IMG_7618.jpeg

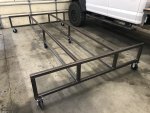
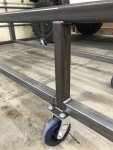
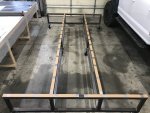
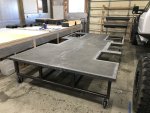
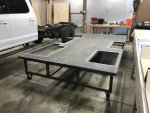
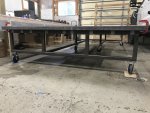
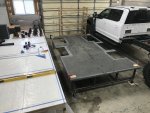
I then had to design/build the steel stand that the camper will sit on for the remainder of the CF layups and build. Unfortunately given: the weight of the camper, needing the stand to be perfectly flat, needing the stand to have casters so I can move it around the shop/out of the shop when the camper is ready for paint and needing it to be 24" off the ground, meant wood was not an option for the stand. It's always hard to swallow the $/time pill for one-time/temporary items needed just for the process of the build. The materials and time to build the stand was not cheap. I'll have some pics of the final product this coming week.

And finally rounding out the week/weekend, more cutting and dry fitting of CF and consumables for the inside layup of the boxes/wheel wells.

Back to work!
 
Last edited:

Vance Vanz

Well-known member
Hey ITTOG,

You are telling me. I can't believe how long it takes to layout/prep all the CF and consumables for these layups. It's a freaking chore sometimes. I'm right in the middle of measuring and cutting everything for the final layup on the boxes/wheel wells and it's a bit of a grind when you are working solo.

I'll get some close ups of the boxes if I don't already have some closer pics in the line up to come.

I was going to wait until after the final layup of the the boxes and wheel wells before writing up a detailed material/layup process, but I guess I can do part of it now and finish out the rest later. See my next post to answer your question related to the use of a release agent on the forms.

Hey ITTOG,

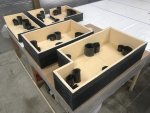
I just posted some closer pics of the boxes after they have been sanded/prepped for bonding to the floor. Let me know if these are close enough/what you were looking for?
 

Vance Vanz

Well-known member
Hey ITTOG,

I just posted some closer pics of the boxes after they have been sanded/prepped for bonding to the floor. Let me know if these are close enough/what you were looking for?
Hey ITTOG,

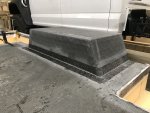
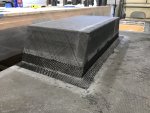
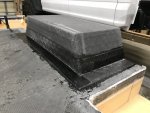
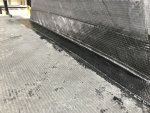
I ended up taking a few more close up pics of the boxes/wheel wells before they were bonded to the floor. I thought I would post them in case you and/or anyone else were interested in seeing them.

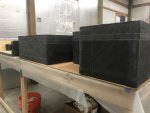
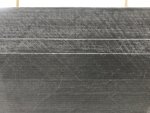
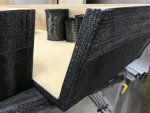
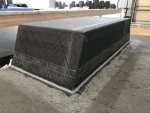
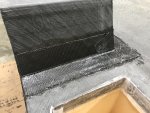
Outside finish of the CF box. (Note: Top portion is sanded and marked for tabbing. Bottom portion is the finish after the peel ply was removed.)
IMG_7625.jpeg

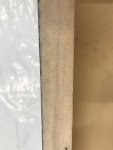
Outside/top finish and front face edge of the wheel well. (Note: Only the 9.5oz plain weave was wrapped around the front/face edge of the wheel well on this layup. The 24oz biaxial will wrap the front/face edge of the wheel well on the 2nd/inside layup of the wheel well.)
IMG_7629.jpeg

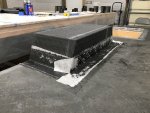
Edges of the CF boxes. (You can see how well/tightly bonded the CF is to the foam core because of utilizing vacuum bagging. Never mind the CF dust and strands of CF on the foam core-it needs to be vacuumed/cleaned up.)
IMG_7631.jpeg

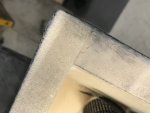
Corner of the CF boxes (I included this pic to show how tightly vacuum bagging compresses an overlap of CF, as well as wraps around a corner. On the left side of the corner of the box, the 24oz biaxial cloth is overlapped by 2". Again, never mind the CF dust and small pockets in the resin-this still needs to be sanded/cleaned up.)
IMG_7633.jpeg
 
Last edited:

Vance Vanz

Well-known member
Awesome! Subscribed! Where did you buy the truck?
Hey Sixinarow,

Thanks for joining the ride ?!

I bought the chassis cab from Grand Prairie Ford, Dann Munro, in Texas. Since I was having DBL Designs do the conversion to save me time, I chose the closest Ford dealership to them. Grand Prairie/Dann Munro also ended up having the best customer service and cheapest price on the truck, which was an unexpected bonus.

Believe it or not, I called and emailed six-seven other dealers and only heard back from one-two of them. Of the ones I heard back from, they took forever to get me pricing and where also much more expensive. Pretty crazy considering I told everyone I was paying cash and already had a list of exactly what I wanted from Fords website builder. Costumer service is going down the crapper these days ?.
 

Vance Vanz

Well-known member
Humanness Check In:

Hi All,

Sorry that it has been a month since I have posted to the thread. I’m going to start off with a humanness check in as August was a bit of an emotional roller coaster ???. You might say August represented LIFE, aspects of life that happen whether you like it or not and events that are not always within your control.

In early August I lost a family member. It was unexpected and he was much too young to be leaving this world. He had well over half of his life left to live. This obviously hit me and my immediate family pretty hard. I had to travel for the services and I also spent some additional time out of town with family members.

Shortly after this loss there was a wedding for an immediate family member of mine. Although this was a time to celebrate and be joyful, it was a bit of an emotional polarization considering it was shortly after the loss within the family. And for some of us, visiting family is not always a positive thing. I also had to spend several days traveling for the wedding as well.

Lastly, the court proceedings for a lawsuit I am involved in (I’m trying to collect money that someone owes me) began in late August. Luckily, I am the plaintiff in the matter, but going to court is never easy and the other person/defendant is being difficult and has strung this case out for almost a year now. Why can’t people just play nice ??

These events have taken a mental and emotional toll on me, as well as taken quite a bit of time away from the build. I lost about 10 days on the build in August. After coming back from some of these events, it was hard to get motivated on the build, or work long days at the shop,

Some of you might be thinking I’m sharing too much personal information, or why is this information important to the build thread? Let me explain!

Considering: it took two months longer than expected to find a shop to start the build, I originally was not planning on having to design/build the subframe or habitat box, I haven’t had as much active help on the build as I was planning on and LIFE happens, I am way behind in the build schedule. I’ve tried to compensate for this by working harder and longer-seven days a week, 10-12 hours minimum per day and I often work even longer 14-16 hours.

I know projects naturally cost more money and take more time than you expect, but some of the events noted above (within and outside of the build process) have turned weeks into months of being behind in the schedule. It’s just a hard pill to swallow when so many things are unfolding that are, to an extent, out of my control and not what I had planned or would want to happen. Also, working seven days a week has me mentally, emotionally and physically drained at times and sometimes even on edge . It then doesn’t take much, like the loss of a family member and/or a stressful lawsuit, to exhaust me.

Being at the point in the build process that I am currently at probably also doesn’t make matters any easier. I believe fiberglass and carbon fiber may just be the most labor-intensive and time-consuming construction method out there-and I'm not just talking about the overlanding industry. You can’t really rush CF; it just takes the amount of time it takes and it unfortunately takes a lot of time. Slow and Steady. I’m also pretty much working solo on the build and these are big CF layups, so it is a mountain of work. The amount of prep time needed never ceases to amaze me. I'm probably going to try and hire someone part-time or full-time to lend me a hand and get the build somewhat back on schedule.

There were even a few days when some difficult aspect of everything noted above happened on the same day, including multiple vendors screwing something up related to the build. This put me in a bit of a tail spin, an exhausted, depleted and simply beat down state. I even questioned for a moment, "Is this build just too much given where I'm at in my life and what is currently happening in my life?" It all passed pretty quickly, but it was there and it was a hard spot to be in.

Maybe I don't need to say this, but i'm going to. Please know that my humanness check ins are not about complaining or just being negative. I think many people, myself included, go into a build with high hopes and aspirations of how great it will be to have an overlander/expedition vehicle ?. We are primarily thinking about all of the cool trips and beautiful places we can visit, the dreams we can experience while in comfort ???! The amount of money, time, energy and even sacrifice needed can sometimes be lost in the initial excitement of everything. Having someone else build your rig is one thing, but building it yourself is a whole other world. There is the material construction process of the build itself and then there is the behind the scenes mental, emotional, physiological, relational, financial, temporal and even sacrificial process of the build. It is this latter process that I'm calling the humanness side of the build. This is the other part of the build process that is not often explicitly talked about. I'm just shedding light on this other part of the build process and trying to depict it as well as I can along the way.

Hopefully my humanness check ins will normalize and validate what others have/or may experience during their build-when a fun idea and hobby can easily turn into work and even a grind.

Switching gears slightly ?!

I have actually found some sick and twisted comfort ? in watching a YouTube channel by an Aussie who is building a catamaran out of fiberglass https://www.youtube.com/c/LifeOnTheHulls/videos. The sick and twisted comfort is that he is exhausted at times too and this stuff takes consistent and persistent hard work. His detailed and in-depth depiction of the process really shows how long glassing projects can take. This guy has been on this project for years. He’s an animal and my hat goes off to him. When I’m doing a solo 5-7 hour CF layup after already having worked for 6-8 hours the same day prepping everything, I think of his build and how long he has been at it. Watching his build channel after a long solo slog of a week of non stop CF work can also normalizes things for me. Wherever I can find validation and inspiration, I’ll take it. Keep at that damn catamaran Ross, YOU DA MAN!!!!
 
Last edited:

Vance Vanz

Well-known member
Camper Stand:

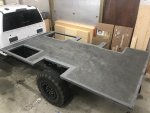
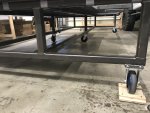
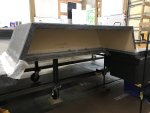
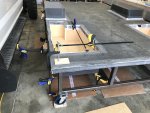
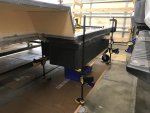
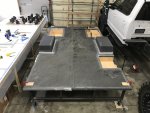
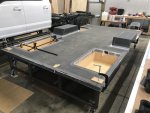
Here is the stand that I designed and had built to fabricate the camper shell on. It sits 24" off the ground so I have plenty of room to get underneath the floor of the camper during construction, especially for bonding the CF boxes to the bottom of the floor. It is made out of 2x2x1/4" steel. It was designed to support 4,000-4,500lbs.

I'm pretty much passing all of my larger metal work off to the fabrication shop that did my subframe. They do a great job, have honest pricing and get :poop: done on time!! I also don't really have the time to do my own major metal work right now.

Here are pics of the stand and getting it to the shop:
IMG_7637.jpegIMG_7642.jpegIMG_7649.jpegIMG_7650.jpeg

After cleaning the stand I placed some thick cardboard on it to protect the bottom of the CF floor. (Good old cardboard and duct tape, everyone's favorite tools ?)
IMG_7651.jpeg

Next was getting the floor onto the stand
IMG_7653.jpegIMG_7654.jpeg

And finally getting the stand to sit level-given that the floor in the shop in nowhere close to being level. As well as leveling it, I also chalked some of the wheels since four of the casters are swivels and I need this thing stationary for all of the CF layups.
IMG_7662.jpegIMG_7663.jpeg

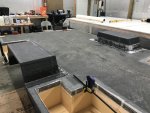
The shop is starting to look small now. This is where things will sit until I get a majority of the CF on the camper complete.
IMG_7664.jpeg
 
Last edited:

Vance Vanz

Well-known member
Bonding CF Boxes & Wheel Wells to Floor:

For bonding the boxes to the floor I used 406 Collodial Silica to thicken up the resin.

I faired out the inside edges, where the boxes/wheel wells meet the inside vertical edges of the cut outs in the floor, with the same thickened resin. I also filleted the outside edges of the boxes and wheel wells with the same thickened resin and during the same layup. This way there was a chemical bond, the same chemical bond, for the faired inside edges, filleted outside edges and end edges of the boxes/wheel wells that but up against the floor.

Econostich/Textured peel ply was also used on all exposed surfaced that received resin.

Quick release clamps were used to hold the step, battery and water boxes in place during curing. I weighted the top of the wheel wells down using buckets filled with water (Not shown in the pic).

Placing the step box and wheel wells were a little tedious as I had to set them back off the outside edge of the floor the exact thickness of the final CF wrap/layer they will receive when the inside layup is done. The outside facing edge of the step box will be wrapped with another layer of 9.5 oz and the wheel wells with a layer of 24oz. This is the same method/principle that I implemented on the inside edges of the cut outs in the floor when laying up the CF on the floor

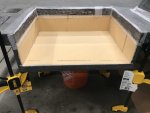
Pics of the step box and one of the wheel wells
IMG_7674.jpegIMG_7675.jpeg

The water box was a little bit more involved given its size. Note: this was one of those days I wish I had a second set of hands at the shop. Setting this thing in place without smearing the resin on the top edge of the box, all over the place while trying to align this thing perfectly, was a process. A few dry practice runs were required.
IMG_7671.jpegIMG_7676.jpeg

All of the boxes/wheel wells bonded to the floor
IMG_7673.jpegIMG_7678.jpeg
 
Last edited:

Vance Vanz

Well-known member
Filleting & Tabbing - CF Boxes & Wheel Wells to Floor - Outside Edges

Here is what the fillets look like for all of the outside edges on the wheel wells and boxes. Note: the 406 silica is white, so this is why the fillets are white and not clear in color.
IMG_7683.jpegIMG_7684.jpegIMG_7682.jpeg

Tabbing for the outside edges of the boxes and wheel wells were done with a 4" wide (2" overlap each side) 9.5oz plain weave and a 6" wide (3" overlap each side) 24oz biaxial 45/45 stitched. Basically it is the same layup schedule/material used on the floor. This is/may be considered thicker than needed for tabbing, but I had plenty of scrap left over from the floor and boxes/wheel well layups that I wanted to use. Also, not every tab will be 2" and 3" wide respectively on the outside tabbing of the boxes. Some edges need to have smaller tabs because they are close to the outside edge of the floor, or front outriggers of the subframe. Because these specific tabs cannot be the desired 2 and 3" width respectively, I wanted to beef up the layup schedule to add some additional strength.

Here is the 4" wide 9.5oz spray tacked onto the wheel well
IMG_7686.jpegIMG_7685.jpeg

Here is the 6" wide 24 oz biaxial over the 9.5 oz and wetted out
IMG_7687.jpegIMG_7692.jpegIMG_7690.jpeg

Peel Plied
IMG_7688.jpeg

And moving onto the other wheel well
IMG_7689.jpeg

Note: all of the tabbing for the outside/underside edges of the boxes were done the same, except I was doing everything under the floor and inverted. Fun times ?! Another job it would have been nice to have a second set of hands for. Trying to place 6" wide 40" long wetted out tabbing strips, under the floor and in a small space between the box edge and steel on the stand, took some patience. Lets just say I got to practice some yoga poses while under there.
 
Last edited:

Forum statistics

Threads
188,039
Messages
2,901,519
Members
229,352
Latest member
Baartmanusa
Top