2022 Ford F550 - DIY - Adventure Expedition Vehicle Build Thread

Louisd75

Adventurer
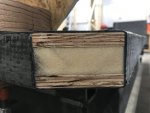
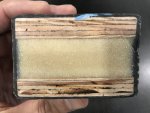
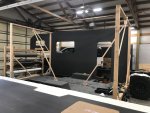
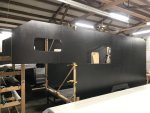
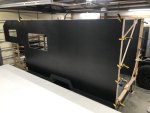
I'm so used to seeing these panels on the layup table, so they don't look all that big. It isn't until I have to move these things around the shop and see them standing/sitting by themselves that I realize how freaking huge these panels are. This Camper shell is going to be MASSIVE.

Any weights yet? :)
 

Vance Vanz

Well-known member
Any weights yet? :)
Sorry, but unfortunately no ?. I don't have a hanging scale to weigh the panels individually at the shop.

Once the camper shell is ready for paint and rigged onto the truck, I will weigh it at a certified scale to get the total camper weight.

It's going to be a bit of time until this happens, UNLESS............... you can find me some free labor to speed up the process ?!
 

Louisd75

Adventurer
Sorry, but unfortunately no ?. I don't have a hanging scale to weigh the panels individually at the shop.

Once the camper shell is ready for paint and rigged onto the truck, I will weigh it at a certified scale to get the total camper weight.

It's going to be a bit of time until this happens, UNLESS............... you can find me some free labor to speed up the process ?!

If you were reasonably close I'd absolutely give up some of my vacation to lend a hand and learn a bit... it's always better to learn on someone else's dime :p I think you're in ID though, which would be a bit of a haul for me. Plus my current vacation is winding down and my next one won't be for at least a few months. What's your general area?
 

Vance Vanz

Well-known member
Curious what your guesstimated per sq ft is for the panel... foam plus cloth and epoxy?
I'm guessing you are asking about weight per sq ft?

For the 3/4" core interior walls, I posted an actual weight for a 4x8' sheet somewhere previously in the thread.

For the 1" core exterior walls/roof, I can weigh one of my smaller solid panels (cab over roof nose angle piece) when it/they are laid up.

I will also be doing composite overhead cabinets in 1/2" core and can also weigh a piece of that at some point.
 
Last edited:

Vance Vanz

Well-known member
If you were reasonably close I'd absolutely give up some of my vacation to lend a hand and learn a bit... it's always better to learn on someone else's dime :p I think you're in ID though, which would be a bit of a haul for me. Plus my current vacation is winding down and my next one won't be for at least a few months. What's your general area?

I appreciate the consideration, but I was just teasing. I'm in the Boise area for the build. And I am right there with yah; it is always great to learn on someone else's dime ?.

I hope you are enjoying your vaca. I can't wait to get on my 2 year vaca when this thing is done. I feel like I have started another new business considering the amount of time I am into this thing ?!

I actually just landed an extra set of hands to get the side panels fitted and bonded. There was no way in H@LL I was going to be able to do that on my own.
 

Vance Vanz

Well-known member
This build is absolutely crazy!! I can't wait to see it done!
Thanks. You and me both ?.

I beginning to think I was a bit crazy in deciding to just jump off the cliff and build such an involved rig DIY style, maybe even a bit ignorant. Let's just say a little of both and also add in determined while we're at it ?.

This thing will be done by spring of 2023, even if I have to work myself to death to make it happen ?.
 

Vance Vanz

Well-known member
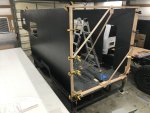
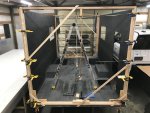
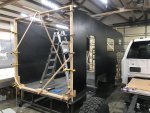
Sidewall Panels - Prep for Bonding to the Floor

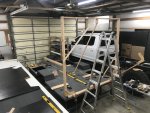
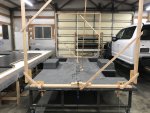
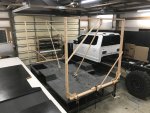
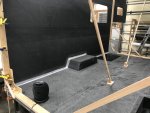
First step, build some temporary framing to hold the walls in place. I got everything level and squared off with the floor (Not so easy when you are working solo). I also had to leave room in the bottom corners of the frames for filleting and tabbing.

Back Frame
#1.jpeg#2a.jpeg#3.jpeg

Both Frames Complete
#4.jpeg#5.jpeg#6.jpeg

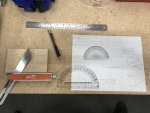
Figure out some nifty angles to match the lines on the truck and cut the corners of the front of the floor, or....... one might say a little quality assurance check of the floor layup ?. Note, the blue is just from the paint on a new saw blade.
IMG_8182.jpegIMG_8173.jpegIMG_8172.jpeg
 

Vance Vanz

Well-known member
Sidewall Panels - Bonding to the Floor

Well, it is finally starting to feel like this project has a pulse. Seeing the shell start to take shape is good. Normally I would be more excited, but I'm too tired right now from these long days. Maybe next week I'll have a HELLZ YAHZ or WHOOO HOOO in me.

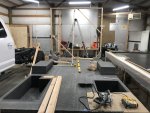
Sanding, shaving and dry fitting the passenger side wall.
#1.jpeg

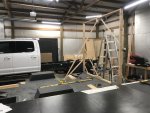
Sanding, shaving and dry fitting the driver side wall, along with dialing everything in perfectly so the walls could be bonded.
#2.jpeg#3.jpeg#4.jpeg#5.jpeg#6.jpeg

It took some time, but making sure everything was level and square was key so all of the work moving forward does not become exponentially more difficult and janky because we were too lazy to take the time to dial it all in.

Not too exciting as far as the pics go, but the walls are bonded on the bottom edge and filleted/peel plyed
#7.jpeg#8.jpeg

Next steps will be laying out, laying up and bonding the remaining front walls. Hopefully my oversized door, (MTB locker) for the back wall, will land mid December, so I can get this thing buttoned up before the end of the year.
 
Last edited:

StenchRV

Well-known member
Sidewall Panels - Bonding to the Floor

Well, it is finally starting to feel like this project has a pulse. Seeing the shell start to take shape is good. Normally I would be more excited, but I'm too tired right now from these long days. Maybe next week I'll have a HELLZ YAHZ or WHOOO HOOO in me.

Sanding, shaving and dry fitting the passenger side wall.
View attachment 754751

Sanding, shaving and dry fitting the driver side wall, along with dialing everything in perfectly so the walls could be bonded.
View attachment 754752View attachment 754753View attachment 754754View attachment 754755View attachment 754756

It took some time, but making sure everything was level and square was key so all of the work moving forward does not become exponentially more difficult and janky because we were too lazy to take the time to dial it all in.

Not too exciting as far as the pics go, but the walls are bonded on the bottom edge and filleted/peel plyed
View attachment 754757View attachment 754758

Next steps will be laying out, laying up and bonding the remaining front walls. Hopefully my oversized door, (MTB locker) for the back wall, will land mid December, so I can get this thing buttoned up before the end of the year.

AWESOME WORK!

LOOKING GREAT!

The amount of effort you are putting into your build is AMAZING! Hats off to you!

CHEERS!!
 

Vance Vanz

Well-known member
AWESOME WORK!

LOOKING GREAT!

The amount of effort you are putting into your build is AMAZING! Hats off to you!

CHEERS!!
Thanks so much.

Hopefully I will say it was all worth it in the end. You know, when I'm parked on a beach in some foreign country staring out into the ocean while relaxing in the shade under the awning of this beast after an amazing surf session............ Of course reggae would be playing in the back ground and I would be sharing the moment with a beautiful woman I had met along my travels.............., since we are swinging for the fences here ?.

I just saw how your build is coming along, great work as always and keep it up. I'm using you for hope and inspiration ?, I hope you don't mind being used ?.
 
Last edited:

Forum statistics

Threads
188,039
Messages
2,901,516
Members
229,352
Latest member
Baartmanusa
Top