2022 Ford F550 - DIY - Adventure Expedition Vehicle Build Thread

Vance Vanz

Well-known member
Tabbing - Interior Vertical Composite Walls (Continued ......)

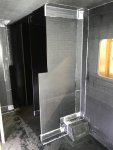
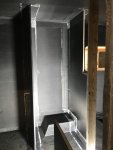
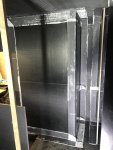
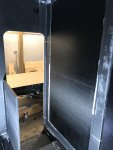
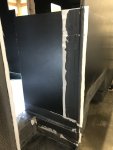
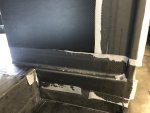
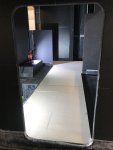
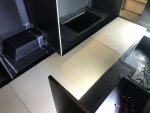
Everything tabbed and peel plied
IMG_8961.jpegIMG_8947.jpegIMG_8948.jpegIMG_8962.jpegIMG_8951.jpegIMG_8954.jpeg

Most of the peel ply will stay on until other items need to be bonded (to keep the joints as clean as possible/protected), but I did pull off a small section to snap some pics. The finished tabbing is the same/similar to the other internal and/or external tabbing on the camper shell.
IMG_8958.jpegIMG_8957.jpegIMG_8959.jpegIMG_8960.jpeg
 

Vance Vanz

Well-known member
Composite Labor Hours:

I'm always surprised by how long composite work takes ?. Even though I've been at this composite work for a bit now, it still takes longer than I estimate.

When doing initial composite research, for this project, I couldn't find much info on the actual time frames (total labor hours) of the various projects I was researching.

For those interested, I did track the number of days/hours related to the work I recently did on the interior vertical walls. I didn't clock in and out each day to the minute, so these total times could be max 3-4 hours over or under. I'm figuring 12 hours per each work day.

Cutting, notching, dry fitting, sanding, cleaning, bonding, leveling/squaring, filleting and peel plying all of the internal vertical walls: 5.5 days, 66 hours

Sanding/cleaning all filleted joints/adjacent walls, cutting/dry fitting all carbon fiber cloth/peel ply, and cutting plastic to wet out cloth for some of the tabbing (Note: I was also taking the time to use scrap materials when I could). 5 days, 60 hours

Mixing resin, wetting out material, tabbing, rolling out tabbing and peel plying all joints: 3.375 days, 40.5 hours

Now most of the tabbing is visible (will be a finished wall), so I am taking my time to ensure it is being laid up smoothly, but it is hard to wrap my head around 166.5 hours to get the internal walls bonded and tabbed.

I'm gonna say it, composite work can be brutal, brutal in the amount of time it takes.

I'm not trying to deter anyone from composite work, but if you embark down this path, you better have a crew to help you , or if working solo-be ready to work your AZZ completely off ?!

See you when the next resin infusion layup is complete.
 

Vance Vanz

Well-known member
After reading your posts, I need to take a nap... (y) ?

??!

I'm in the composite trenches and it feels like I may never get out. Somebody show me the light at the end of this long dark composite tunnel. If it gets any worse, I may start having dreams about being strangled by carbon fiber strands, or................ a full faced respirator being permanently attached to my face and the cartridges/filters are plugged solid so I can't breathe ?................... ??.

A nap, I think I am going to sleep for a solid month once this build is done. So long international trip. The finished rig will be in the drive way collecting dust while I'm in my month long recovery comma ??.

Back at it in the morning; somebody has to finish this damn composite work.
 

rruff

Explorer
I'm always surprised by how long composite work takes ?.

You are doing a much nicer job than I did, plus I just did hand layup rather than infusion... you have several times more work involved! I had no experience, but I don't know that it mattered much. There are just a lot of little details and mess with the materials and sanding.
 

ITTOG

Well-known member
Composite Labor Hours:

I'm always surprised by how long composite work takes . Even though I've been at this composite work for a bit now, it still takes longer than I estimate.

When doing initial composite research, for this project, I couldn't find much info on the actual time frames (total labor hours) of the various projects I was researching.

For those interested, I did track the number of days/hours related to the work I recently did on the interior vertical walls. I didn't clock in and out each day to the minute, so these total times could be max 3-4 hours over or under. I'm figuring 12 hours per each work day.

Cutting, notching, dry fitting, sanding, cleaning, bonding, leveling/squaring, filleting and peel plying all of the internal vertical walls: 5.5 days, 66 hours

Sanding/cleaning all filleted joints/adjacent walls, cutting/dry fitting all carbon fiber cloth/peel ply, and cutting plastic to wet out cloth for some of the tabbing (Note: I was also taking the time to use scrap materials when I could). 5 days, 60 hours

Mixing resin, wetting out material, tabbing, rolling out tabbing and peel plying all joints: 3.375 days, 40.5 hours

Now most of the tabbing is visible (will be a finished wall), so I am taking my time to ensure it is being laid up smoothly, but it is hard to wrap my head around 166.5 hours to get the internal walls bonded and tabbed.

I'm gonna say it, composite work can be brutal, brutal in the amount of time it takes.

I'm not trying to deter anyone from composite work, but if you embark down this path, you better have a crew to help you , or if working solo-be ready to work your AZZ completely off !

See you when the next resin infusion layup is complete.
It doesn't really matter that you are doing composite work. It takes a really long time whether you are doing composite, wood, steel, aluminum, etc. The fact that you are building a complete habitat is what takes the time. I feel just like you do in terms of the time commitment.

Sent from my Pixel 7 Pro using Tapatalk
 
Last edited:

Vance Vanz

Well-known member
It doesn't really matter that you are doing composite work. It takes a really long time whether you are doing composite, wood, still, aluminum, etc. The fact that you are building a complete habitat is what takes the time. I feel just like you do in terms of the time commitment.

Sent from my Pixel 7 Pro using Tapatalk
Hey ITTOG.

Agreed; it takes a long time to build your own habitat box and it is a big time commitment. And, if you are creating/laying up your own panels/material with resin infusion and/or vacuum bagging, I would still say it is by far the most labor intensive construction method from start to finish.
 

Vance Vanz

Well-known member
Resin Infusion – Overhead Cabinets & Shelving – Layout & Layup

Hey Rruff, get some warm milk, cookies and your blanky, it's nappy time ☺?;)?.

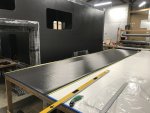
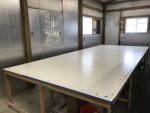
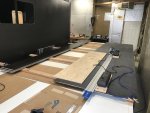
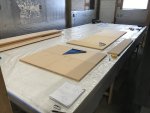
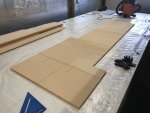
Cutting materials and prepping the big ohhhh table.
IMG_8966.jpegIMG_8969.jpeg

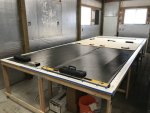
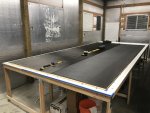
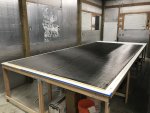
Stacking up materials for the layup
IMG_8970.jpegIMG_8971.jpegIMG_8972.jpeg

I forgot to take pictures of the infusion, but we have all seen it plenty of times by now.

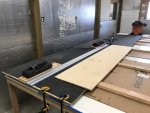
The Final Product - Total Dimensions: 7'-5" (89")W x 16' (192")L x 1/2" core material Panel. I was originally going to layup an 18'-6"L panel, just to have some extra, but decided not to.

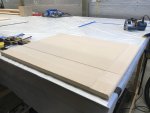
Ripping full lengths off the panel while it was propped up on the layup table was fun. The shop is so tight now, I don't have any room to move large panels around.
IMG_8982.jpegIMG_8987.jpeg

Even though I need to infuse the subfloor before build/bonding my overhead cabinets/shelving, I decided to cut as many of the pieces as I could for the cabinets/shelves, since I was already set up for cutting and making a mess of the shop.
IMG_8992.jpeg

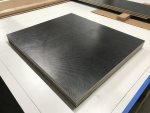
Here is the stack of 1/2" shelves that I weighed, info below.
IMG_8991.jpegIMG_8990.jpeg

I also tracked my labor hours from start to finish for this panel, info below.

Technical info from the layup for those that are interested:
  • 7.5 gallons of epoxy was used for the layup
  • About 2 hours for the layup
  • 26.75 total labor hours (for layout, layup and stripping/cleaning), which also included about 3.5 hours leak chasing
  • 16.3lbs for 4 x (31W x 27-1/8”D) panels/shelves. 1/2" Divinycell H80 core and 8.85 biax and 5.7oz 2x2 twill carbon fiber cloth on both sides. NOTE: same electronic bathroom scale used for previous weighing, so I can't guarantee exact accuracy :)
 

Vance Vanz

Well-known member
You're kicking butt! Go get a prescription for Adderall and you'll be done in a week!
?........ Trust me, the thought has crossed my mind. "What can I do/take to keep these 12-16 hour days up, without skipping a beat?"

I'll stick with my double daily dose of caffeine for now and a triple dose for the extra long days.

Starbucks gift cards are welcomed! Summer is coming and I love me some double espresso shots over ice ;)?(y).
 

rruff

Explorer
Pretty sure when he said 7.5 gal above, he meant 7.5 lbs. I went through about 30 gal on mine, but it's a smaller camper and doesn't have internal partitions. At any rate, I don't think he's in the 55 gal drum range ?
 

Vance Vanz

Well-known member
Look at this way, it will only get better!

Any idea how many gallons of epoxy you have used? Did you purchase it in 55 gallon drums?
:love: That is true!

I have used about 47.5 gallons total of Infusion epoxy (resin and hardener) so far. The only thing I have left to infuse is the subfloor and that should take about another 2-3 gallons. So, the grand total for infusion epoxy (resin and hardener) will be about 50 gallons.

I have also purchased 29.14 total gallons so far of Laminating epoxy (resin & hardener). I have about 5.5 total gallons left and I am hoping that will get me through the remaining tabbing, fairings and fenders I have left to layup ?. But.........., I'm sure I will probably have to order a little more. So, the grand total for Laminating epoxy will be between 29.14 and 35 gallons.
Note: This also includes the epoxy needed to make my mold(s) for the fairings.​
 
Last edited:

Vance Vanz

Well-known member
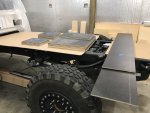
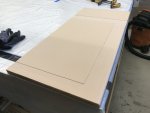
Subfloor Layout

Using my larger scrap pieces (1" Divinycell H80 and/or 100) for the base layer of the subfloor
IMG_8994.jpeg

Base layer cut to the general size
IMG_8996.jpeg

Now for the tedious task on the bottom side of the floor/core: rounding off the edges that butt up against filleted joints/walls, routing any edge that sits on top of tabbing and routing a line all the way down the length for an overlap of carbon fiber cloth in the main floor. I took my time on this, as I wanted the subfloor to sit nice and level on the main floor.
IMG_8997.jpegIMG_8998.jpeg

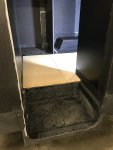
Base layer trimmed to size and all routed, rounded and level.
IMG_9009.jpegIMG_9014.jpegIMG_9011.jpeg

Top layer of core material cut and stacked (1" Divinycell H80 and/or 100)
IMG_9015.jpeg

Now onto infusing it/some carbon fiber to the top of it.

See you in 2-3 days :cool:?
 

Forum statistics

Threads
188,353
Messages
2,905,822
Members
230,115
Latest member
smpltech
Top