2nd Gen Dodge Ram 2500 5.9 Cummins / The “Puller” Project

EricJeepGuy

New member
I drive the same truck but ‘02 model year. You mentioned replacing the water pump, mine just failed but considering it was the original and lasted 280,000 miles, I’d say that’s to be expected. You have a very dependable rig to say the least.
 

landman

Well-known member
I drive the same truck but ‘02 model year. You mentioned replacing the water pump, mine just failed but considering it was the original and lasted 280,000 miles, I’d say that’s to be expected. You have a very dependable rig to say the least.

Yea this truck is my first dive into the diesel world. Wrenching on this thing, sometimes I feel like a chicken looking at wrist watch. I’ve been told they are super reliable. Time will tell :)
 

landman

Well-known member
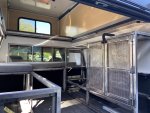
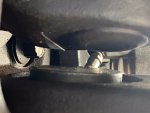
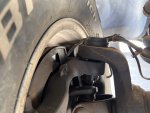
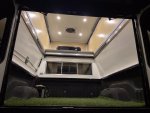
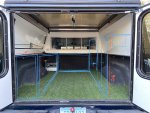
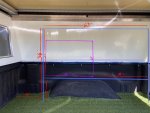
Quick update: after wheeling with this big truck a few weeks ago I realized I blew out my ball Joints. I replaced them with greaseable “problem solvers.” Also late last night I finally got the electrical connectors I order and I did a quick check of the lights and fan. The Hiatus lights up beautifully! The dimmer switch it has is perfect. Anyways below are a few quick pics. Now we’ve had some ************ weather here, so I have not done the video I promised. I also had some other stuff that got in the way. That being said I PROMISE to shoot the video this week still. It will be edited and then Ill post it next week.

89B70836-DE3A-414B-AD21-0E63A5BF8688.jpegB77CA139-05BE-4140-8934-5FE4336DB402.jpeg0A979ED8-5D70-4FCE-BDBD-3646B0F9CBB7.jpeg7F3B469F-6C6B-47DA-9BC8-42E1B062943D.jpeg
 
Last edited:

ITTOG

Well-known member
I have been designing a camper based on the GFC's. my design has two items that are significantly different than the GFC's. First, I am extending it two feet past the end of my truck because I only have a 5.5 foot bed. There will be occasions where my 6-foot son will sleep in the bottom part. Second, I was trying to come up with a way to make the top like your Hiatus. I didn't even know this existed. The design I had is very similar but I had not give any thought to what kind of hinges I would use. Would you mind taking close up pictures of the hinges in use on your camper?

Sent from my Pixel 3a XL using Tapatalk
 

landman

Well-known member
Wow, its been awhile since I’ve done an update. With this “lockdown“ going on I’ve had a lot of time on my hands to make good progress with the build. I have been focusing on getting the interior built out. The original idea was to build the interior out of wood to make it feel like a cozy cabin, but then I went down the Pinterest wormhole and got inspired to take on a different look. I decided to go for a ”comfy industrial“ style. I thought this was suiting considering the truck is a “workers/all American truck.“ The industrial style just seemed to fit the truck Is what I’m trying to say. So, out came the pencil and paper and I started drawing. Here are my crappy drawings that I started with that acted as my rough guide (note, the pink box is where I want the slide out fridge and the blue dashed box in the sink) :
0232387B-D2FA-4B01-B552-4C7E71B8E58C.jpeg965923FA-8DF5-46A6-9514-AAA1A2C4F597.jpeg

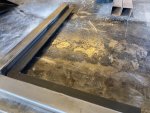
I wanted to use 1 inch 16 gauge square steel for the framing. I was then going to use strap steel to make a recessed edge in the framed areas that I can install some wood panels into. Here are two example pics of what we made to show aesthetics and design we wanted to echo throughout the whole inside.

E7E6F0AD-4864-415A-998D-5A6659F83583.jpegE141766C-A501-4E98-9C85-5B76871BE1E9.jpeg

Now, I know I am going to get this question A LOT, so I want to address it now. Why didn't I use aluminum? Because steel is cooler. It suits the truck.

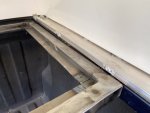
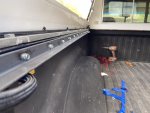
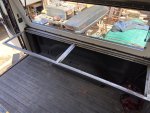
The first thing I started on was the trunks/benches that go along the drive sider of the bed and front of bed. I didn‘t want to simply make boxes that when against the side of the bed, that seemed like a waste of space. I wanted to use the side of the truck bed to be part of the trunk/storage space area. So, I had to create some attachment point for the trunk to rest on. I ended up using some angle iron and drilling/screwing it to the lip of the truck bed. On the back side of the angle iron I used some super strong adhesive tape. I figured this would absolute stop any squeaking issues that could happen. See image below (I did the same thing on the front of the truck bed against the cab):

B9D3047F-0179-4D32-920E-D1AEB2536014.jpeg

From here we made the top of the trunk:
1CD2AE60-E976-4FC3-AC19-BB02A4029DA5.jpeg

Since the self-tapping screws where sticking out from the angle iron lip, I drilled out the back of the top of the trunk to allow it to slide over those screw heads:

BAFFFEFB-7D5C-4E87-AFAB-B04C77A418CB.jpeg

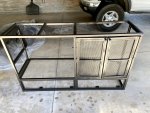
Next came making the front of the drivers side trunk:

BDBEB5B0-B522-4E26-AA56-B6BE6BA3B8EE.jpeg


Hit my photo limit, next post coming right up.....
 

landman

Well-known member
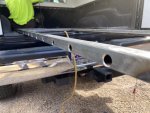
So since I have the Hiatus wiring at each corner of this trunk we had to make some space for them to pass through:
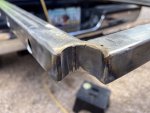
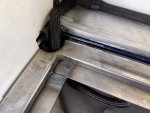
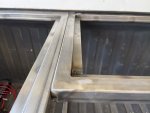
96118CC4-8985-469A-B38A-EBE9D588466F.jpeg431A9791-5526-4392-B1F4-EBCA7268D497.jpeg

After this we frame out the side the back of the trunk (the part you would see if you where outside of the camper looking into it. You can also see the attachment points we welded on to connect to the bed of the truck:
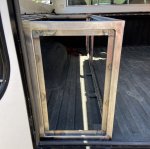
C5C10628-3794-41EA-9FF2-55566F02BF57.jpeg

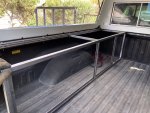
Next, we made the trunk that goes along the front of the truck bed:
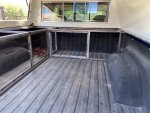
E7174631-7102-4B0B-A2E4-245F7EE84CDD.jpeg1E68E9B9-D3B6-444A-B4BA-B02C2FF9CF22.jpeg
2489B637-691B-4858-9C30-61EBFB36CED9.jpeg

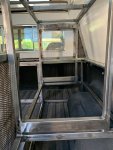
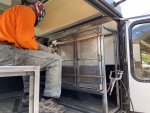
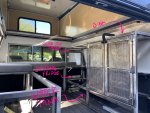
Once we test fitted it and did a soft install of it we moved onto the kitchen. This part was much harder. We knew we wanted space of a slide out fridge, slide out table top, 36” inch-ish high counter top, room for a sink, room for a water tank, room for stuff we haven’t thought of yet. Lots of angles with the camper, the truck bed, and how it all comes together. It took some time be we got it done:
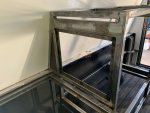
E3C9566B-6468-45E4-8E52-01C5A65E9275.jpeg
D28A6E17-3440-4F0B-8226-DAC7074D6171.jpeg
581BDE81-8633-4A8F-9F8E-482A8E29DF9A.jpeg
6293E18A-3E32-42B9-BFFF-3FE70DB9B837.jpeg

A couple of notes on how the build is going to come together:

1) The tops of the trunks/bench will open up with long piano hinges.
2) Every other wood panel will sit nicely inside the recessed boxes and they will have strong magnets holding them in place. This will allow me to take/pop off any wood panel I want to allow for easy packing, re-arranging, or even re-finishing the wood down the road. It just made a lot of sense to me to do it that way.
3) I was thinking about clear coating the steel and having that “raw” look, but I think my wife has changed my mind and I am going to paint with black with a “hammertone” finish.
4) We are using birch wood with a clear coat finish which will pop well amongst the black steel.

I know I missed a lot of detail on how this all came together, but I did my best but sometimes you get caught up and just wanna work and not take pictures. If you all have questions shoot them at me.

I am going to start painting today and I am also going to weigh the trunks and kitchen framing as well. I think it would be good to keep track of the weight as we go. Hopefully Friday next week we will be very close to done....famous last words!

@HiatusCampers
 
Last edited:

landman

Well-known member
Ok, just got done weighing up the steel frames I made. Total came to 139 lbs. Here is a list of expected future install items and what I’m expecting their weights to be:

*rough guess for now*

1) Wood panels and counter tops: 60-75 lbs
2) Sink & Faucet & hardware: 15 lbs
3) Water Tank (20gal): 180 lbs (including tank)
4) Fridge/sliders/loaded with food: 65 lbs
5) Slide out table with sliders: 25 lbs
6) Yeti 1400 Power Station: 44 lbs
7) Shower System: 30 lbs
8) Bike Rack & 2 Bikes: 170 lbs
9) Pantry Items (cups, plates, knife, forks, coffee, & ect): 30 lbs
10) Steel Interior Framing: 139 lbs
11) Hiatus Camper: 488 lbs
12) Misc. (rock climbing gear, MTB gear, Camping Gear, Cloths, Toiletries, Bedding, a Husky, ECT ): 300lbs

Super rough estimated weight of build: 1,561lbs.....not bad!!

I will weigh the truck after the build as I do have the weight of it before to get a super accurate number.
 
Last edited:

Chevrolado

Cruisin'
Lovin this build. Nice work. (y) What a clean fullsize..

Also.. side note: astroturf bed mat?? :oops: That's definitely going in my truck when I get my bed cover. hah. :giggle:
 

landman

Well-known member
Lovin this build. Nice work. (y) What a clean fullsize..

Also.. side note: astroturf bed mat?? :oops: That's definitely going in my truck when I get my bed cover. hah. :giggle:

Yea the astroturf was actually super nice, to be honest. It’s nice to walk on and super easy to pull out and wash. It was a temporary thing for me, but I recommend it for people who are willing to try it.
 

landman

Well-known member
Love the industrial look your going for. It screams don't tread on me. ?

Thanks! I want the trucks personally to be ”American” for sure. I was originally planning on just applying a clear coat enamel on the raw steel and leave it with the “raw“ look. My wife was not a fan of the idea, so yesterday I painted the steel with a “hammer tone” black paint. Looks super good actually and with the creamy berch wood, I think its going to have a nice look and pop really well.
 

ITTOG

Well-known member
Thanks! I want the trucks personally to be ”American” for sure. I was originally planning on just applying a clear coat enamel on the raw steel and leave it with the “raw“ look. My wife was not a fan of the idea, so yesterday I painted the steel with a “hammer tone” black paint. Looks super good actually and with the creamy berch wood, I think its going to have a nice look and pop really well.
I am looking forward to pictures of the paint job. Sounds cool. I had thought about painting mine black and then aging it by hitting it with leather straps, both studded and un-tudded and then a clear coat over it.
 
Last edited:

landman

Well-known member
I am looking forward to pictures of the paint job. Sounds cool. I had thought about painting mine black and then aging it by hitting it with leather straps, both studded and un-tudded and then a clear coat over it.

Here is a quick sneak peak. The paint is still curing, so I cant install till tomorrow afternoon. More pictures over the weekend hopefully.

E70413B0-B609-492E-AB9C-952BCB34F63D.jpeg
 
Last edited:

Forum statistics

Threads
188,040
Messages
2,901,549
Members
229,352
Latest member
Baartmanusa
Top